Working in a 3D World with Substance Stager
I recently began experimenting with one of Adobe's newest tools, Substance Stager. Stager picks up where our former 2D/3D compositing tool, Adobe Dimension, left off, while still remaining fairly easy to use for the novice (like me).
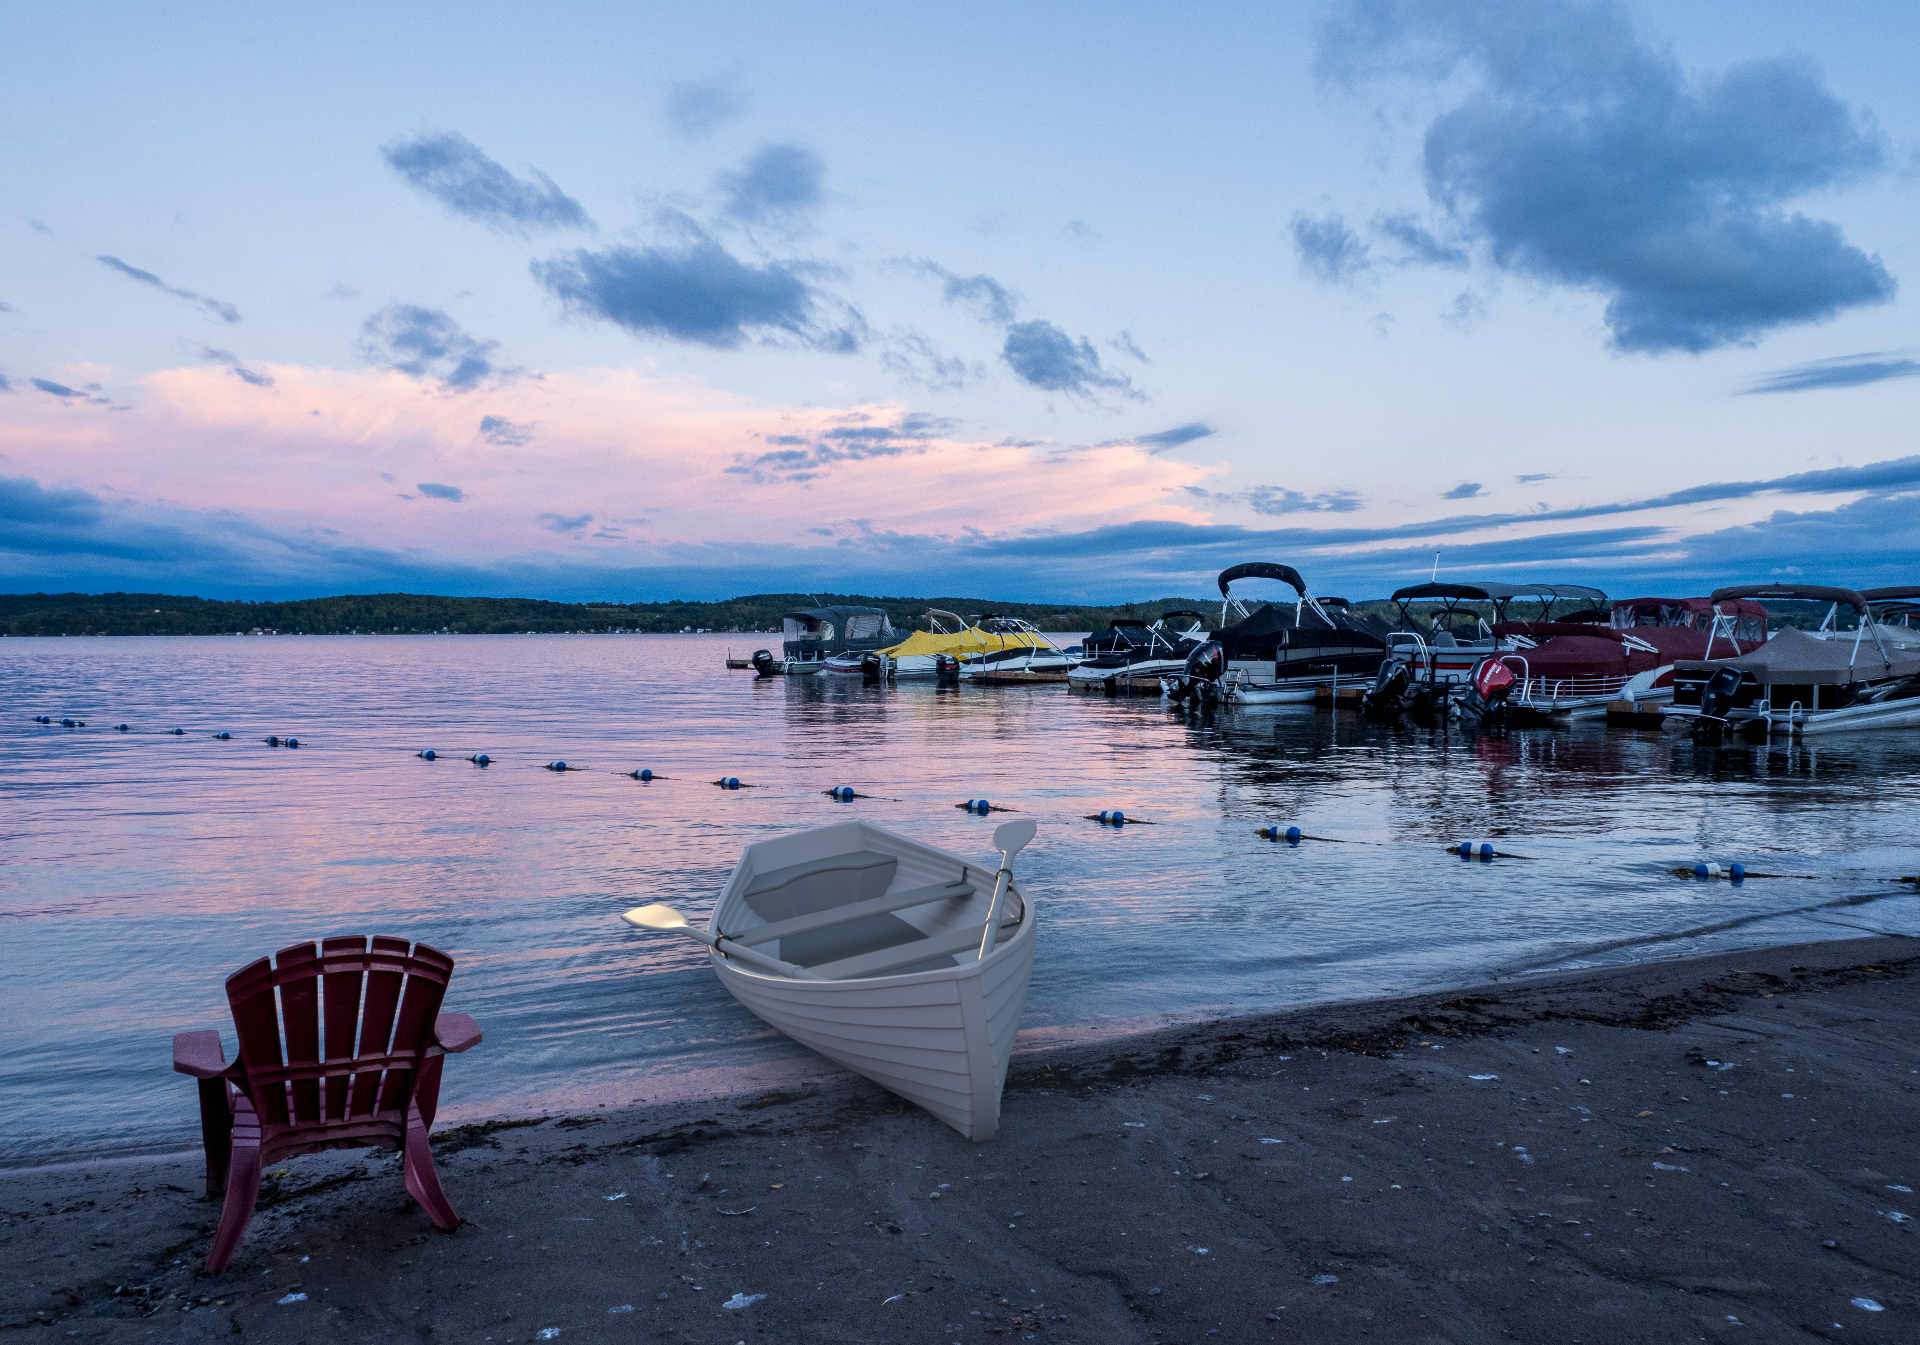
If I found one point of frustration with Dimension, it was that the 3D objects I placed in a natural 2D scene often did not look completely real; they looked too new, unused. This is well and good for a hero product shot, but when you're dropping a kayak or canoe into a landscape scene, you visually expect the objects to look a little rougher, scuffed up. I couldn't get that level of control with the 3D models I was using in Dimension.
Now, I'll be the first to admit this issue could stem from the user (me) - I'm not an experienced 3D artist; I'm a photographer. And as I talk to photography students and try to gently warn them of the technology coming down the pipe, I try to explain that they - as trained photographers - are possibly in one of the best positions to understand and adopt this technology and incorporate it into their workflow when necessary.
With the addition of Substance 3D into the Adobe toolset, I now have that greater level of control. The 3D models optimized for use in Substance Stager have far more parameters available to control the various elements of a 3D model.
Equally as exciting, is the new collision-based transformation option! According to the help files: "Collision transformation is a system that changes the behavior of the transform tools. It allows objects to naturally interact with each other on contact."
In English this means 3D objects can now bump into each other and react in a natural, physical manner (rather than simply disappearing inside of or behind the object they bump up against).
Example of enabling the Collision tool. Animations courtesy of Adobe.
The addition of this feature, combined with the Match Image command (to set your object on the ground plane and match perspective and lighting) make getting started in 3D far less complicated. And in my case, encouraged me to do more.
Example of using Match Image. Animations courtesy of Adobe.
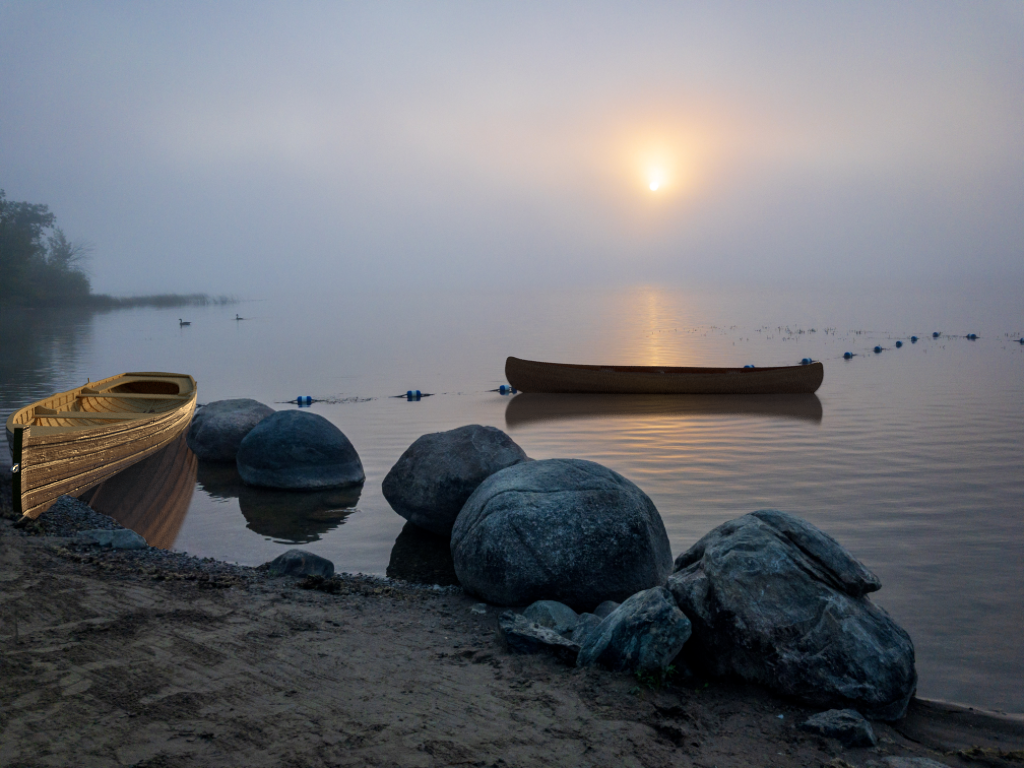
It started with a Boat
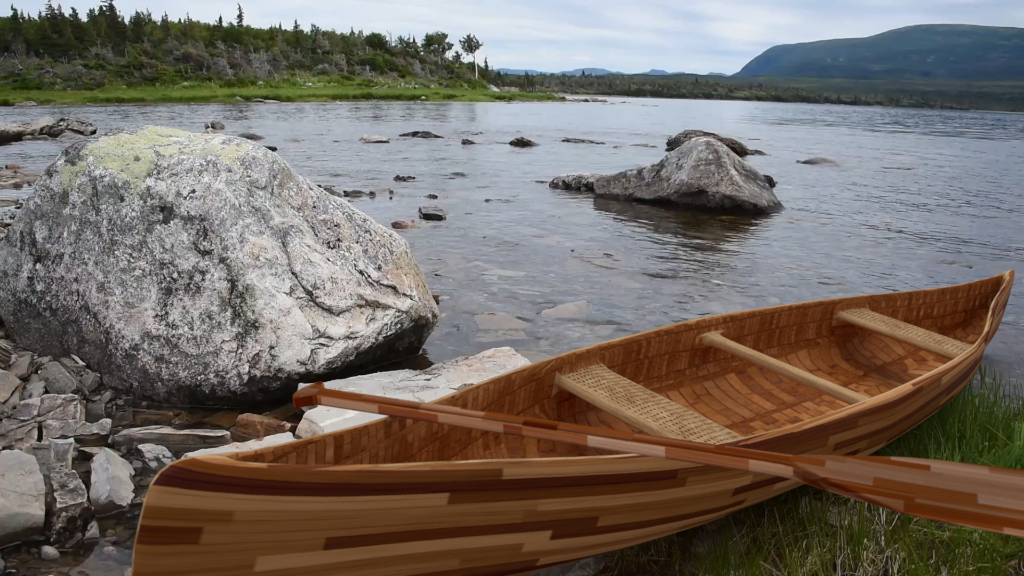
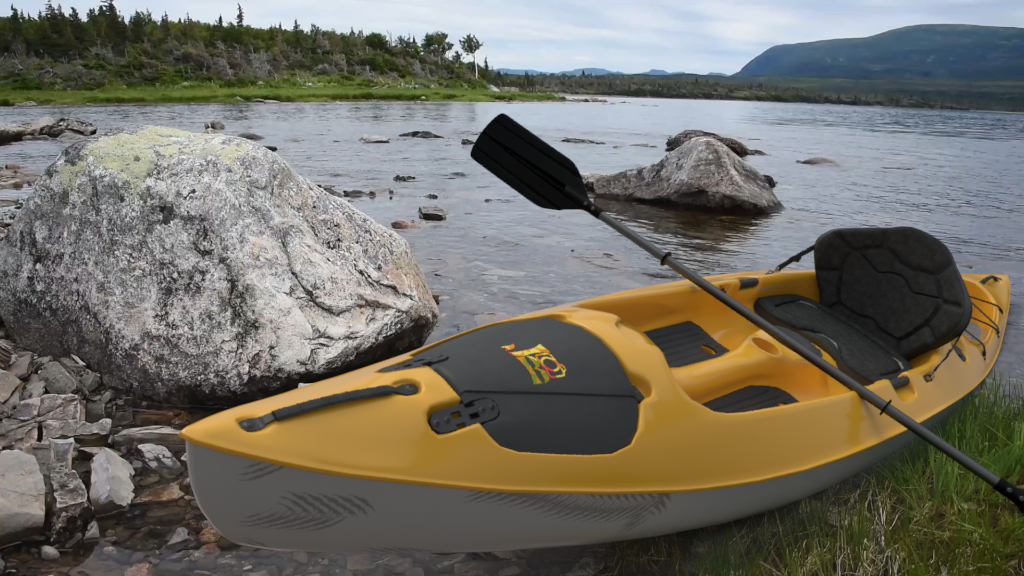
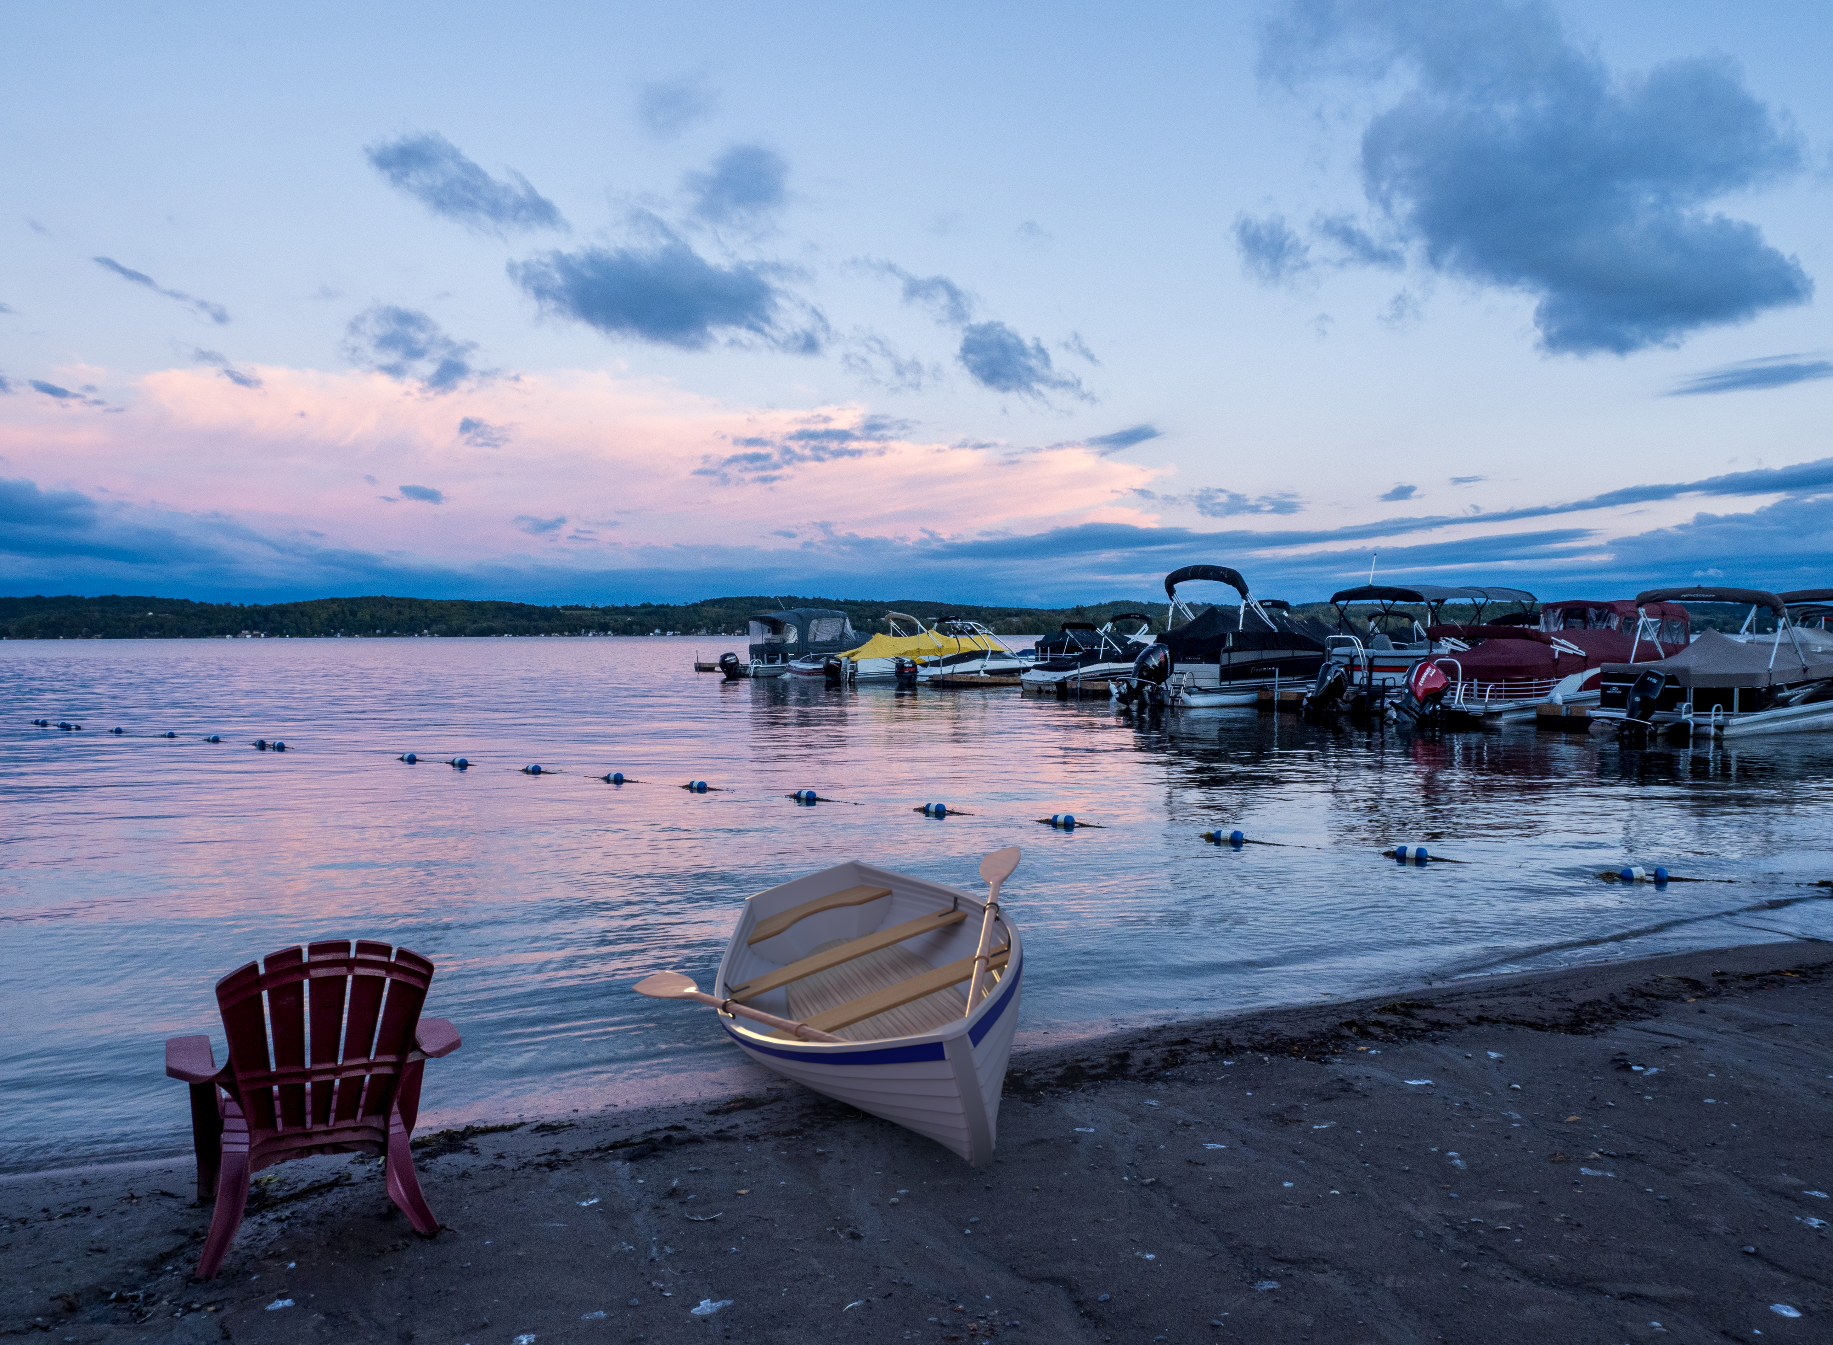
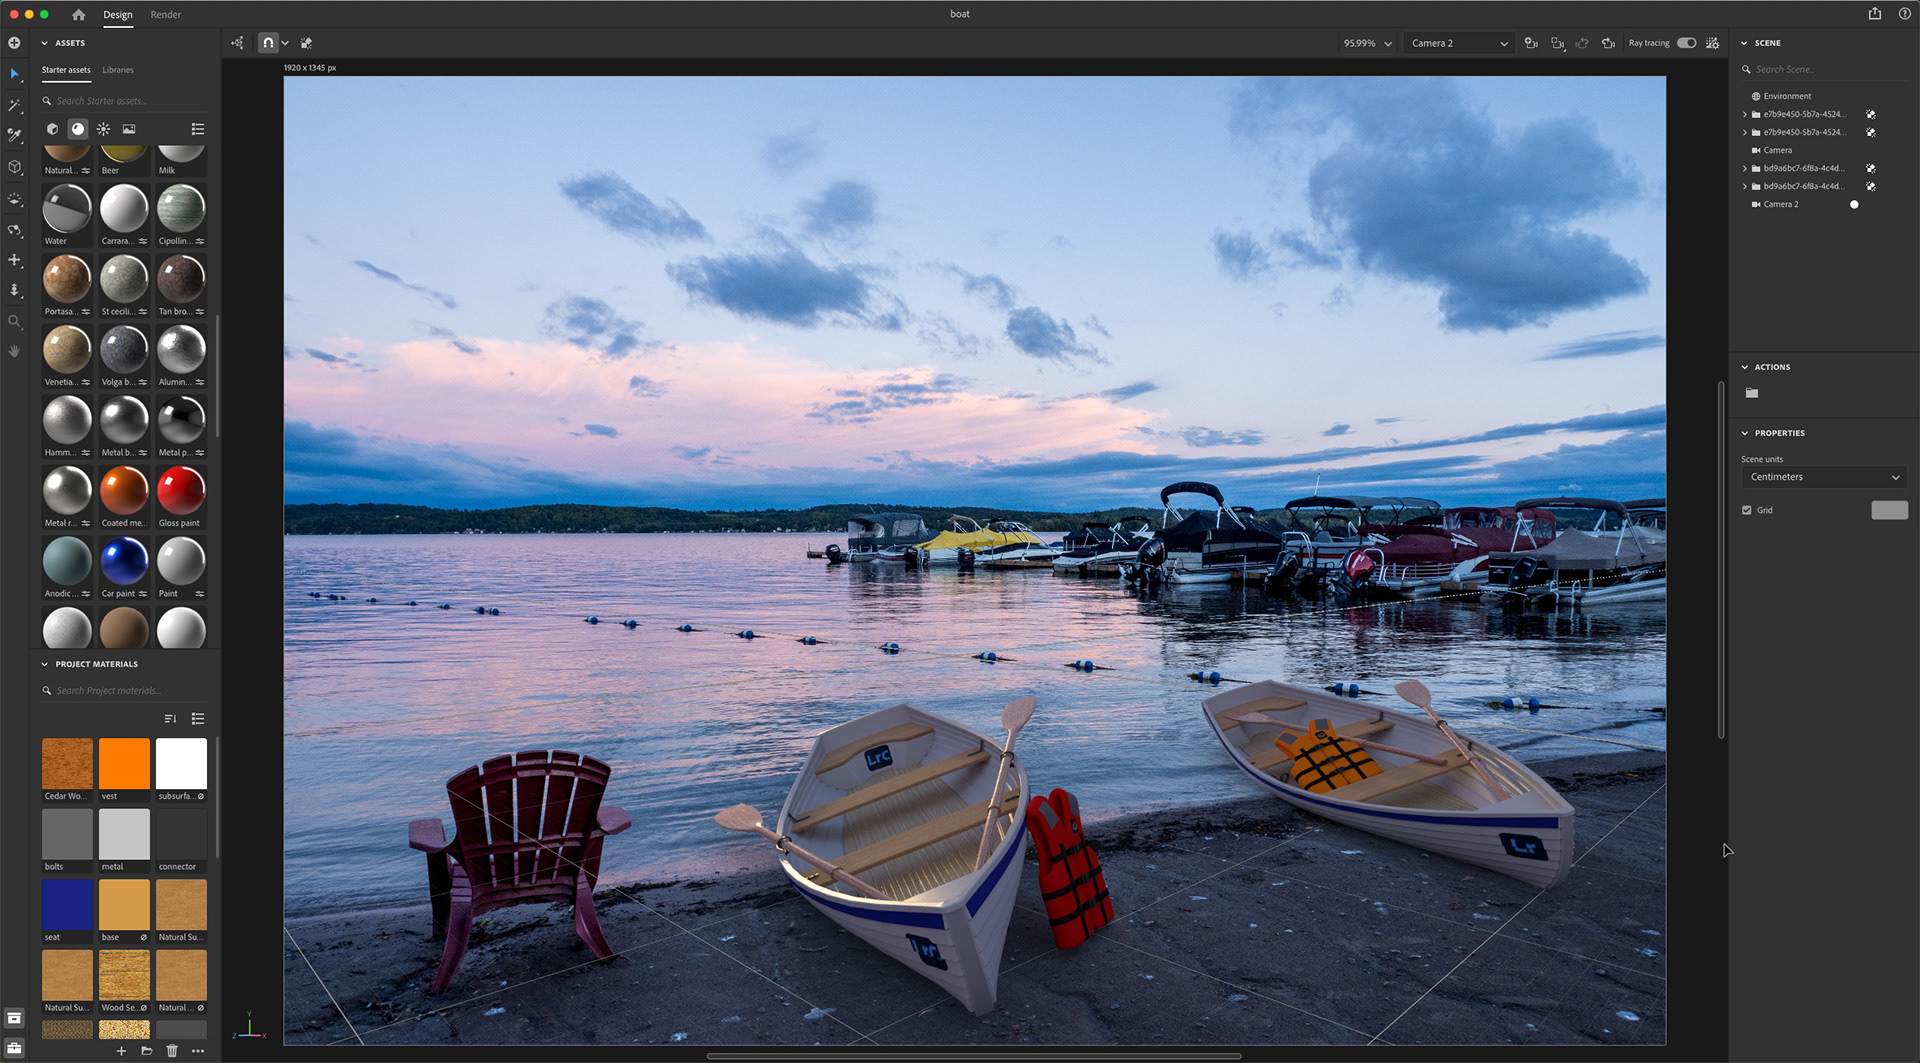
I began simply enough; searching the Substance assets collection for a couple different boats. I found a kayak and two wooden rowboats, but no canoe, sadly. I opted for using a rowboat in my composition.
Through trial and error (admittedly, mostly error) I was able to adjust the various properties of the rowboat to make it appear "realistic." More experienced 3D artists would likely be able to do more with materials, but I could find a cedar-strip material that I liked, which also matched the ribbing of the hull. So...I went with white paint. I did add wooden decking, seat material, wood detail for the oars and a blue paint stripe. I by sub-selected part of the hull with the Magic Wand and applied a standard paint material. from the Starter Assets.
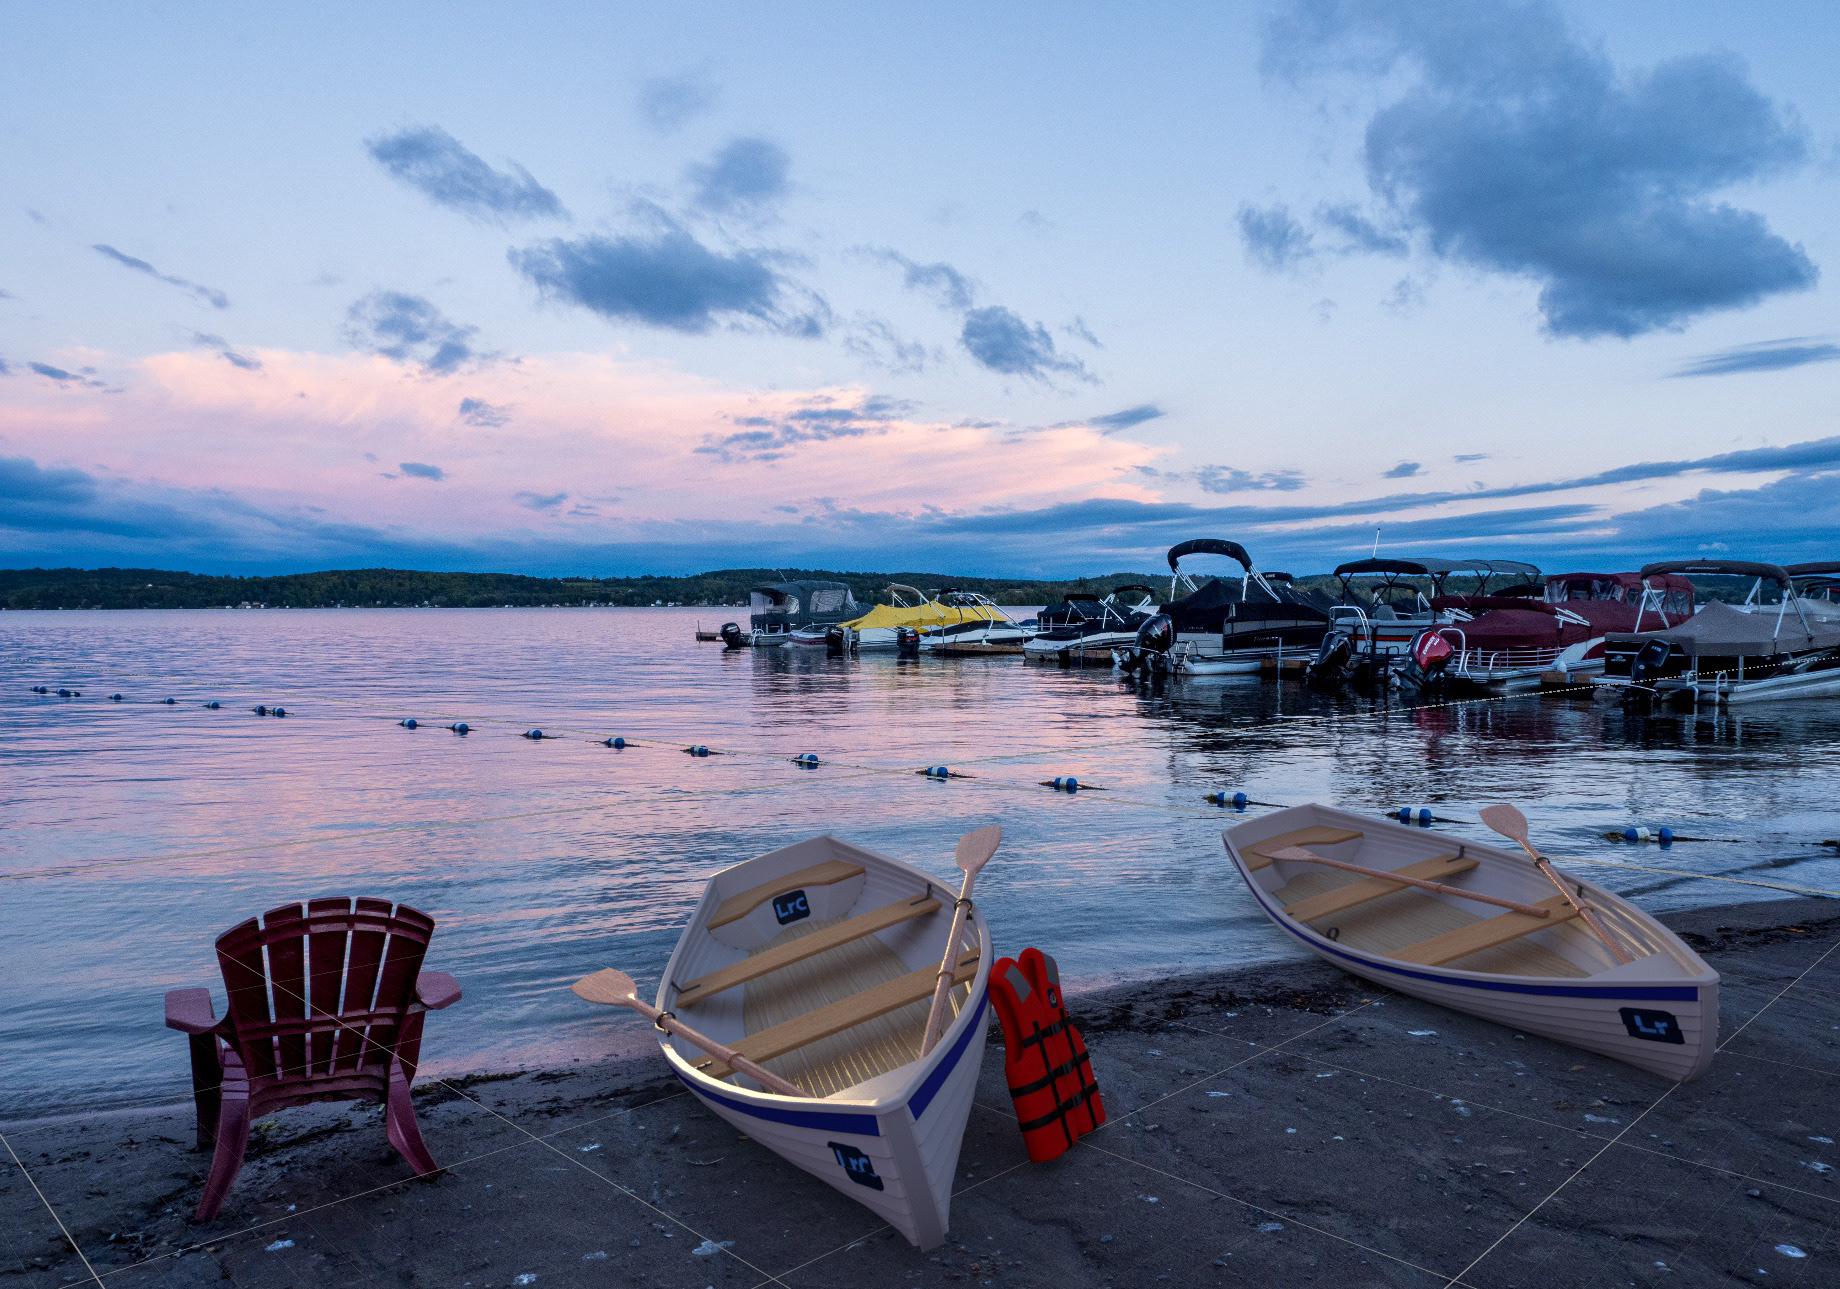
After adding the first boat, I duplicated it to add a second (two boats are better than one!). I didn't want both boats to be identical, so I decided to reposition one of the oars on the second boat. Models are often made up of many 3D elements. Each of my paddles were separate objects within the boat model, so I could select a single paddle using the scene panel. Once selected I could use the 3D Gizmo (yes, really that is the name of the controller) to reposition the paddle.
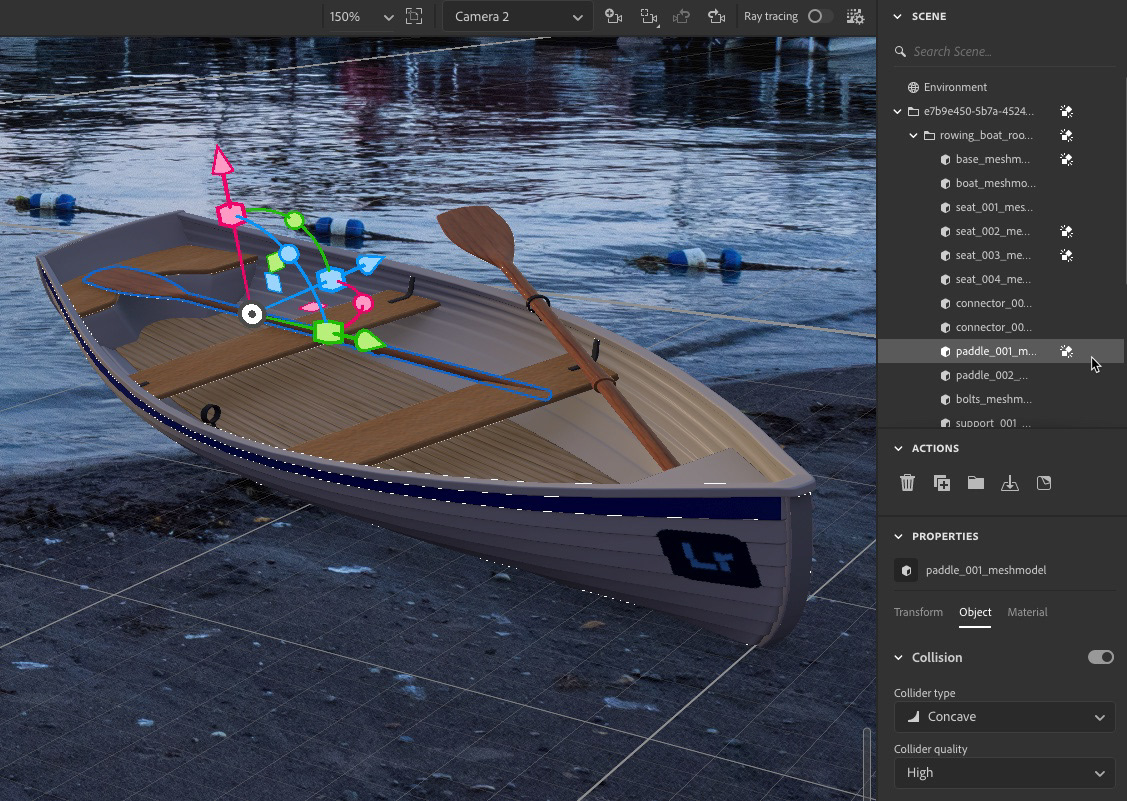
I decided to add a couple life jackets to the scene (safety first) and enabled the collision tool. Here is where I may have went a little crazy; not only did I enable collision, but I set it to high quality, and applied it to sub-components of the models (like the paddle, seats, etc...) At first this was not an issue, but as I added more objects (life jackets) I got myself into some trouble with my system slowing waaaaay down. Did I NEED to drill down to this level of collision? I honestly don't know and I'll have to start a new project from scratch to see if there is a difference to performance and scene realism.
I wanted to prop up one jacket against the nearby boat and have the other jacket inside the other boat. I located the lifejacket model from the Substance 3D Assets collection and brought it into the composition.
If I have one issue with this 3D model, it is that the life jacket model is very rigid; it doesn't respond to what I'll call "assumed gravity." It doesn't sag, or bend (or at least I don't know how to make it sag). That said, good life jackets aren't particularly floppy, either. It just felt like I was moving a piece of cardboard around the canvas.
Live Raytracing version of the scene while in editing mode. Unless you have a very beefy system, I don't recommend trying to move anything around while Raytracing is enabled. I do NOT have a beefy system.
Much like the boat, I was able to subselect elements of the life jacket from the scene panel, so I could alter the coloring and/or material of the jacket. I also added a tiny logo on life jacket, by selecting a Creative Cloud library asset and dragging it on top of the life jacket.
You can drag and drop images to use as a complete fill for the object, or to use as a singular logo/decal object. Animations courtesy of Adobe.
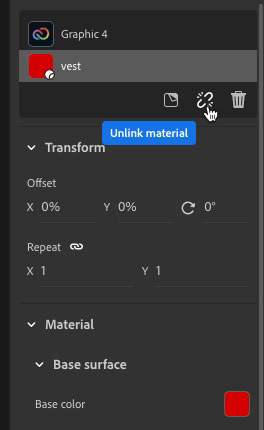
I duplicated the life jacket and moved it into its new location, laying inside the other boat, partly under the seat. This is a great use of the Collision tool; I was able to move the model around so that it was on top of the middle seat/paddle and be angled so that the bottom of the jacket was under the third seat. I also wanted it to look a little different, so I sub-selected the life jacket mesh to change the color. It's important to note that I had to unlink the material on the new jacket in order to ONLY change the color of the second jacket. If the material remains linked to the other jacket, when you change the color, both jackets will adopt the new color.
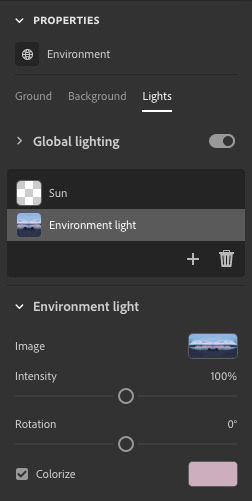
Lastly, I colorized the main environment light by sampling the pink/magenta sunrise color reflecting in the water. This was done by choosing Environment in the Scene panel, then choosing Lights in the Properties panel and then enabling Colorize and using the eyedropper tool to sample from the canvas.
With everything in place, I saved the file again and then chose the render tab to create a final output. I opted for both PNG and PSD outputs and it was a good thing I did.
Finishing Touches
On viewing the final render from Stager, it looked ok, but there was something off about the scene; the boats were still too clean and crisp, not matching with the somewhat grainy background image. I opened the PSD file in Photoshop and converted the rendered elements to a Smart Object so I could make non-destructive use of the Camera Raw filter. I wanted to add a bit of grain to the 3D objects.
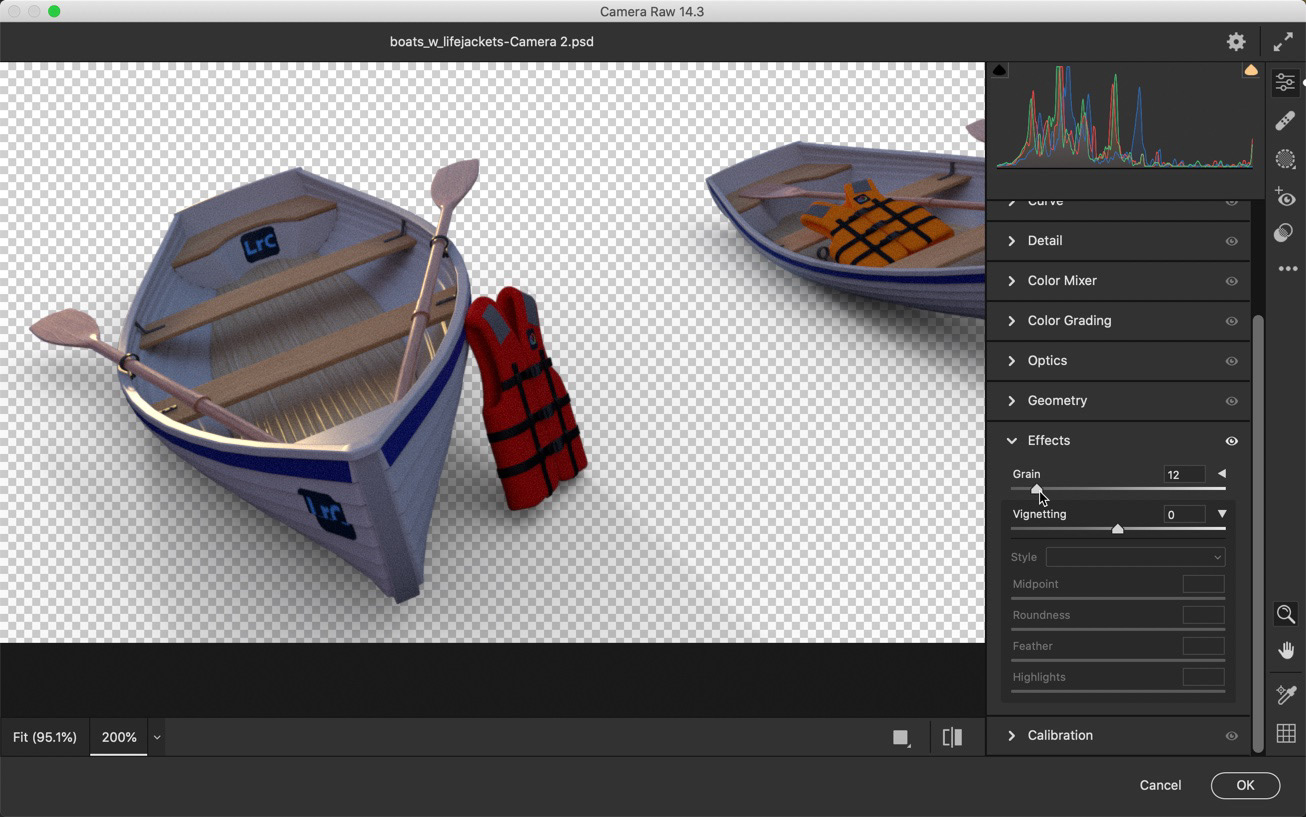
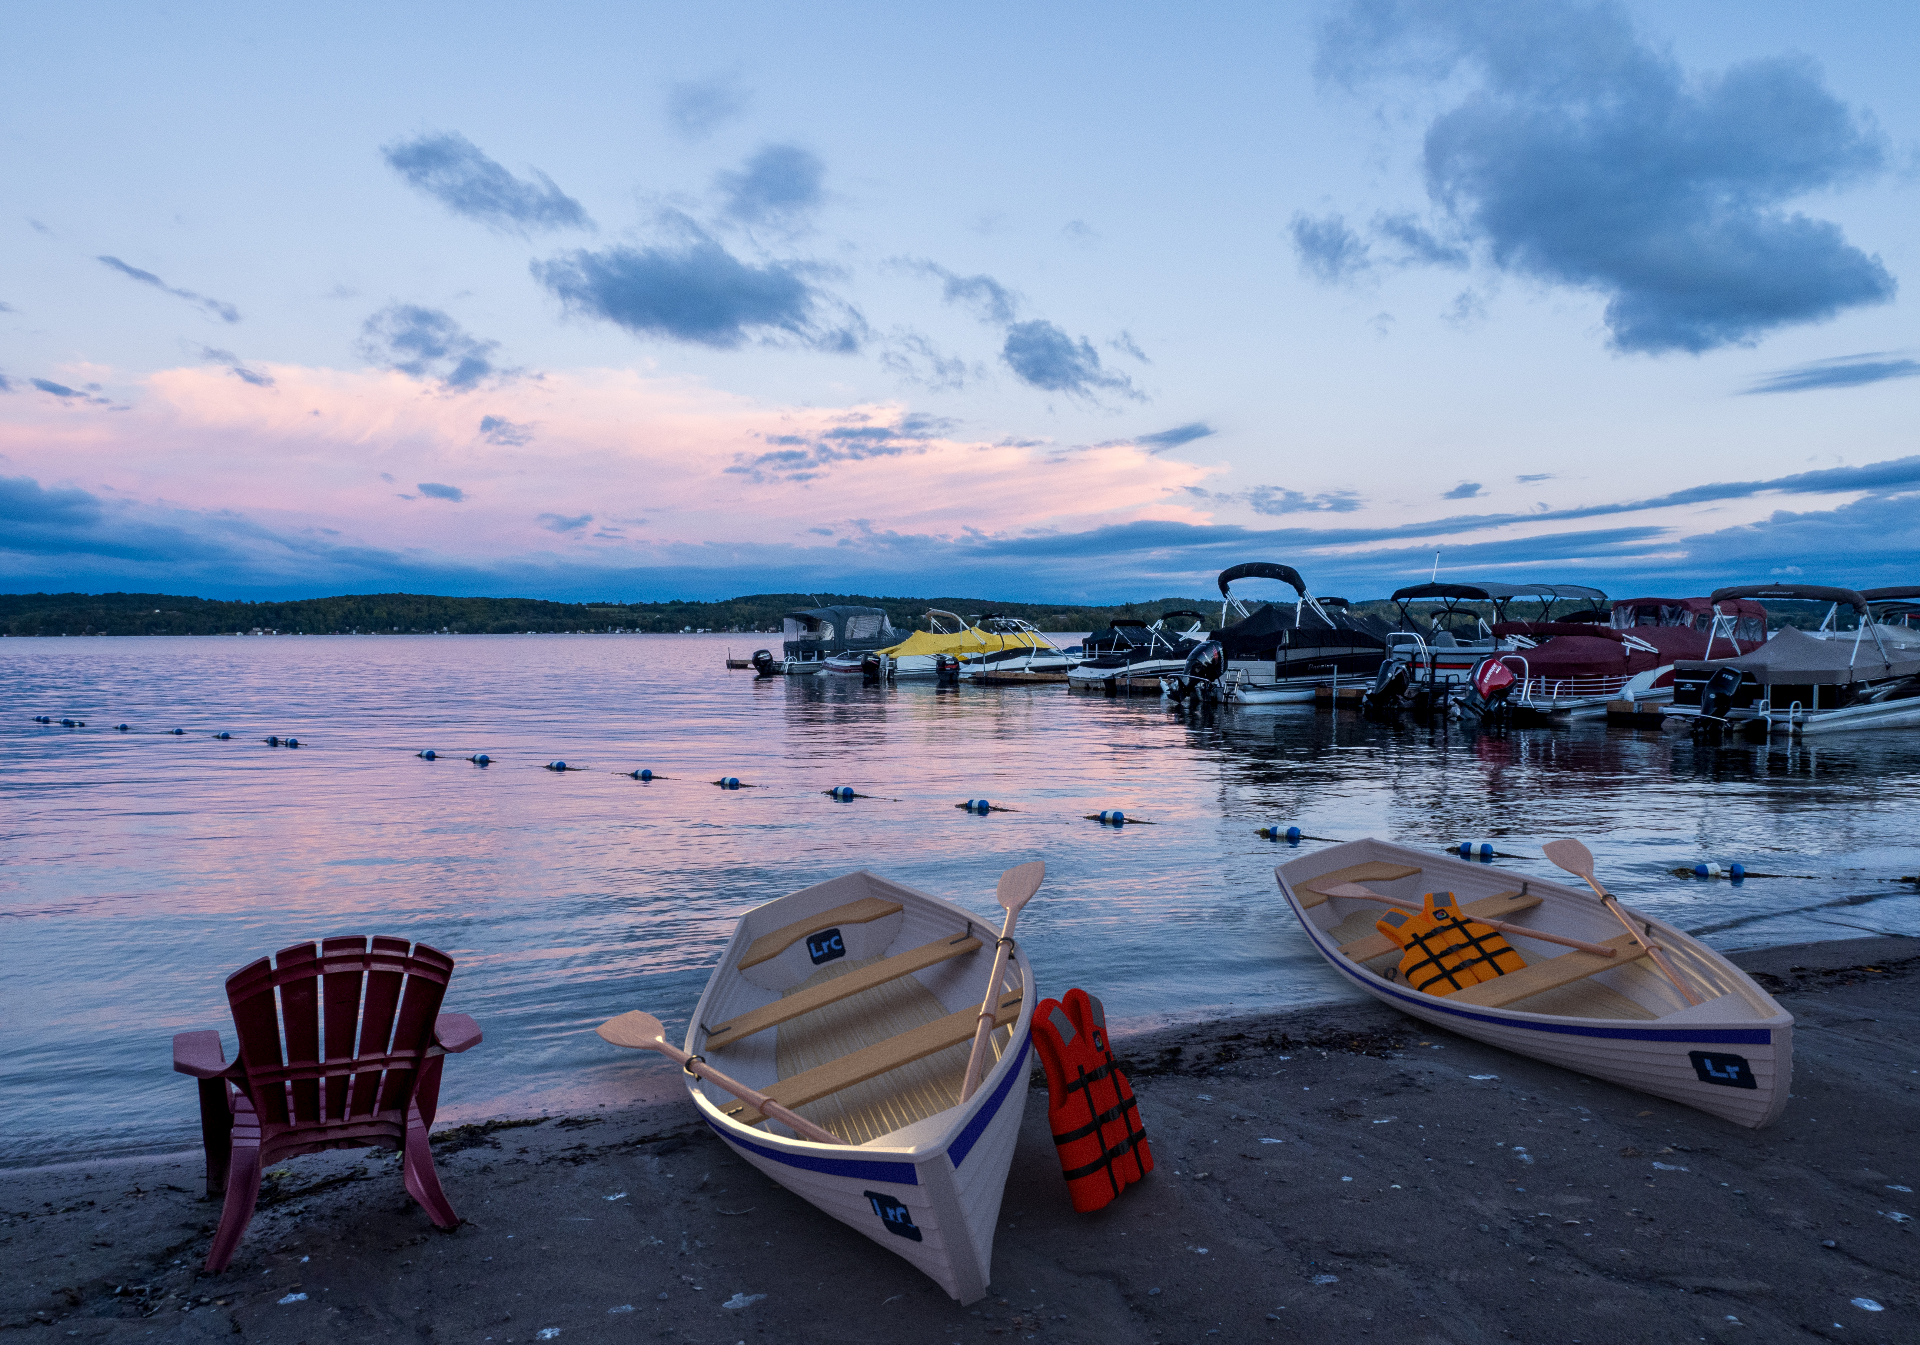
Adding a minimal amount of grain helped with the blending between the 3D elements and the background. As a final step, I flattened the entire file, and applied a small amount (.50) of noise to the entire image, again to help with blending.
Wrap Up
My experience with Adobe Dimension was a huge boost to achieving what I did in this project. It certainly shortened the learning curve. I'm pretty pleased with the end result, although there might still be too much sheen on the gunnel of the boat... Maybe I have to learn a bit about Substance Painter, next.
If you have the opportunity to try out Substance Stager, give it a go. I really enjoyed working on this project and am looking forward to doing more virtual photography.