Create a Social Media Campaign with Adobe Express
Final multi-page project shown in Adobe Express. Using the multi-page feature helps me keep all my artwork for one campaign in a single project location.
I've recently hung a new photography exhibit and - while I've been using Adobe Express sporadically to promote the event - I thought I'd take a more structured approach in the weeks leading up to the show.
I decided to create a simple design series that would feature a single image from the show in each post, and I would use 2 - 3 posts/week to promote the event. Spoiler alert: the finished project can be seen above or you can go to this link to see them big and bold: https://express.adobe.com/post/Glpjci7Qey6rX/
Start with a Design
This could be a daunting task in itself - the old "blank page syndrome" - but Express has so many professionally designed templates, the hardest part might just be picking which one you want to use.
Note: I've created posts from scratch (with a concept in mind) but also used templates either as just inspiration - like a moodboard - or as the starter graphic if I find one that truly resonates with me.
There are several ways you can find that inspiration once you're logged into Express.
1 - Main template search bar
2 - The Create button (+ sign)
3 - By category
4 - Curated/seasonal templates
5 - Shared templates in your Libraries
6 - Create using your own photo
There are many ways to start your search for an inspirational template.
Once you start searching, you can filter your results to narrow down your options.
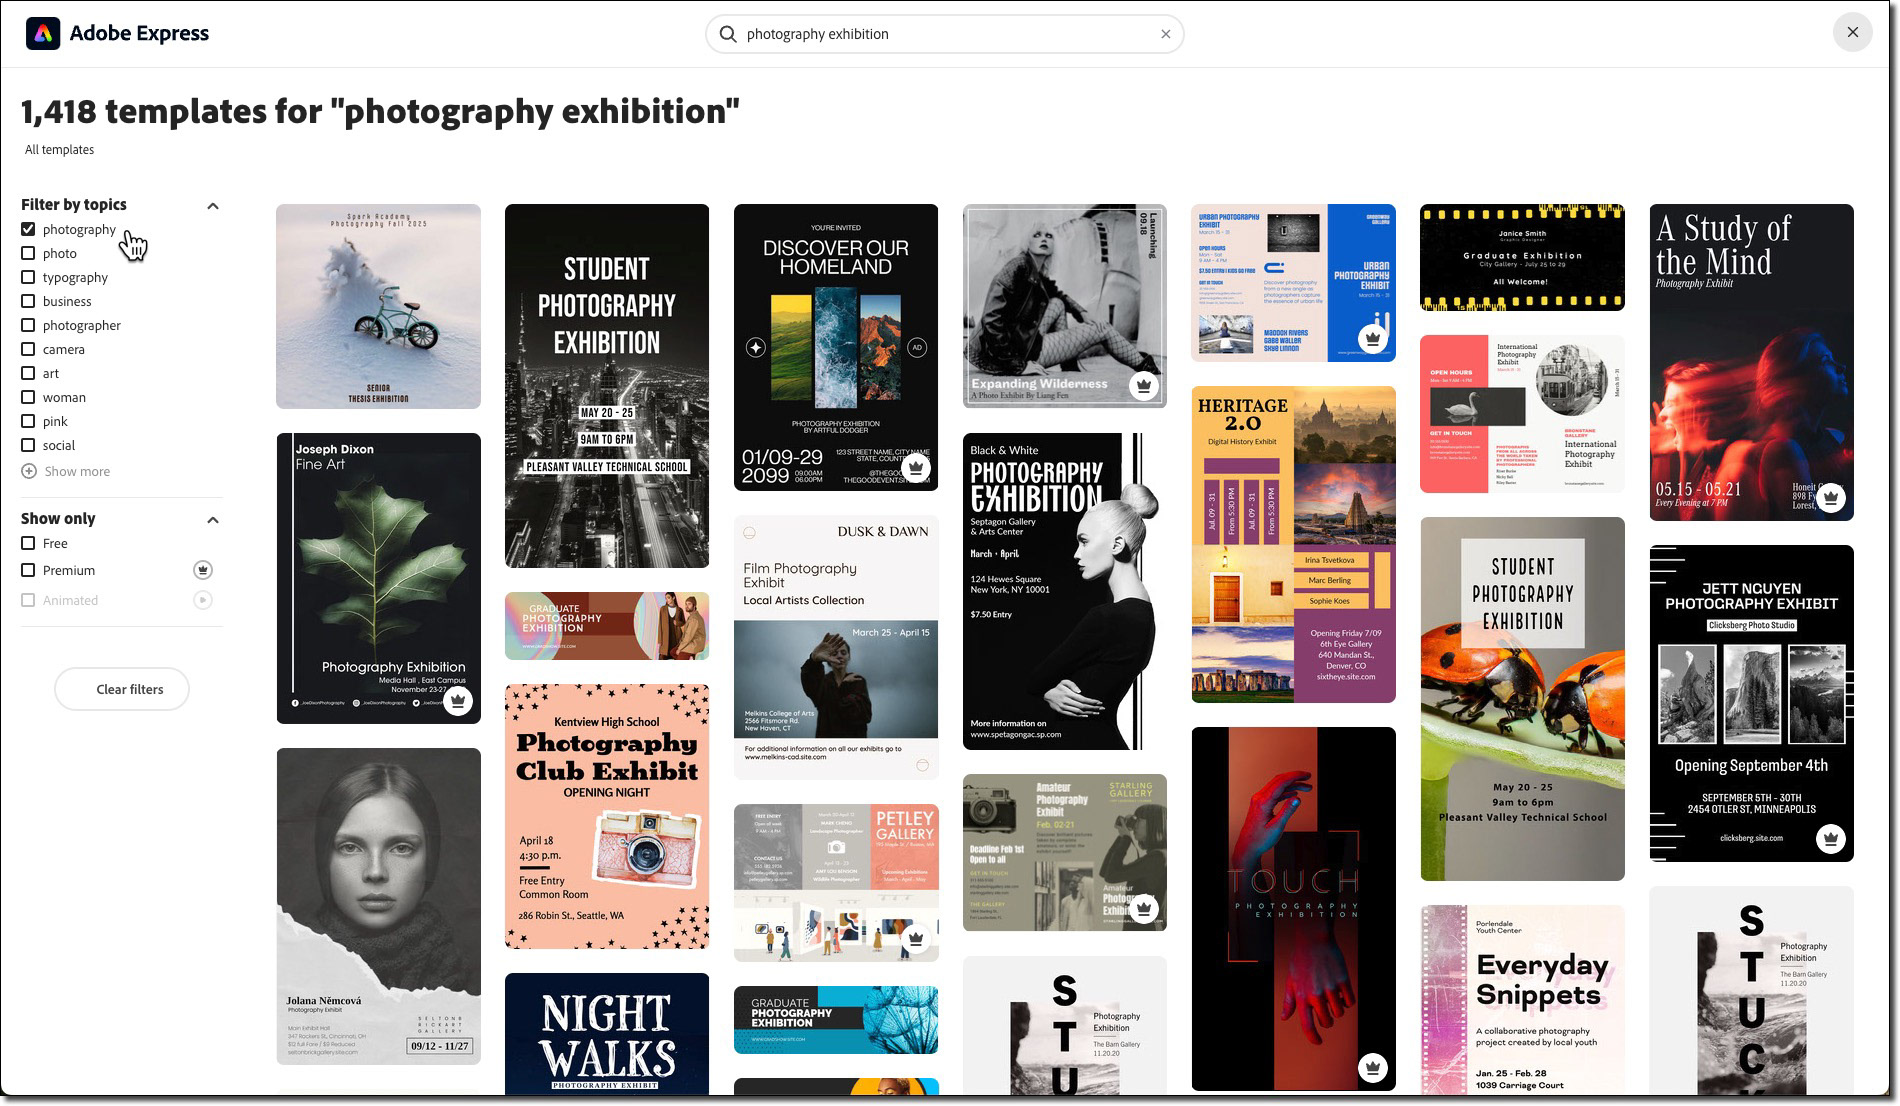
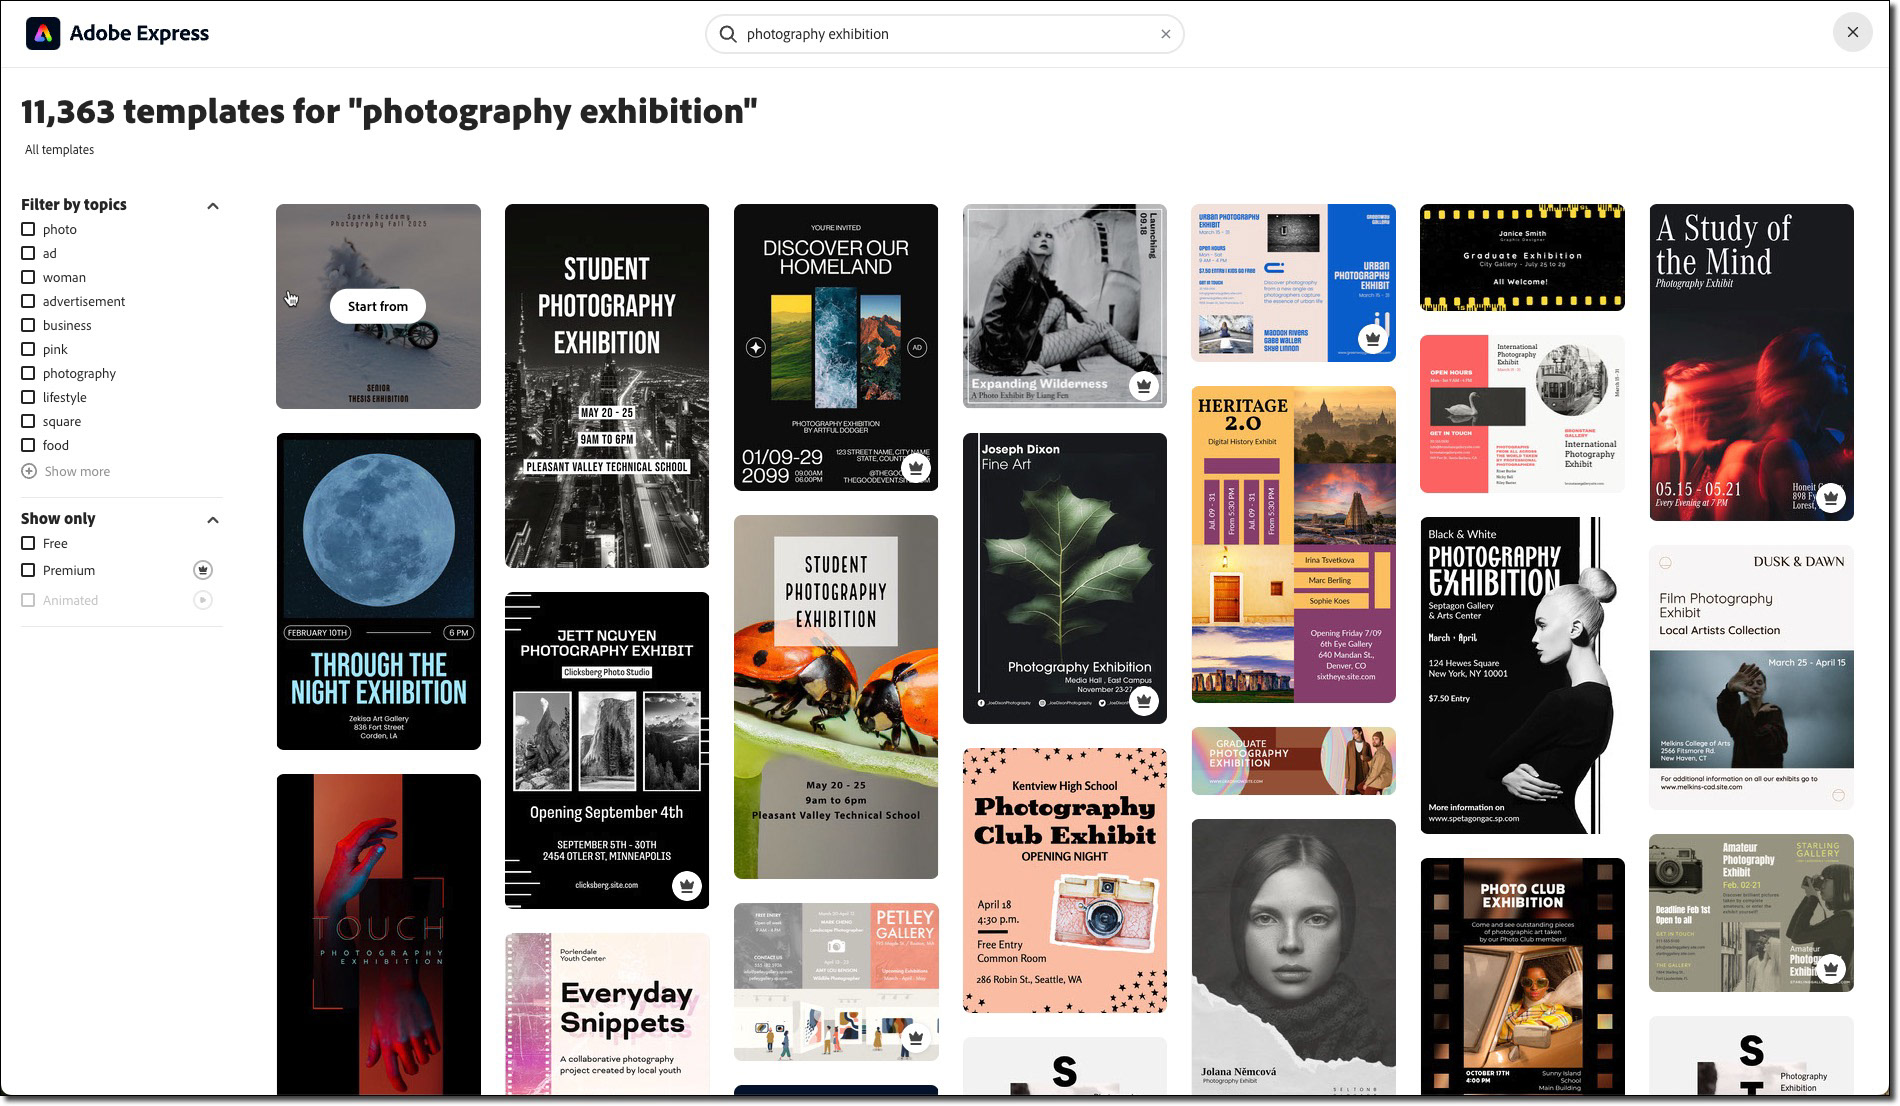
Unfiltered results can give you too many choices, so be sure to use the filter panel to narrow down your options.
Because I had a specific idea in mind, I started by clicking on Custom Size, picking Instagram Portrait from the Social Post sizes, and adding my own image and text.
Note: For the purposes of this article, I am working in the desktop web browser version of Express, but you can just as easily create your content using the Adobe Express mobile app. In fact, it's even easier to share to social media from there!
You can easily choose a common popular image size or create a custom size.
Once my basic settings were applied, it was a matter of creating the main design. I wanted the feature image to stand out, while still providing important information about the event. I opted for a two-cell layout with a roughly 30/70 balance. The header area (30%) would hold event information and a pleasing but non-distracting background image and the lower cell would hold the main image and my logo. Nice and simple.
A simple layout was key for my campaign.
Adding the Elements
Because all the relevant photography was already in a Lightroom collection/album, it made sense to import the photos using the Express/Lightroom integration. The grid below shows the main steps for this import. You can click on the images in the grid to enlarge them.
Note: I am going on the assumption you HAVE synced a Lightroom album or collection with the cloud. If your files are just on your hard drive, you can browse for them in the normal way, briefly outlined in step 7.
In brief, the steps are:
1- Select a cell in your layout and pick Choose Image.
2 - When the Photos panel appears, click the more icon (three dots) and choose Lightroom.
3 - Click/tap on the thumbnail of the desired album/collection.
4 - Click/tap on the thumbnail of the desired image.
5 - Position/scale the image as desired.
6 - Repeat the process for adding an image to the header
7 - For images not in a Lightroom folder, choose Upload photo and browse for the file locally. I did this for the logo supplied by the event organizer.
8 - Position/scale the image as desired.
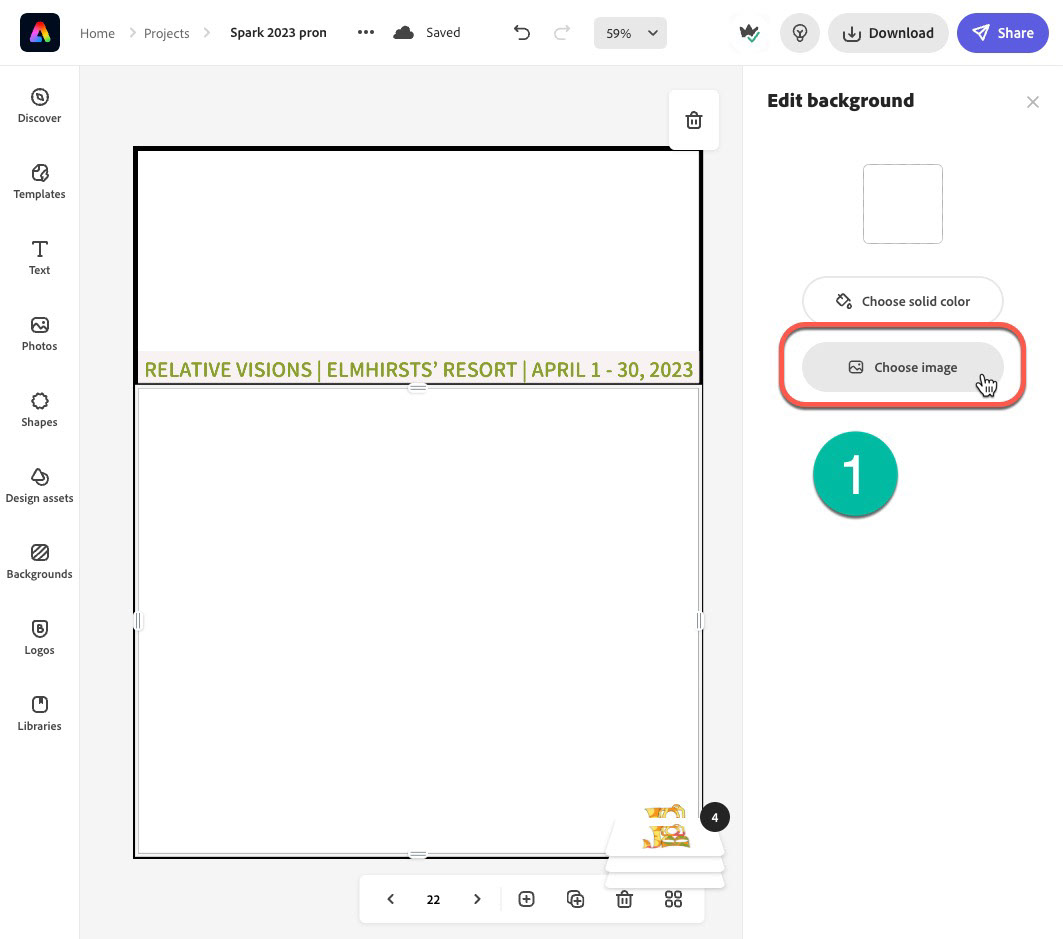
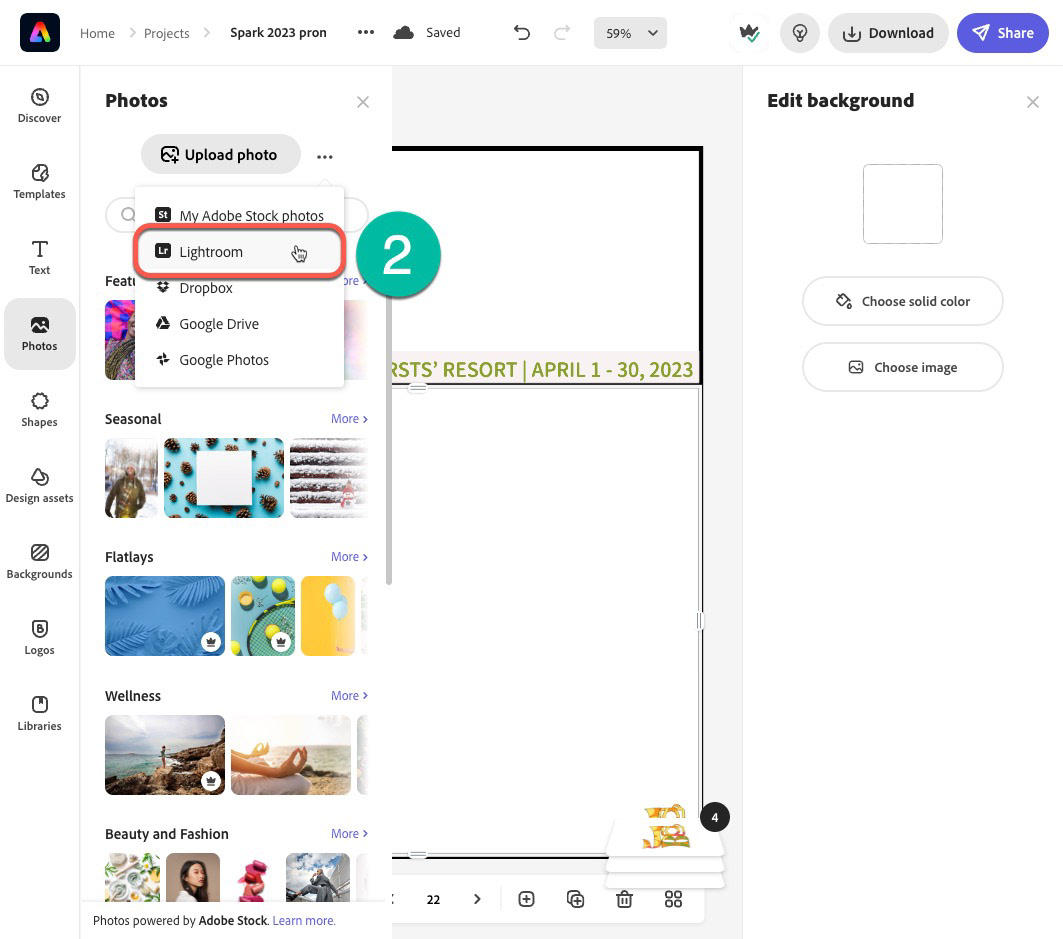
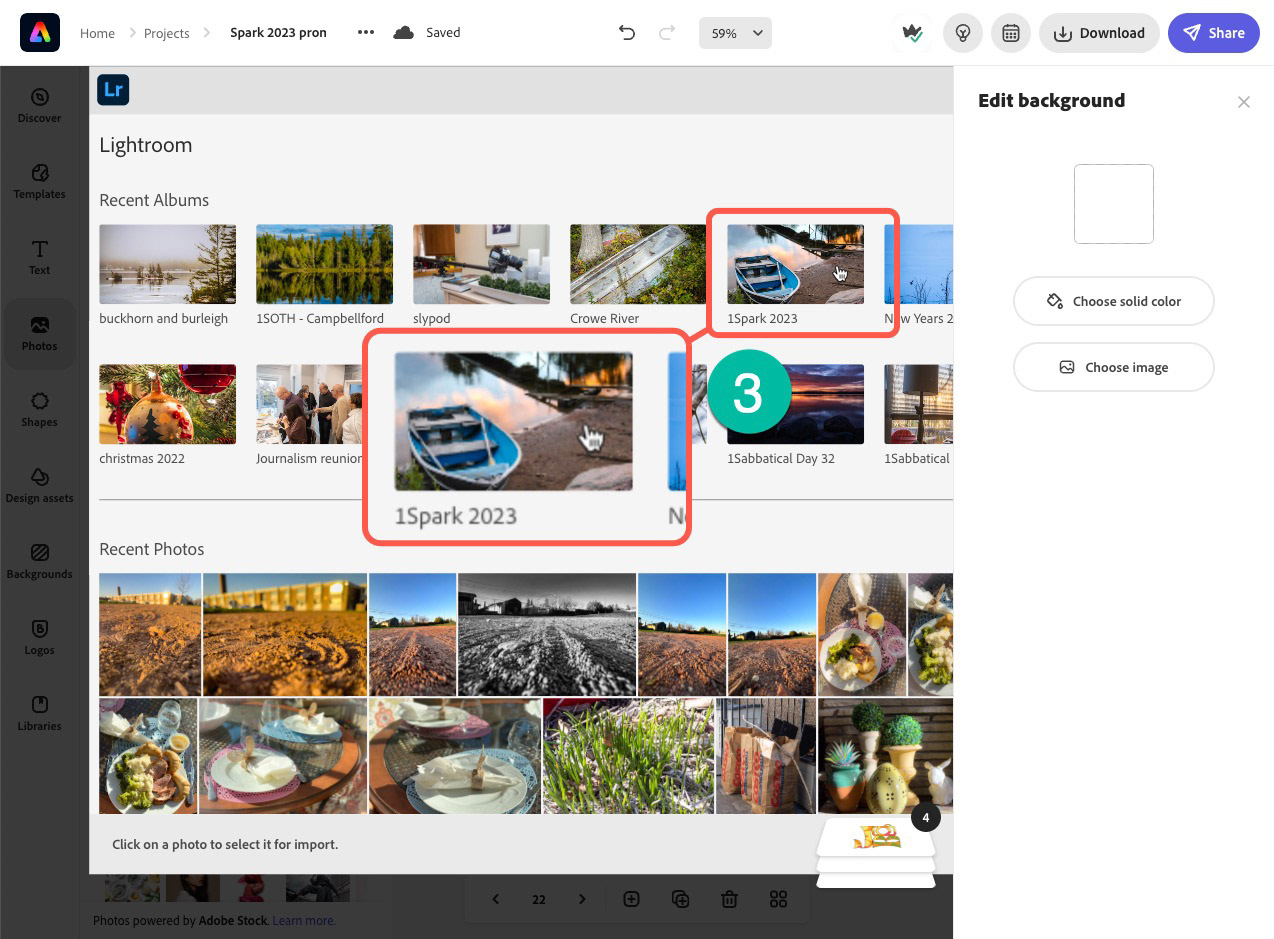
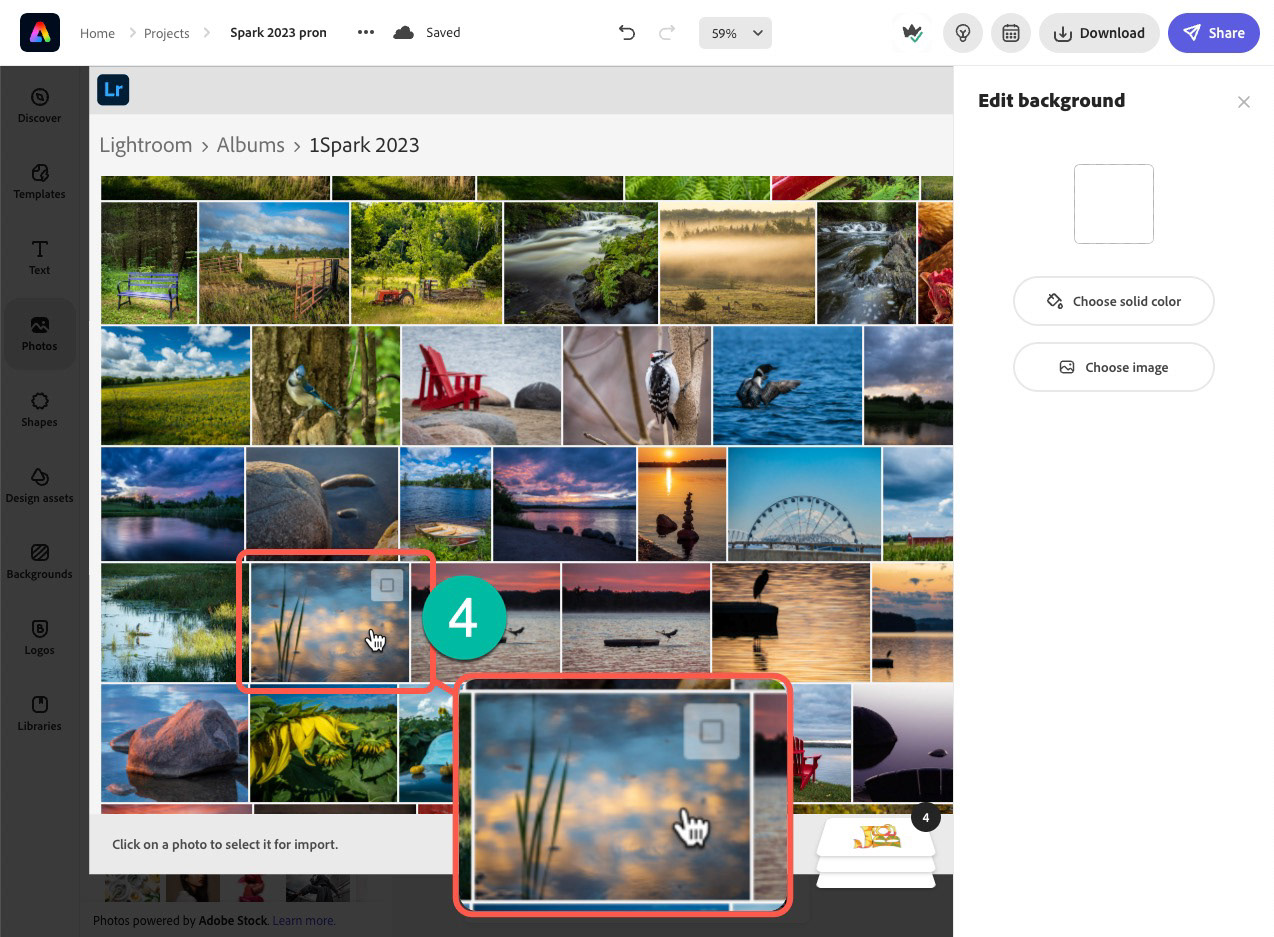
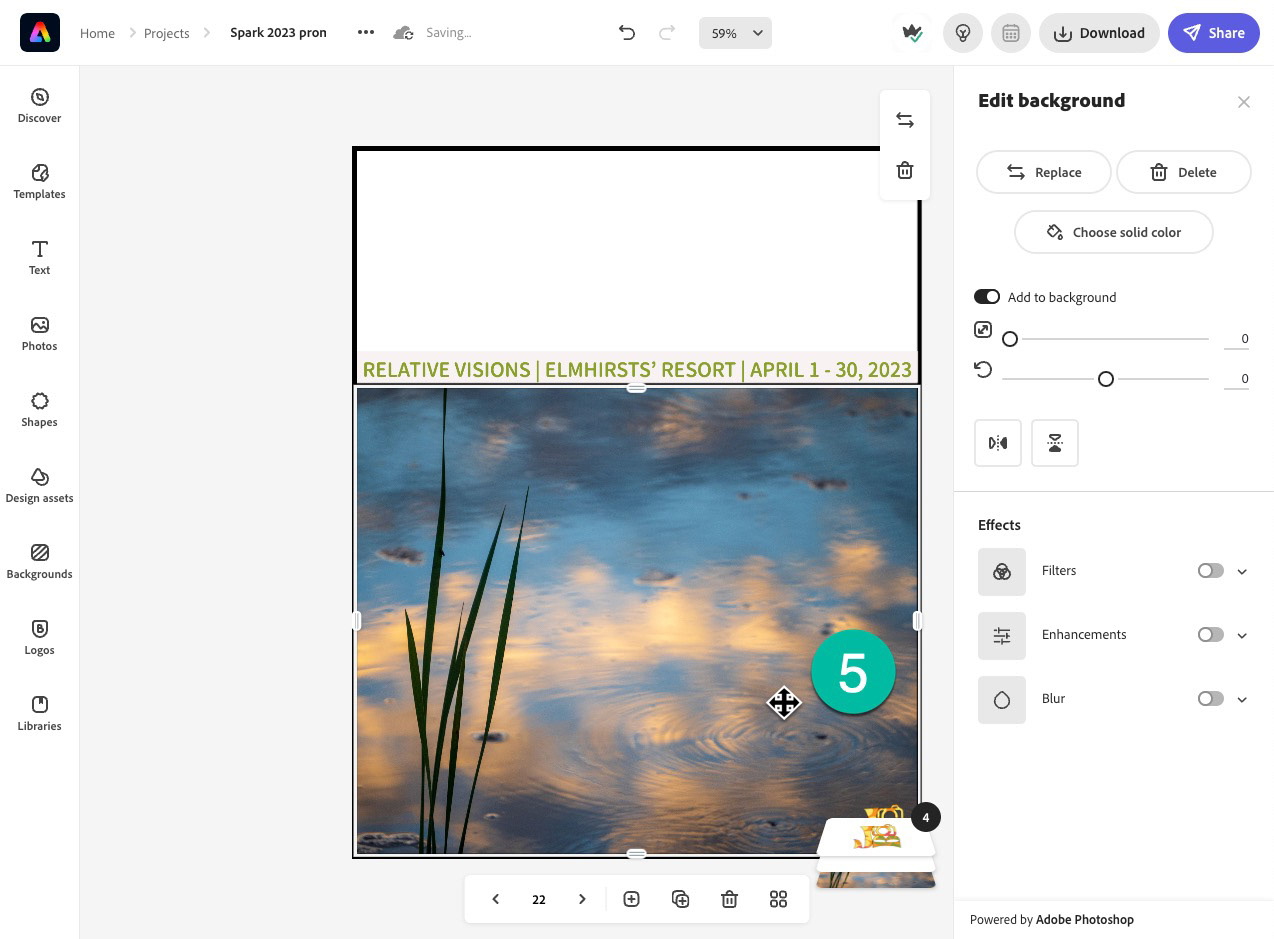
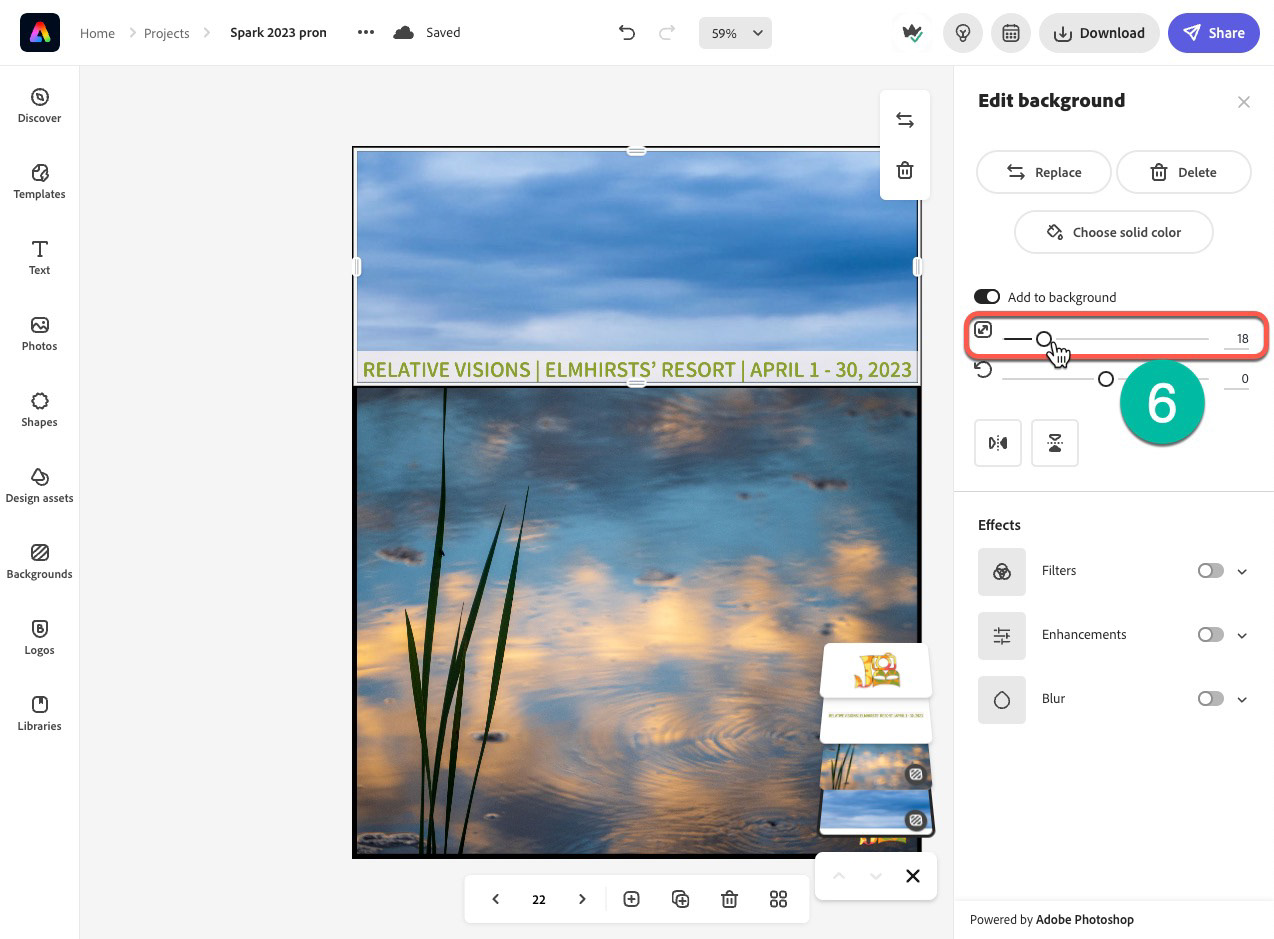
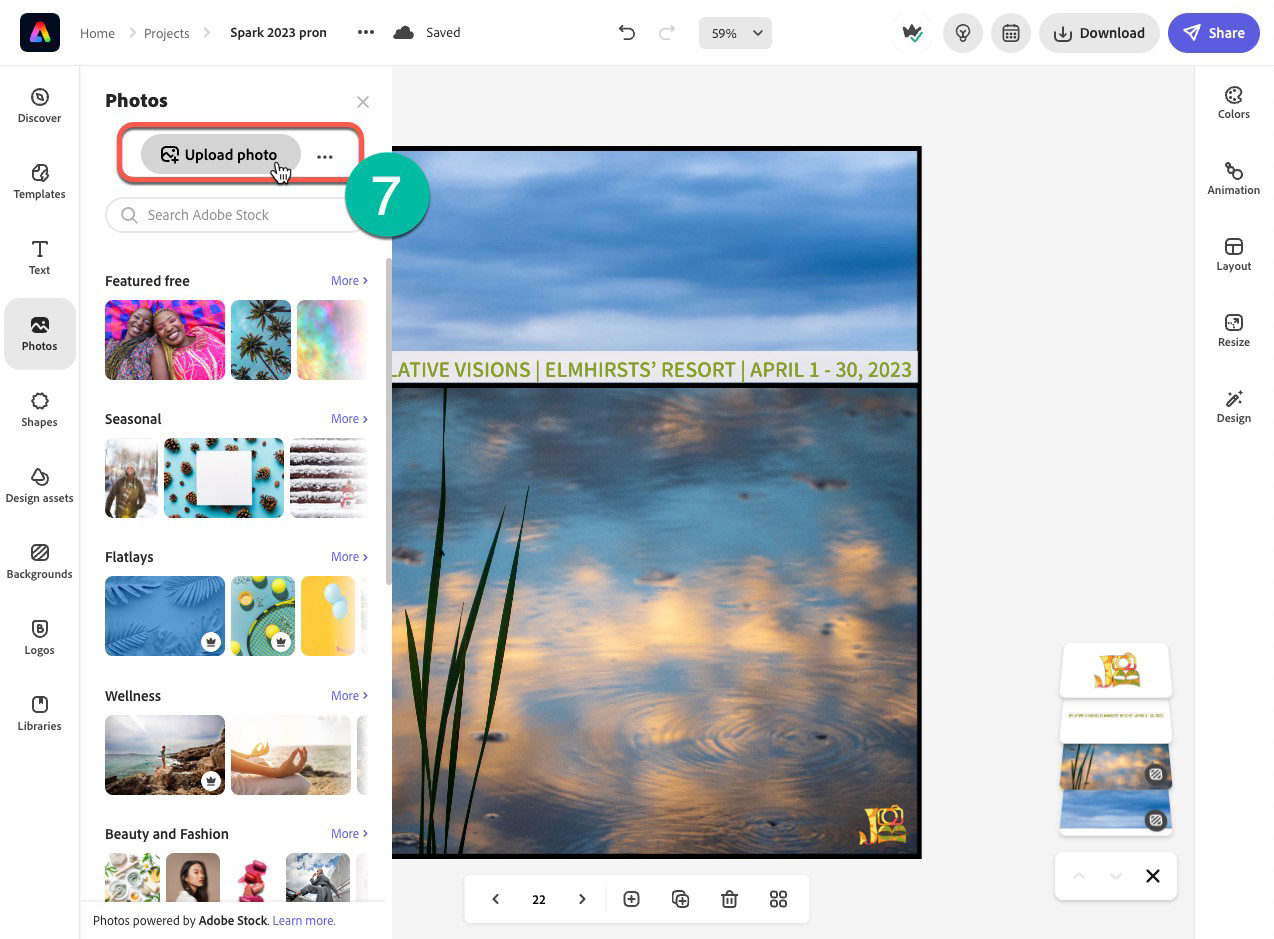
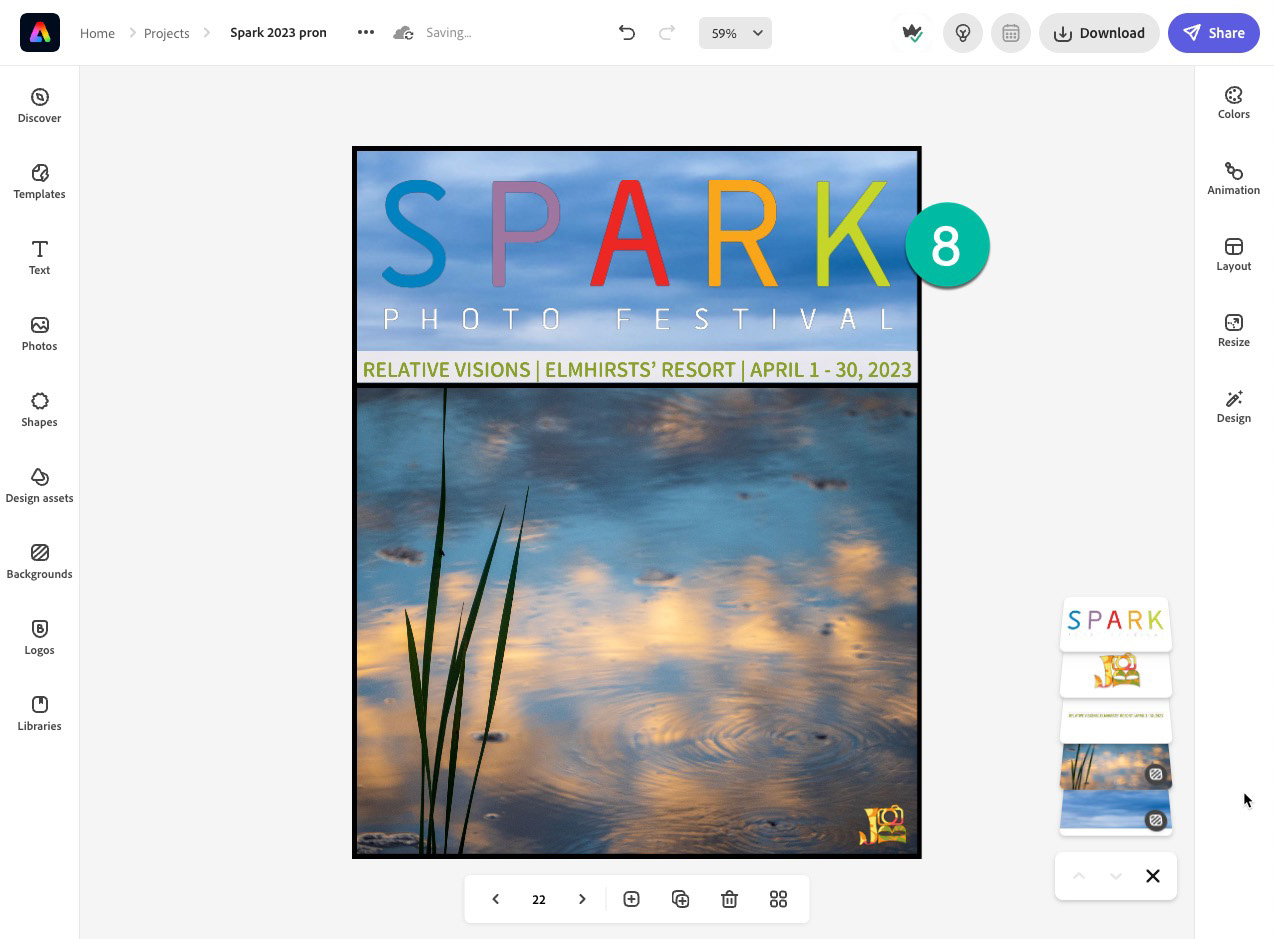
Click on the images in the grid to enlarge them.
Making More
Once I have my final design, it's super easy to create more based on that original. Simply tap the Duplicate Page icon below your design. Instantly an exact copy is created and becomes the active design. Then, in my case, all I had to do was browse for a new feature image. I kept up this process until I had enough iterations for my promotional campaign.
Creating a duplicate of a page design is super easy. One click and you have a copy, saved to the same project!
I'm really loving the recently-added support for multiple pages in an Express graphic project. It allows me to keep up 30 distinct graphics in a single project. I've even created iterations to announce a print sale and to promote the event in a collage format, all in the same project!
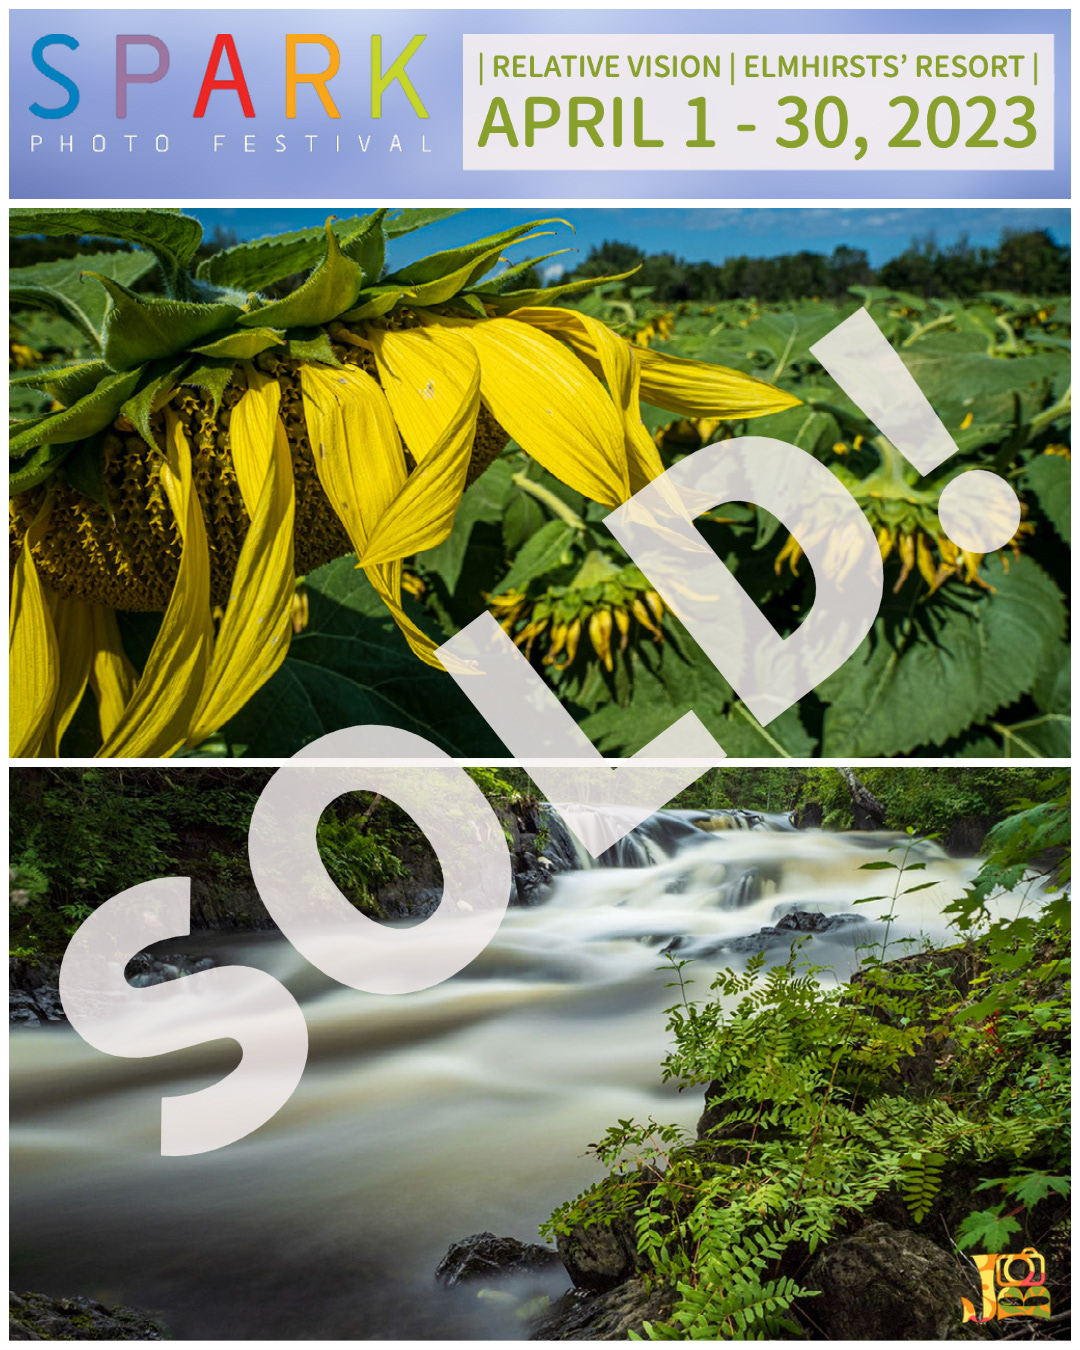
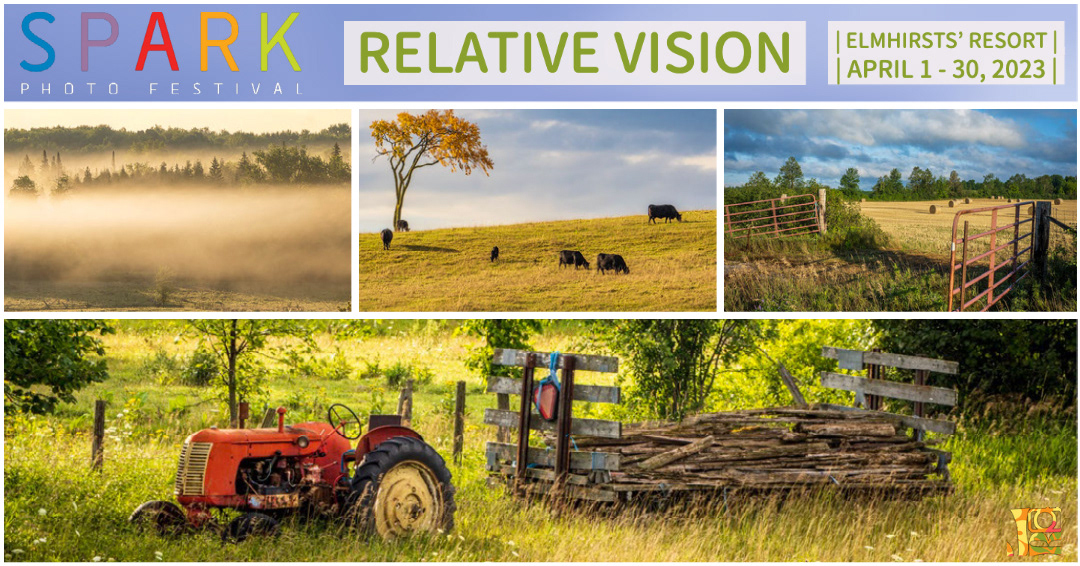
Examples of other promotional content including print sales announcements.
The multi-page support makes my Express workspace less cluttered and in turn, it's much easier for me to find what I'm looking for.
Note: A project can hold up to 30 distinct pages. Each page can be totally different content/size. If you are planning an expansive campaign, consider breaking it out in terms of timeframe or medium or season. Then create your first campaign and simply duplicate the entire project. Duplicating a project will create copies of each page in the original project.
Sharing and Promoting
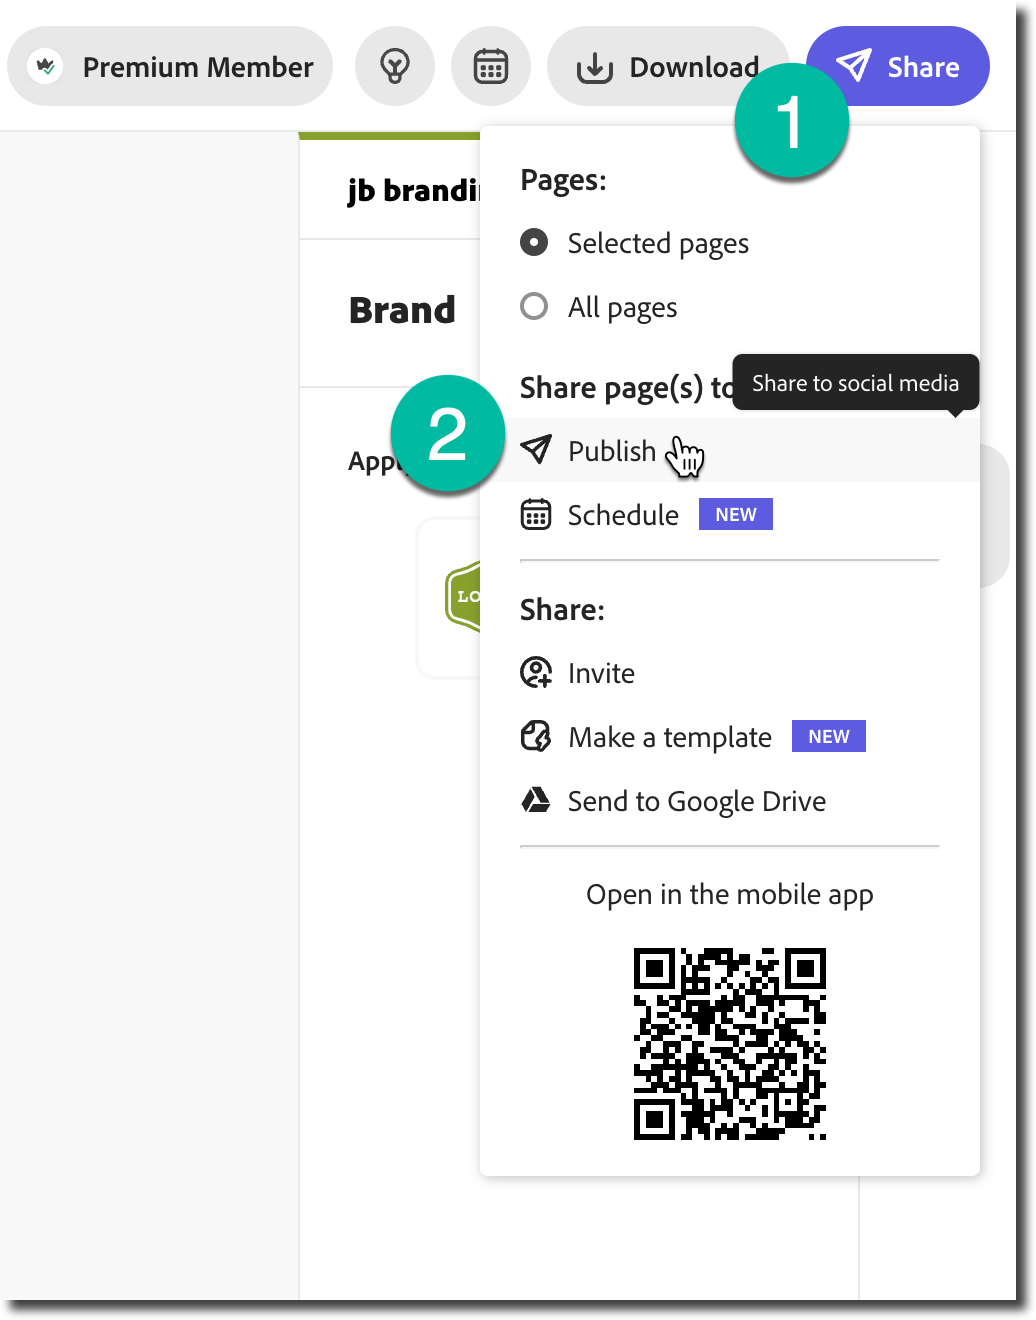
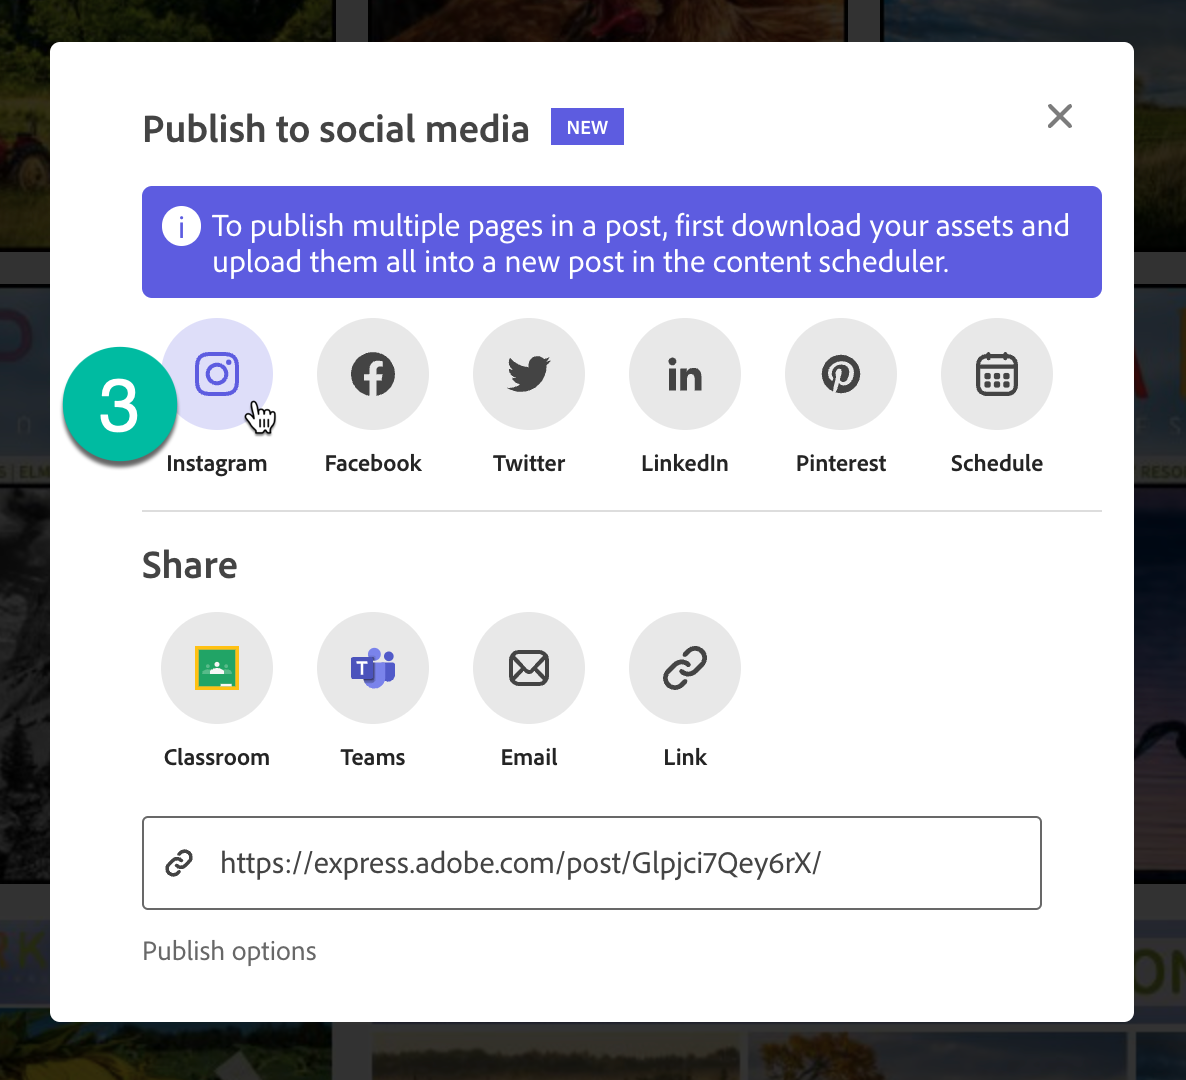
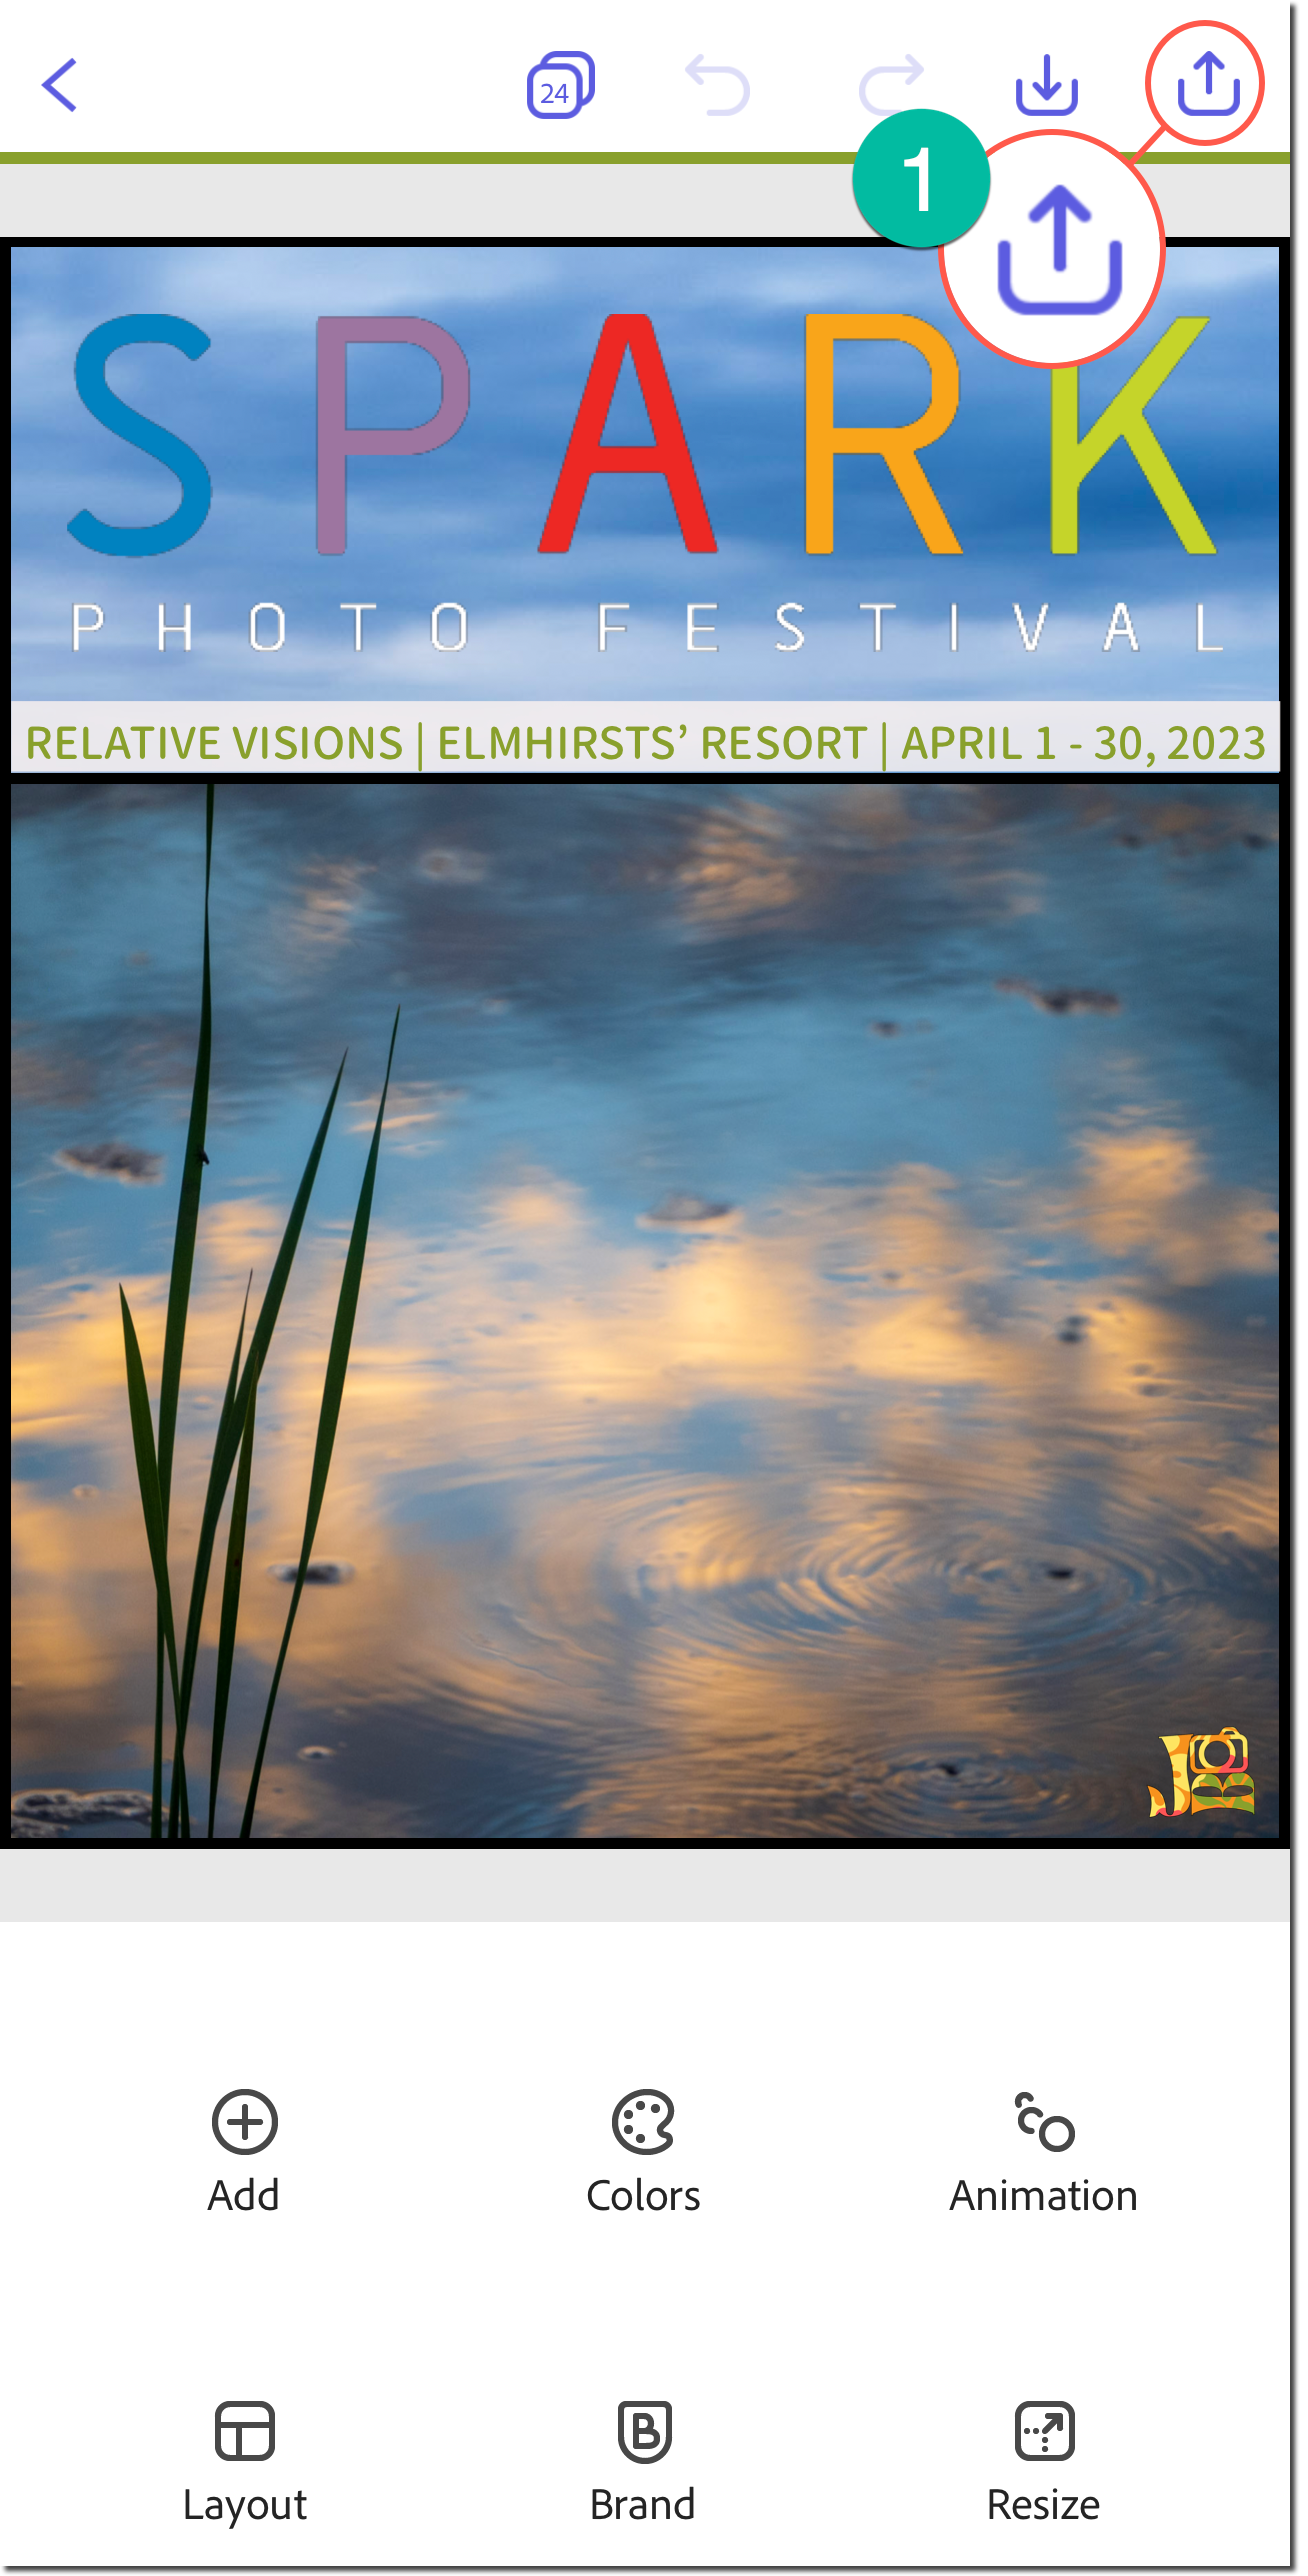
You can easily share project page to social media using the Share button in the Express browser window, then choosing Publish, or the Share button in the Express mobile app.
Web App Sharing
Mobile App Sharing
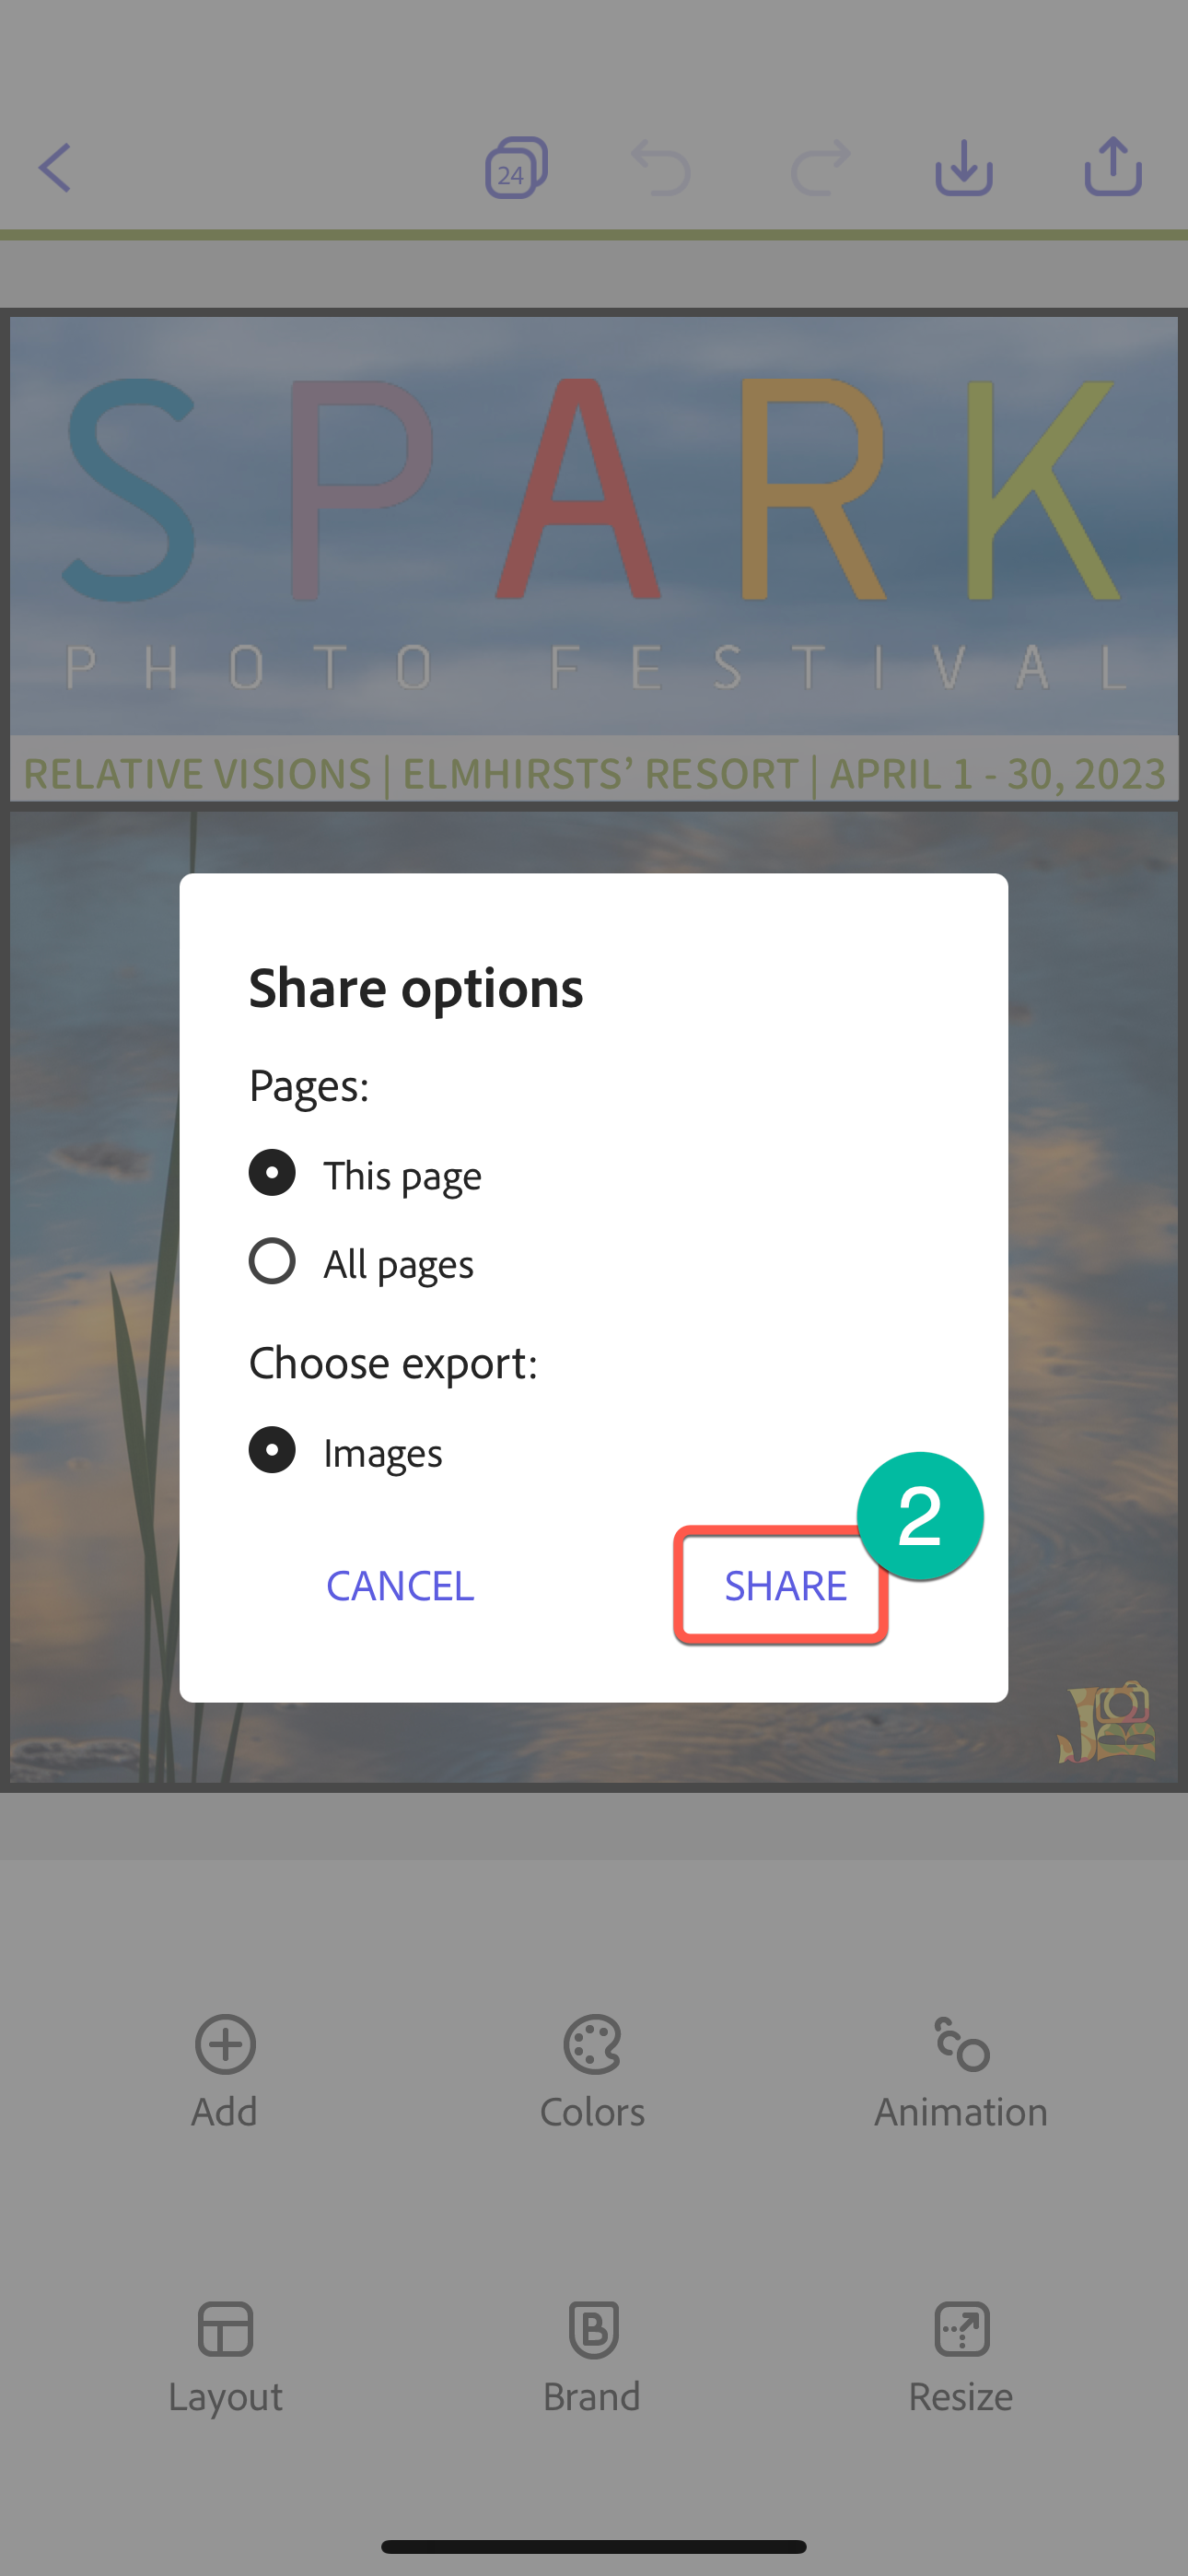
Schedule your Campaign
If you are using a web browser and are using the Premium version of Express, you can automate your social sharing over a series of days or weeks using the new Content Scheduler tool. Scheduling your content is a great way to free up time over the week; you can create content and plan your campaign on a slow day or when you have downtime. Just set it and forget it.
With this method, you're not scrambling to create a post because you got busy the post was left to the last minute.
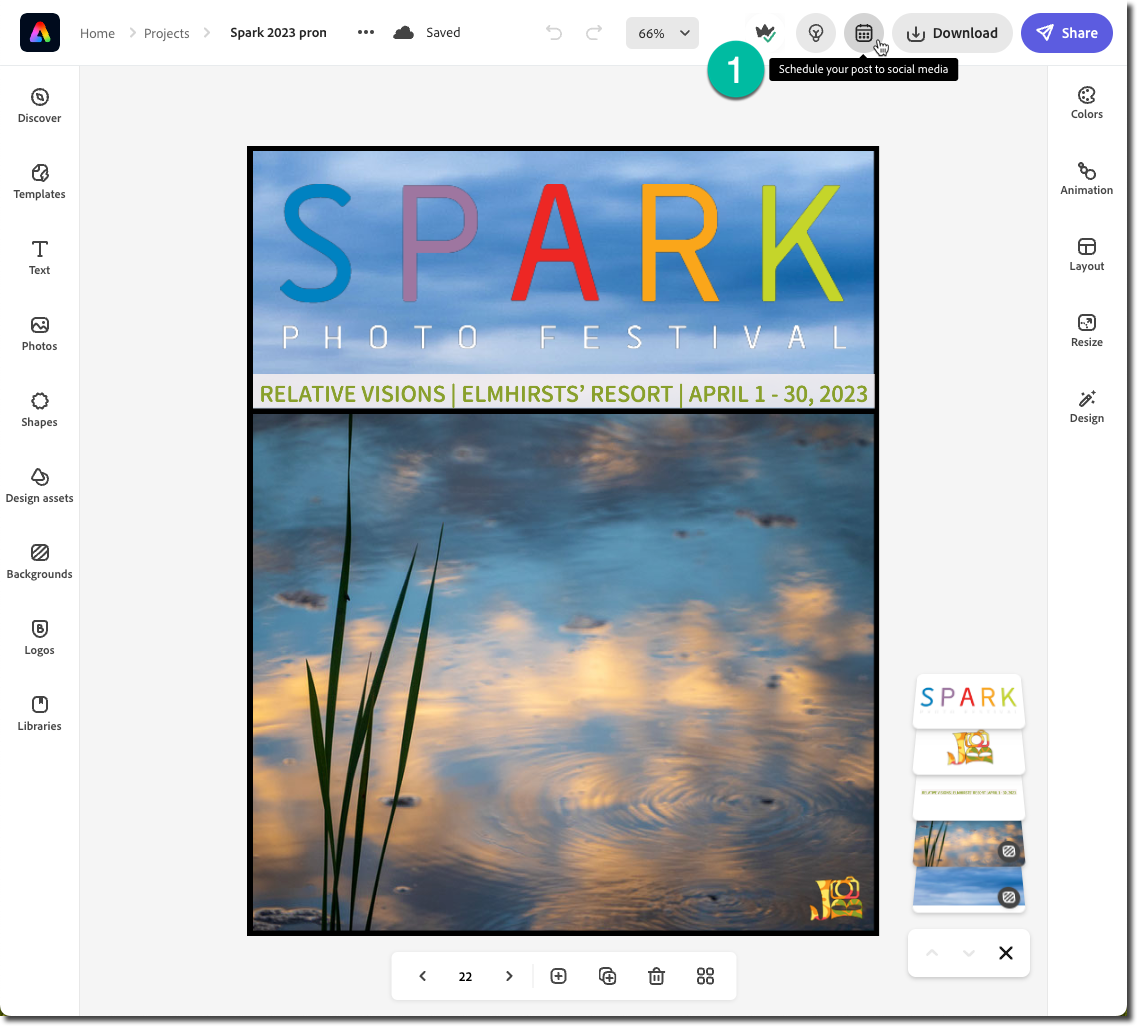
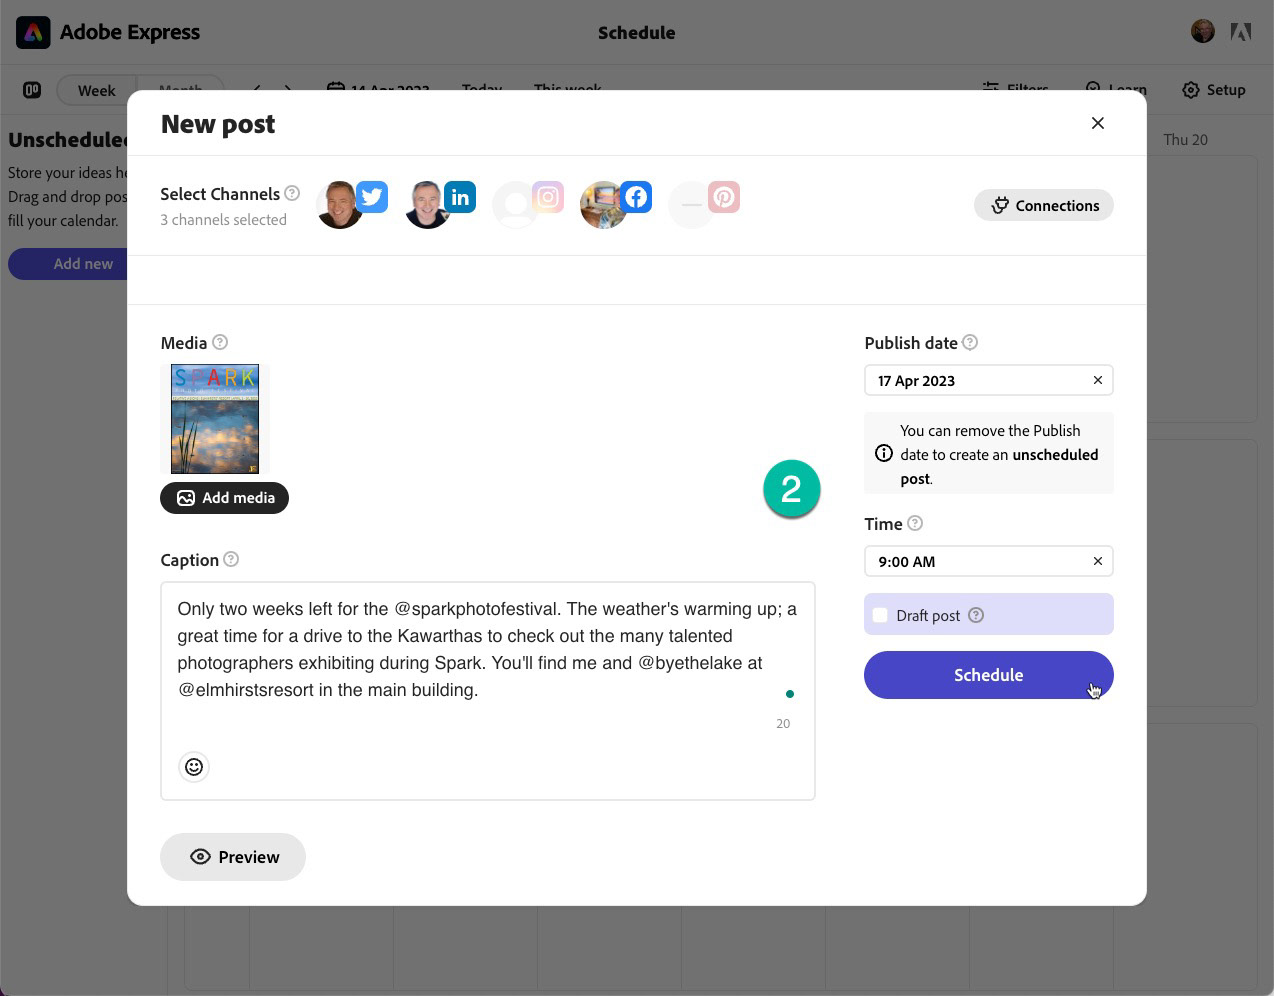
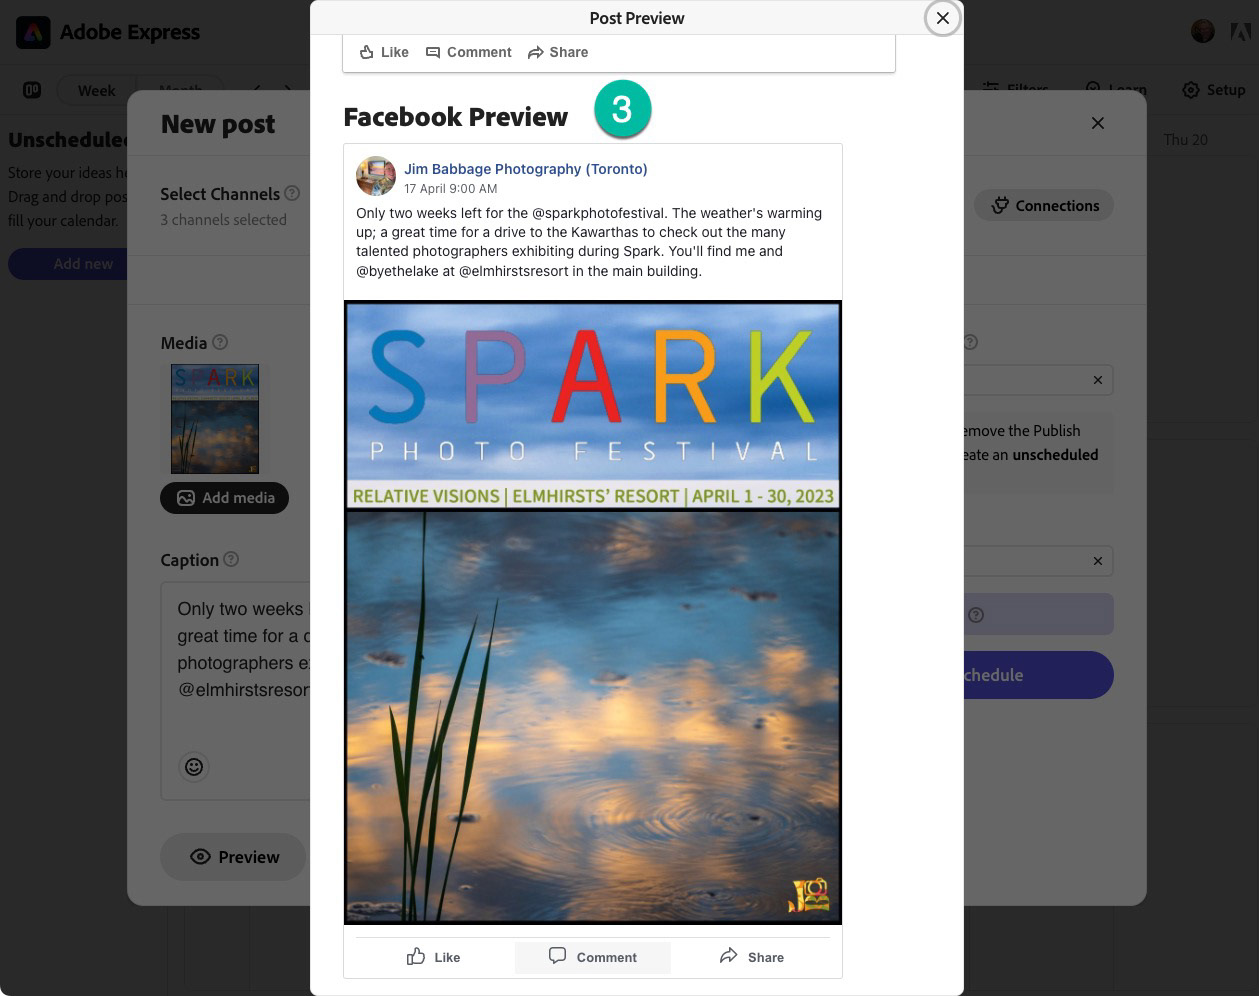
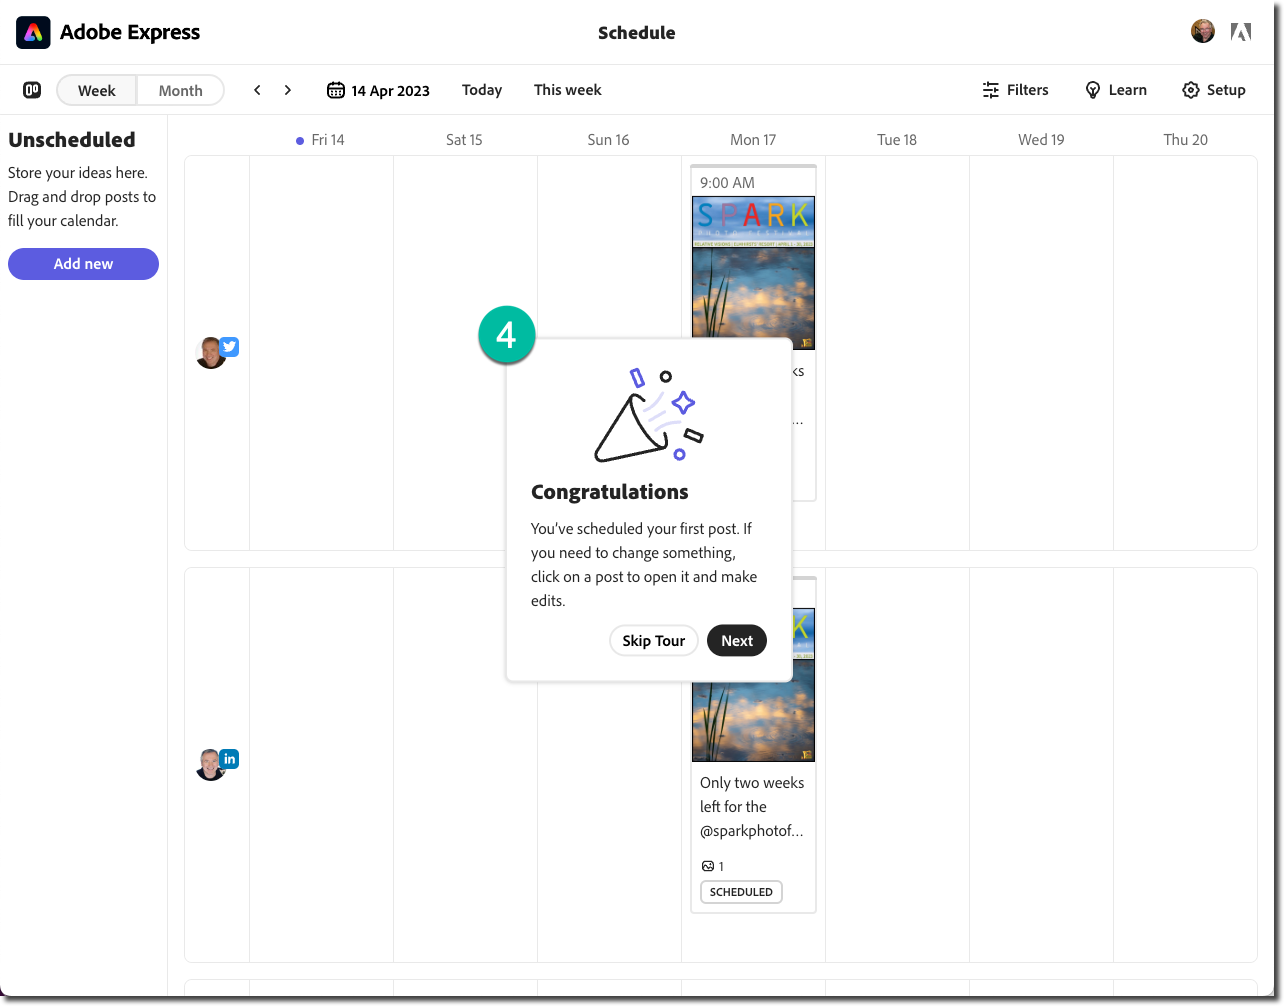
Click on the images in the grid to enlarge them.
Here is a short video on using the Content Scheduler.
Wrap Up
I had a lot of fun creating this campaign. It was easy to create my first post then simply repurpose that page by duplicating it multiple times; a huge timesaver that also ensures I don't accidentally overwrite my original work.
If you're planning a long term campaign, consider using both the Express multi-page feature and the Content Scheduler tool.
If you are new to Adobe Express, you can learn the ropes on the Adobe Express Learn page (https://www.adobe.com/express/learn/tutorials).

