Living Room Still Life
Our fireplace and mantle are key features in our living room and - frankly - one of the things we fell in love with when we first viewed our soon-to-be home.
In the past, I have used the mantle or hearth as display areas for my Christmas or Halloween villages. Once, I even created a magazine cover shot, here. It continues to be a spot that catches my eye quite often, especially when the sun is streaming through the patio doors in the late afternoon.
A couple weeks ago, after missing the chance to catch the actual sun as it streamed across the stone facade, I grabbed one of my Lumecube 2.0 lights on a tiny tripod and did my best to emulate the effect, quickly capturing the shot handheld at ISO 2500. The processed result is the first image. This became one of my Project 365 images.
I was so pleased with the photo, I decided to take more time and "do things right," setting up not just the Lumecube for directional light (this time, attached to a gooseneck arm on my Platypod Pro base for more flexibility), but also a large ringlight, bouncing off the ceiling for some ambient fill. I composed on a tripod, allowing me to reduce my ISO considerably, down to ISO 400.
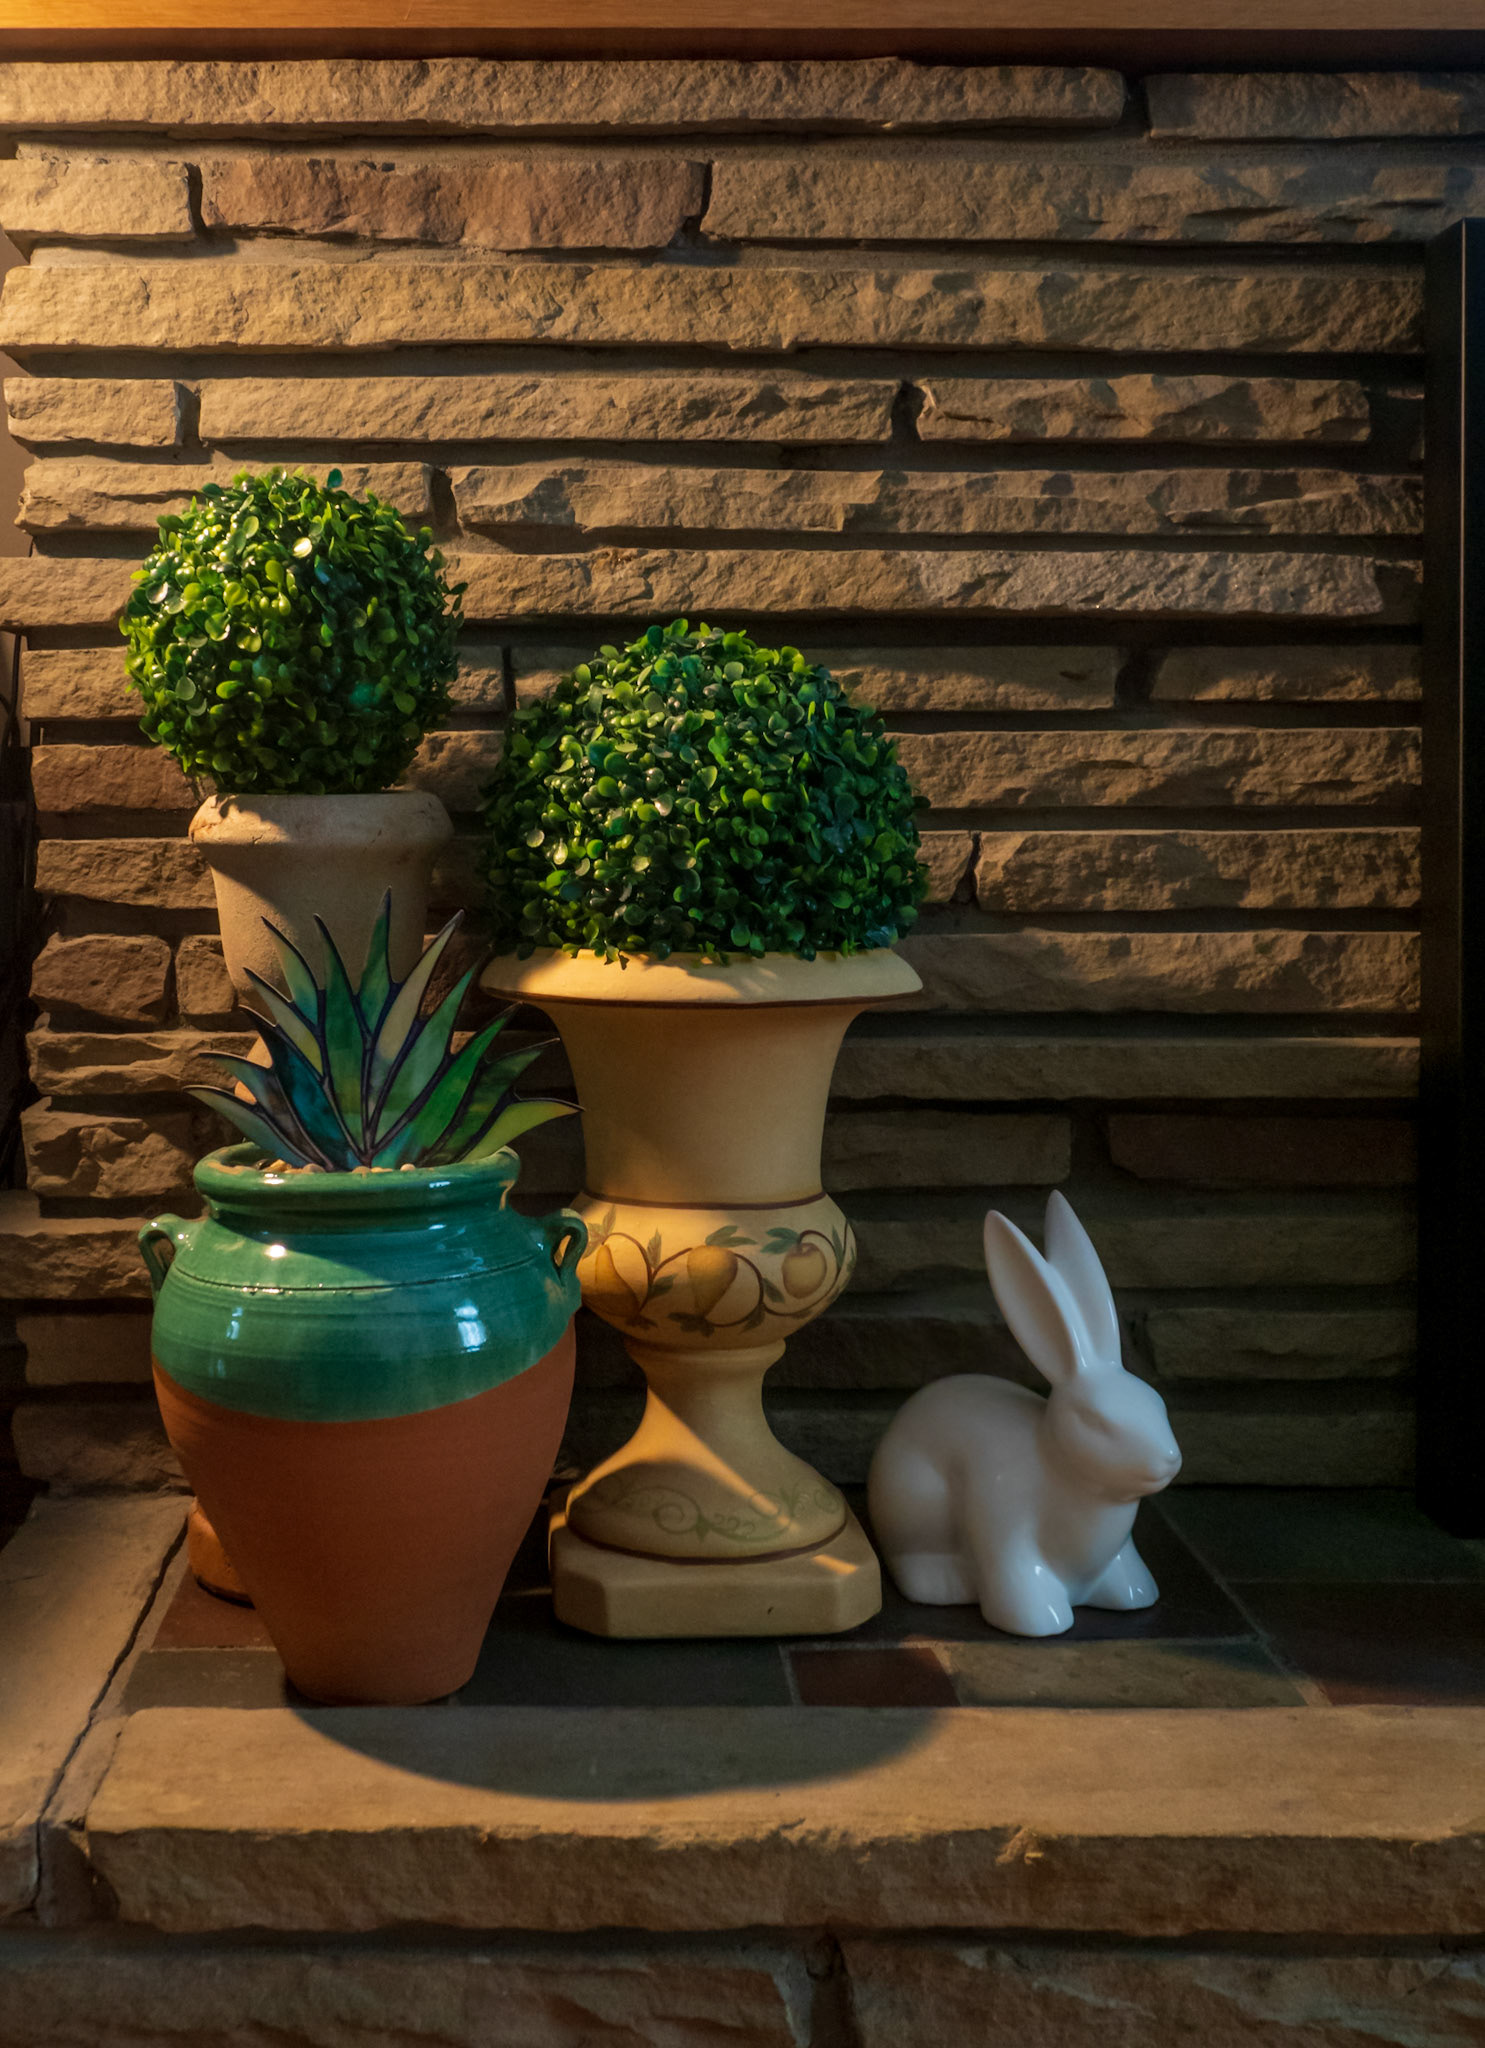
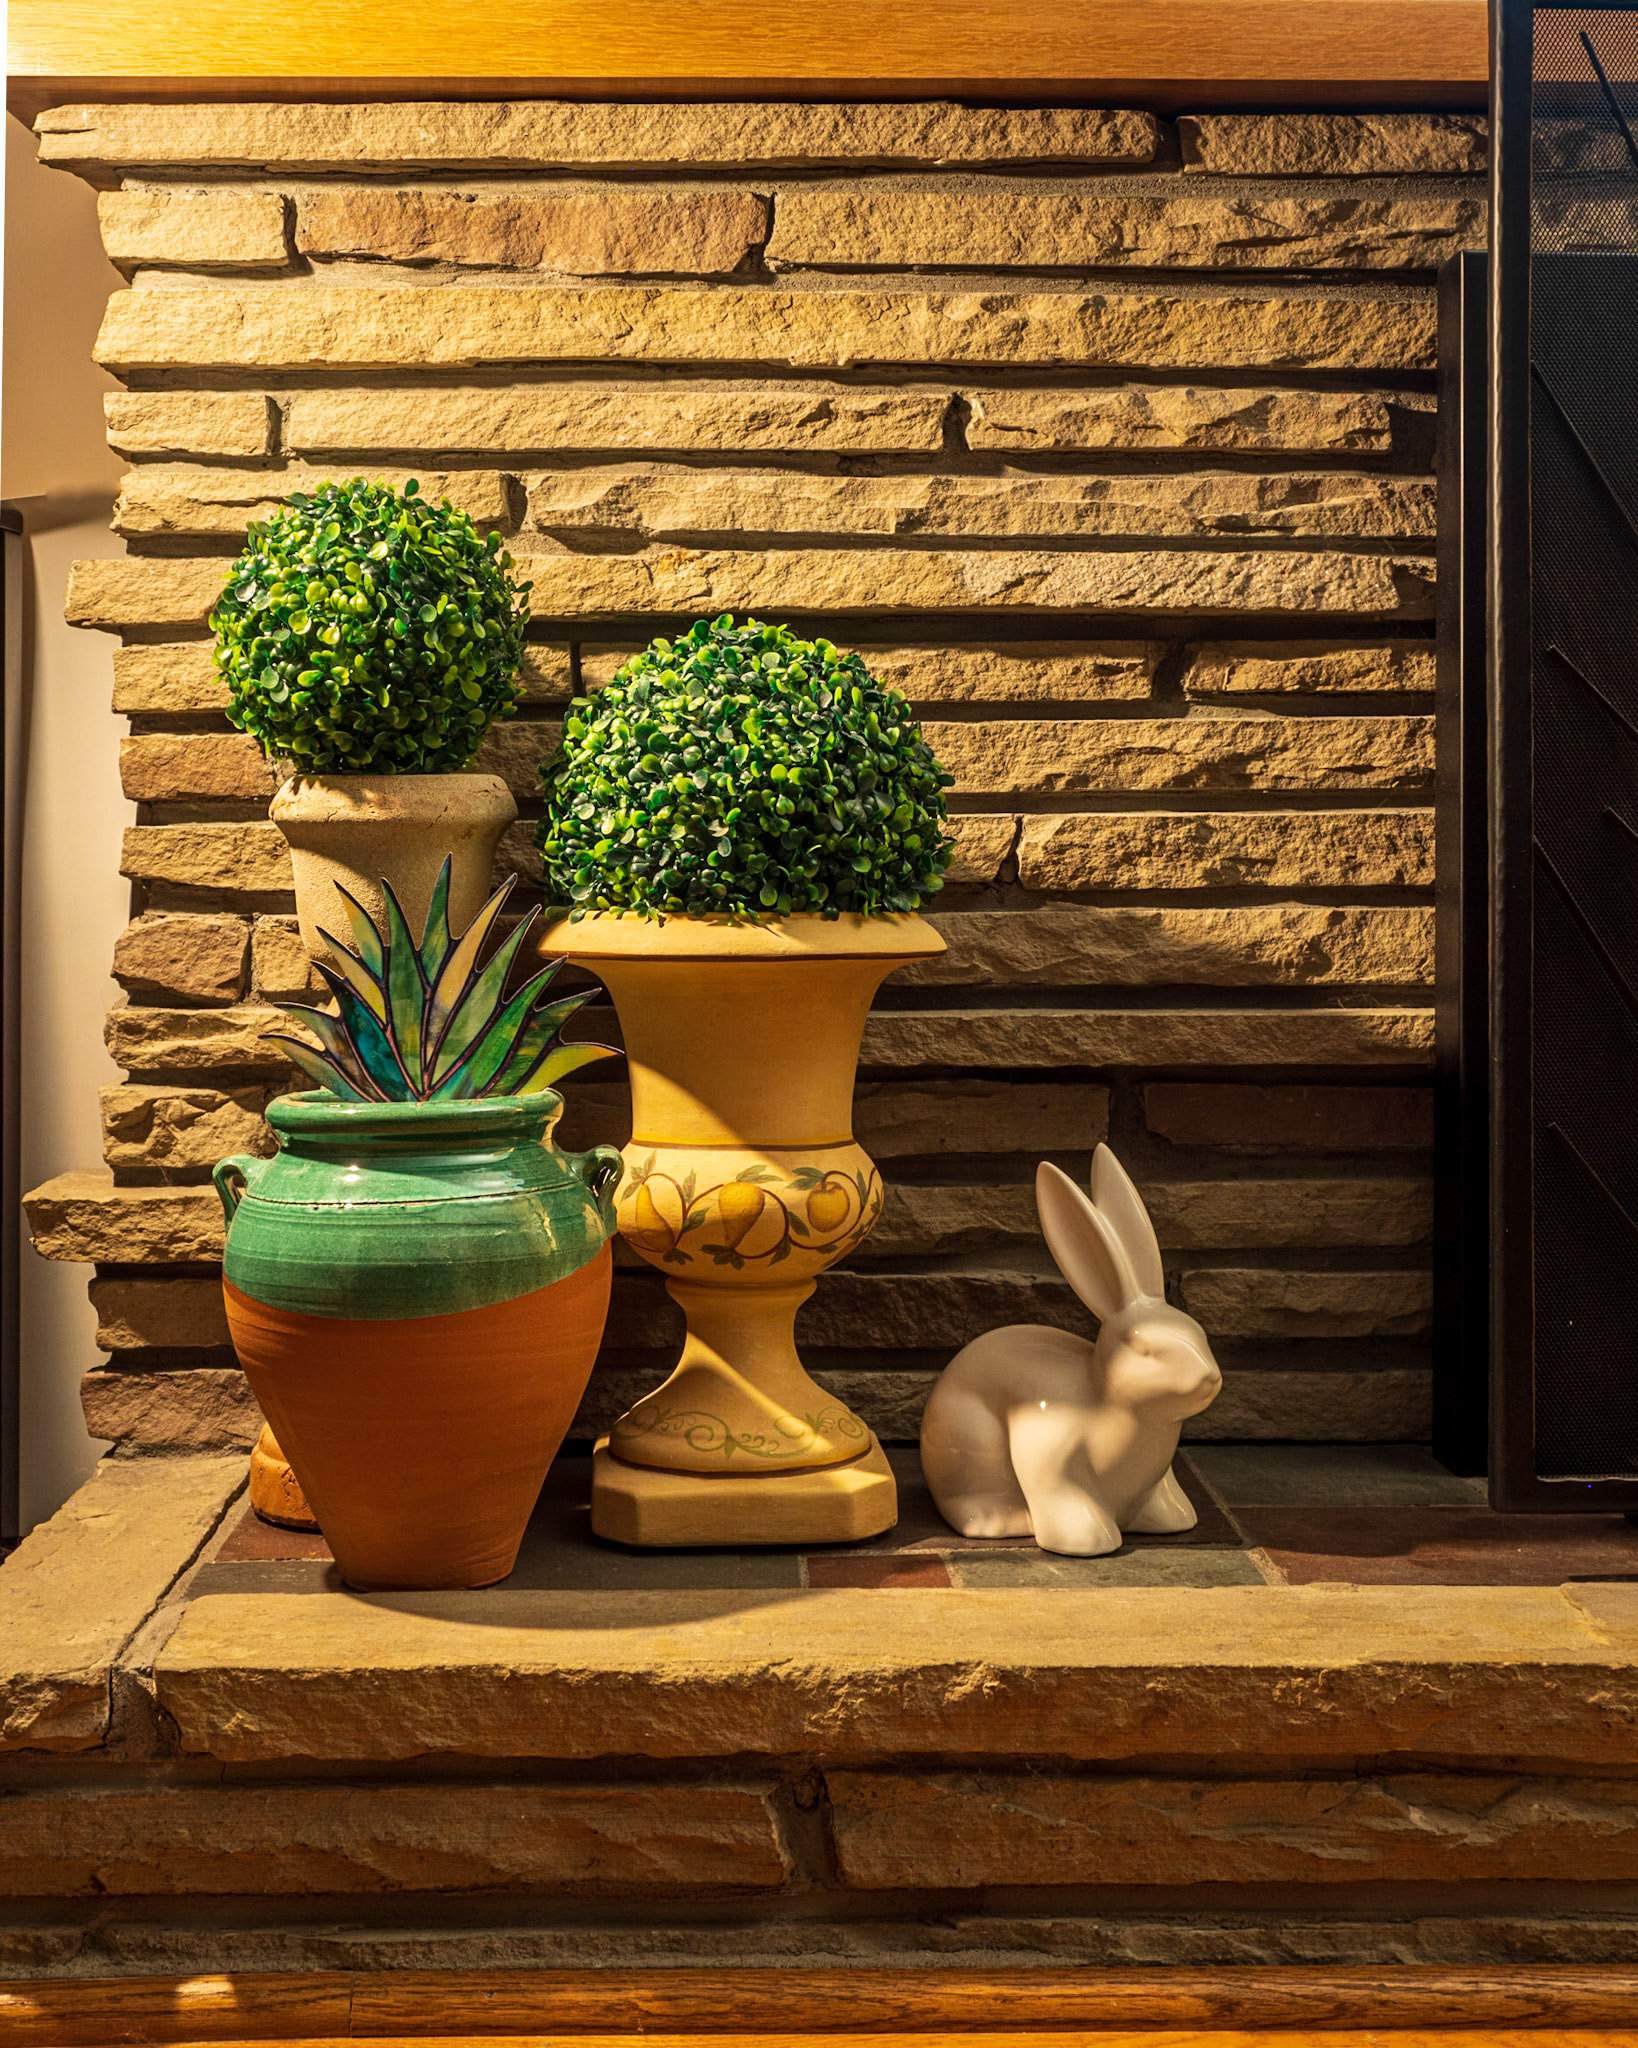

I also made some minor adjustments to the composition, lowering my viewpoint slightly and bringing the bunny forward a bit so it partly caught the light.
As with the original capture, I shot with my Olympus EM5 Mark III, my go-to Micro Four Thirds camera. While the camera only has a 20 megapixel sensor, it offers a high-resolution mode, that shifts the sensor ever so slightly over multiple exposures and then blends the frames into a single 60 megabyte raw file. I used this setting for my shoot.
I knew from the original photo that there was an unsightly mass of power cords running down the wall beside the fireplace. In the original photo, I simply used masks in Lightroom to darken down the area, and cropped tighter on the left.
For the new shot though, I had the foresight to place a piece of white card against the wall, covering up the black cords. It was my hope to have a little more flexibility in cropping by do so. More on that a little later...
During the shoot, I experimented a bit with light balance, adjusting the intensity of the fill light. I definitely wanted strong shadows from the key light, but I also knew I needed more exposure for the shadow areas. This is a problem with the original handheld capture.
Both lights were tuned to a warmer color, either with gels or through the controls of the light.

Lumecubes throw a surprising amount of light. This tiny light acted as my key light for this shot.
Post Production
After shooting and importing the images, I quickly settled on the version with my preferred light balance, and processed the file. It was so nice working with the extremely high res image!
I soon determined I was not going to get a satisfactory result using Lightroom's cloning and healing tools to blend in the white card with the taupe wall color. That said, the addition of the white card would make selecting the area easier in Photoshop.
Moving to Photoshop, I realized I wouldn't be happy with that blending job either. However, I found myself wondering how well Photoshop's Content-Aware Fill would do in extending the width of the fireplace. My initial attempt was quite promising, enough that I let PS do its magic and then used a combination of Clone Stamp, Healing and Patch tools the clean things up to the point where I felt the result was pretty realistic.

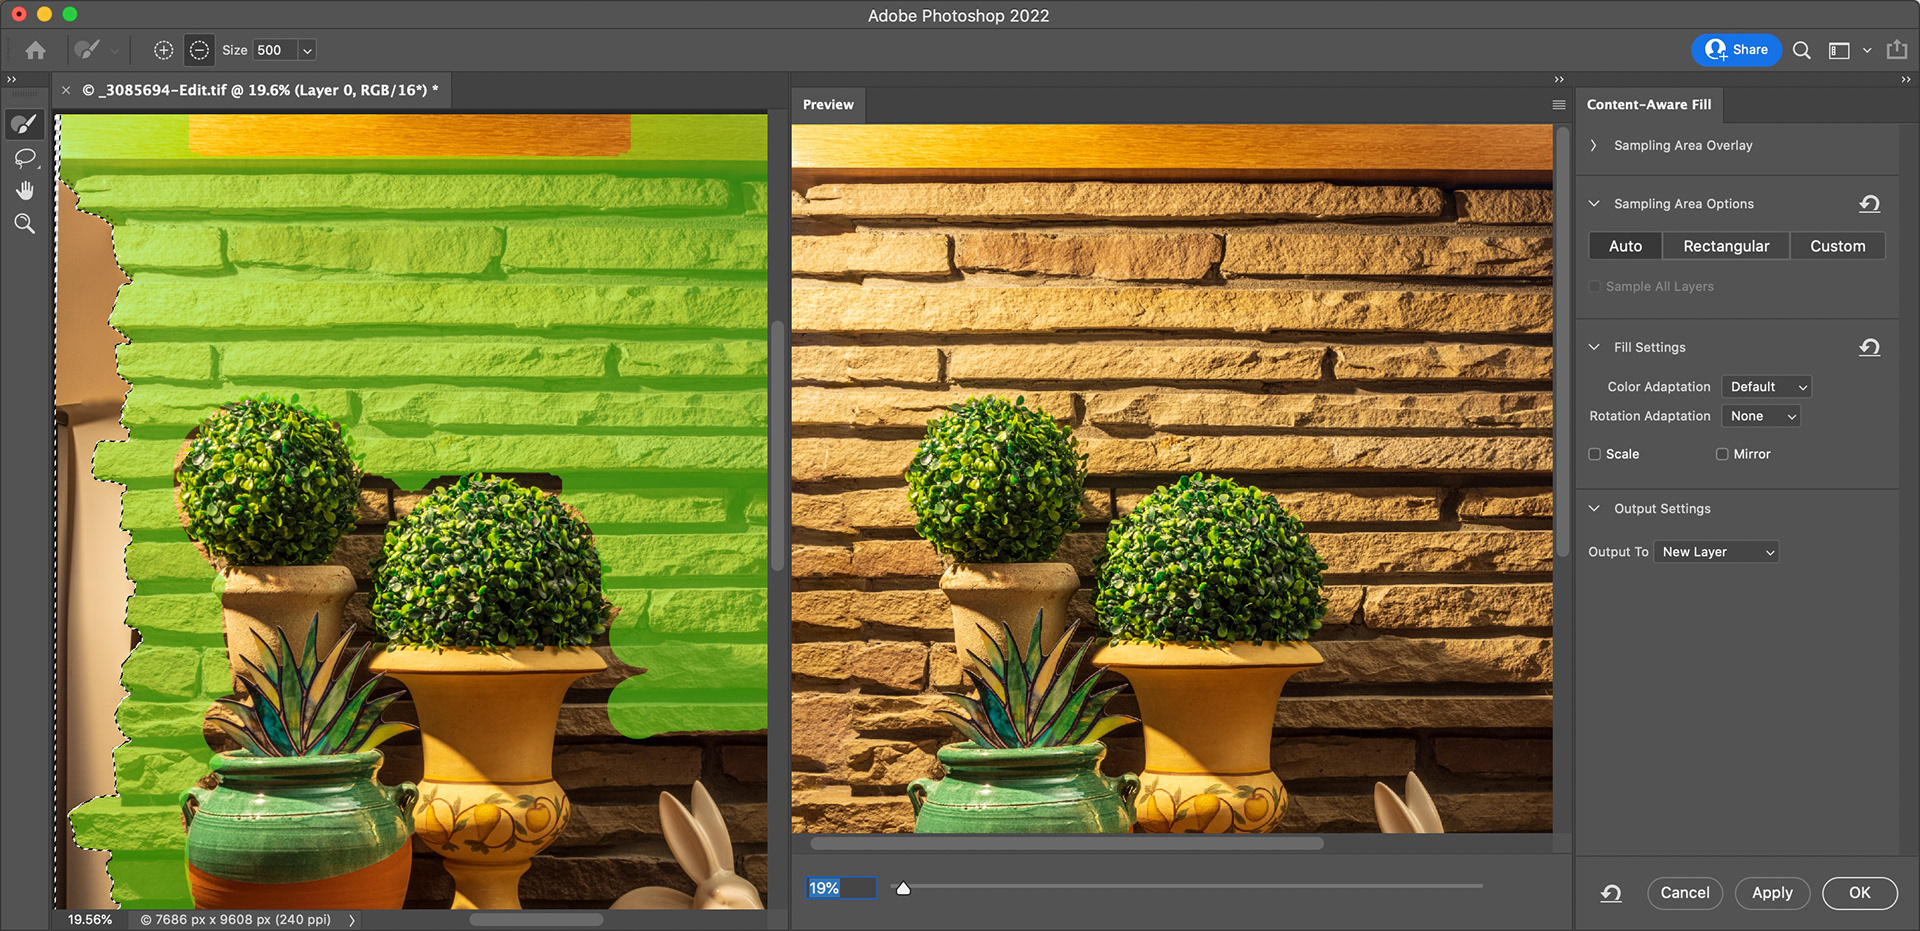
Using Photoshop's Content-Aware Fill dialog (Edit > Content-Aware Fill ), I was able to quickly and easily customize Content-Aware to get me a pretty pleasing result. The green shaded areas in the image above represent the areas Content-Aware will use to clone from.
After committing to this edit, which filled in the selected area but on a separate layer, I continued to use the Clone and Healing tools to touch up the result, making it even more realistic.
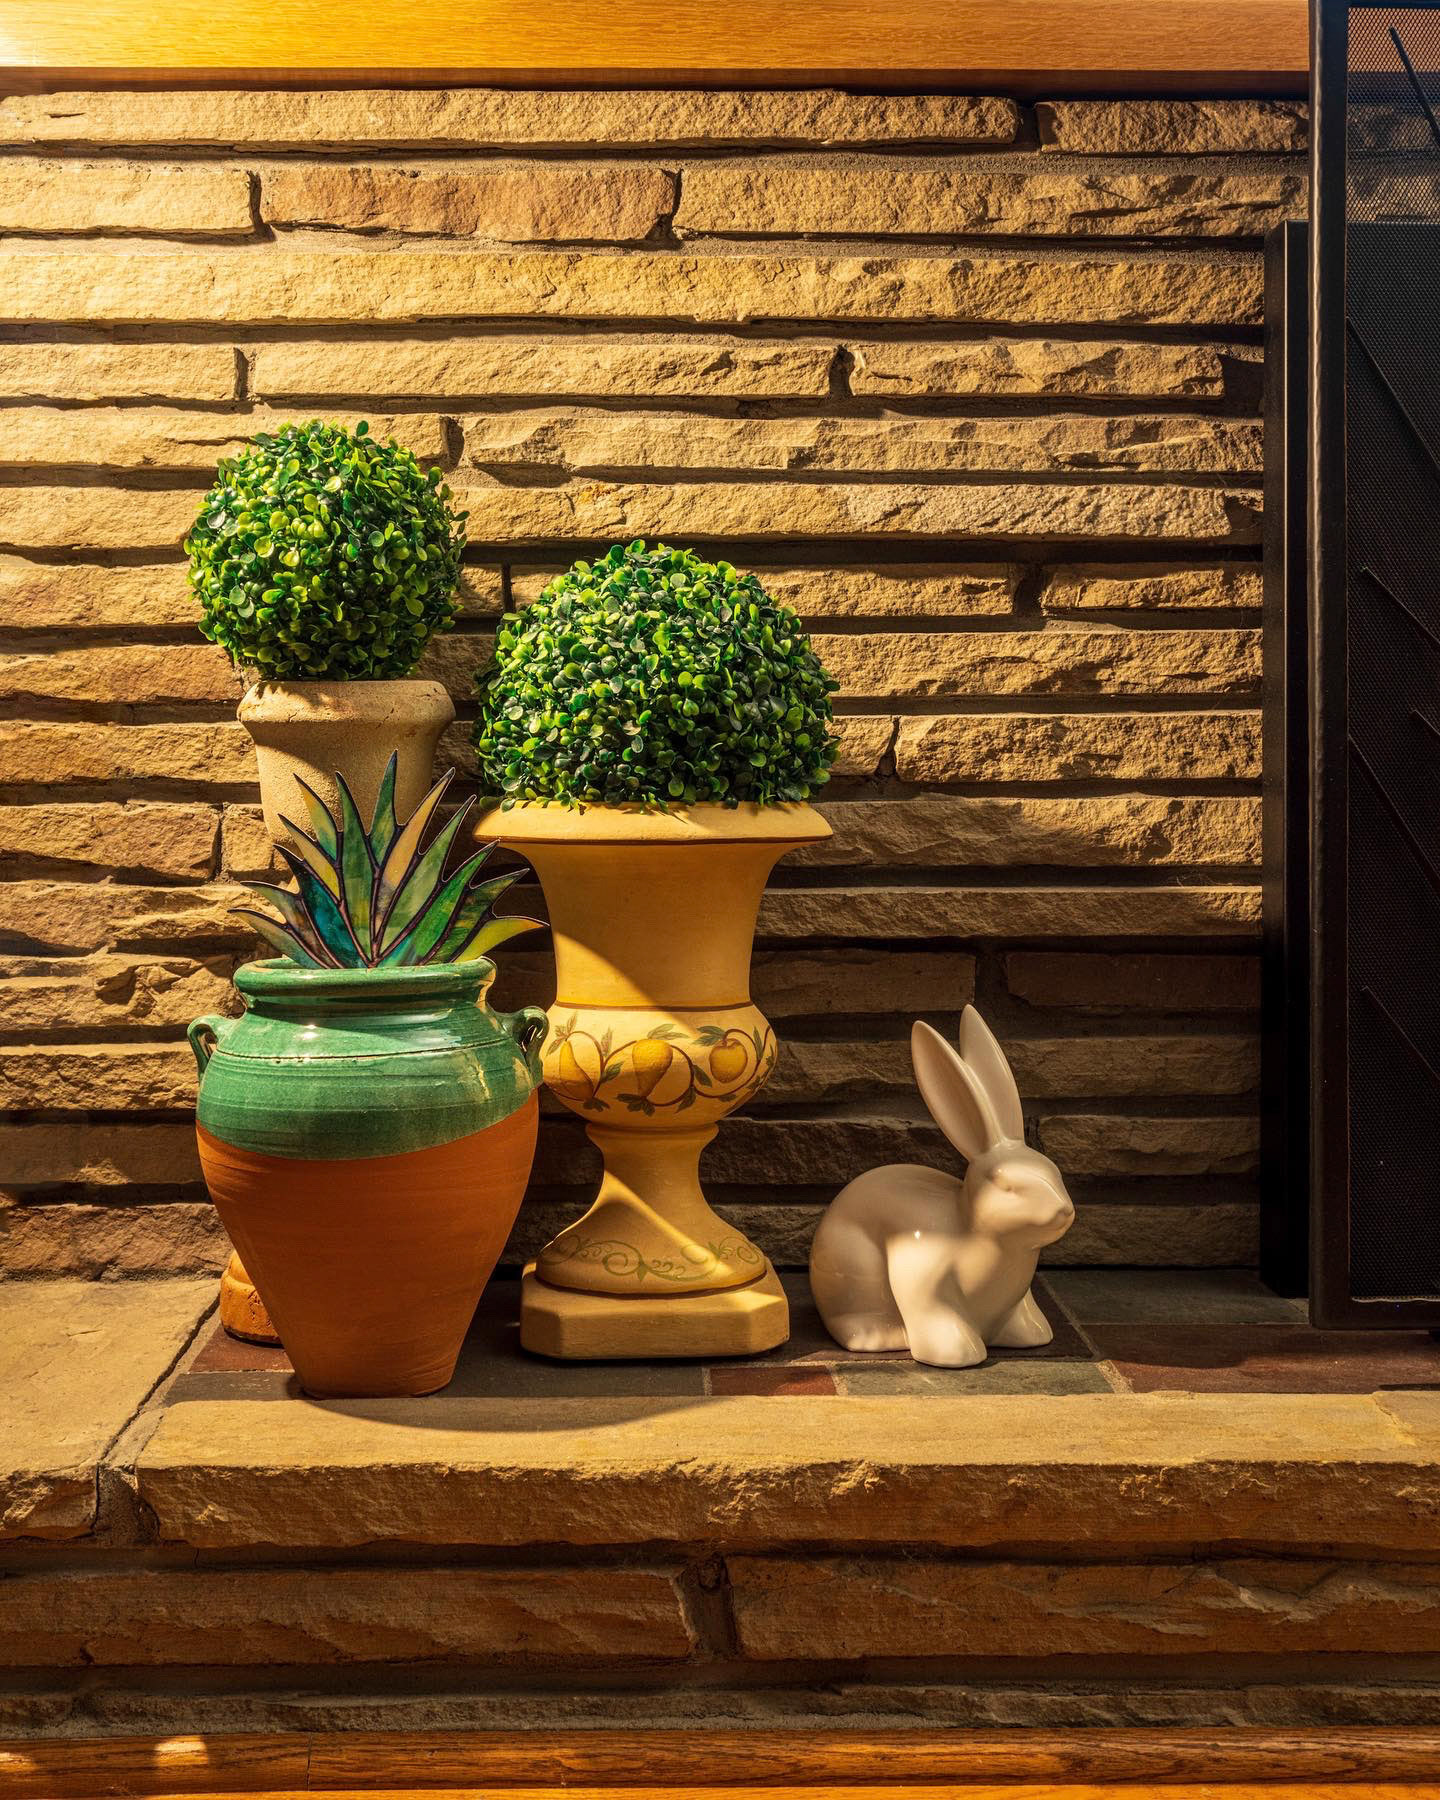
Final Image
Summary
Overall, I was quite impressed with how well Photoshop handled the replication of the brickwork on the fireplace. If you have tried out this Sensei-powered functionality, you should give it some consideration. There were definitely areas I had to tidy up, but Content-Aware Fill saved me an hour or more by handling the bulk of the cloning.
Lighting-wise, I'm happy with my faux sunset look and pretty impressed with how effective that small LumeCube light truly can be. The two-light scenario was simple yet effective.