Using Stock Imagery to Illustrate the Written Word
Many years ago, I wrote a Christmas story, inspired by Linus' speech in Merry Christmas, Charlie Brown and another, less well known Christmas special called The Christmas Messenger, starring Richard Chamberlain, featuring some wonderful animation sequences to tell the main story.
To this day, my story, A Midnight Clear, remains one of the favorites I've written. It has a timeless quality to it, in my opinion. I have shared it as a text-based web story and PDF over the years during the holiday season and it's been well received by those who read it.
But...I always felt it was missing one key element - illustrations. I do not have the wherewithal or skill to create actual illustrations, and while I have a large photographic collection, I had no hope of using my work to properly visualize this story.
Enter stock photography and illustrations, specifically Adobe Stock (no one should be surprised by this - lol). As both a creative professional and contributor to Adobe Stock, I saw an opportunity to do the story justice with proper, professional imagery and to truly showcase how stock assets can enhance and support the written word.
Properly licensing stock art instead of using "free" photo sites also eliminates any ambiguity around usage rights. This is critical if you plan to take your work beyond the confines of personal viewing or classroom exercises.
Note: While I am using my specific project as the example, I believe the ideas and tips I share here can be applied to most any form of writing, fiction or nonfiction, long or short stories.
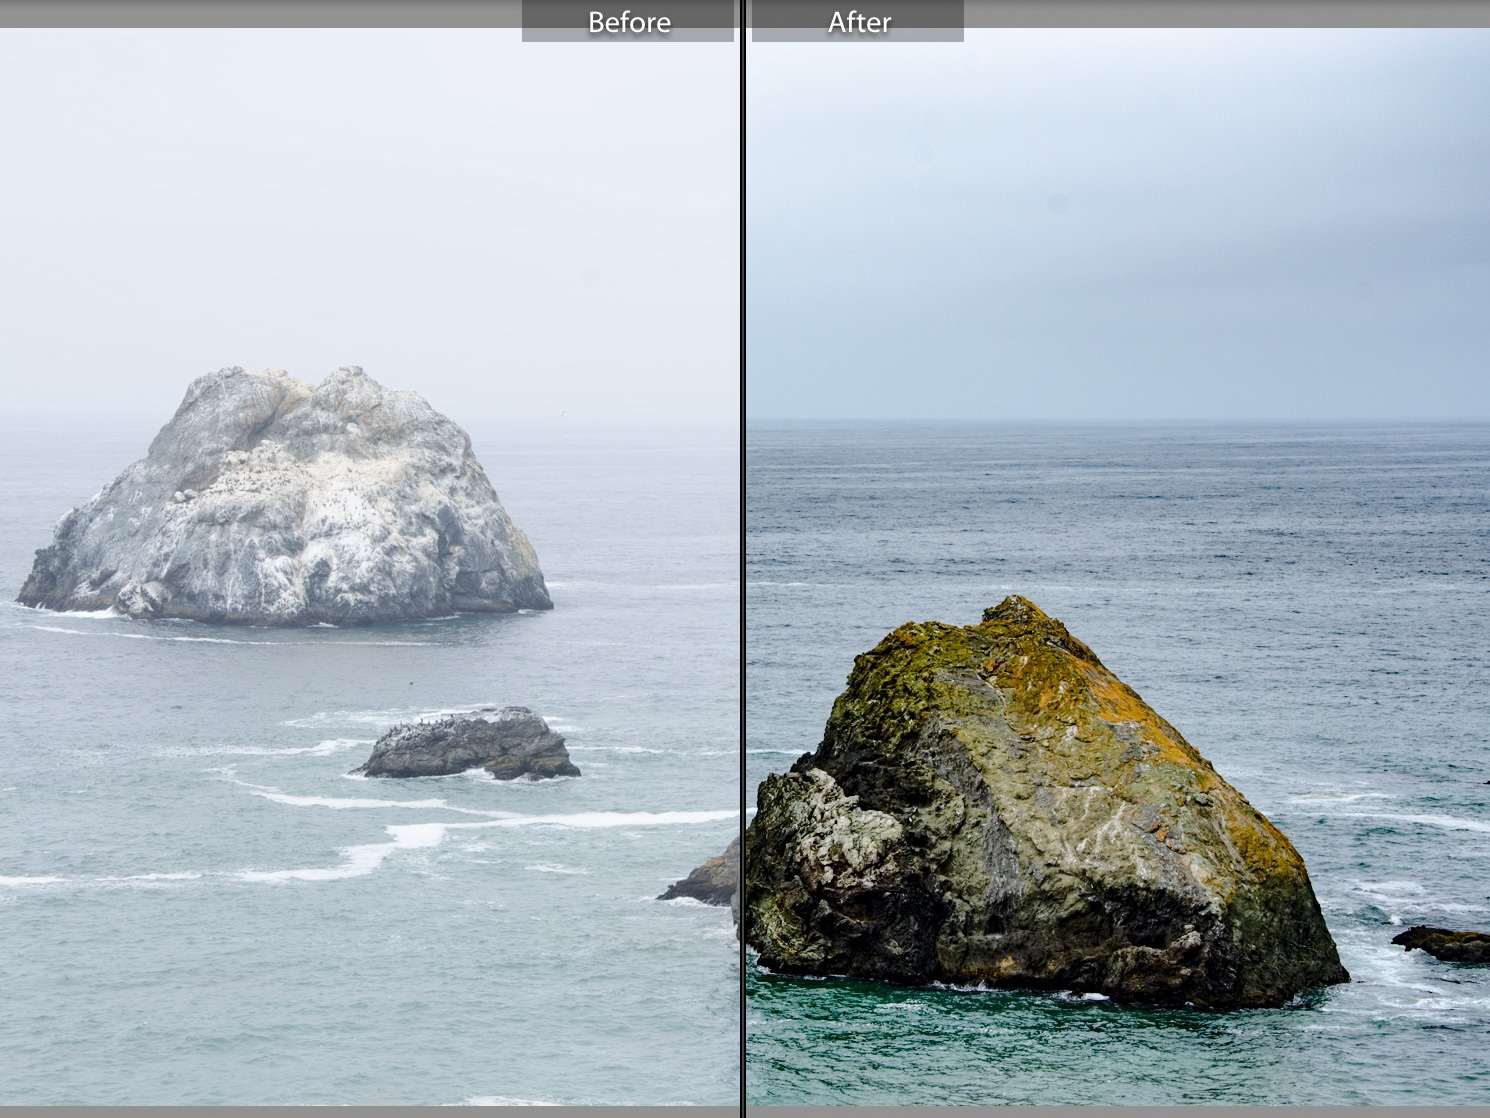
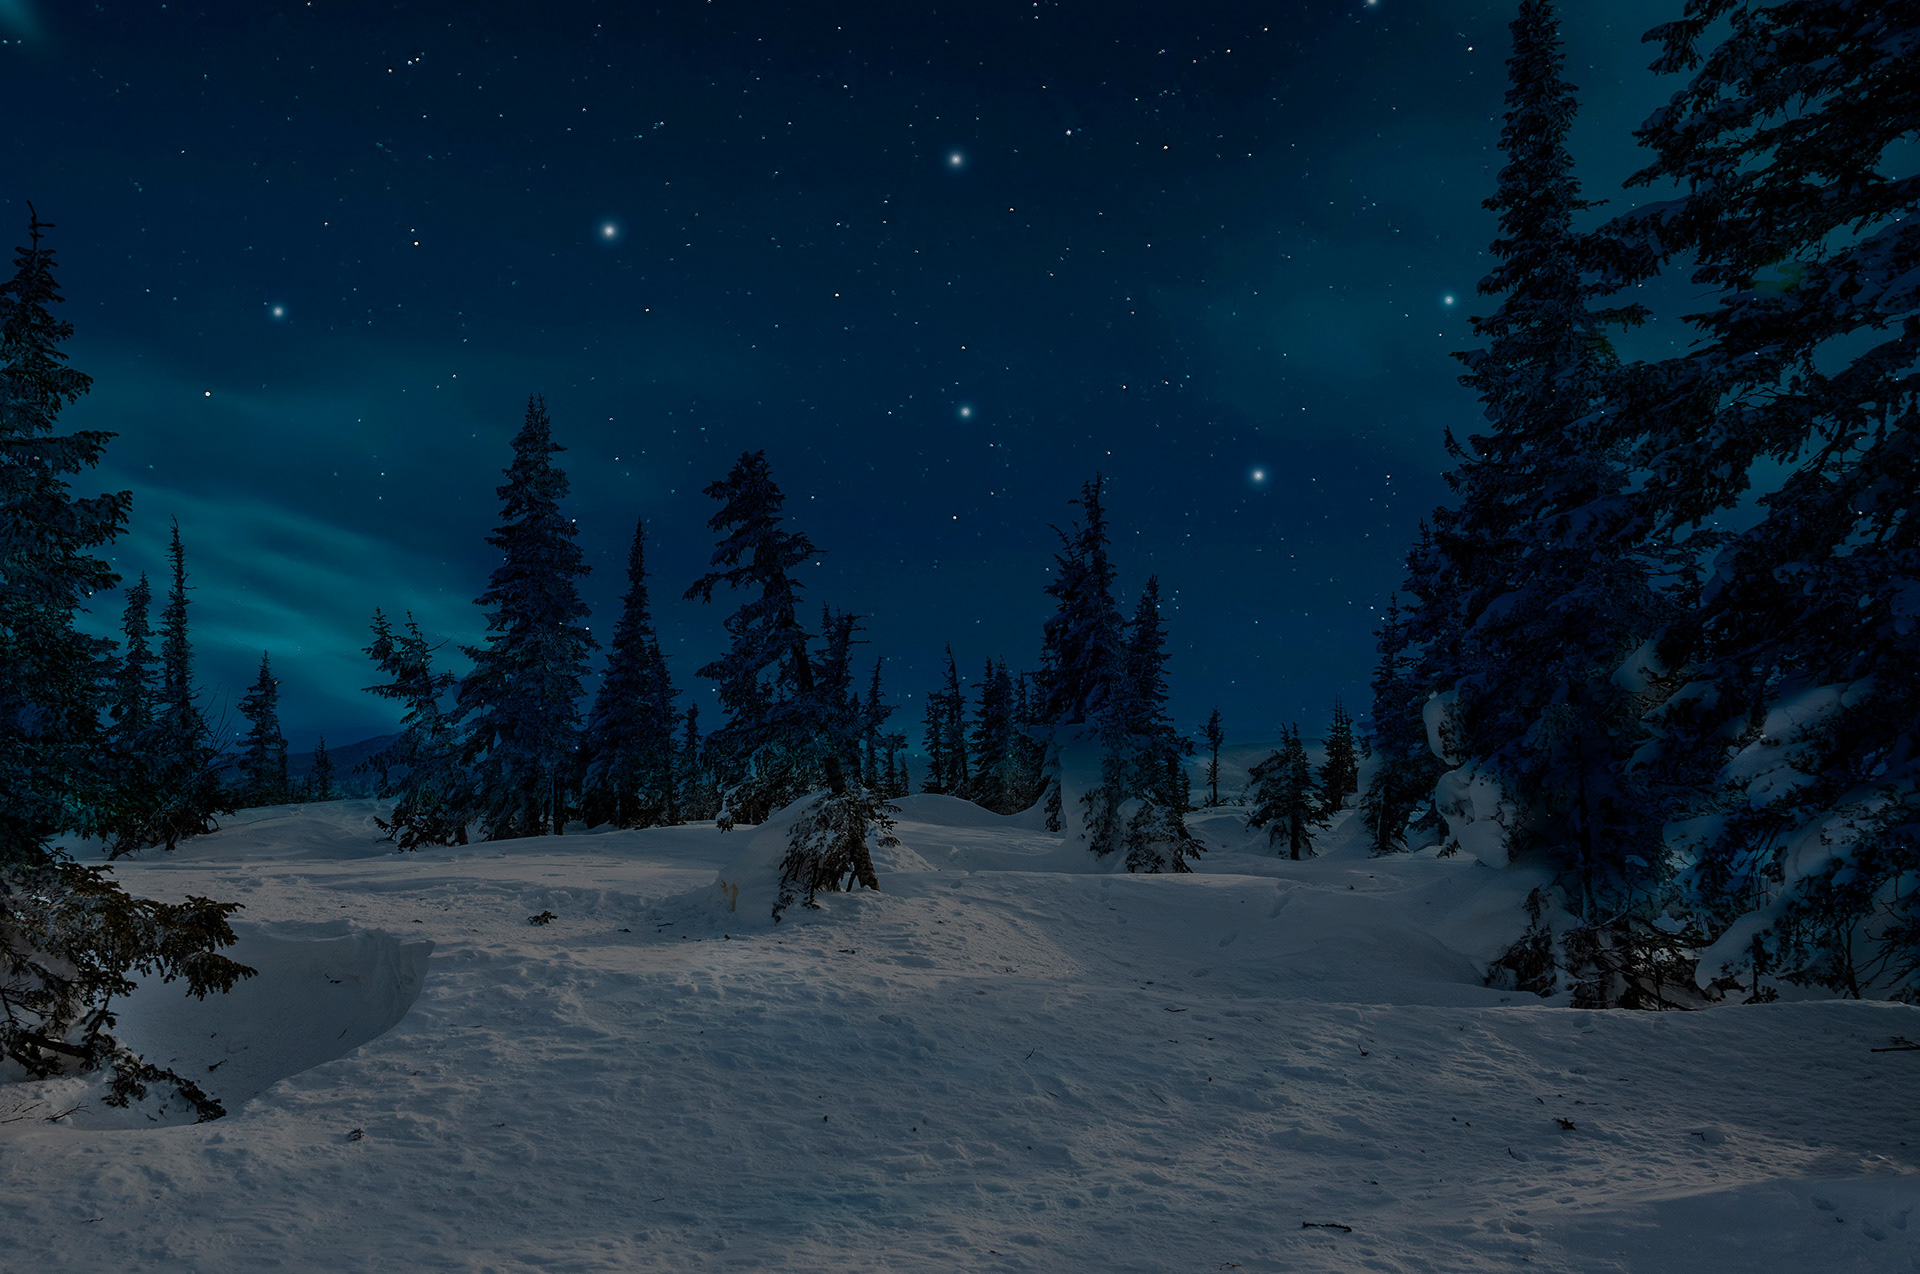
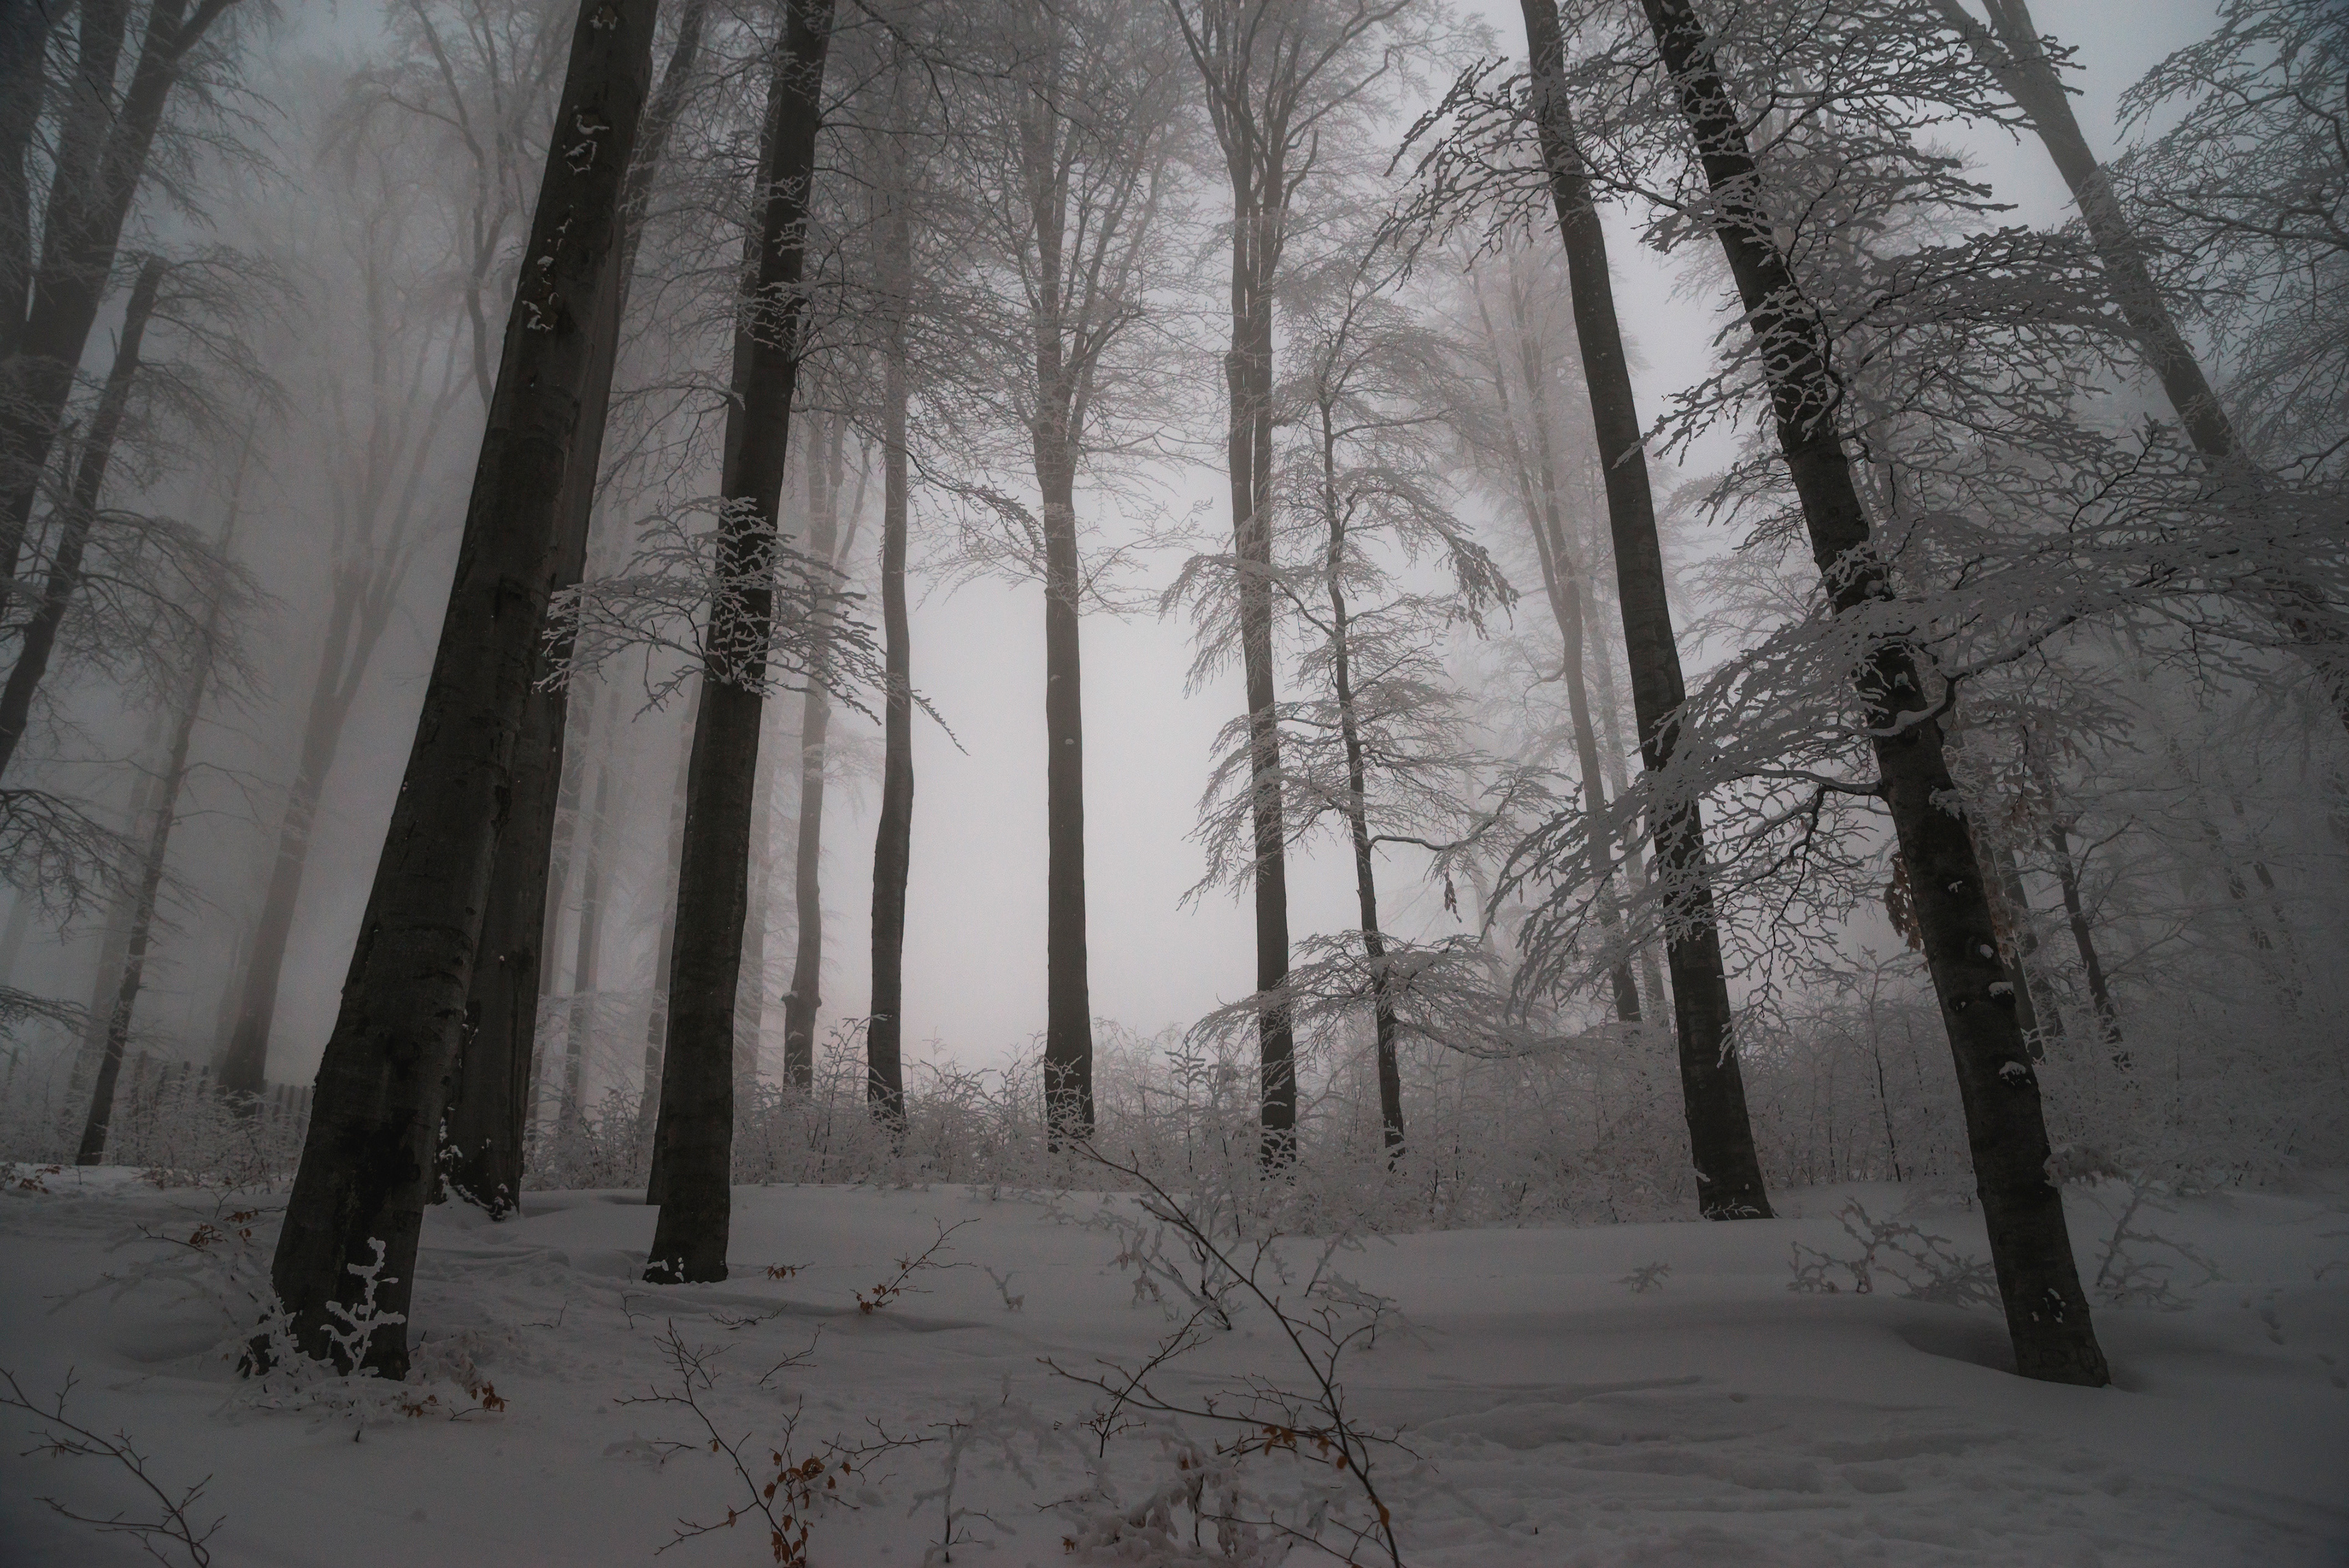
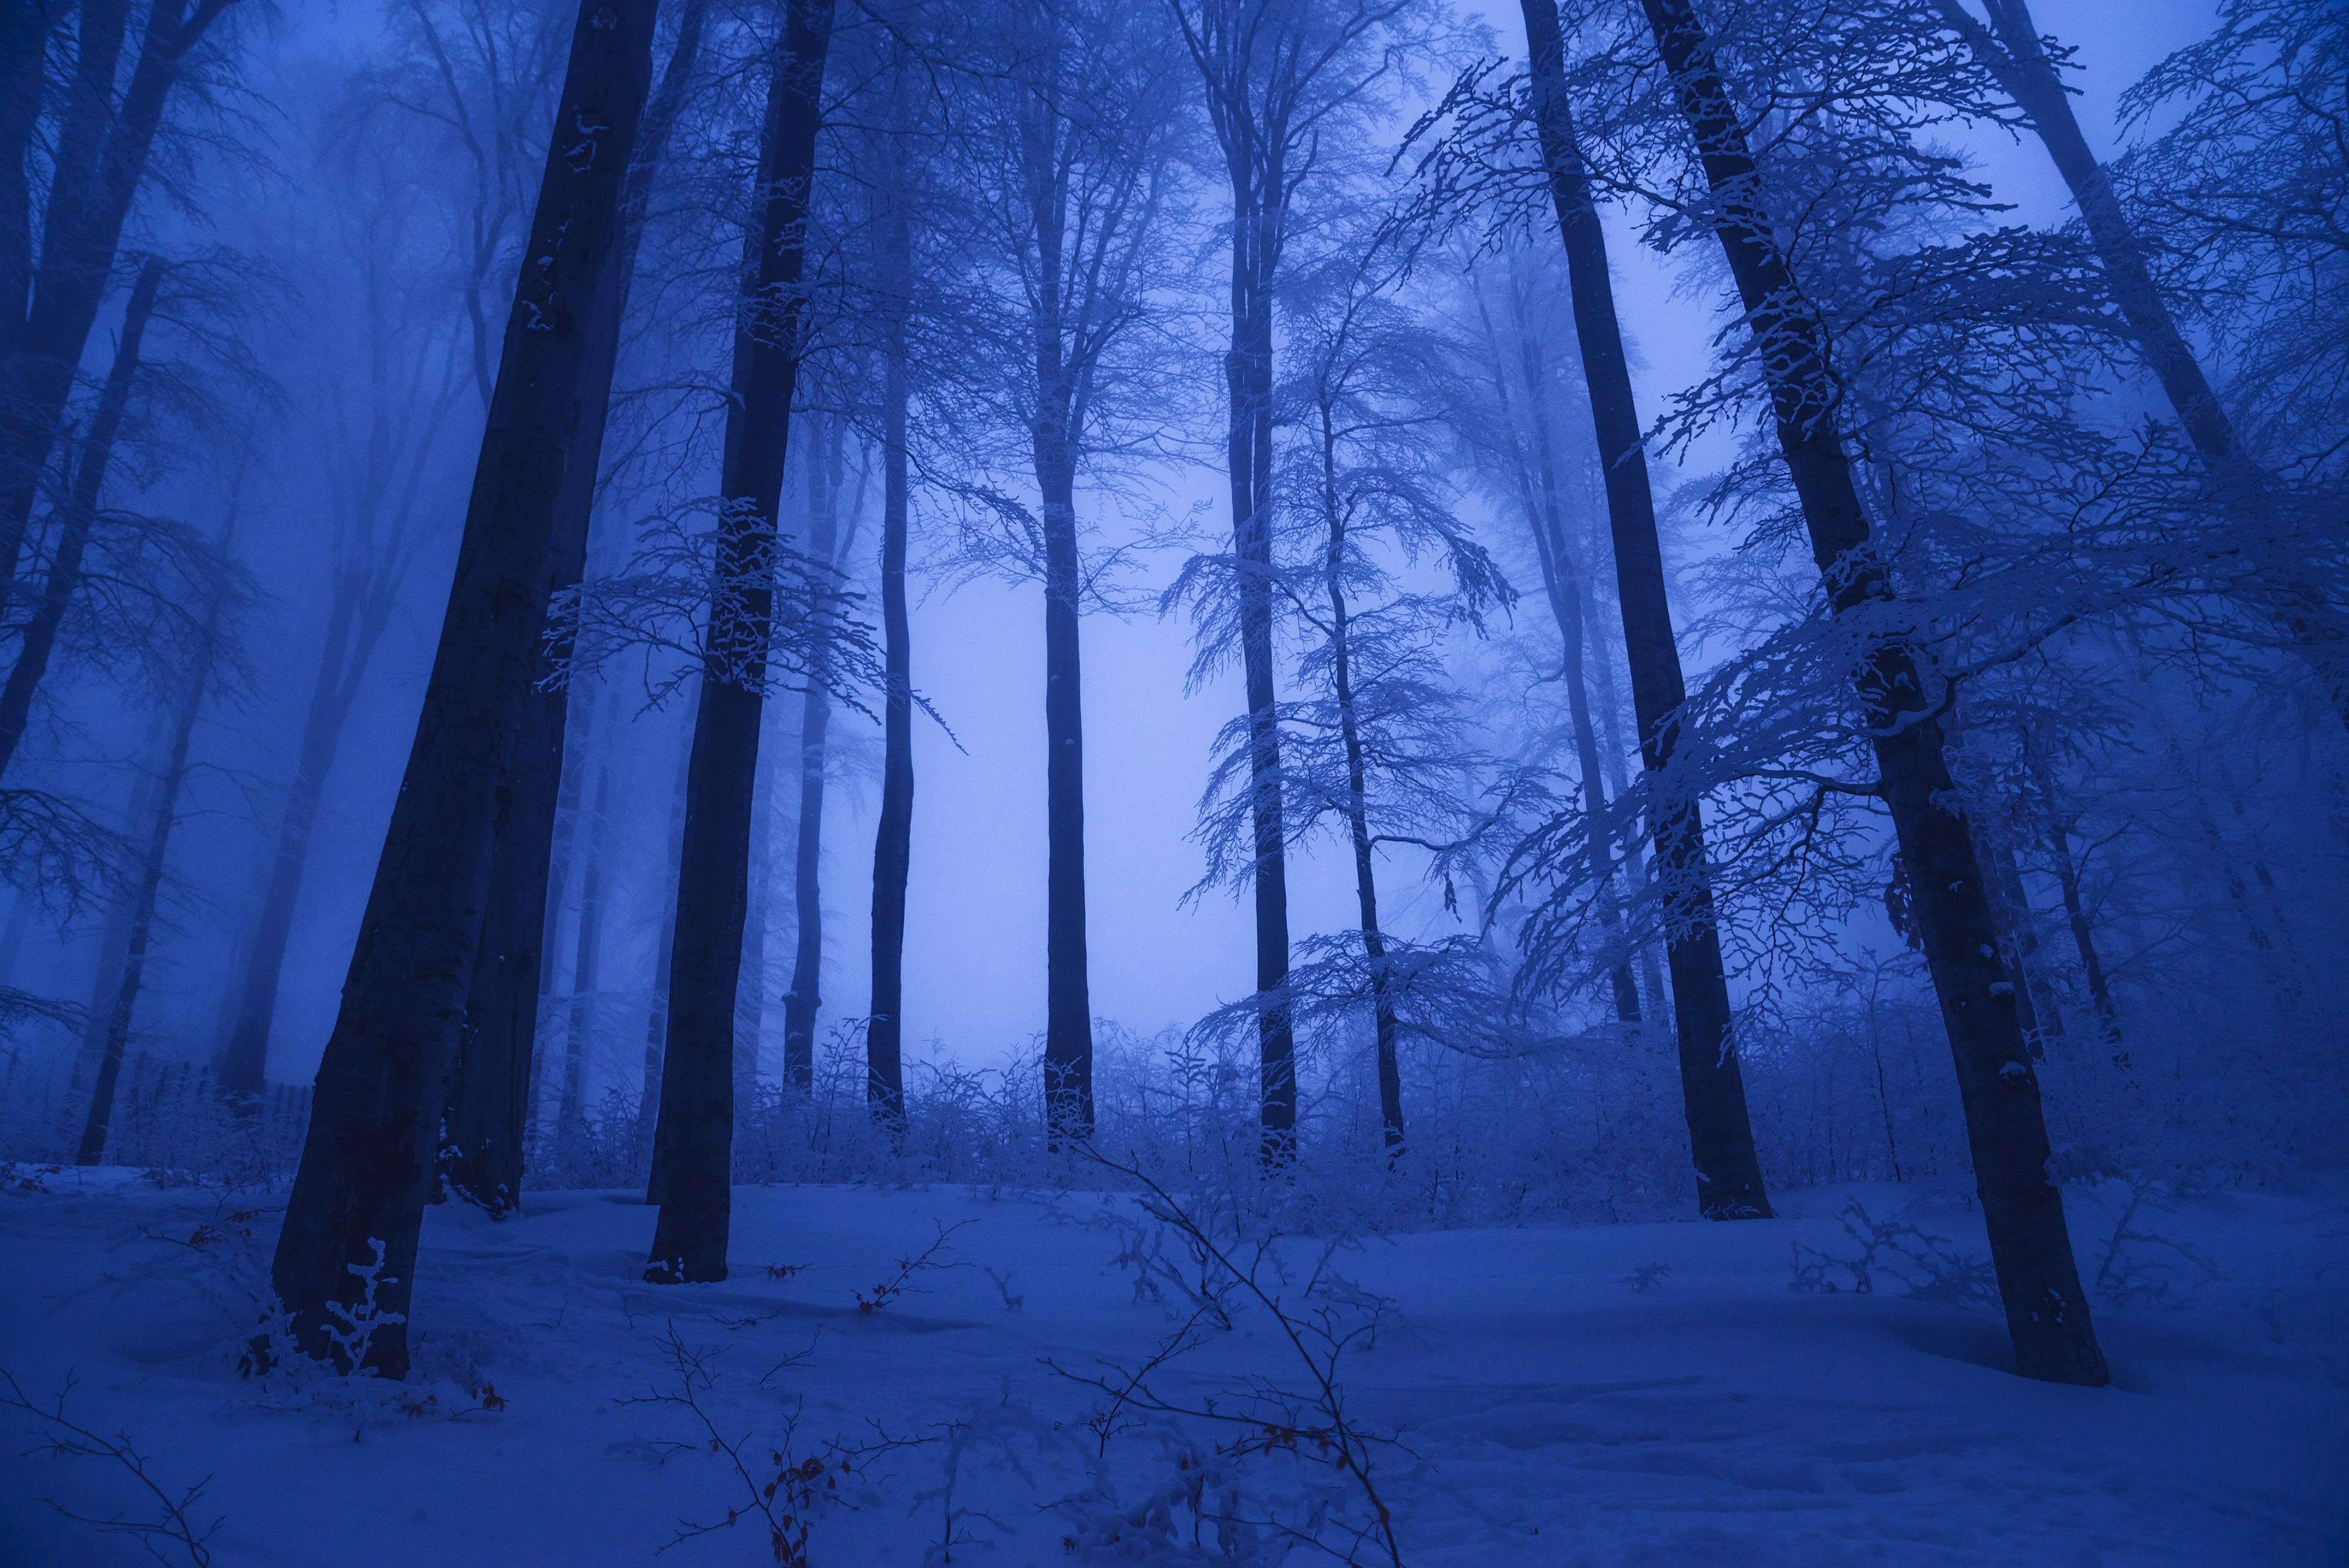
Stock images don't have to work "straight out of the can" but in speaking with customers - primarily non-designer customers - I would get the impression that altering imagery was often not a consideration - beyond perhaps cropping the image. This can be a very limiting perspective. If you've spent time looking for an image with specific criteria like "night, snowshoeing" for example, you may not find exactly what you are looking for. But if you are a little less prescriptive in your search - "showshoeing" - you could find just the perfect composition, merely needing a little bit of color balance and brightness tweaking. These are relatively simple enough processes to complete in a variety of software applications, including Photoshop, Photoshop Elements, Photoshop Express, even Spark Post. Below is one example of converting a daytime image to a moonlit night.
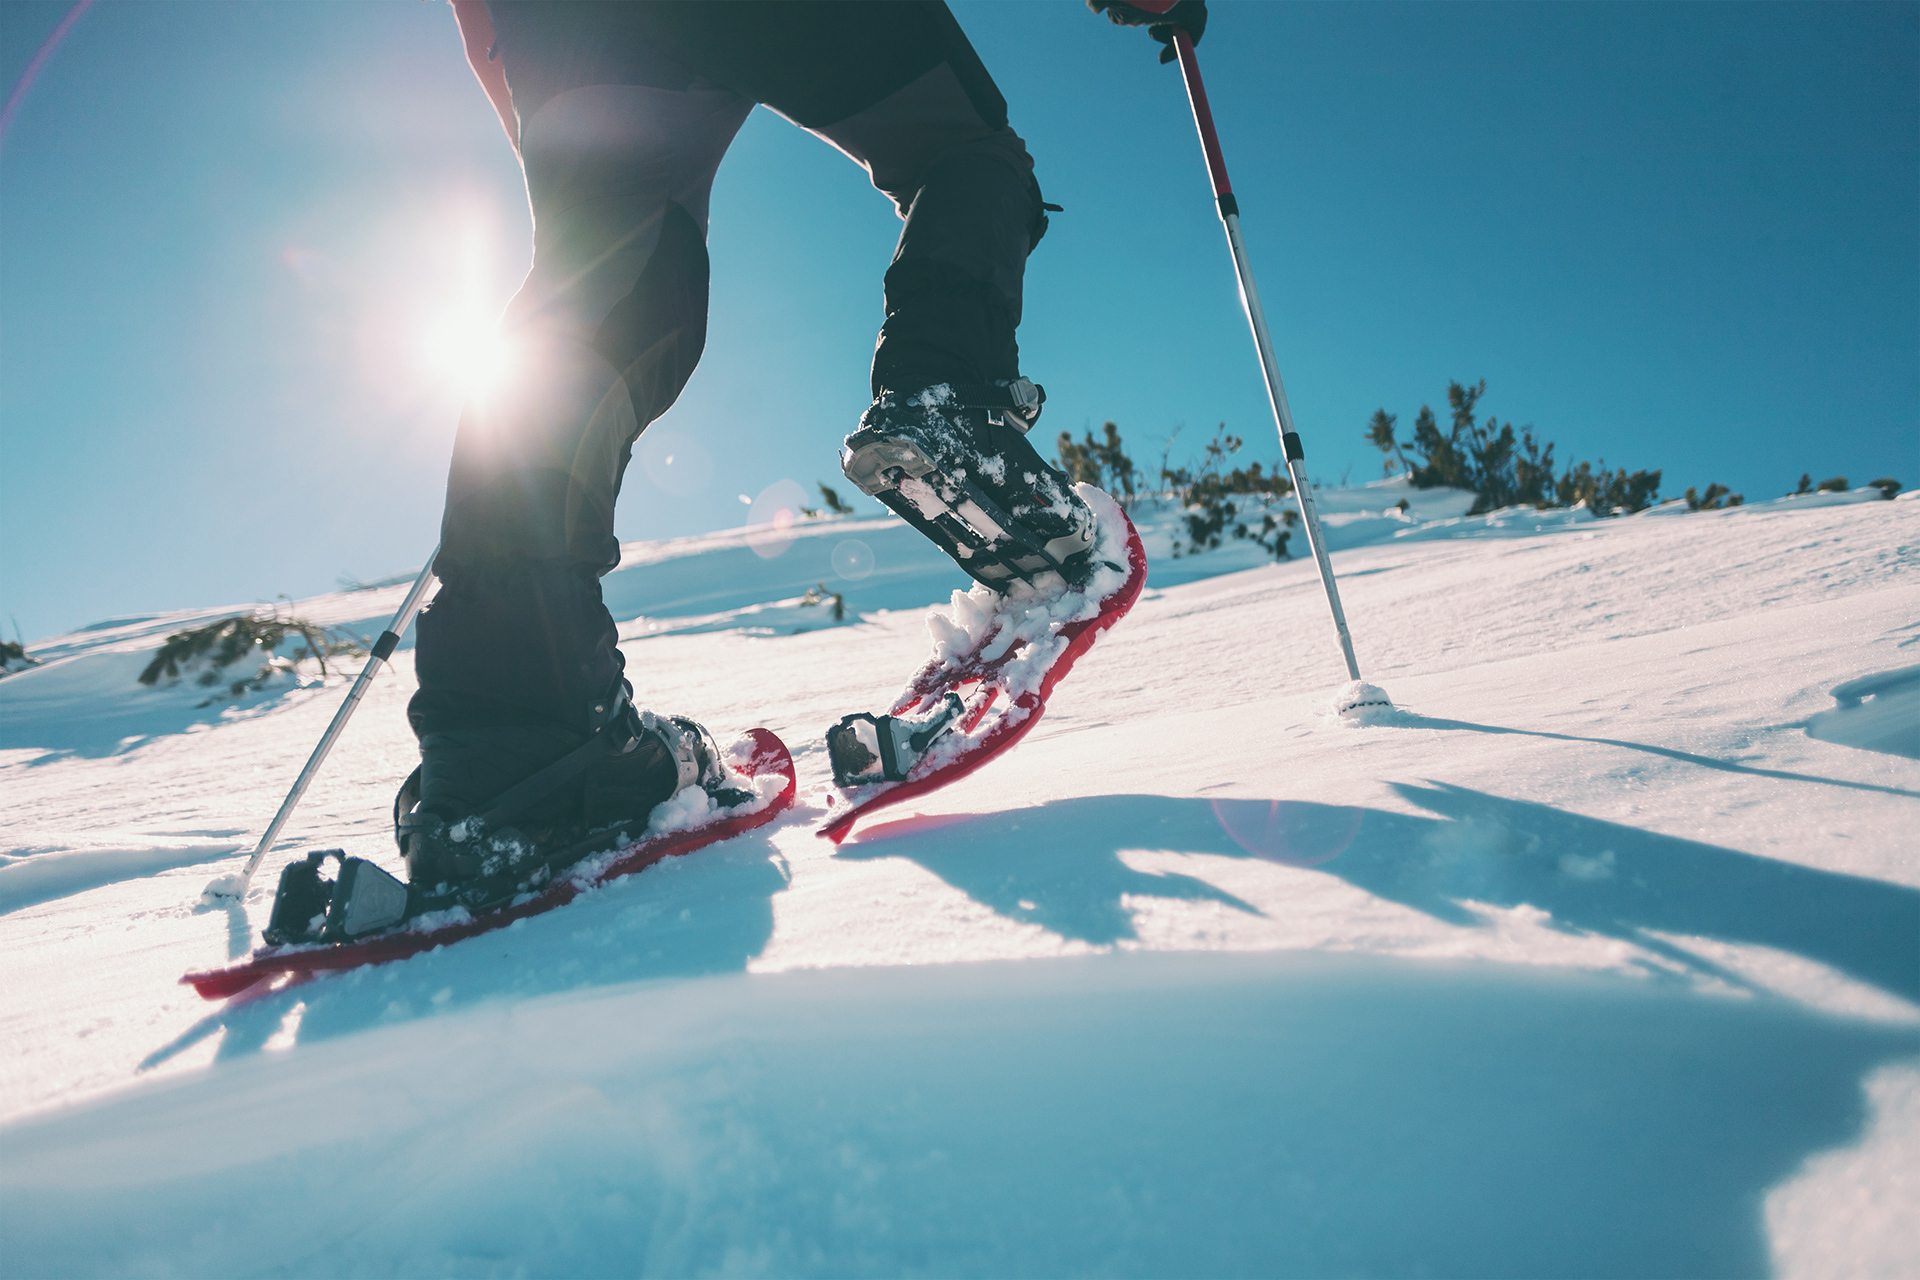
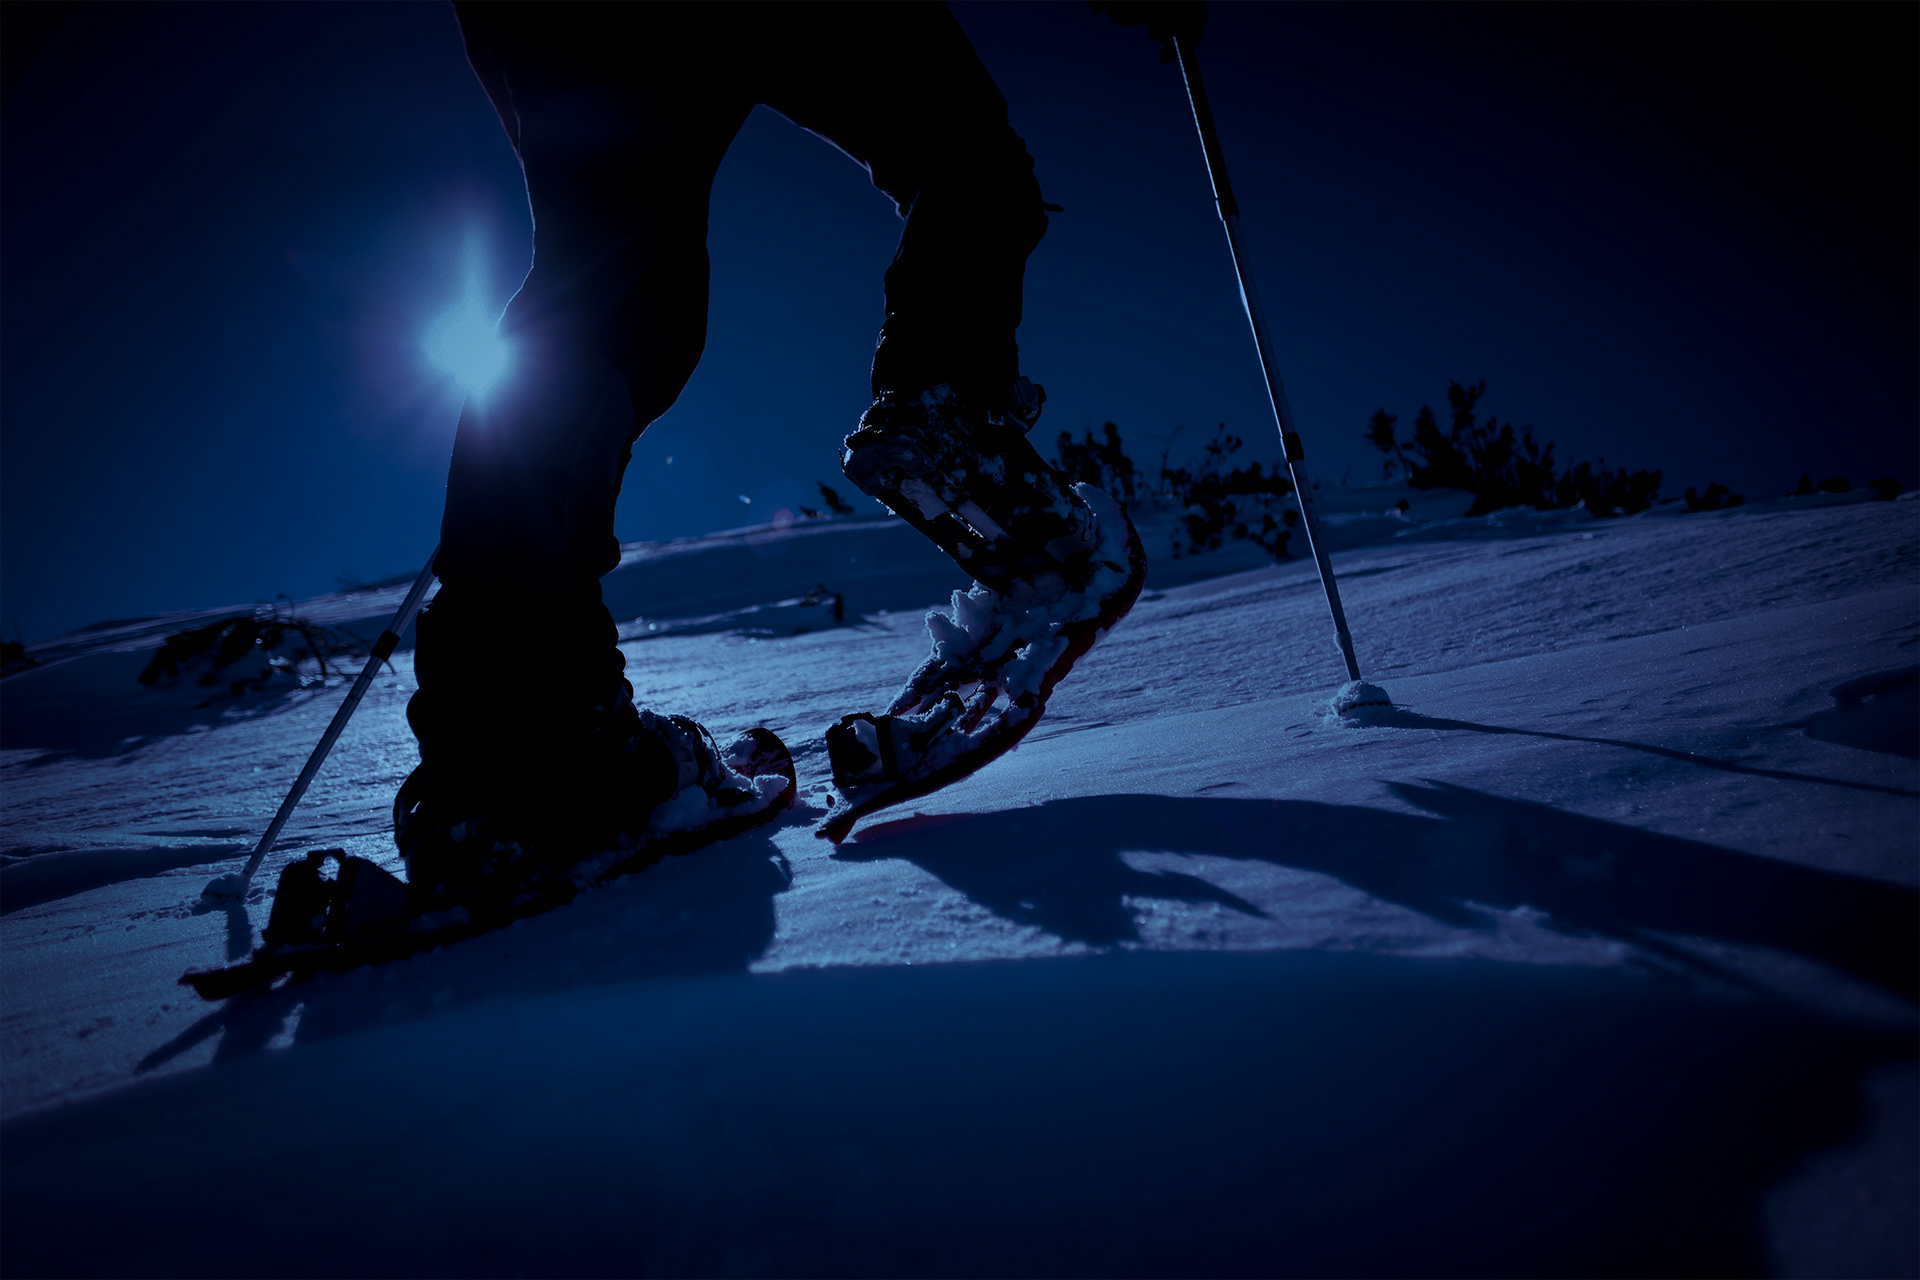
In my story (links at the top and at the bottom of this project), not only was every single image licensed through Adobe Stock, but the majority of them were also altered - either subtly or significantly - to help tell my story. In all, 24 of the images you'll see were changed, manipulated, enhanced, customized, and in some cases assembled from multiple stock images. From colour correction (converting daytime images to night), to full-on multi-image composites, I did what I needed to do to help the story along.


In this article, I am going to walk you through my process of bringing new life to this story, and provide some tips I learned along the way.
Finding the Right - or Almost Right - Image
Think First, Search Later
This process starts even before you really begin looking. Whether your work is a piece of fiction or a research project, understanding what you want to communicate is critical. Ask yourself, where will pictures help? Where will they just be in the way? Identifying those areas where imagery will support your message, crystalize a point or a concept will save you time as you further refine your search for those perfect - or nearly perfect images.
In my case, I knew upfront there would be a bit of an uphill battle in finding the exact right content. My story takes place entirely at night.
In a forest.
In the winter.
I knew my publishing medium would be Adobe Spark Page and I would be making extensive use of both Split and Glide Show layout options. I also knew that some of the scenes I wanted to illustrate would likely require composite images. And that I wanted these composites to look realistic, more than artistic or conceptual in nature. These were all important things to realize before I began my search.
So, having a few more images than I might actually need would be a good idea.
Make a List, Check it Twice
I would recommend making a "shot list" especially one if this is your first time pulling together where you need more than a couple visuals. You could make a separate list, or - as I often do when creating tutorials - put text placeholders in your body copy. This is advantageous in a few ways:
- There is no list to lose/find later.
- You'll know exactly where you wanted to place the images, days or weeks (or in my case, even just hours) later.
- You will have additional context/reminders about what the image(s) need to do.
- You stay in "the zone" if you're writing/refining the written work.
Of course you could do both, too. It all comes down to what works for you.
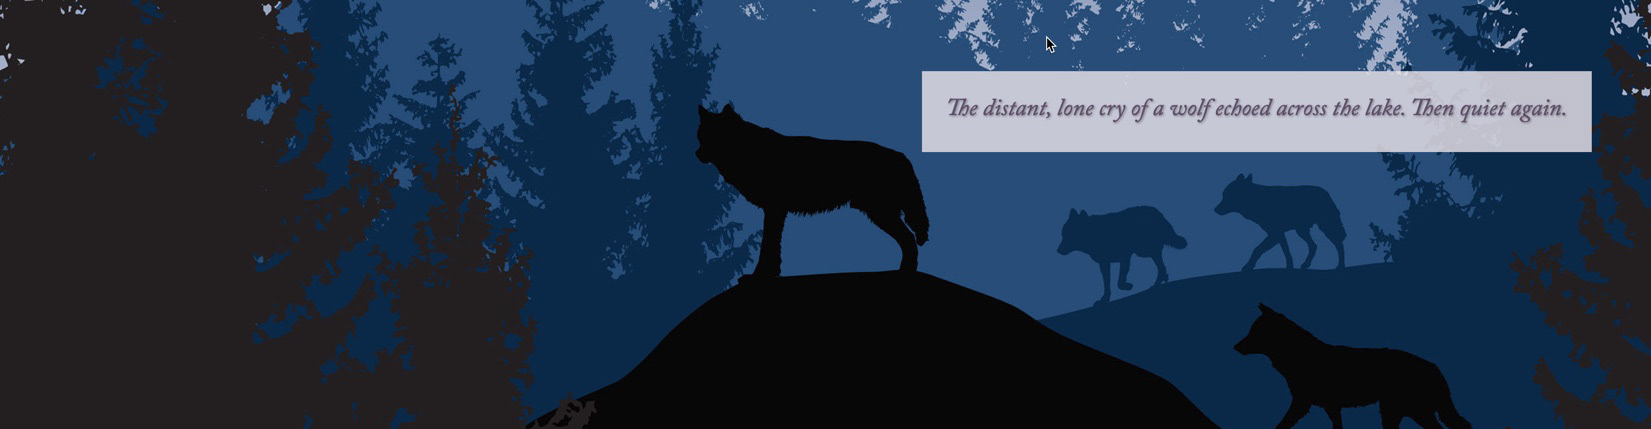
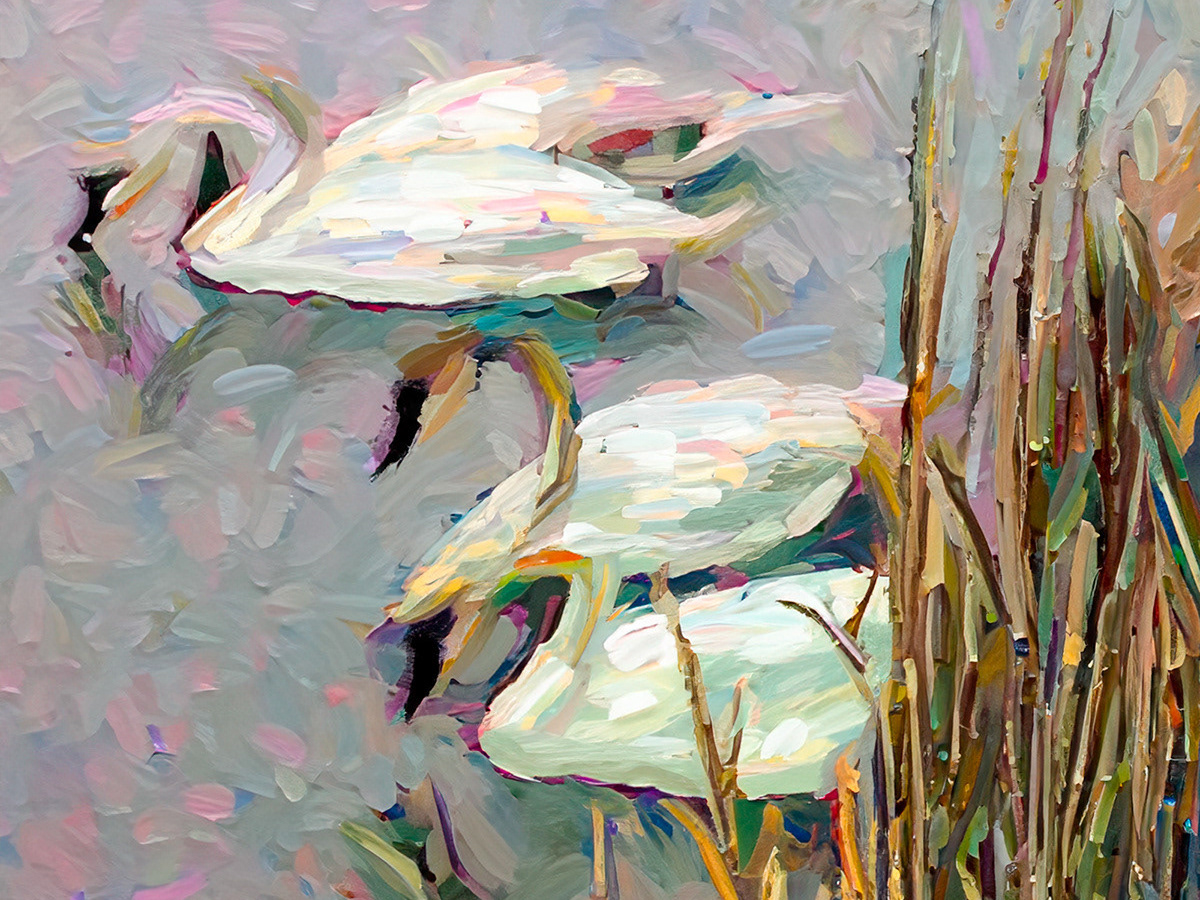
Imagery can be used to expand the imagination of the reader, be it for a single sentence, or multiple paragraphs. Knowing ahead of time where images can enhance your text will aid you in your image search. And there is no need to limit yourself to one medium. I chose an illustration in the example above, instead of looking for a photograph.
Create a Collection
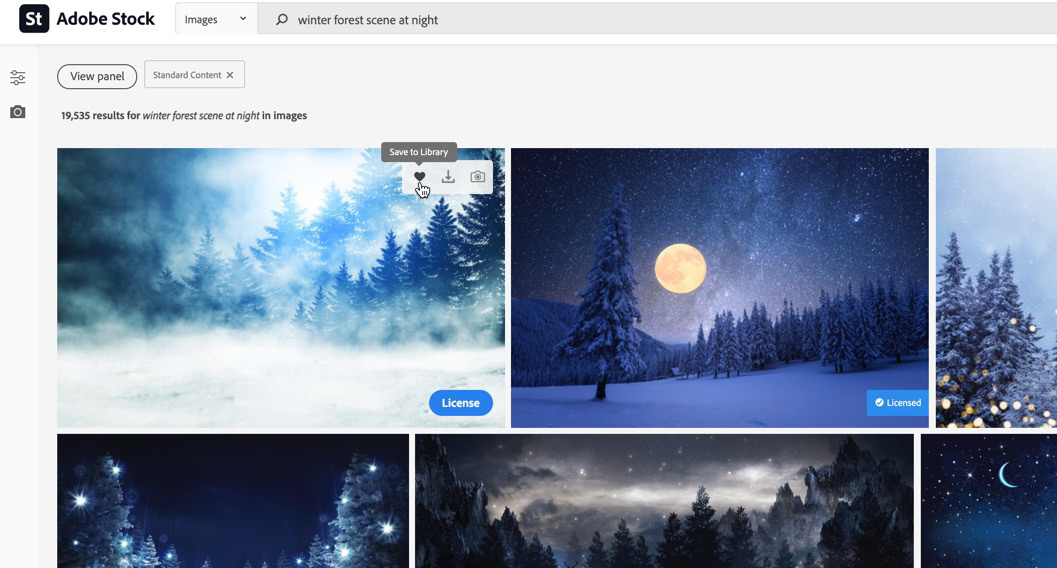
Adobe Stock is integrated with Creative Cloud Libraries, which in turn are built into all of the major desktop applications like Photoshop (sadly, direct CC Library integration with Spark Page is not yet available, but I have a workaround). Establish a Library before you begin searching for images and you can save watermarked previews to this library on the fly right from the Adobe Stock website.
Having the images in a Library was a huge timesaver - I could quickly pull images into Photoshop and test out ideas for composites or color correction/balance changes. I could also license the final images right within Photoshop, saving me multiple trips back out to the web site.
You can create a brand new library ahead of time in the Creative Cloud Desktop App, under the Your Work tab, or within all the major desktop applications, from the Libraries panel.
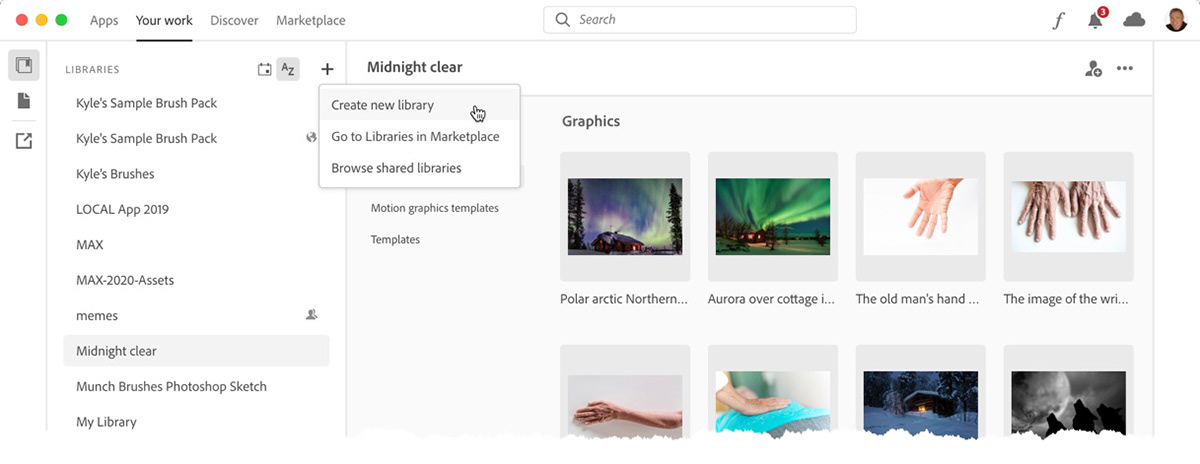
Creating a new Library within the Creative Cloud Desktop App is easy.
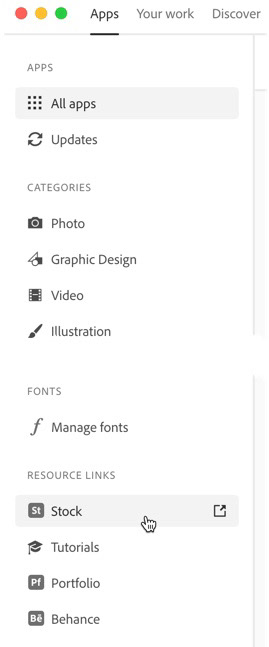
Pro Tip: An easy way to log into Adobe Stock with the right credentials is to click the Stock link in the Resource Links under the Apps tab.
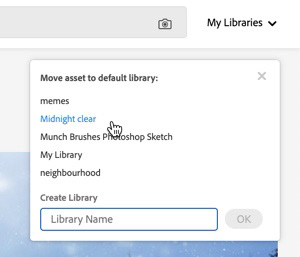
You can also create a new Library on the Adobe Stock website, at the time you save image previews.
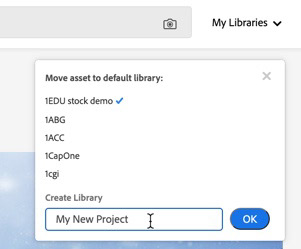
Or if your Library already exists, move assets to that existing library as they are saved.
Is This Picture Worth a Thousand Words?
Much of Adobe Stock searching is powered by our AI, Adobe Sensei, making it easier and faster to find what you're looking for. I used keywords and our Sensei-powered visual search tool to find the majority of my images. It's great to find the exact image you need, but be open to the possibility that some tweaking may be required to give additional resonance to the final image you use. In my story, 24 of the 43 displayed images were altered in some way, and 9 of those images were composites requiring at least 2 stock images. My point being, don't feel the image has to be exactly perfect out of the can. You have the tools to effect change.
You can learn more about smart searching in this article.
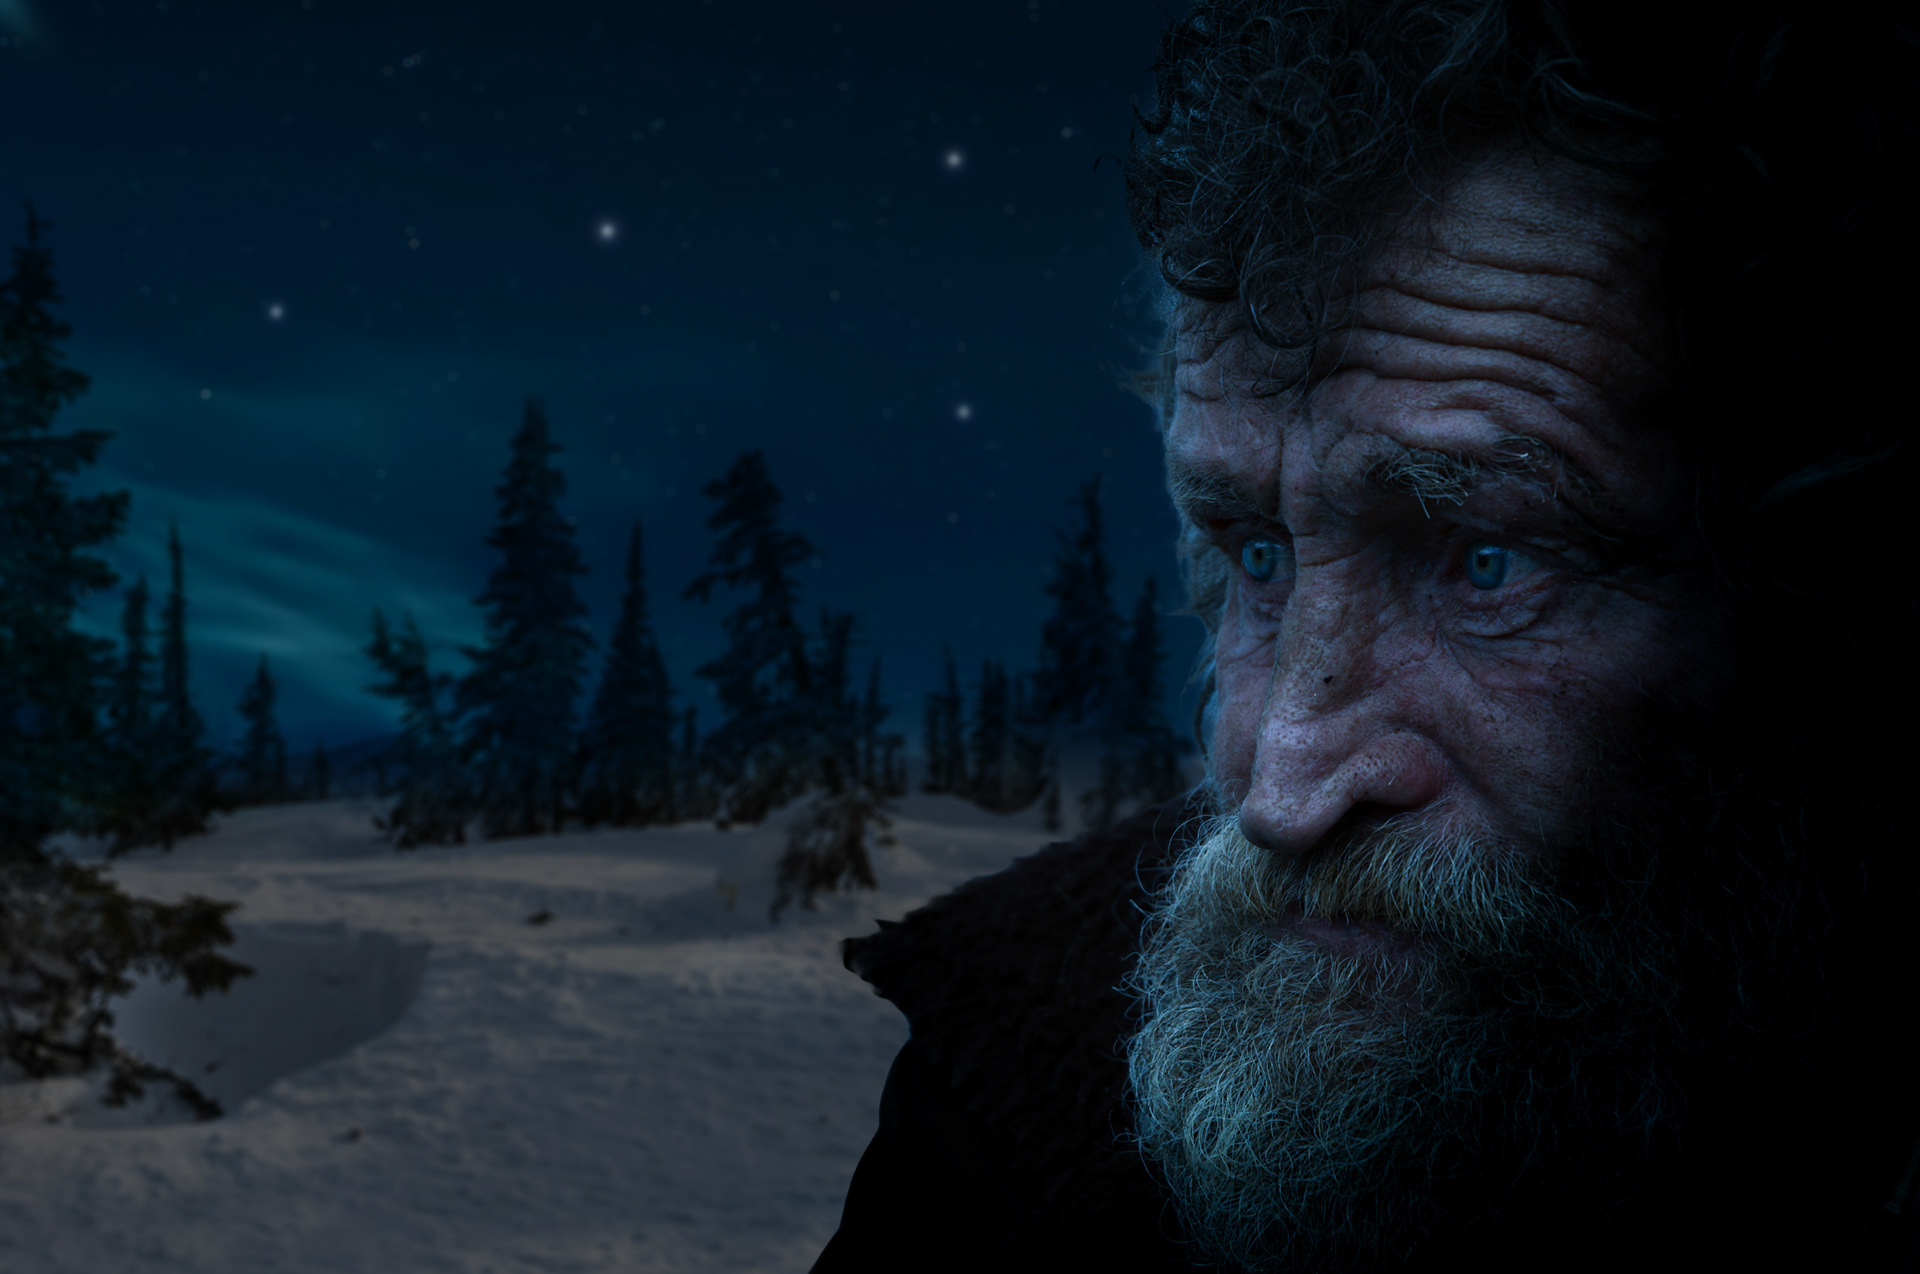
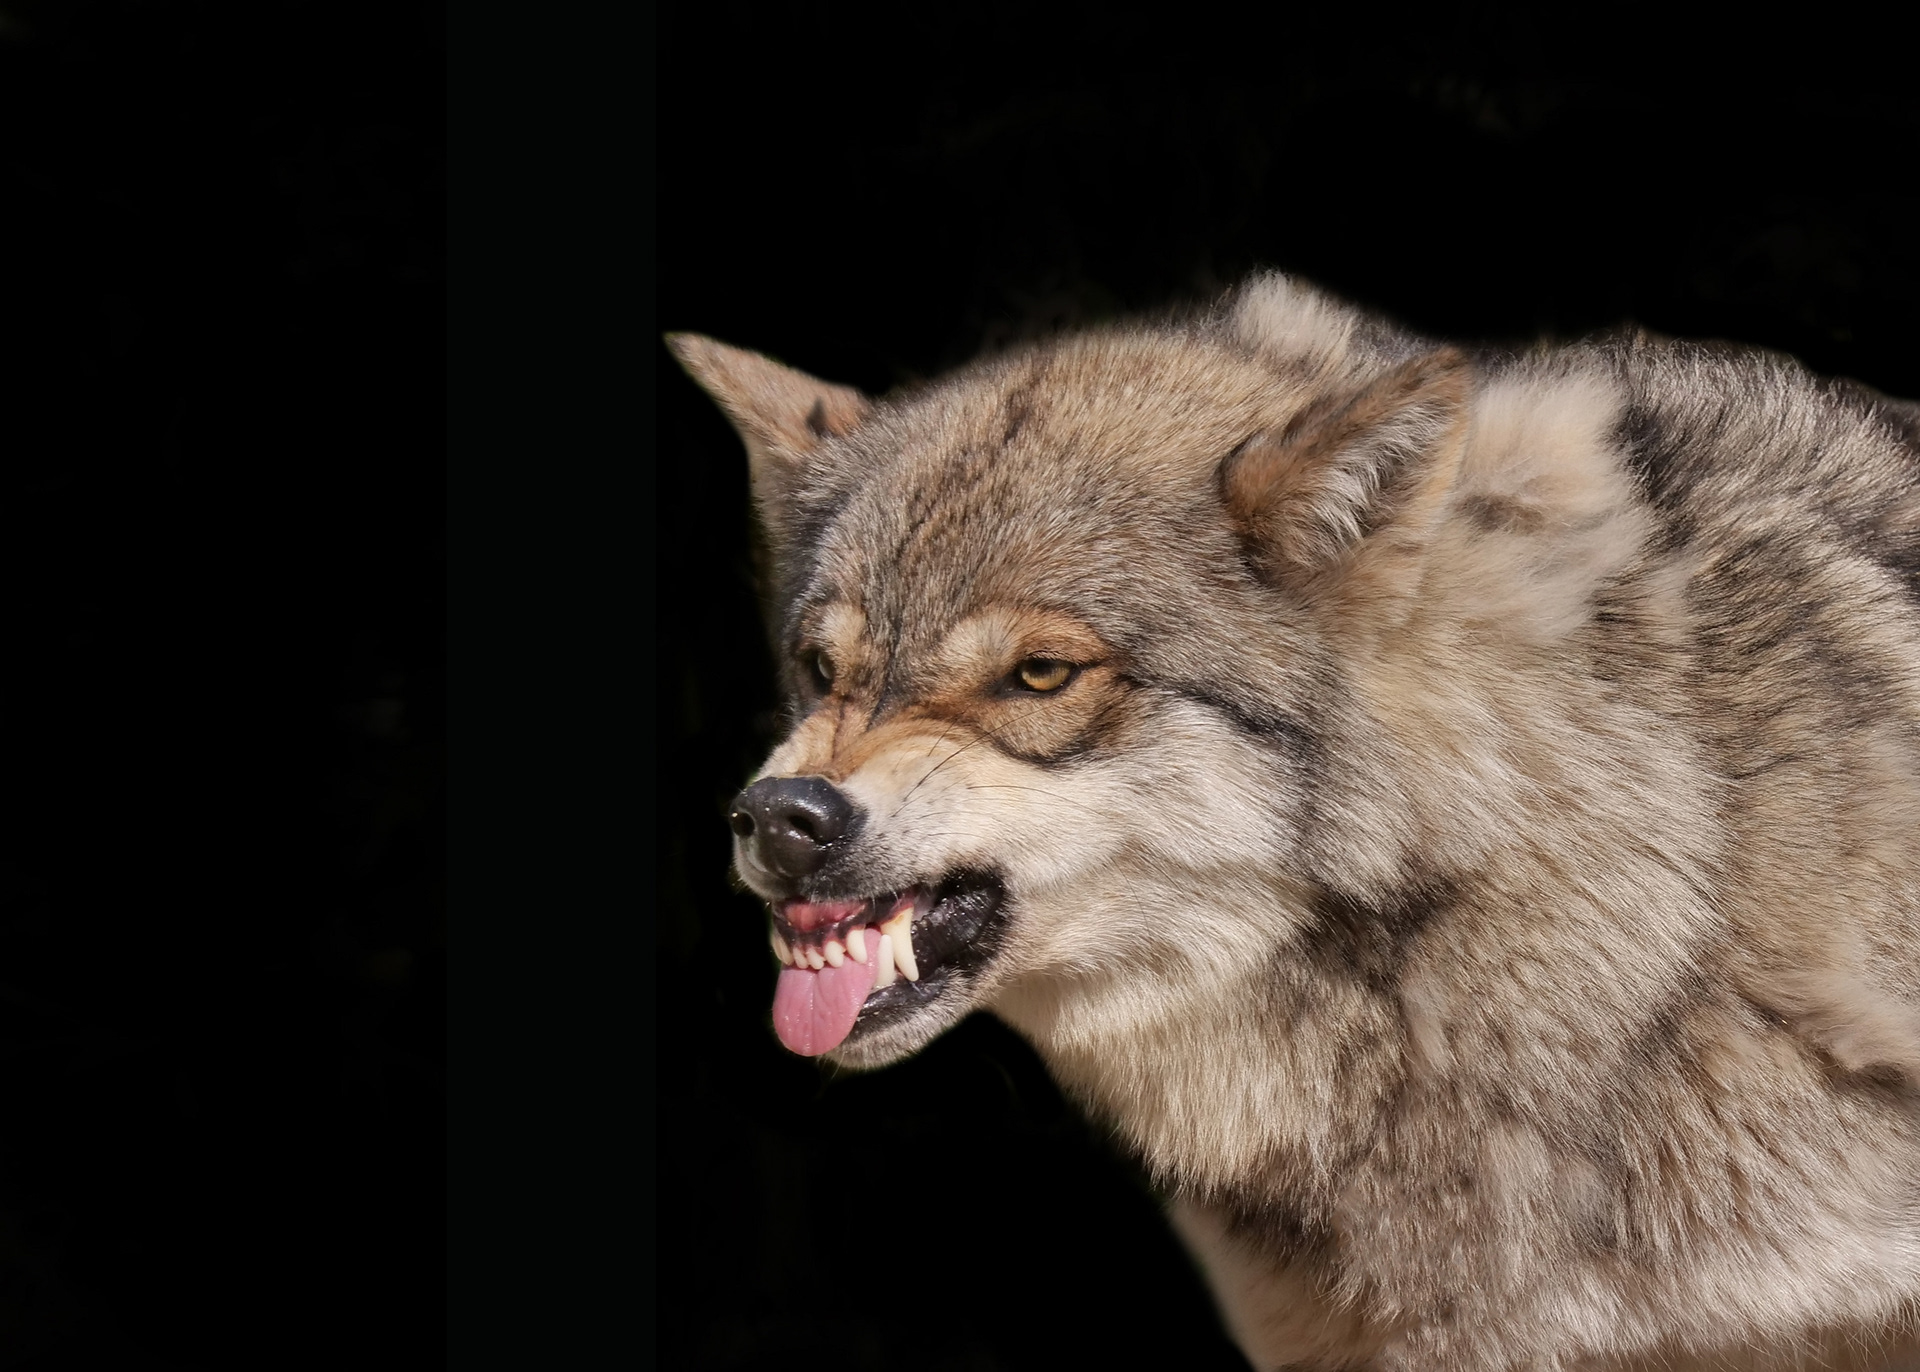
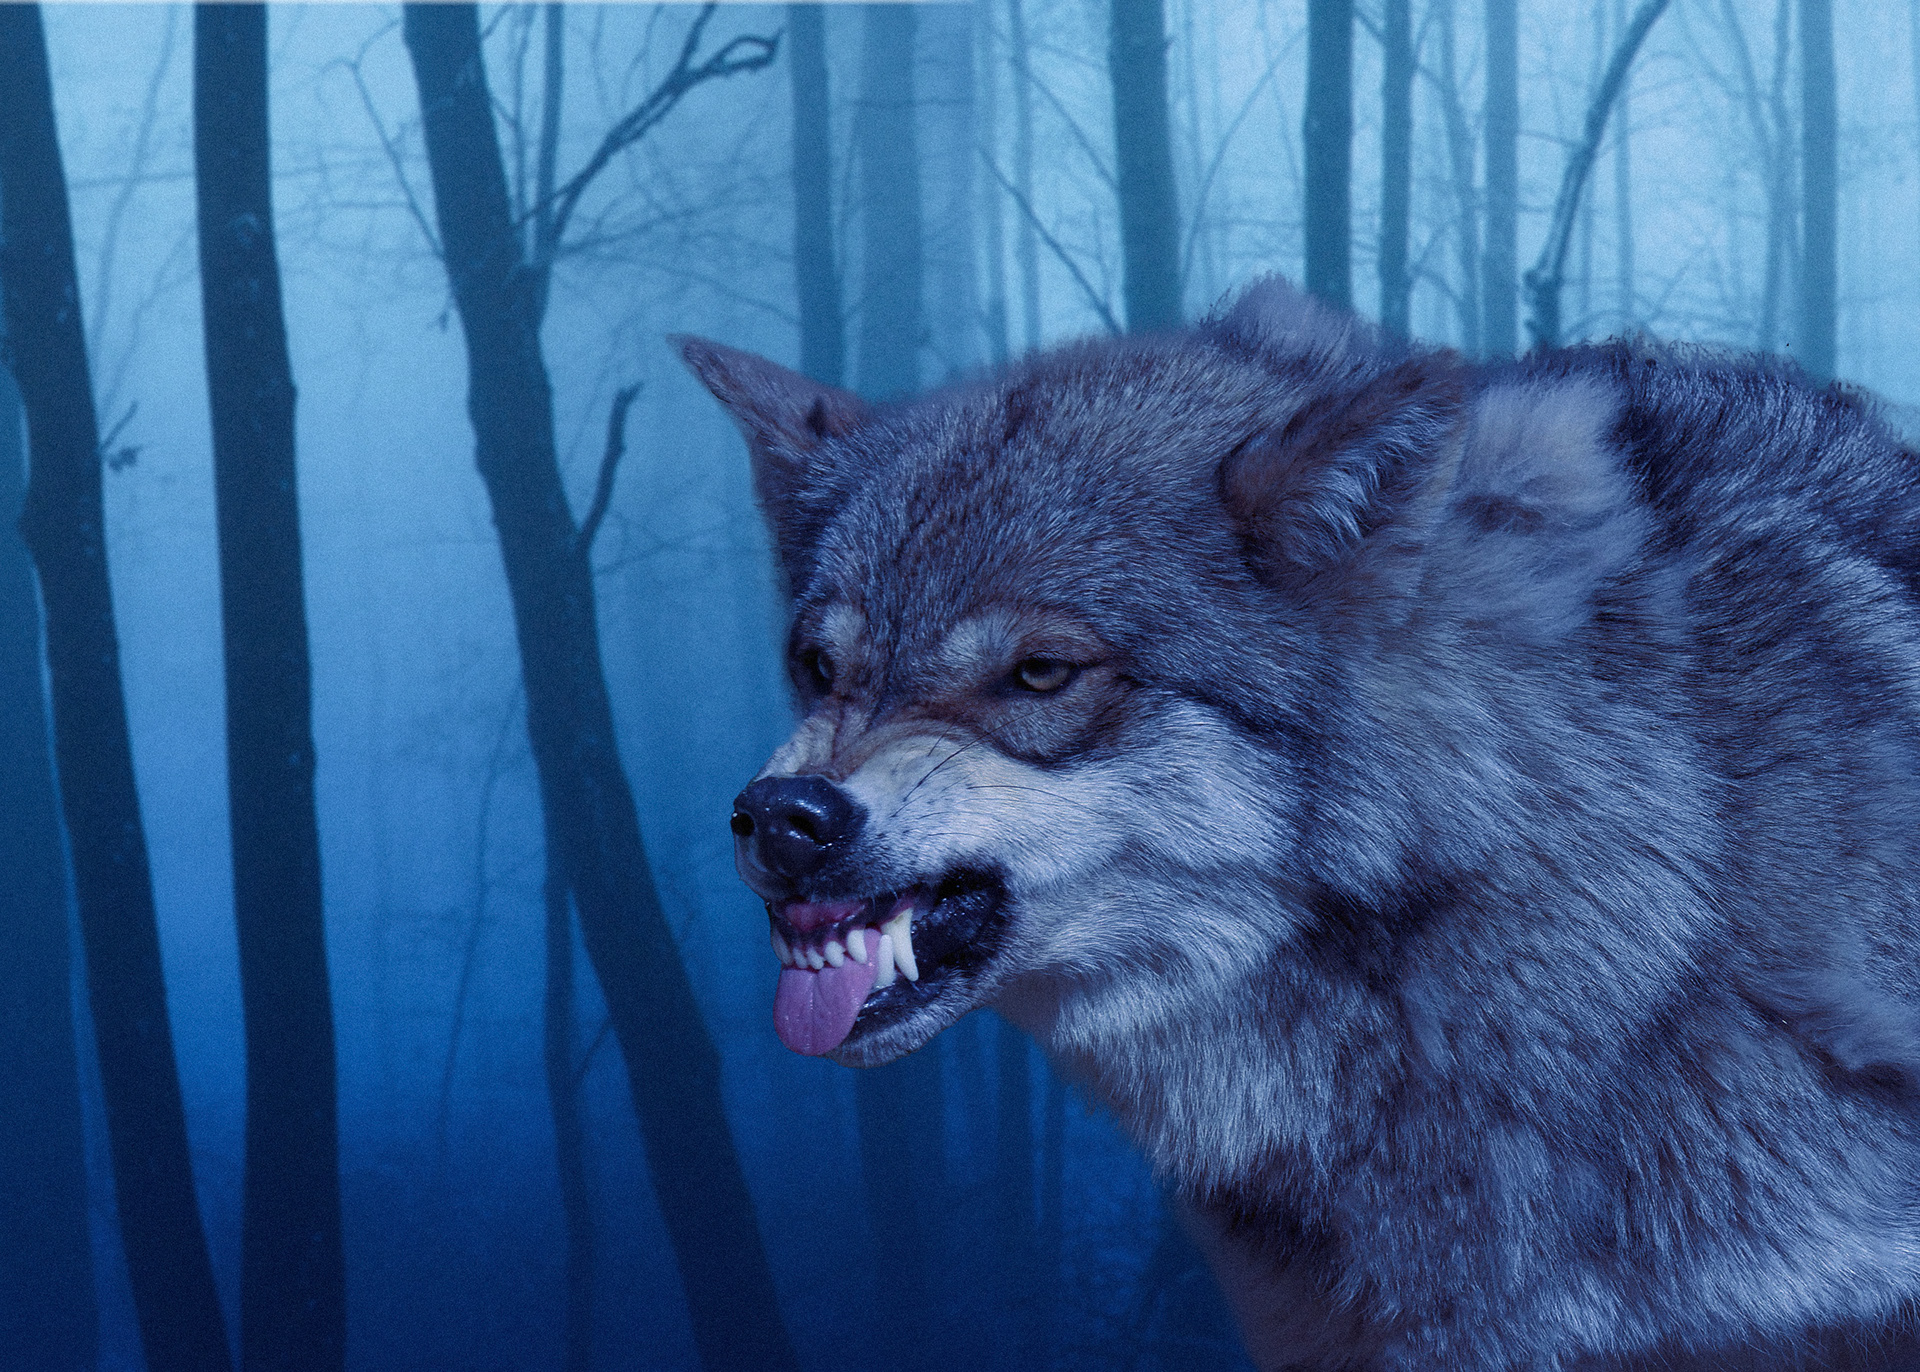
Transformations
I've gathered together some before and after examples from my story illustrations. I'm not going to walk through each of these composites step by step, but I have curated some tips and tricks below that I learned along the way.


Tips and Tricks
Adobe Stock
- Create a shot list, annotating a draft of your article or story for context.
- Build a Creative Cloud library as a "lightbox" of images that you hope to use in your project.
- Use Visual Search and keywords to assist you in finding the right images, faster.
- Use Visual Search and keywords to assist you in finding the right images, faster.
- Apply Sensei-Powered filters, such as Copy Space, Color, Vibrant Color and Depth of Field to refine your search.
- The Copy Space filter can be very useful if you're planning to use Spark Page and either the Glide Show layout feature or Full Width images. You will find images that allow for other elements like text to fit in the photo's composition.
Power Tip - Standard images cost less, so if you find a Premium-tier image that you really like, try using it as your source image in a visual search, and specify Images as your asset type.
Compositing - Photoshop
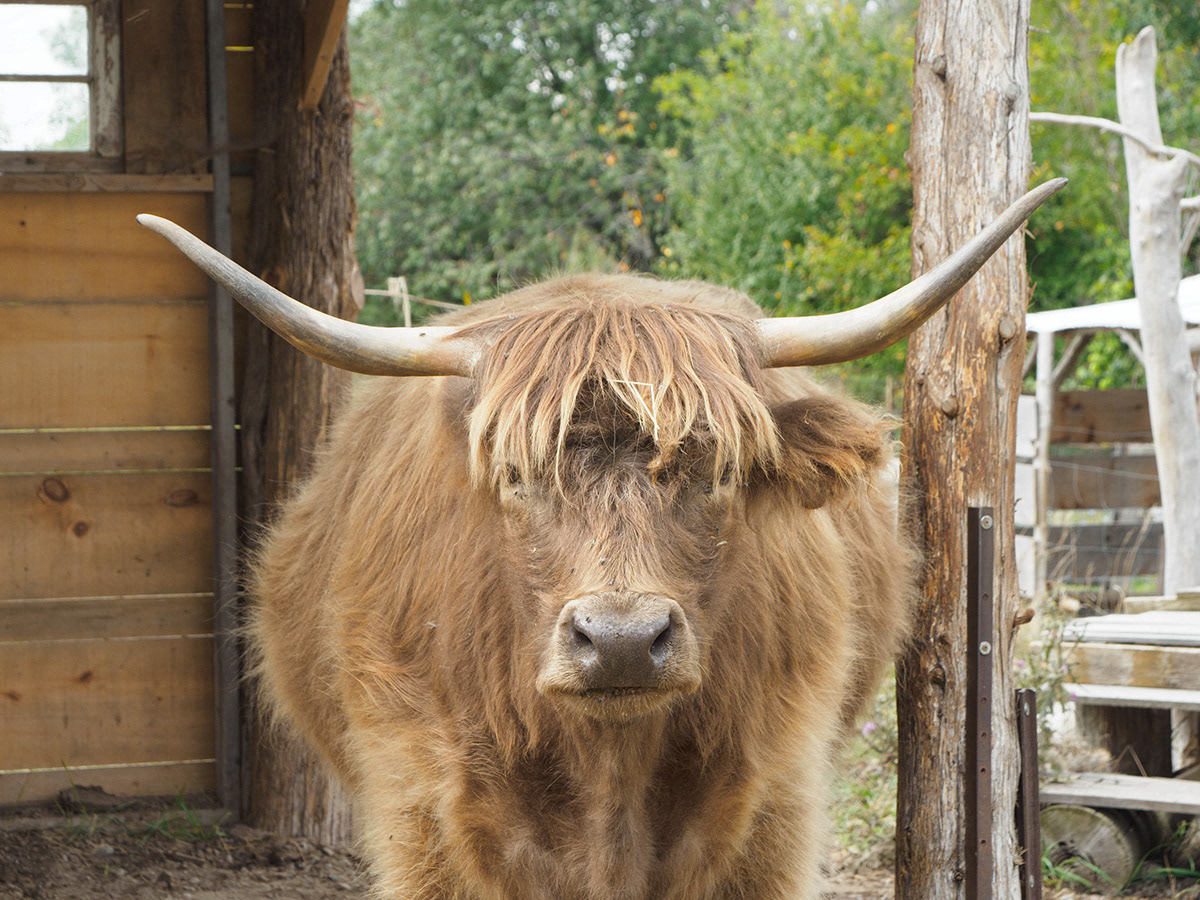
- Look for images with simple or clean backgrounds to make it easier for selecting, masking or extraction.
- Try new Photoshop features like Remove Background, or Sky Replacement to speed up your workflow.
- Test out your compositing ideas using watermarked previews, before paying for stock image licenses.
- Pay close attention to color balance to ensure your composite layers match. Consider applying a color LUT (look up table) Adjustment Layer to harmonize colors between layers.
- Study and match lighting quality and direction to enhance realism (if that is your goal).
- Match image perspective and camera angle/elevation to enhance realism (if desired).
- Save your work regularly. I save mine to Creative Cloud Files making it easy to access content on any device.
- Add noise: when your composite is finished, create a flattened layer version, and apply either a bit of Noise (Photoshop) or Grain (Adobe Camera Raw Filter) to help blend elements together. This can help where edges meet.
- If extensive editing is required, consider converting image layers to Smart objects.
Other Compositing Options
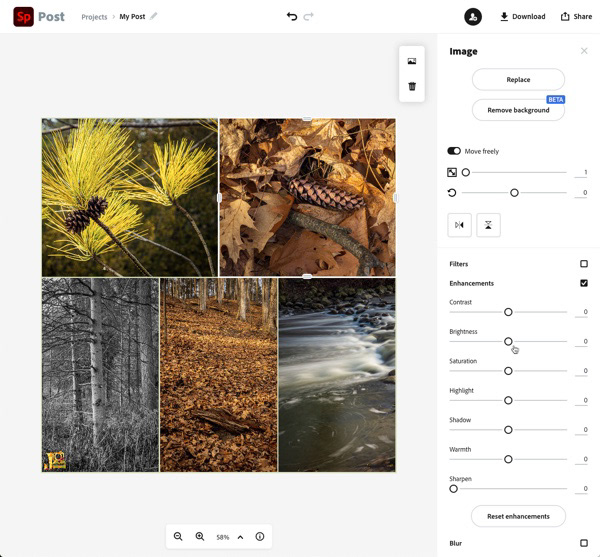
While I did all my compositing and manipulation in Photoshop, it doesn't mean you have to. Spark Post contains some powerful features including Remove Background, Move Freely, Zoom, Color Filters and Enhancements. Unless you are intentionally trying to learn a new skill set, use what you are comfortable with.
Unlike Spark Page, Spark Post does support Creative Cloud Libraries!
Adobe Spark Page
If your project incorporates a lot of text, I strongly advise writing it out in a word processor or text editor first. Resist the urge to write from scratch in Adobe Spark Page if you are going beyond a few paragraphs. Editing text content (moving, copying, pasting - especially lists) can be a tedious process in Spark Page (and for the record, I pretty much LOVE Page).
- Use the Layout features. Spark is a visual storytelling tool. Make the most of it. Use images as backgrounds for text and other images (Glide Show), or the Window display option for images, which creates a full-width visual divider between content.
- Experiment with the order of images in a Glide Show. Glide Show images blend into each other as you scroll through the content. Think of this almost like a cinematic fade. What images transition best from one to the next?
- Alternate the position of Glide Show content boxes. You can reposition the content in each Glide Show image to the left, centre or right, by dragging the box. Place your content in the area with the least important detail. Tip: the centre location creates a wider box.
- Choose a suitable template or - with the paid version - create your own custom branded page.
- Make use of typographic formatting such as Pull Quotes, Headings and Subheadings to break up long stretches of text.
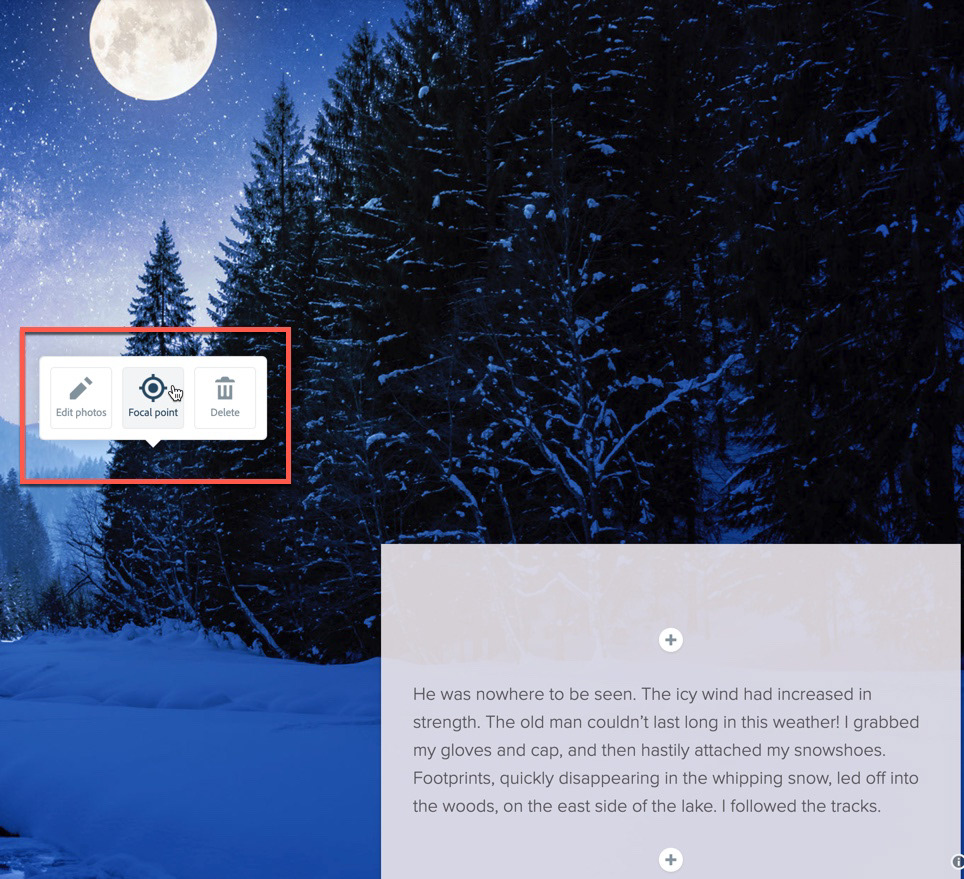
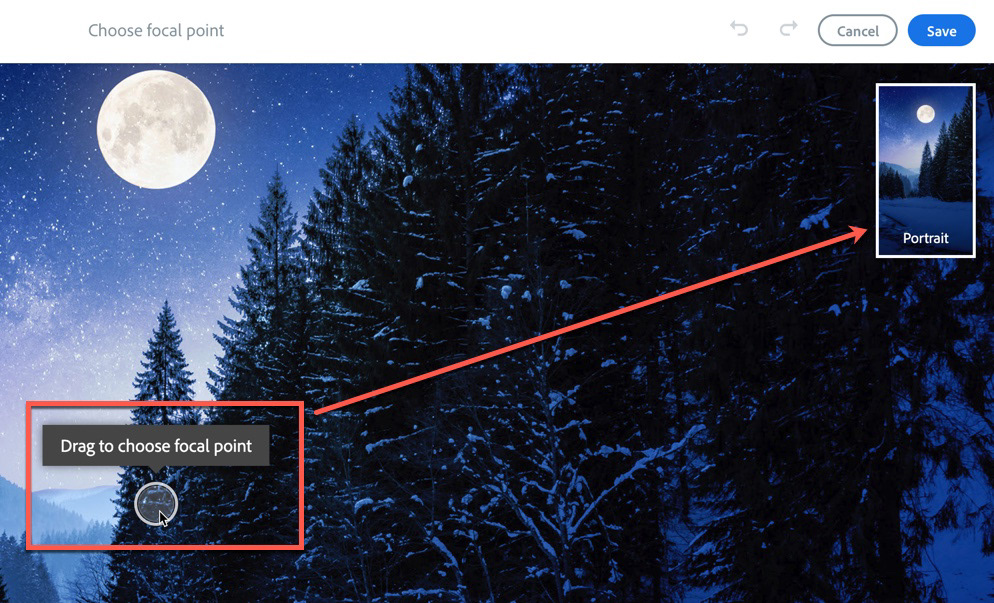
- Adjust the image Focal Point. To ensure the most appropriate part of your images show up when viewed on a device in Portrait Mode (like a smartphone), all full screen images give you control over vertical and horizontal positioning within the viewport. Just click or tap on an image while in editing mode to bring up the Focal Point option.
- Socialize your published work! Much like I am doing here on Behance, both the Spark and Behance platforms give you multiple options to share and promote your work. Don't be shy - share on Twitter, LinkedIn, Discord servers, even Facebook and of course your own website or blog! Generate awareness on Instagram by creating a promotional collage using Spark Page.
Credit where Credit is Due
If you search, license and add Adobe Stock assets through Spark, those images will be auto-magically credited at the end of your project. However, if you customize images and upload them to Spark, the attribution is not maintained. If attribution is important to you, consider creating a "dummy" page with all the assets you plan to use, added through the Stock widget in Spark. When you preview the document, you can easily copy all the attribution from the end of the "article" and paste it into the body of your real project work.
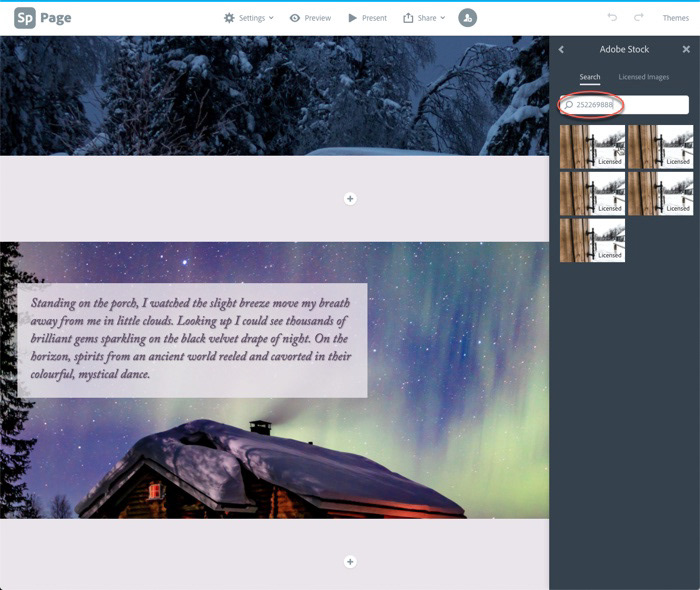
While Spark Page does not support CC Libraries, it's fairly easy have the Library with your assets open within the Adobe Stock website, and then copying and pasting the asset file number into the Stock widget search field in Adobe Spark.
The Story Inside the Story
Well, patient reader, if you've made it this far, your reward is below. I hope you have found this article interesting and informative. And I hope you find the story below, inspiring and heartwarming.
Merry Christmas and Happy Holidays to each and every one of you.