Upscaling Generative AI Images using Creative Cloud
One of the current downsides to AI-generated imagery is the image resolution that these tools produce. The desire to increase the resolution of these assets is not new; it's been around likely since the first Gen AI image was created. And there are plenty of videos on Youtube offering a variety of methods to upscale your AI images.
So... why am I writing this?
Simply put, my focus will be on using Adobe tools to perform these functions, from start to finish. I'll also include a couple links to videos at the bottom of this article that discuss other tools, both free and paid.
If you want to learn more about Adobe Firefly, check out this article: https://www.behance.net/gallery/168748695/Sensei-Putting-the-New-%28and-Cool%29-into-Adobe-Tools

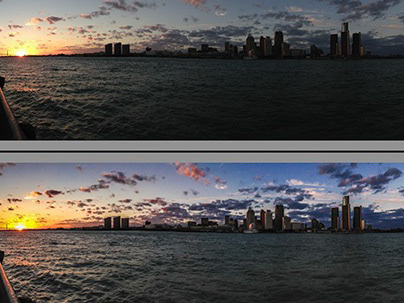
Firefly-generated image, before and after resizing using Adobe Camera Raw.
The Workflow: Bridge > Camera Raw > Photoshop
We will be making use of Adobe Camera Raw (ACR) to upscale the image. Like Lightroom, ACR can invoke the Enhance module. As of April 2023, Enhance now has three options: AI Denoise, Raw Details and Super Resolution. The first two options currently work only on RAW images. Super Resolution uses AI to double the resolution of a variety of graphic files, including .jpg. That's the functionality I want.
For more information on ACR/Lightroom Enhance options, visit this link: https://helpx.adobe.com/camera-raw/using/enhance.html
From Adobe Bridge to Camera Raw
I'm going to assume you've guided the creation of some awesome art in Firefly (or another Gen-AI tool).
First thing to do is to make sure your newly created assets are all in one easy to locate folder. If you're like me, your Downloads folder is a wasteland of new, old and forgotten files, so create a dedicated folder and move your Gen-AI files into that folder.
Next, open Adobe Bridge. Bridge will give us quick access to Adobe Camera Raw (ACR).
Use the Folders panel to locate your folder of assets.
Note: We need to use Adobe Camera Raw for the upsizing; the Camera Raw Filter does not support the Enhance options of ACR.
Right-click on the folder and choose Add to Favorites. This will make it much easier to locate the folder at a future time.
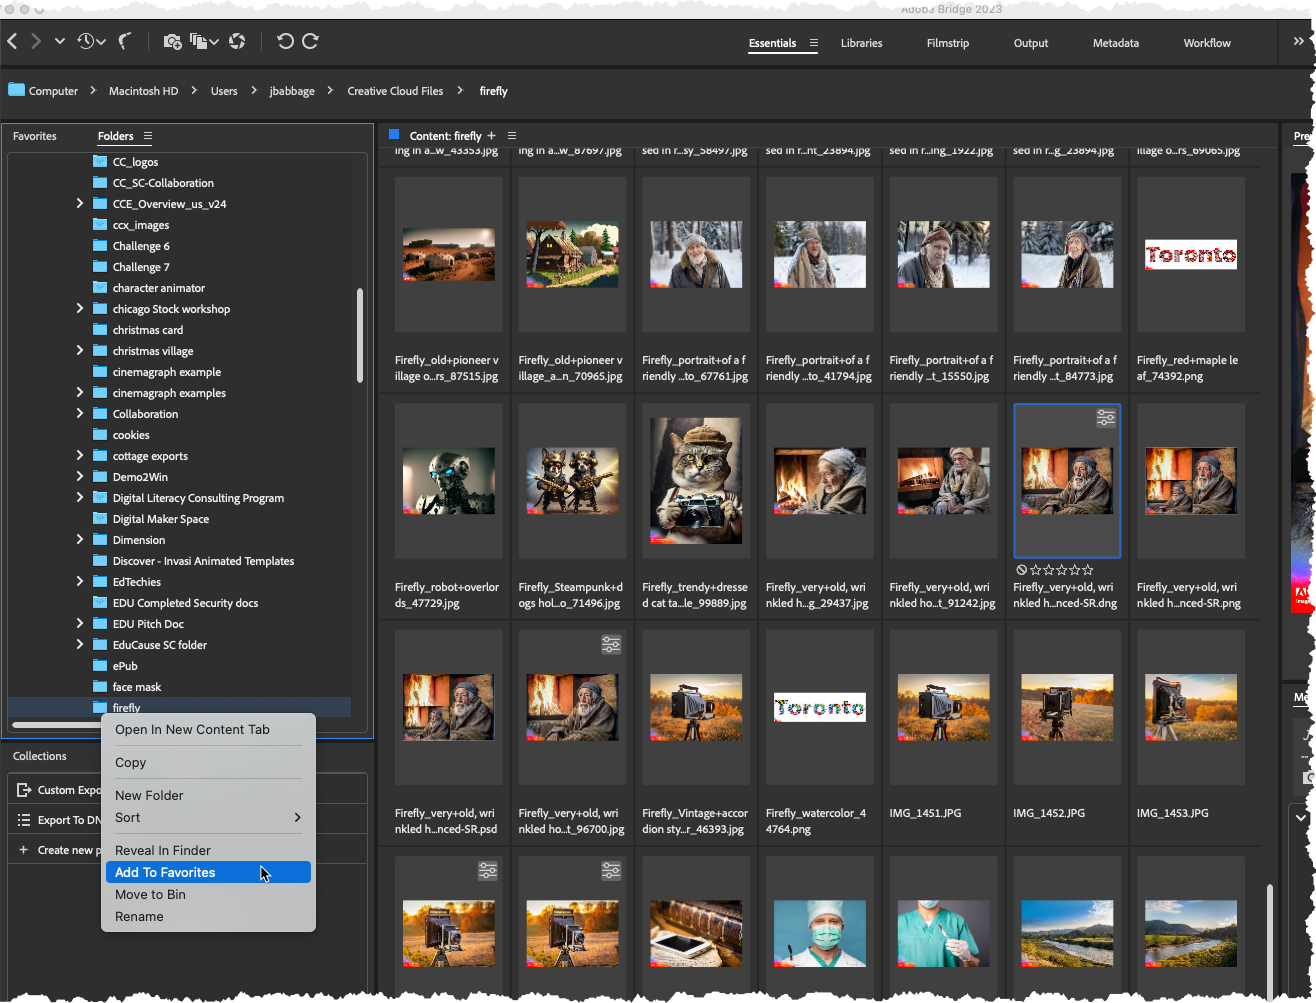
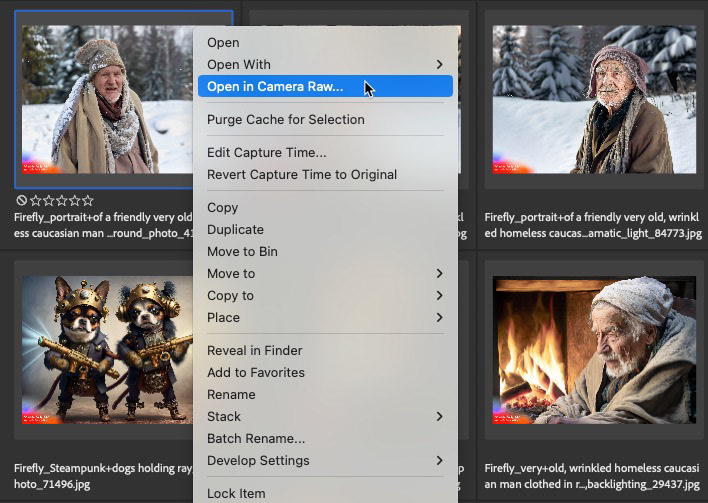
Select the folder and browse your images in the Content panel.
Ctrl+Click/Command+Click on the files you want to upsize. Maybe start small and just pick one file.
Right-Click on the image(s) and choose Open in Camera Raw.
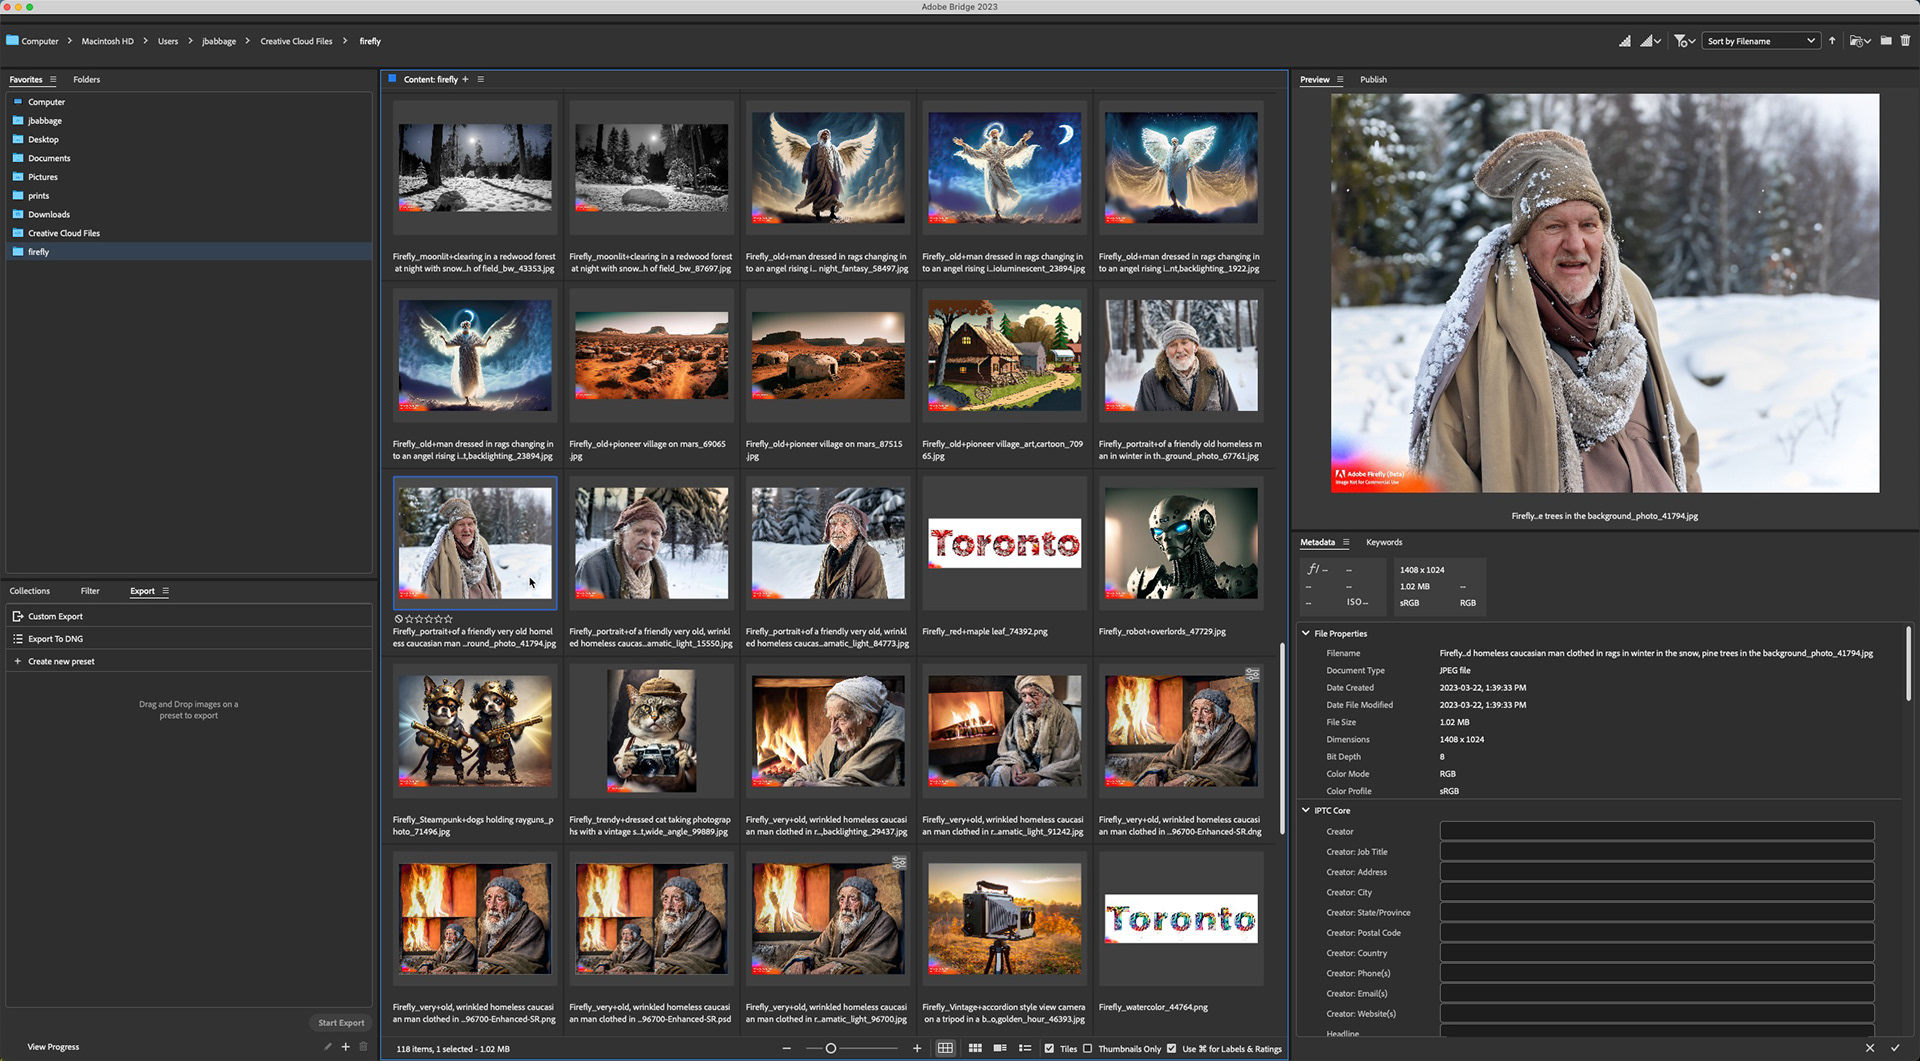
When the image opens in ACR, right-click on it in the preview window (not the thumbnail) and choose Enhance. Because these assets are not typically RAW files, your only option in the Enhance module will be Super Resolution. Enable the setting if necessary.

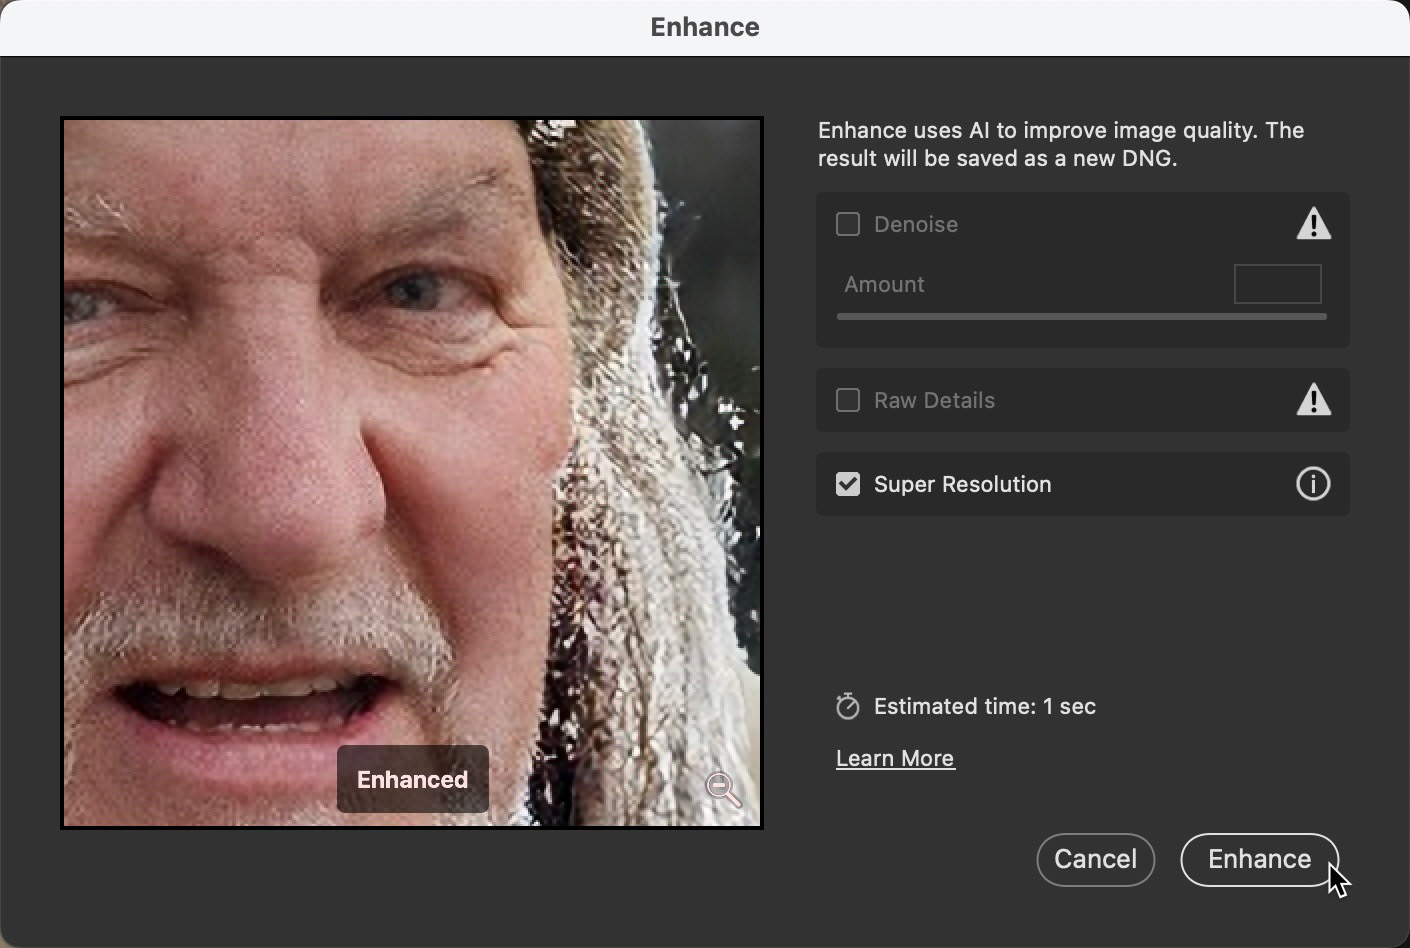
Tap the Enhance button. In fairly short order, your resized image - a brand new DNG file at double the original resolution - will appear in ACR.
Process your file(s)
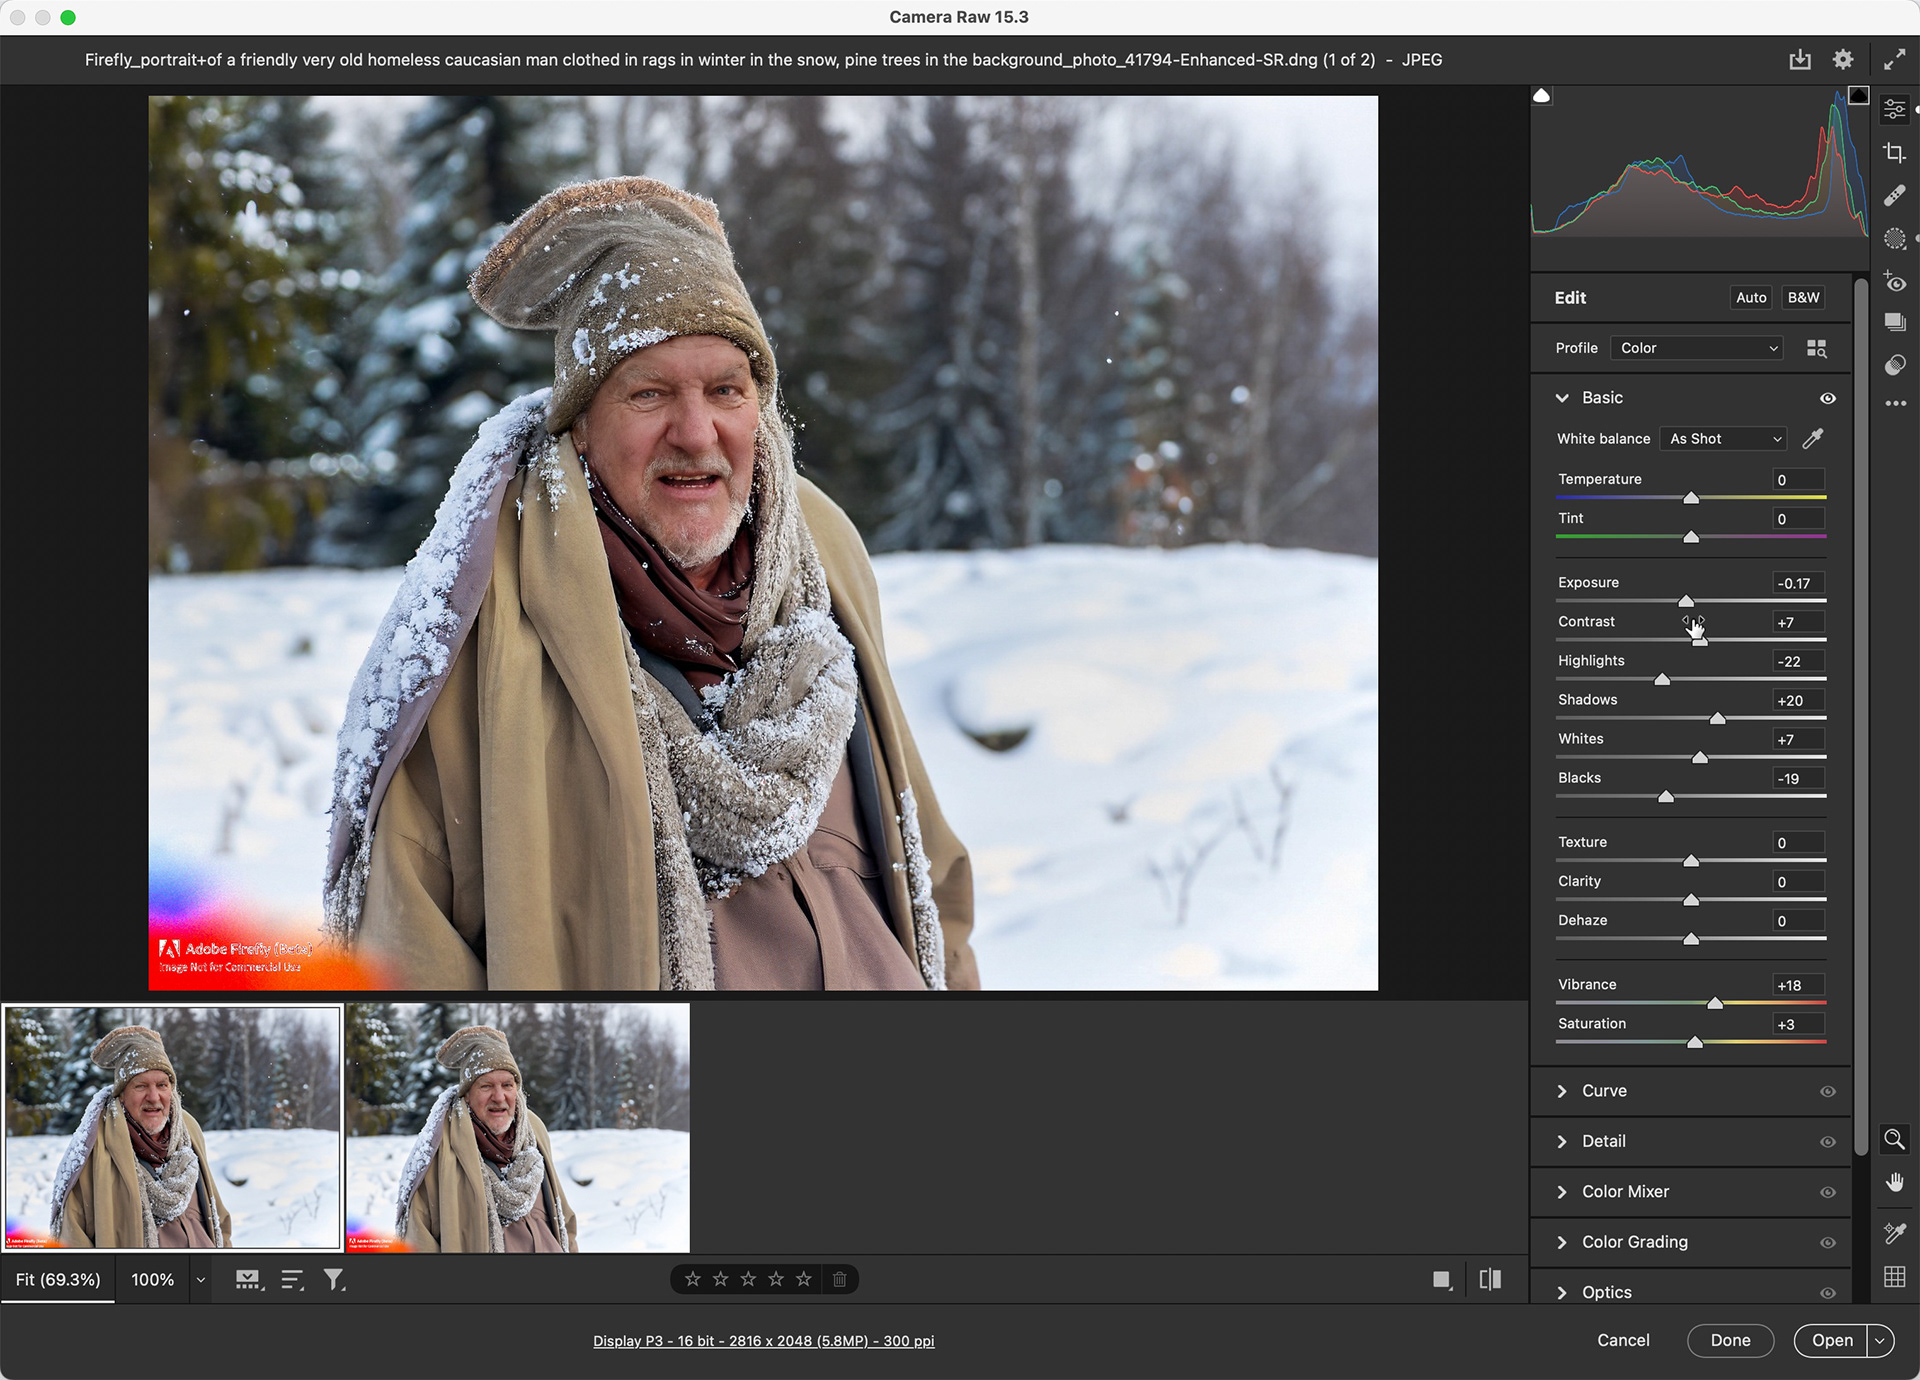
Because we're already in Camera Raw, which is basically a less attractive version of the Lightroom Classic Develop module (sorry, ACR), I'd recommend doing any image processing you need using ACR. For my upsized sample image of the old man, I started my processing much like I do with any traditional digital photo; I clicked the Auto button.
The Auto processing in ACR is much improved, just as in Lightroom (same engine, remember), and often gets me most - if not all the way - to where I need to be in terms of brightness and contrast.
I made a few additional global tweaks to the image, reducing the highlights a bit more and adding some Clarity and Texture.
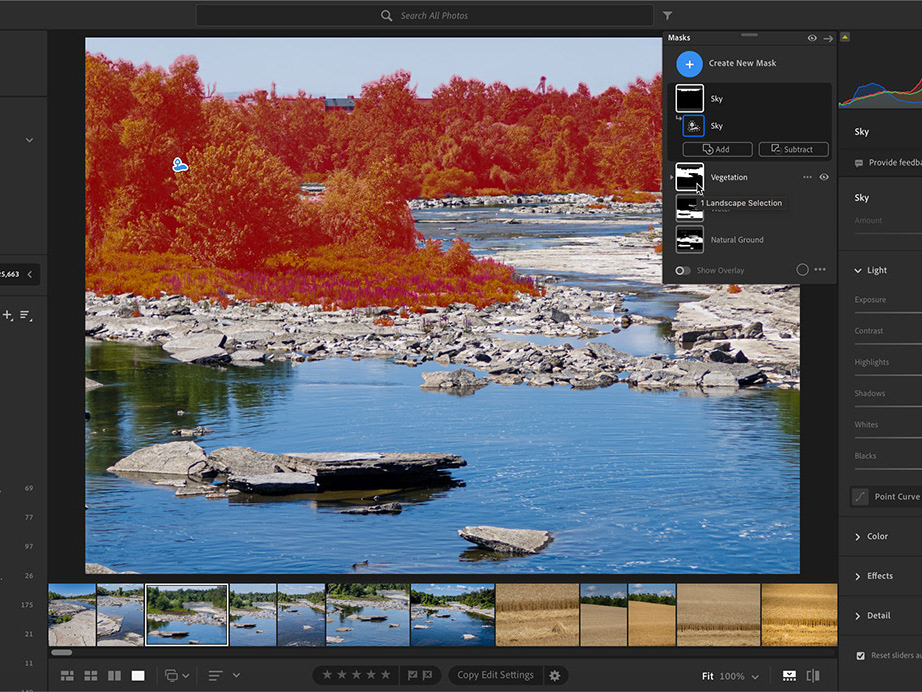
AI Masking
I wanted to pay special attention to the old man and that is where the new AI masking tools came in very handy.
The new masking features in ACR (and Lightroom) are game-changers and perhaps the best thing to happen to LIghtroom and ACR.
Note: The April 2023 release of Lightroom and ACR brought us the darned impressive AI Denoise (that's another story)as well as even more updates to the people masking tools.
Because I have a generated human in my image, I opted to go with the people-masking tools as a starting point.
Click on the Mask icon, choose the blue plus sign to create a new mask and choose Select People.
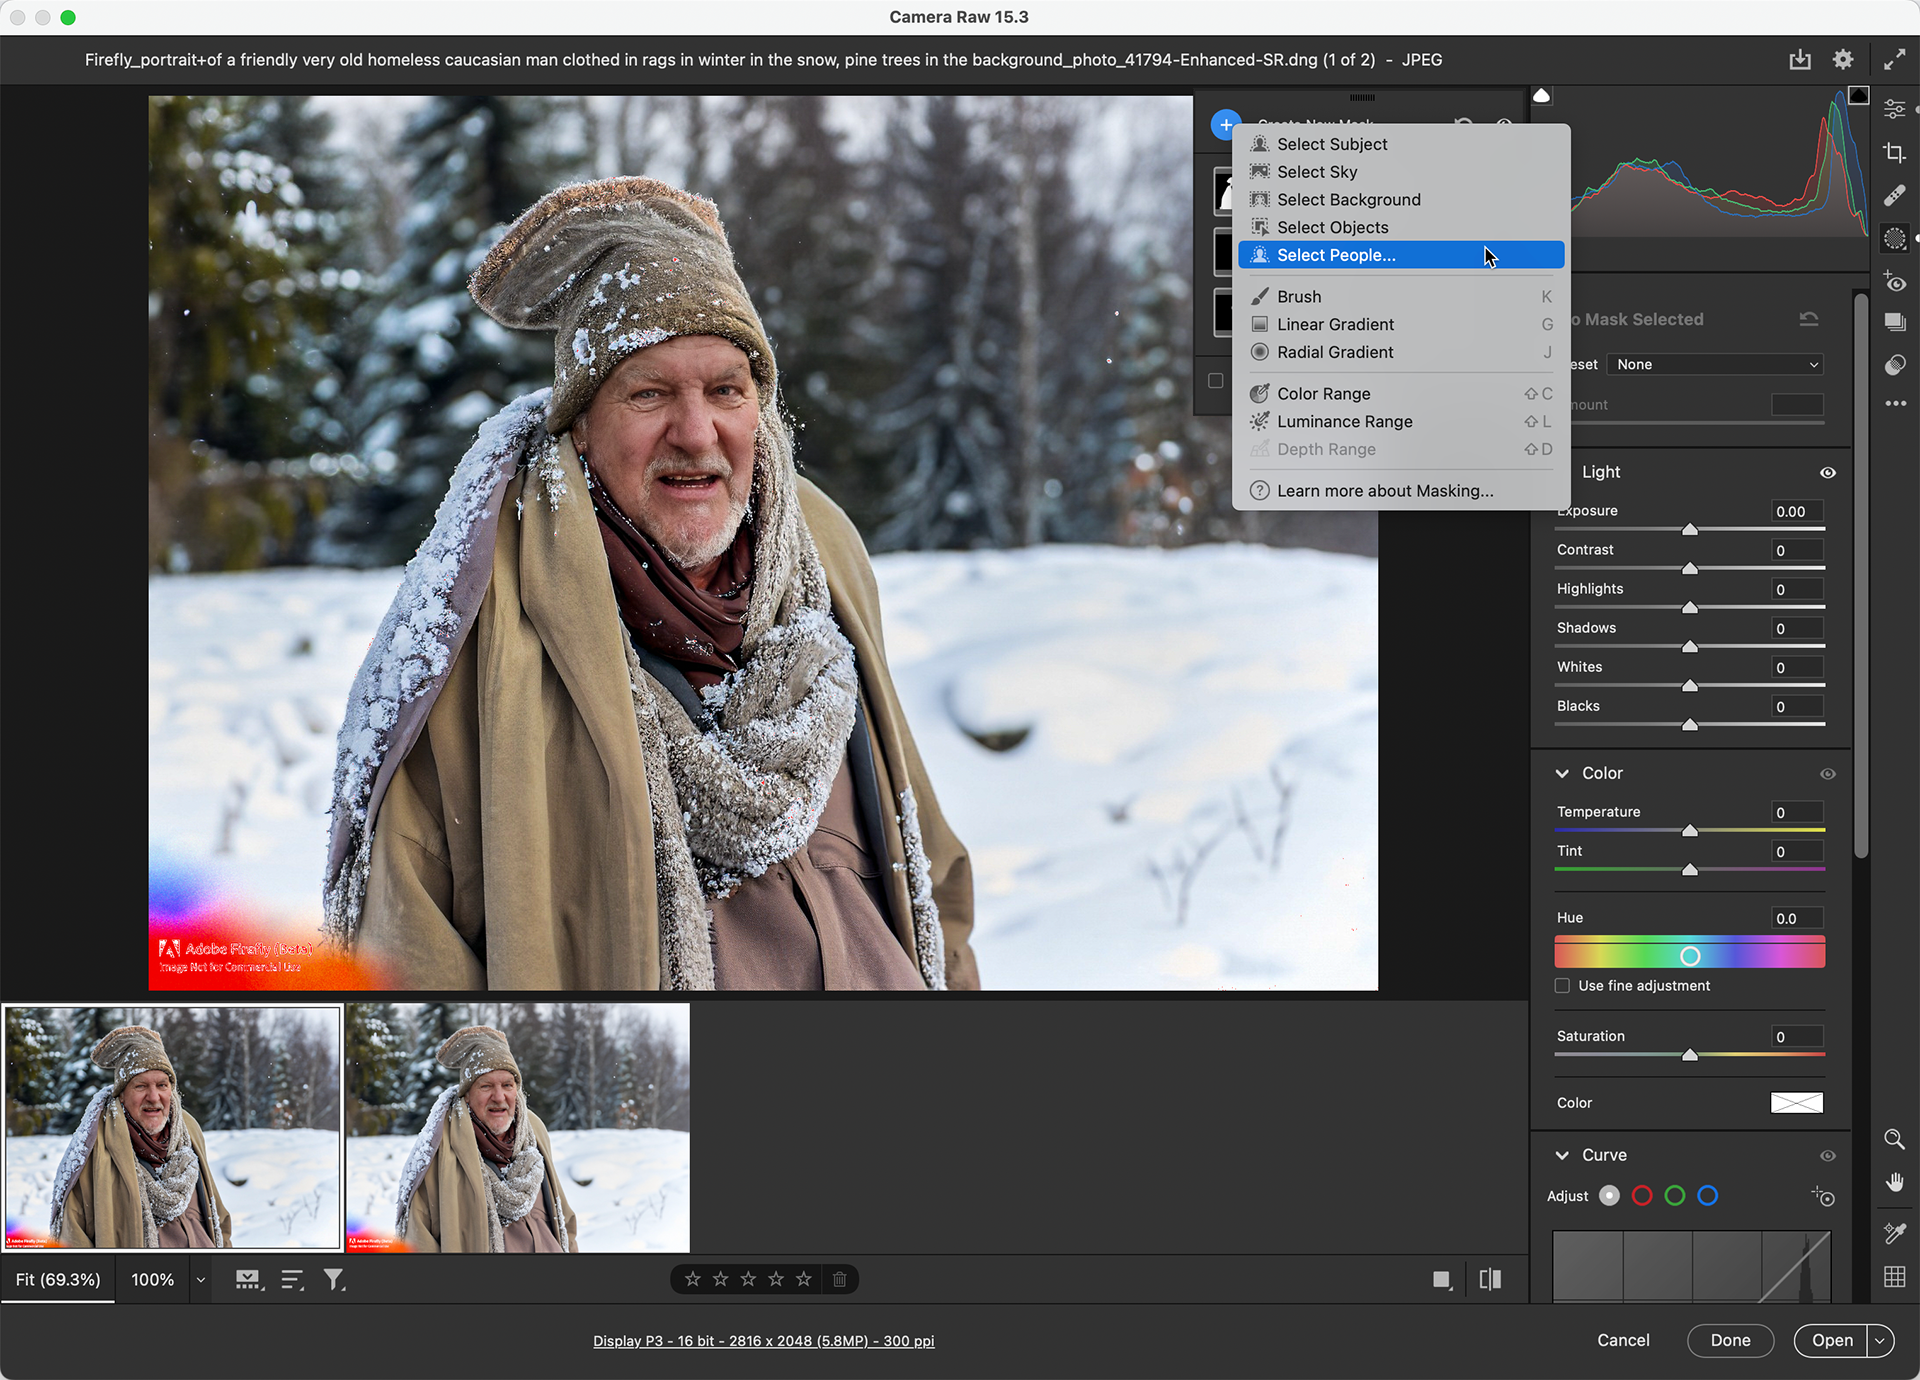
Adobe's AI - Sensei - kicks in and identifies the people in the scene. Once people have been identified, you can select each individual and apply multiple intelligent masks either as a group or individually. In my case, I chose to create one mask set for the teeth and eye sclera, one mask for the facial skin and lips and one for the clothing (using the brand new clothes mask).
ACR did a great job of selecting the main clothing, but fell short when it came to the old man's hat. This isn't a problem though; if the mask misses an important element, you can choose add (or subtract) from the active mask using any of the masking tools. In my case, I used the Select Objects mask to add the hat to the mask.
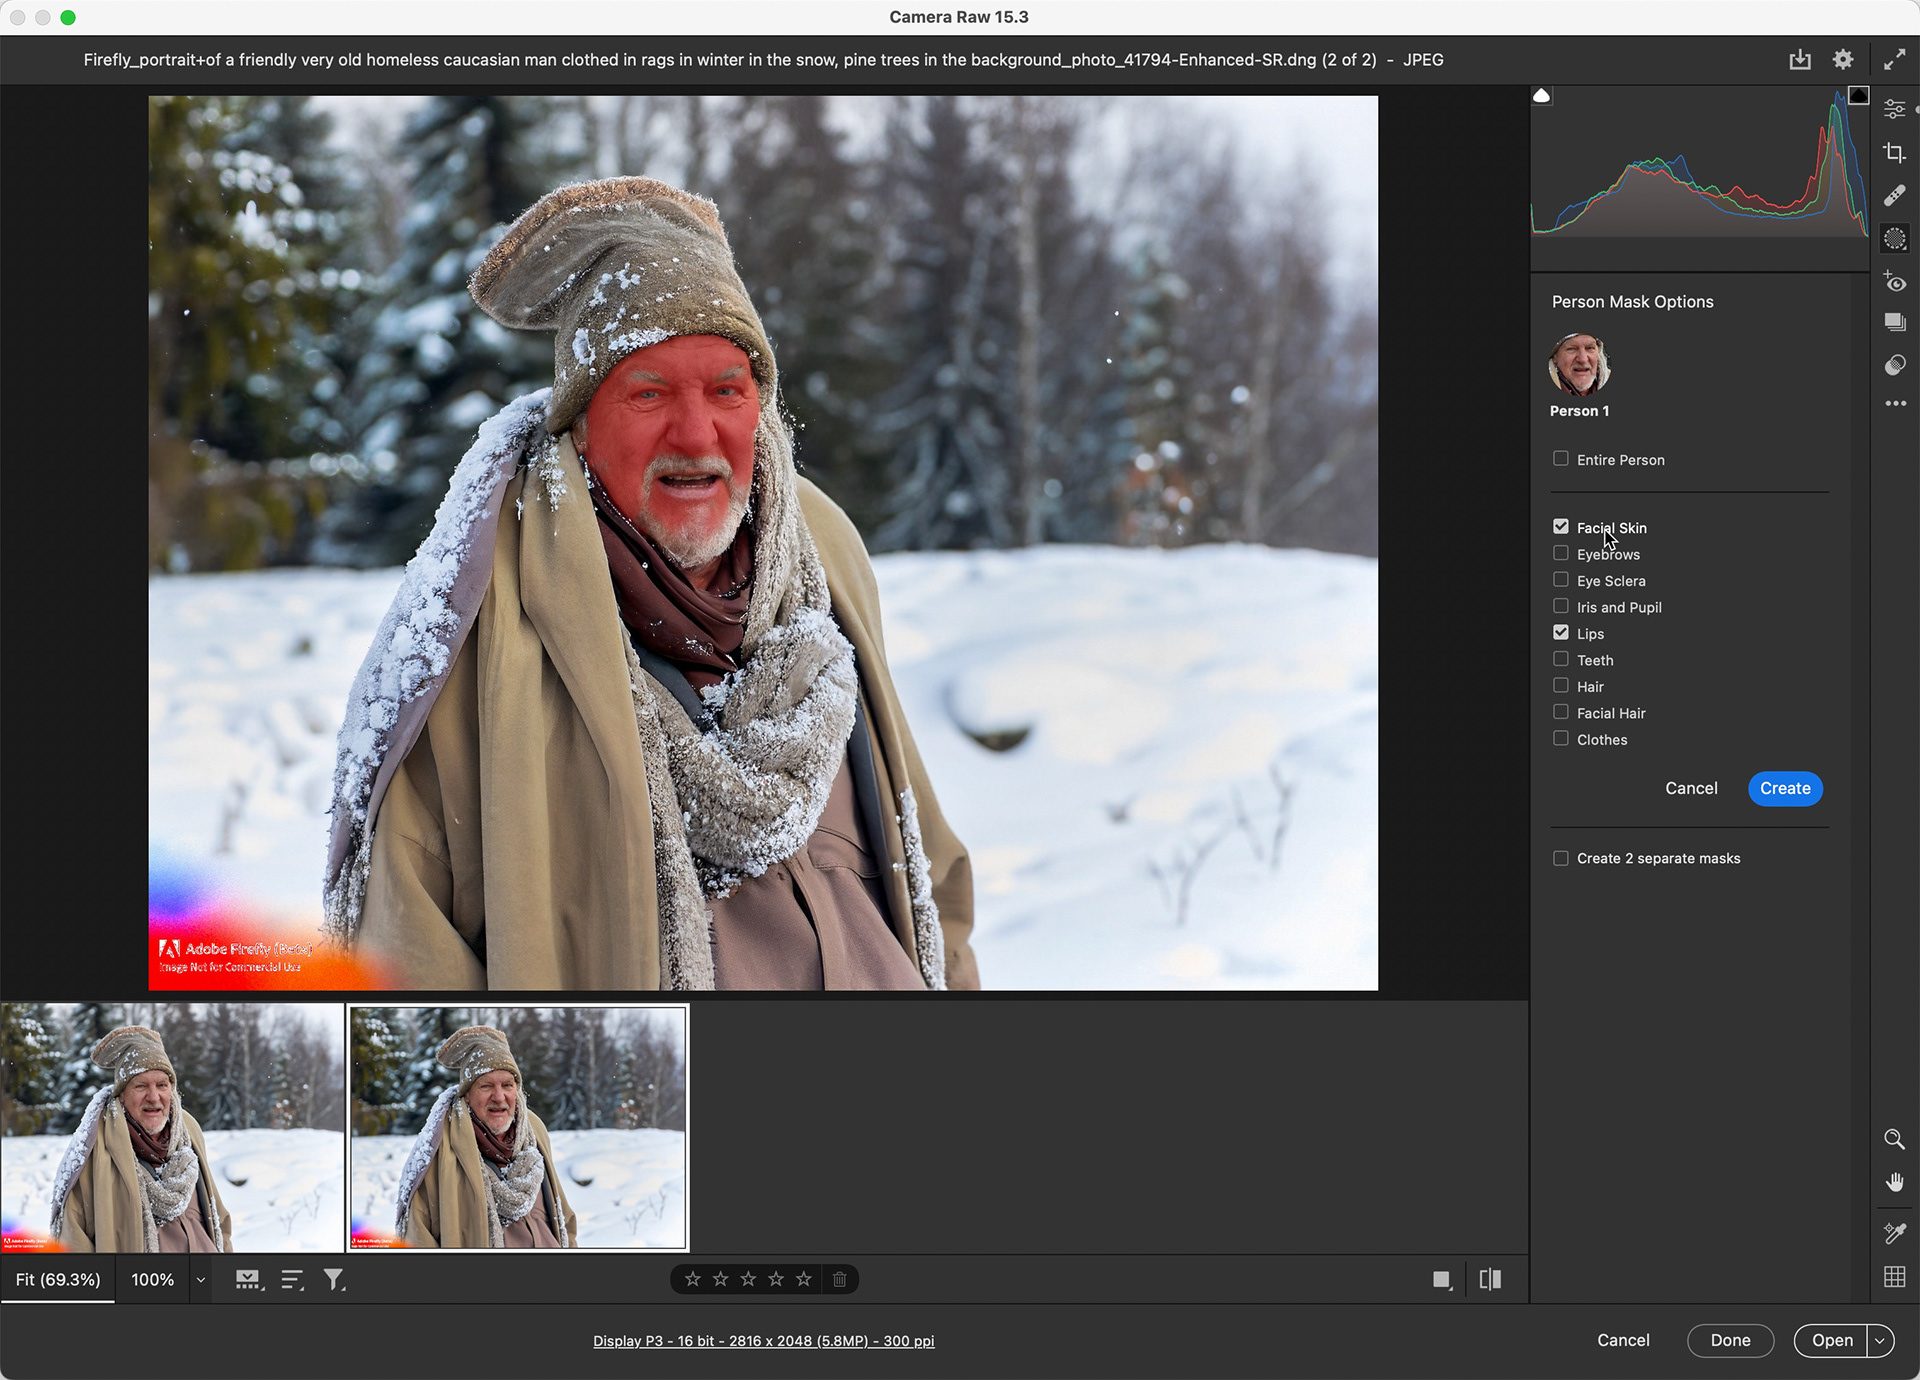
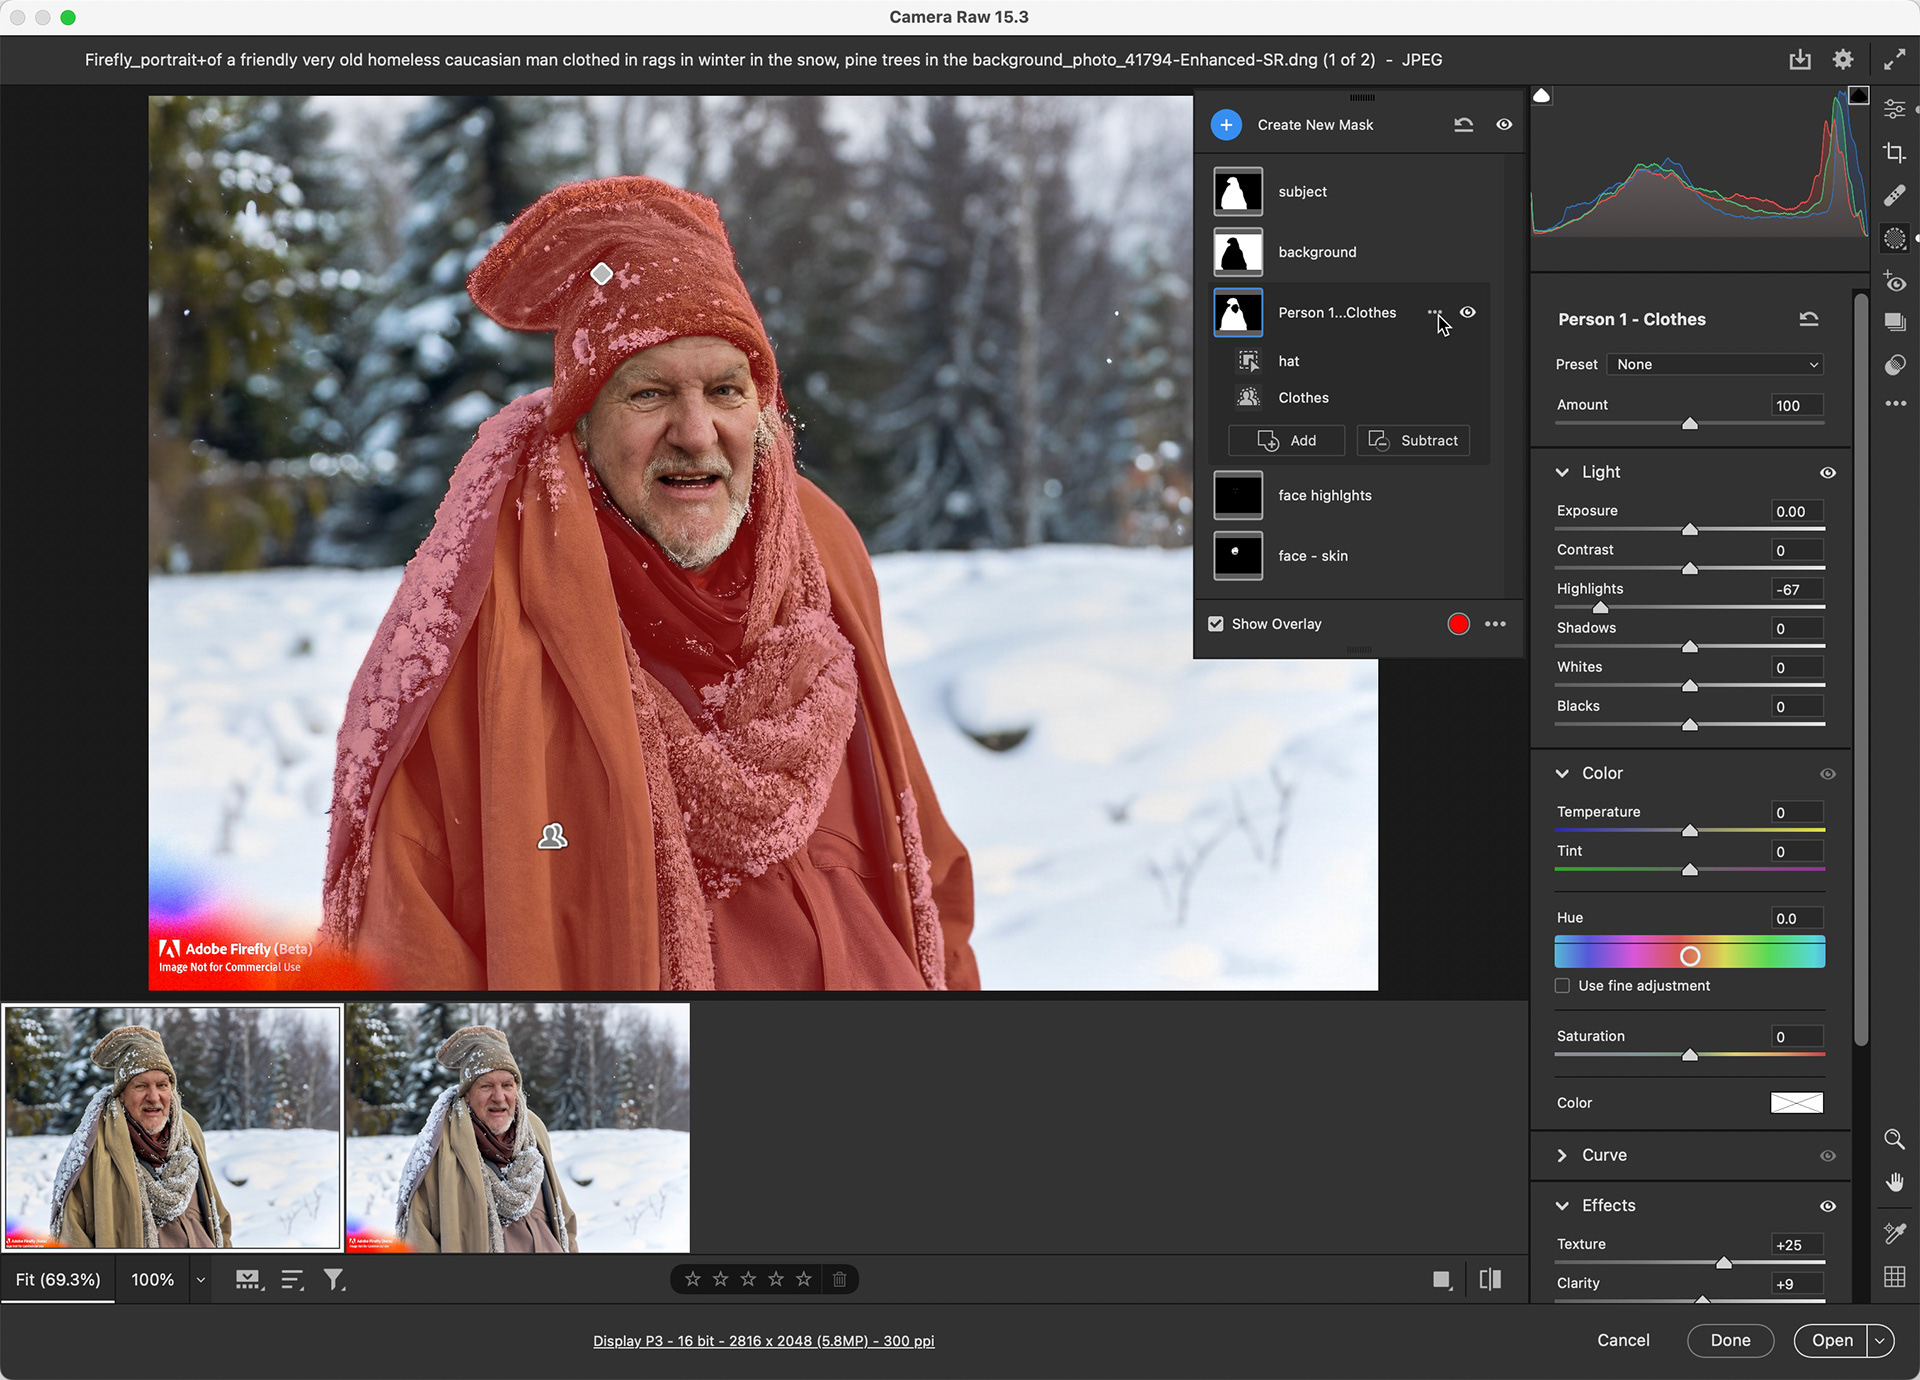
Once you've applied your masks, make your adjustments as desired. I brightened the teeth and eyes, smoothed out the facial skin and added some clarity and texture to the clothes.
For my example image I also created a background mask to blur and lower the contrast of the background, and a "whole person" mask to tweak the color temperature and tint of the old man.
Let's recap: at this point, I have a visually optimized image that is double the size of the original file (1408x1024 --> 2816x2048). ACR Enhance will not allow me to reapply Super Resolution to this file.
However...
If I export this resized image as a TIF file (no data loss when compared to jpeg export), I can then invoke the Enhance tools on the new TIF file. This workaround will give you a new image that is quadruple the size of the original (1408x1024 --> 2816x2048 --> 5632x4096).
Now, I'm not necessarily recommending this workflow, and the quality results will like vary from image to image, but it could be worth a try if you want to stay within an Adobe-based workflow and need an even larger image. In my case, on screen at 100%, I could see artifacting. Would that show up in print? On canvas, perhaps not, on photo paper at 8x10 reproduction size, you might notice if you were looking for it, especially because a face is involved. I don't think a casual viewer would notice.
Of course, you could skip this extra, unsupported step and take the additional upsizing to Photoshop - which has also gotten much better at upsampling. Speaking of which...
Final Touches in Photoshop
If you have access to the publicly available Photoshop Beta (hint: check the Creative Cloud Desktop app), you also have access to the new and truly magical Remove Tool. Think of it like a wonderful combination of the Clone Stamp tool and the Healing Brush tool, but without all that annoying pixel sampling.
To quote a recent posting from Meredith Stotzner:
"Use this tool to remove any distracting regions or elements, no matter how small or large.
Simply brush this artificial-Intelligence-powered tool over objects and people to make them disappear… as if they were never there.
Complicated backgrounds and structures, such as fences or edges are seamlessly completed."
In my case, I wanted to remove the Firefly moniker in the bottom left to test of the effectiveness of the new tool. As you can see in the video below, it did pretty well on the first go round. A couple more minor tweaks with other tools like the healing brush and Clones Stamp and in minutes I had an excellent result.
If you don't have access to the Photoshop beta, don't worry; you can still use tools like Content Aware Fill, Patch Tool, Clone Stamp and Healing Brush to get a similar effect. it just might take a little longer.
IMPORTANT: Remember that Firefly is currently in beta. The Firefly moniker on your image is there as a reminder that Firefly content cannot currently be used for commercial purposes.
Sharpening
Super Resolution does use AI to boost the size and maintain quality of the image, but when you don't have an original RAW file to work from, things might not be as sharp as you want. So far, we don't have a true AI Sharpen tool in ACR, but, based on the new AI Denoise feature, I'd expect that capability is only a matter of time.
So, for now, while you're in Photoshop, you could also try applying a High Pass Filter to a duplicate layer to sharpen things further.
Create a new duplicate layer by pressing Ctrl/Command+J.
With the new layer selected, make sure it's at the top of your layer stack.
Set the Blend Mode to Overlay
Go to Filter > Other > High Pass
Adjust the radius to taste. You can probably go to a higher value if you don't have people in your scene. I only went to a value of 3. Your mileage may vary.
Click OK and then adjust the layer's Opacity to dial in just enough of the filter effect. I settled for about 40%. Any higher and his face started to look a little - umm - crunchy is a good descriptor.
Lastly, if necessary you could also apply some traditional sharpening to the original layer. Remember, the High Pass layer above will impact that sharpening effect to some extent.
From here, it's just a matter of exporting the final file out in your desired format.
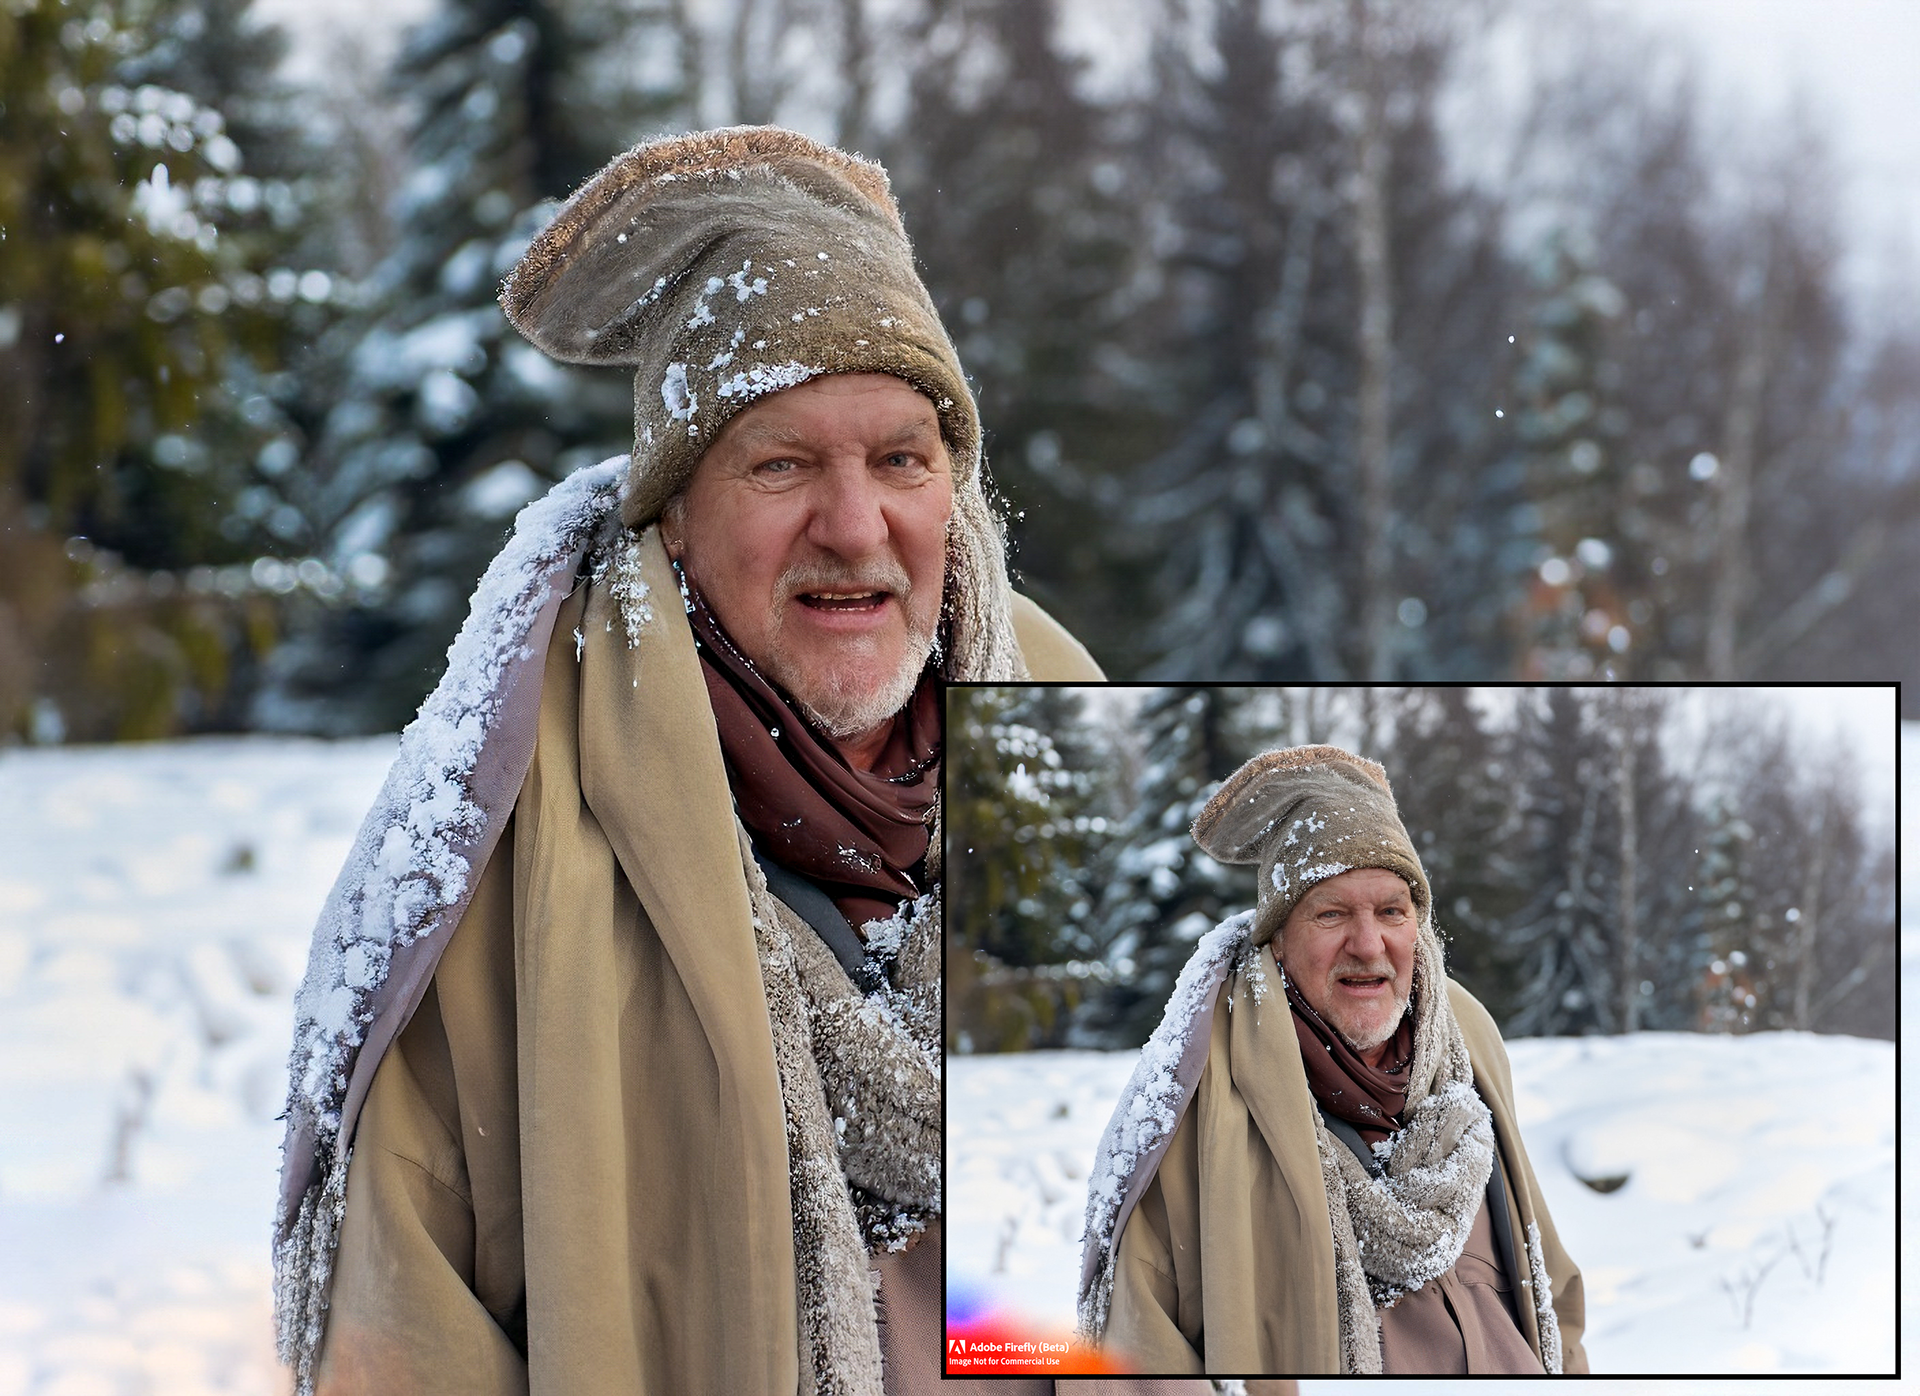
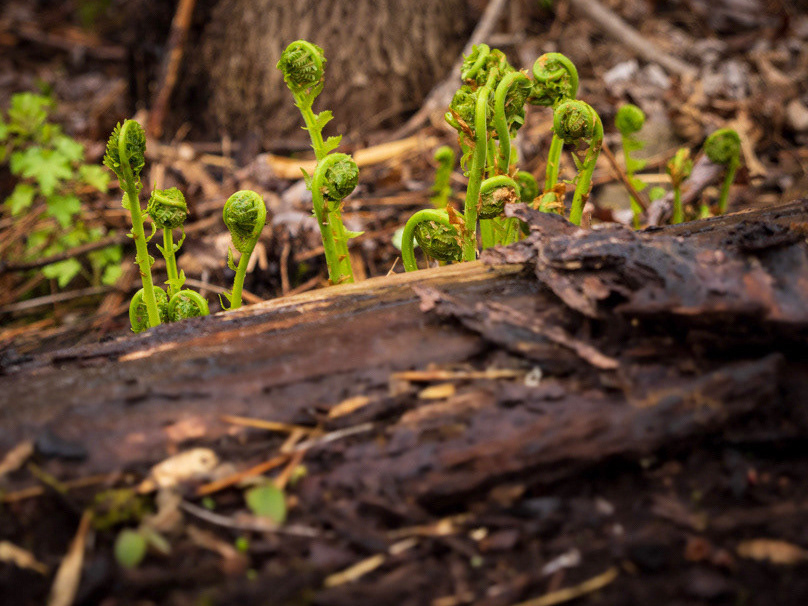
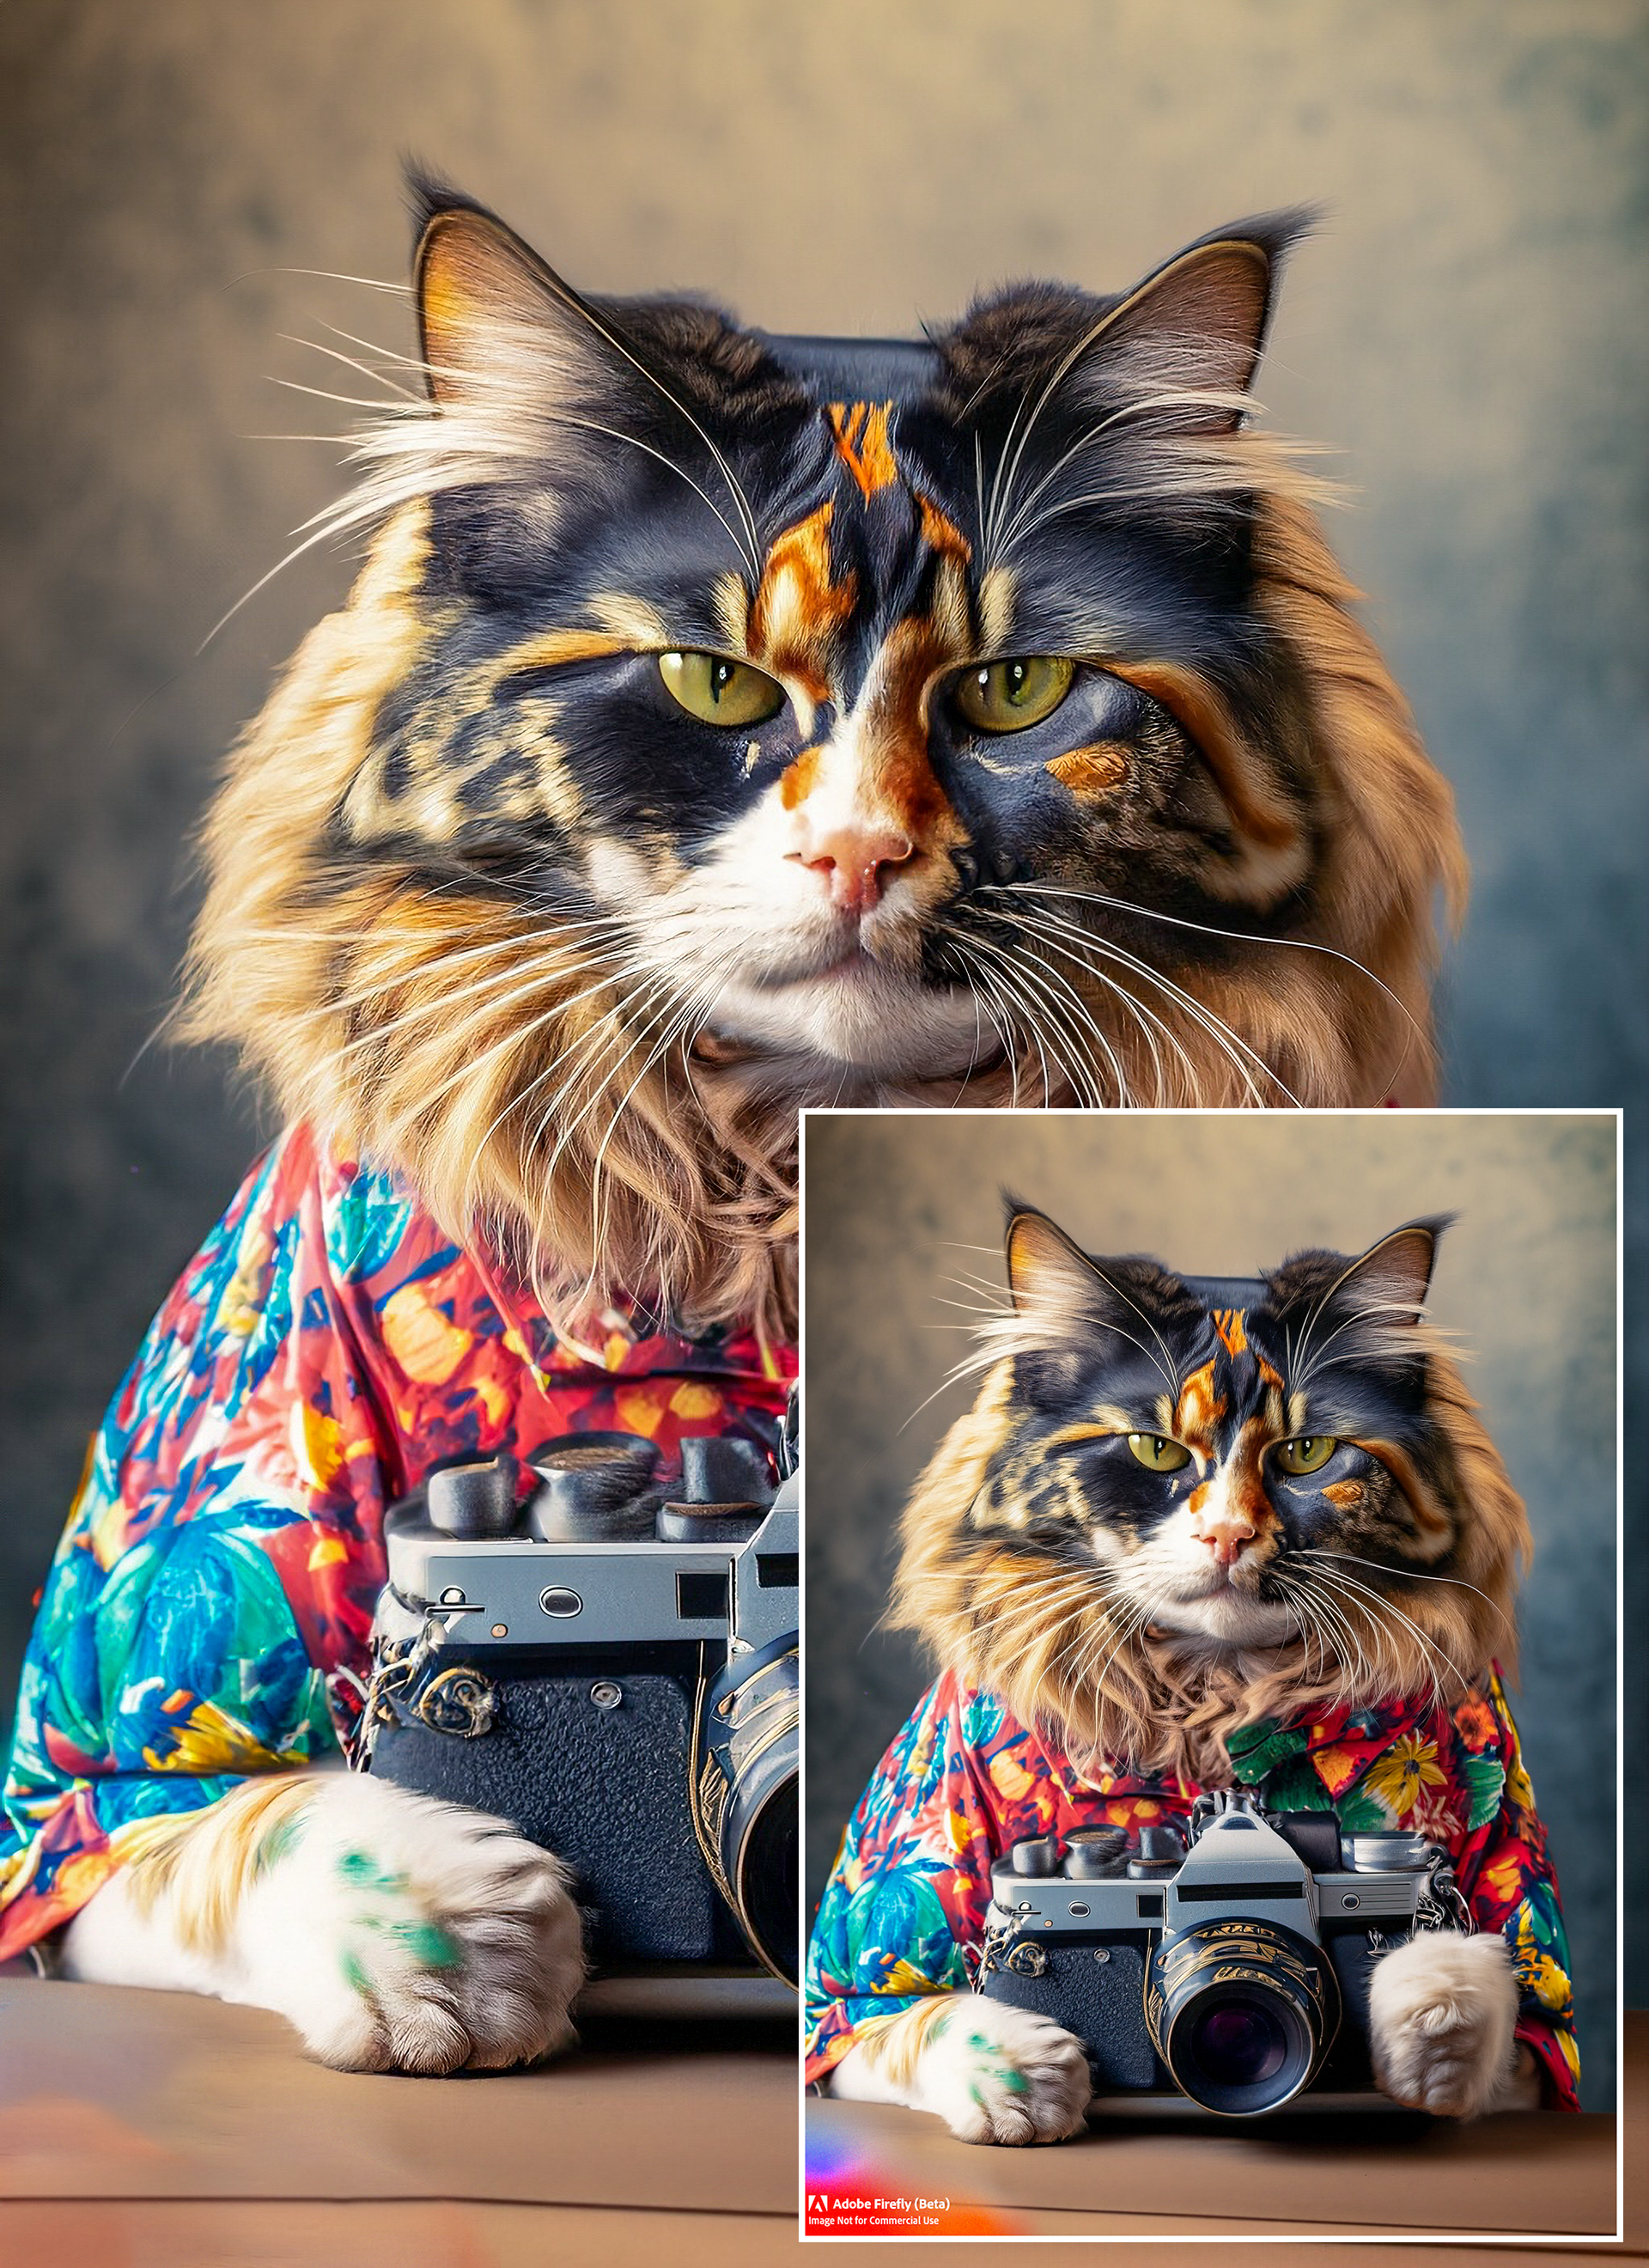
Original Firefly generated image in the lower right, compared to the larger version created with Super Resolution and Adobe Camera Raw, and processed further in ACR. Not too bad, consider how easy the process was.
Wrap up
I hope this article has opened your eyes to a new workflow, one that uses tools you already own and don't need to learn.
I like the fact I can stay in a single ecosystem to get this result, and that the result is in my humble opinion quite acceptable.
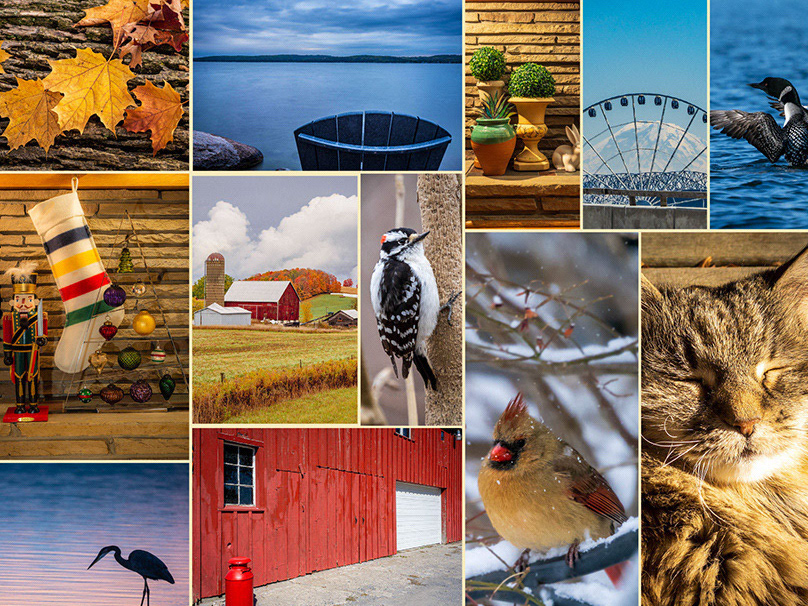
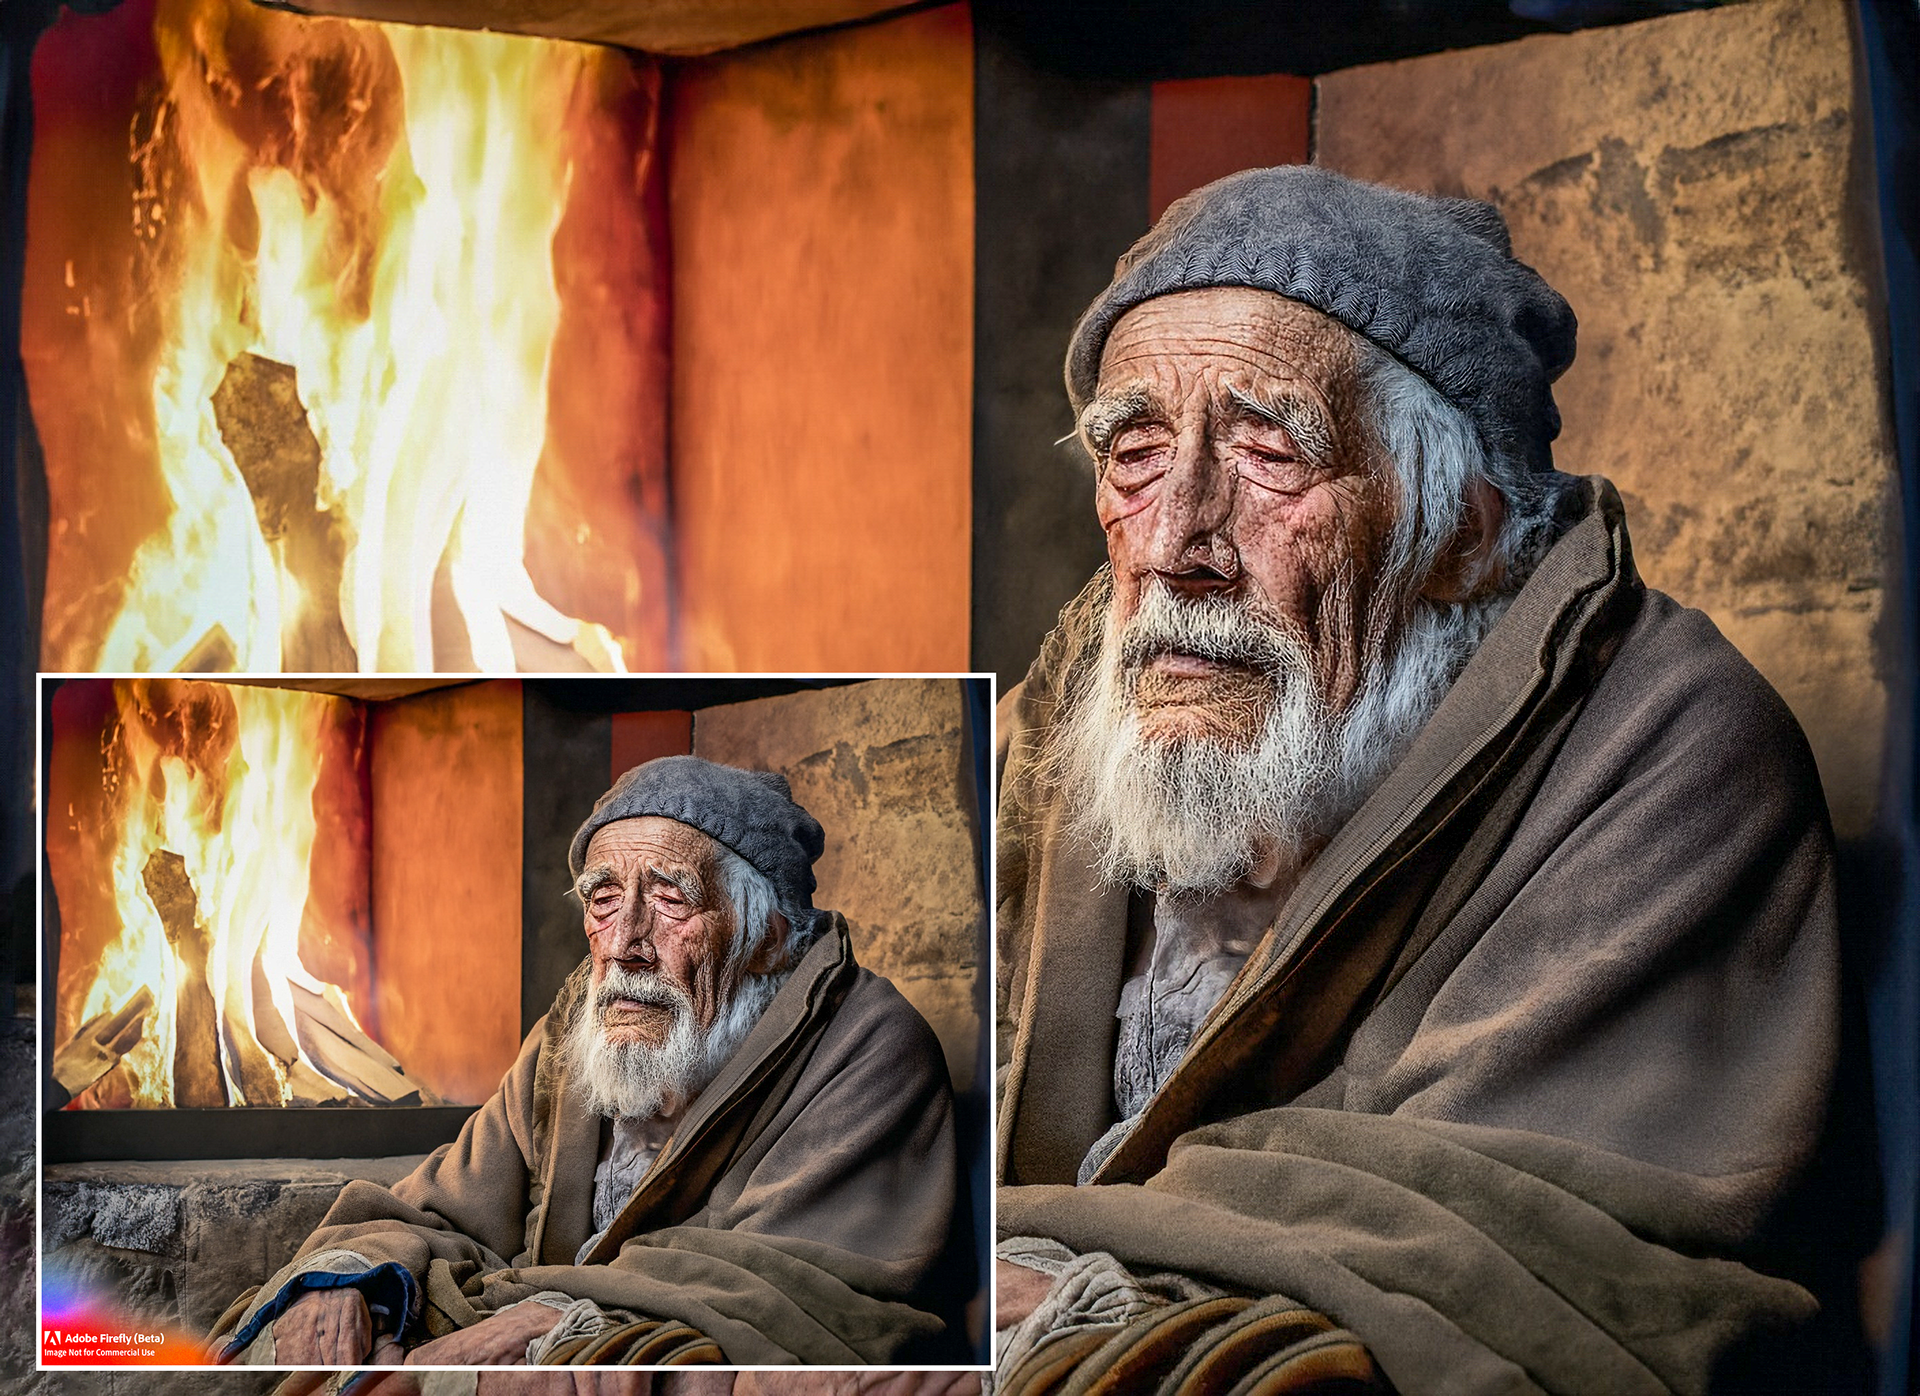
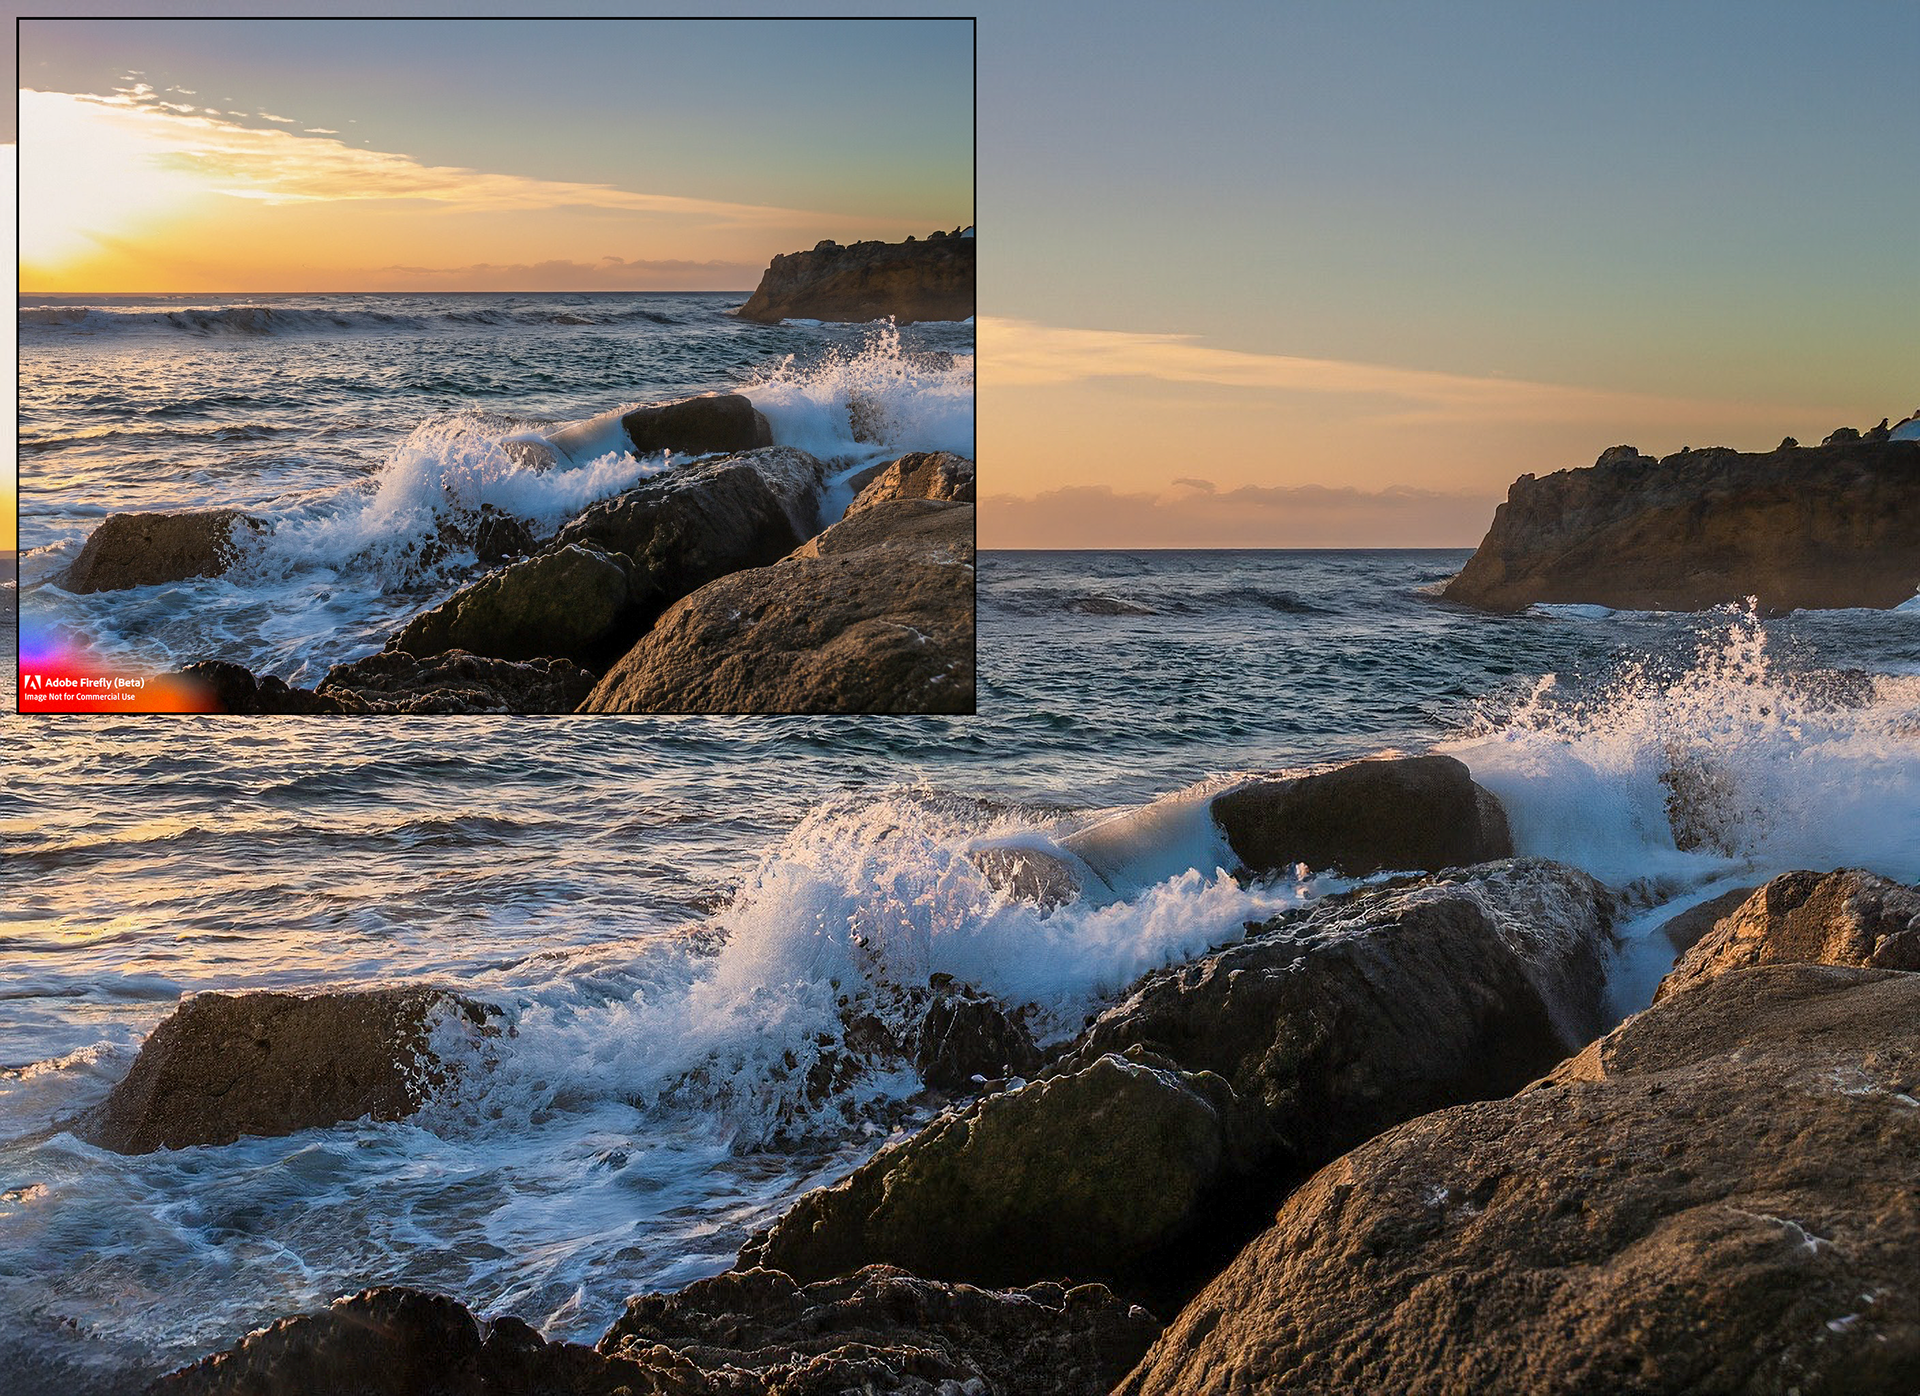
I've been having some fun with the process, as you can see from the examples below.In each case, I have inset the original, smaller file into the larger, enhanced version, for comparison.
Until next time!
Other Resources
I get that Adobe is not the only game in town when it comes to AI, or increasing the resolution of Gen-AI artwork. And I've learned a lot from watching other skilled artists share their knowledge. Below are a couple videos that I found particularly helpful.