Continuing to experiment with HDR, I recently went a different direction while on a business trip to Stanford University. I was lugging gear for a presentation, so I chose not to bring my DSLR with me. I had NO idea how beautiful a campus Stanford would be though. I couldn't help but take pictures even if I just had my iPhone.
If you follow me on Twitter or Instagram or Facebook, you've seen some of my the shots I captured while on the Stanford U campus, like the one above, which is also the subject of this project.
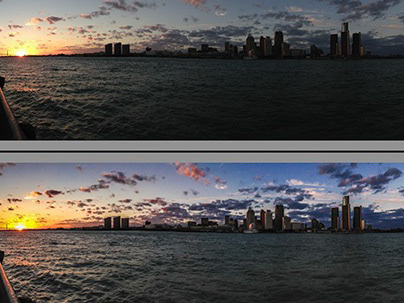
The image below is the final HDR image, created from three handheld iPhone shots at different exposures. Let's see how this result came to be.
I made three shots:
1 exposure for the highlights
1 for the shadows
1 iPhone HDR exposure for the midtones
If you're wondering how I got different exposures using my phone, I did so by tapping on different areas of the scene, on my phone screen. Tapping near the highlights gave me a better highlight exposure, tapping on the shadowed walkway gave me more detail in the shadows. The HDR was created using the iPhone's HDR feature.
Exposure for the highlights
Exposure for the shadows
HDR exposure for the midtones
Much like my Moraine Lake HDR example, https://www.behance.net/gallery/16215197/Working-with-HDR-a-progression, I selected all three images in Lightroom and merged them in Photoshop's HDR Pro function, saved as a 32-bit image. The result of the HDR merge is seen below. Not very exciting and frankly, the highlights are blown out.
I made several overall exposure adjustments and one problem problem that occurred from this work was the excessive blue cast in the highlight areas of the walkway. At first I was concerned and thought I couldn't get the result I wanted, but then I remembered, I could remove the color cast using a local adjustment brush.
I selected the Adjustment Brush and set the saturation to value to about -80.
The next step was to pull more detail from the shadows. Again the Adjustment Brush came to the rescue. I made liberal use of it as you can see from the mask below.
The final image in all its glory.
What did I learn?
I learned that Merge to HDR Pro can do a pretty decent job of aligning handheld exposures like this example. Because the phone wasn't braced, each original image is slightly misaligned from the other, but you wouldn't know it by looking at this shot. The only real giveaway is the cast shadow in the foreground. I think I can clean this up with Photoshop, though and the Healing/Clone Stamp tools. We'll see . . .
As with any HDR image I'd take the time to shoot with my DLSR, taking more exposures would have been a good idea. Doing so might have resolved the blue cast I was getting in the walkway.
This image might also be a good candidate for Luminosity masks. Ah, another project!

