Using Generative Remove in Adobe Lightroom
Welcome to another installment in my series on practical generative AI for photographers!
Some very exciting updates came to the Lightroom ecosystem this May (2024). Arguably, the most evolutionary of these updates was the introduction of Adobe Firefly into Lightroom, in the form of Generative Remove.
Available as an Early Access feature in Lightroom Classic, Lightroom Desktop (CC), Lightroom Mobile and even Lightroom Web, Generative Remove uses Adobe Firefly to replace visual distractions in images at a very high level of realism, and with no input other than a brush-based selection. And it does a pretty good job!
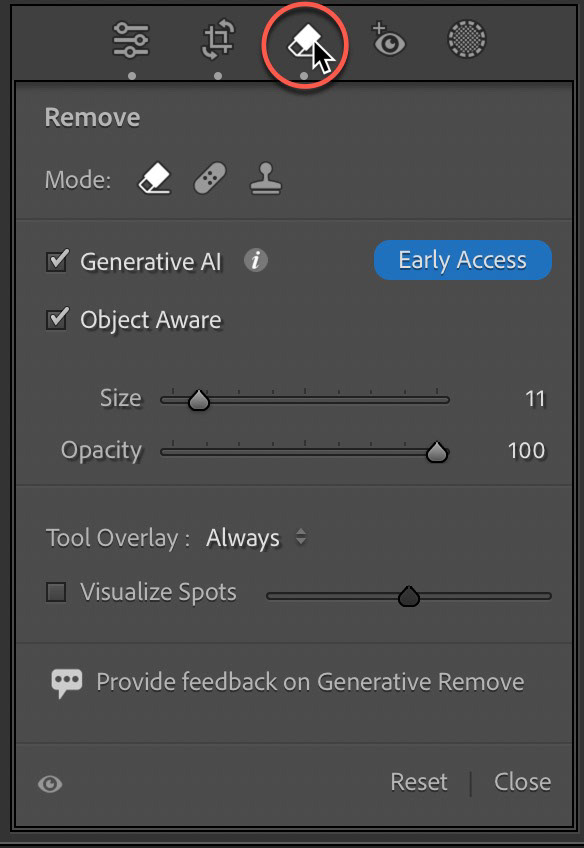
In Lightroom Classic, access Generative Remove by pressing the "Q" key or tapping the Eraser icon. Enable the feature by checking the Generative AI checkbox and then use brush to paint over the are you want to replace.
You can also enable Object Aware to fill in the selection without having to paint the entire object.
After painting, the area is analyzed, and then you can add to or subtract from the selection, or simply click Apply.

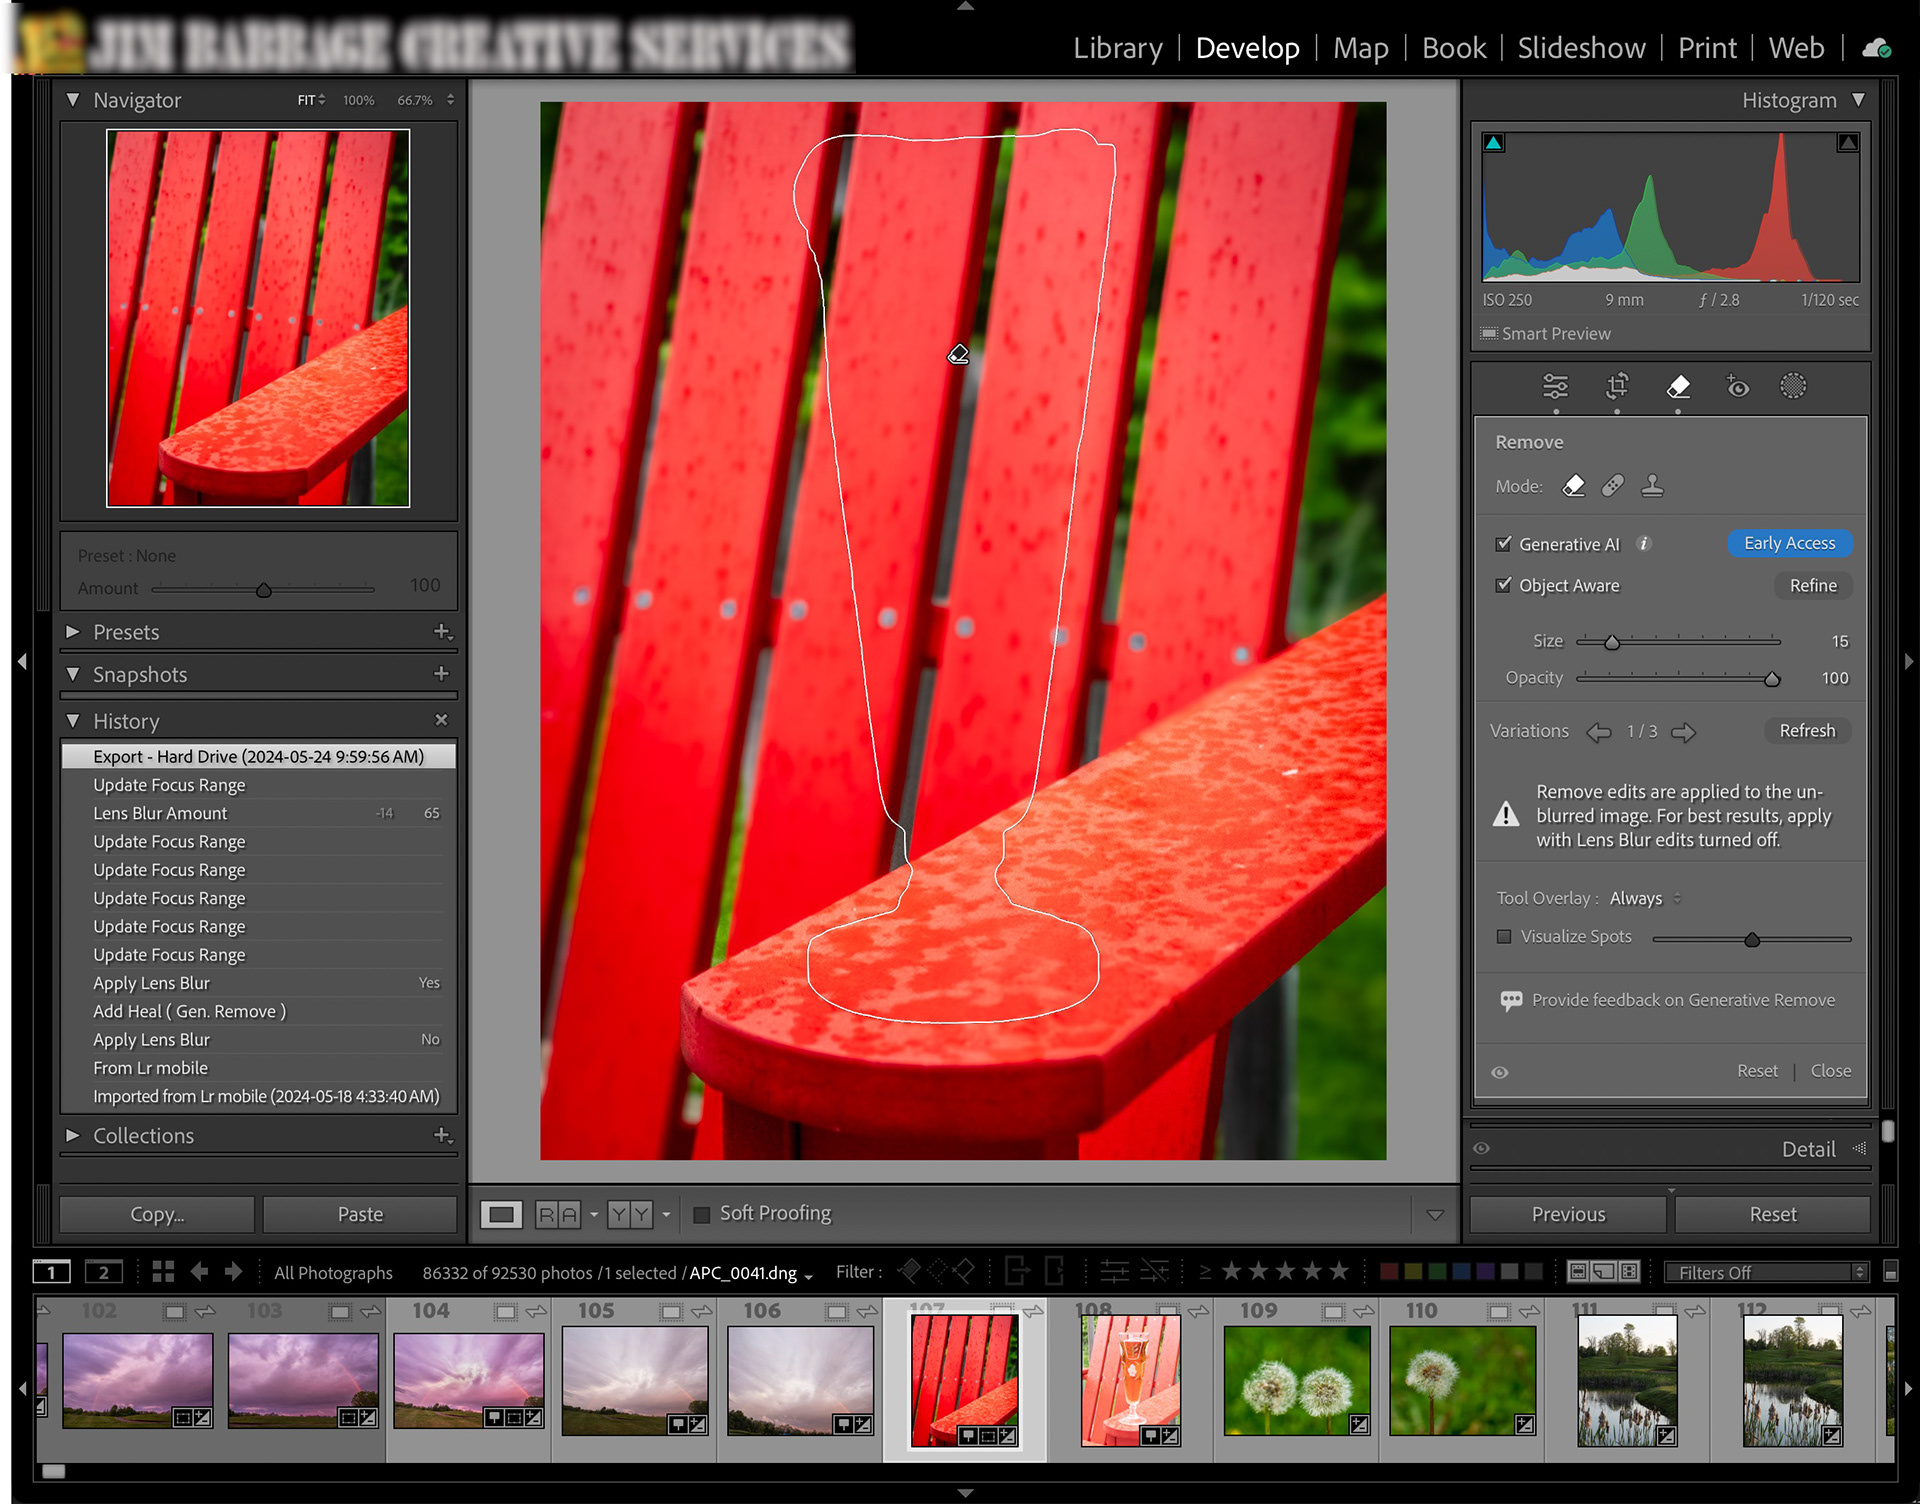

A deceptively simple image, but one where the viewer would immediately notice issues with a poor replacement. Frankly, I'm not good enough with the Clone Stamp and other retouching tools to manually remove something like this glass from the photo. But Lightroom Generative remove pulled it off on the very first try.
This video shows how quickly and effectively Generative Remove can remove an object from a photo.
Improving Compositions Using Generative Remove
I really liked this photo in the series below, but ended up not liking the wooden stump in front of the old ladder. In image 2, I used Photoshop, Generative Fill and a smidge of the Clone Stamp tool. In image 3, Gen Remove had just been added to Lightroom. I tried Obect aware first, but while the stump was accurately selected, the shadow was ignored, resulting in LIghtroom/Firefly replacing the stump ...with a different stump. In the final image, I added to the selection to include the shadow and the result was impressive, to say the least.


In the quick grab shot below, I used Generative Remove to rid the image of multiple distractions, including some cottages, dock platforms and even a sign post. While I could select all these objects and replace them in one action, I found better results by making individual selections.
I also used that standard Remove tool - without AI - to clean up a few issues in the sand.


In this final image of the Trillium, I liked the environmental nature of this image; the viewer gets a better sense of the growing conditions for this delicate forest plant. However, I found the thin cedar branch to be both distracting and acting as a strong divider, splitting the image into two pieces. Two separate swipes of the Generative Remove tool resolved those compositional issues.


Wrap Up
In all the above examples, my input as the photographer was critical to improving the images. Generative AI did not recognize or fix the issues independently. I had to decide what elements were problematic and whether or not the tools produced acceptable results. Generative AI, used as another creative and time-saving tool in my software kit, helped me improve and - in at least one case - save an image I would normally just have archived or deleted. I know I will be printing the vintage lantern photo and likely the Trillium photo as well.
I hope you enjoyed this latest installment in my series. I'd love to hear your thoughts on the article and the topic of Generative AI.
Until next time!