Enhance your video's audio using Adobe Podcast
Full disclosure: this tutorial was inspired by by Claudio Zavala's recent video tutorial on the same topic. I decided to try this out with an example containing much poorer audio quality and supply another option for extracting audio.
Unless you're a professional videographer, you might find that you're shooting video with either your smartphone or digital camera using that device's built-in microphone. While convenient, typically the audio quality is not great - there is often a lot of ambient noise and - depending on your distance from your subject - the audio might even be quite low in volume. You watch the video later and might think, aww if only the sound was better, I'd share this!
Case in point, here's a snippet from a workshop I attended a couple years ago. This recording is - in my view - a pretty good example of poor quality audio, recorded using my iPhone's built-in microphone. There was at least 15 feet between me and the camera.
Example of poor quality audio captured by a smartphone
The audio in this footage was SO bad that I just ditched the whole clip and recorded the audio separately, using a montage sequence of video and still images to tell my story.
Yes, I could have cracked open Adobe Audition and spent time cleaning the audio up, but I didn't think it was going to be worth the effort in the long run.
Well, a couple years later, enter a new service - Adobe Podcast. While the main web app is still in beta (you can request access), there is a free Quick Tool you can use to improve spoken audio, called Enhance Speech. Using Adobe's AI (Sensei), it can clean up virtually any speaking voice.
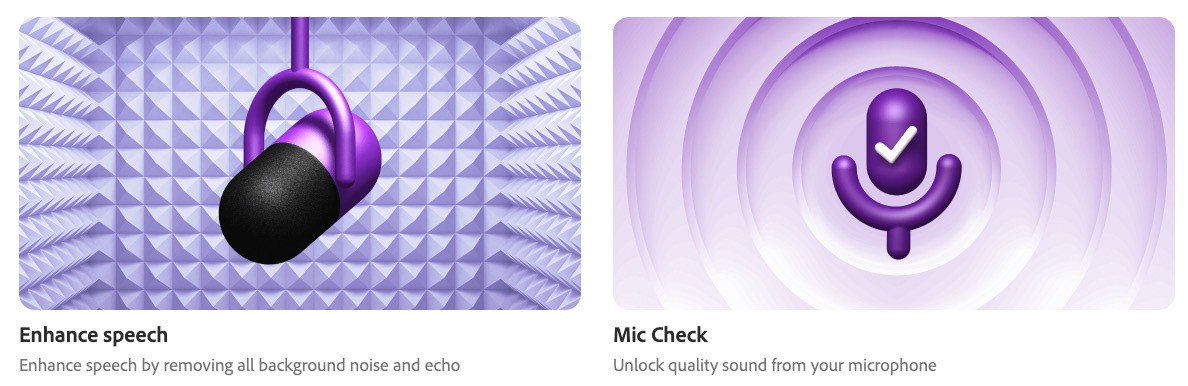
Adobe Podcast comes with two free utilities, Enhance Speech and Mic Check
Have a listen to the same footage after the audio was run through this tool and synced back into the video footage.
Audio cleaned up and enhanced by Adobe Podcast.
In this second example, you're no longer straining to hear me, or even concerned about the audio quality. You're probably being more picky about the composition and lighting of the footage. But that's a story for another day...
Workflow
Extract the Audio
Once you have the footage on your computer, you need to extract the audio from the video clip and convert it to MP3. The Enhance Speech tool currently only supports MP3 format. There are several ways to do this; I'll share two of them.
Use Quicktime
If you're on a Mac, this is probably the easiest way to pull audio out of a video clip.
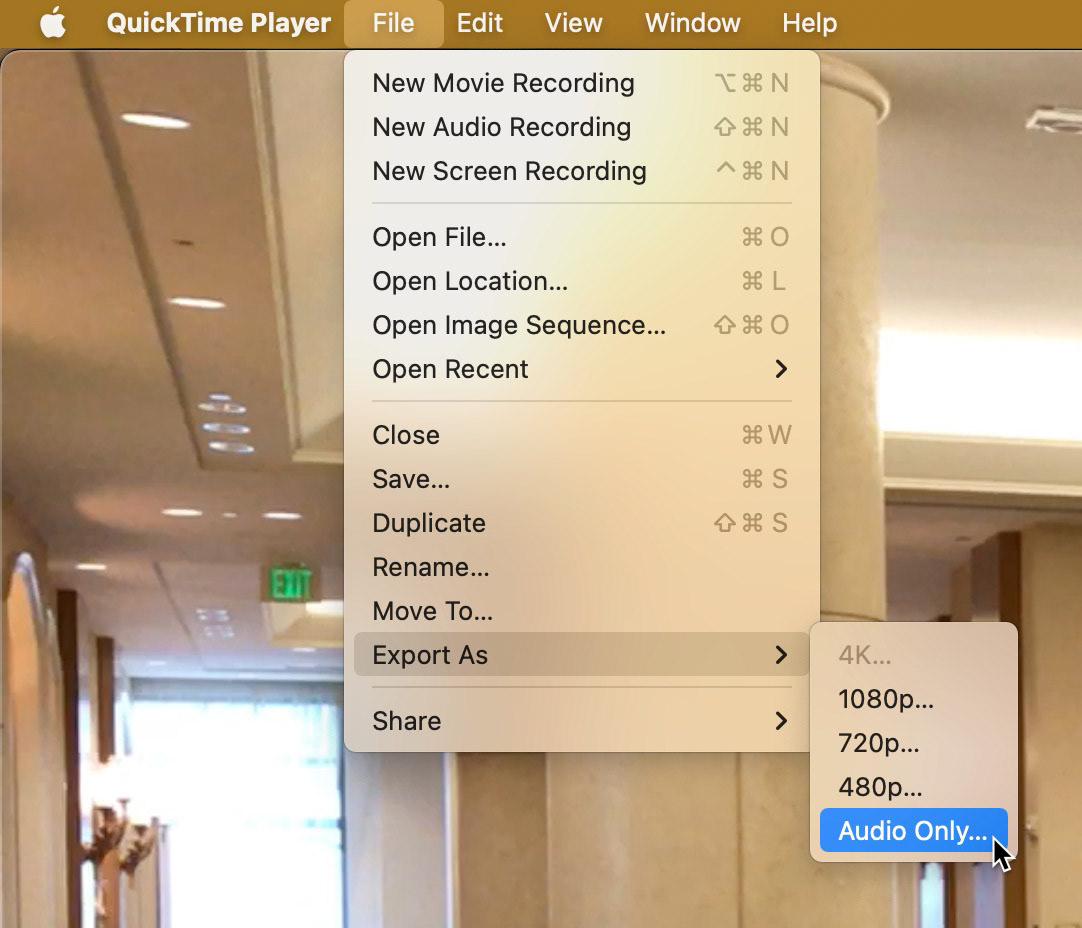
1. Open your video in Quicktime
2. Choose File > Export As > Audio Only.
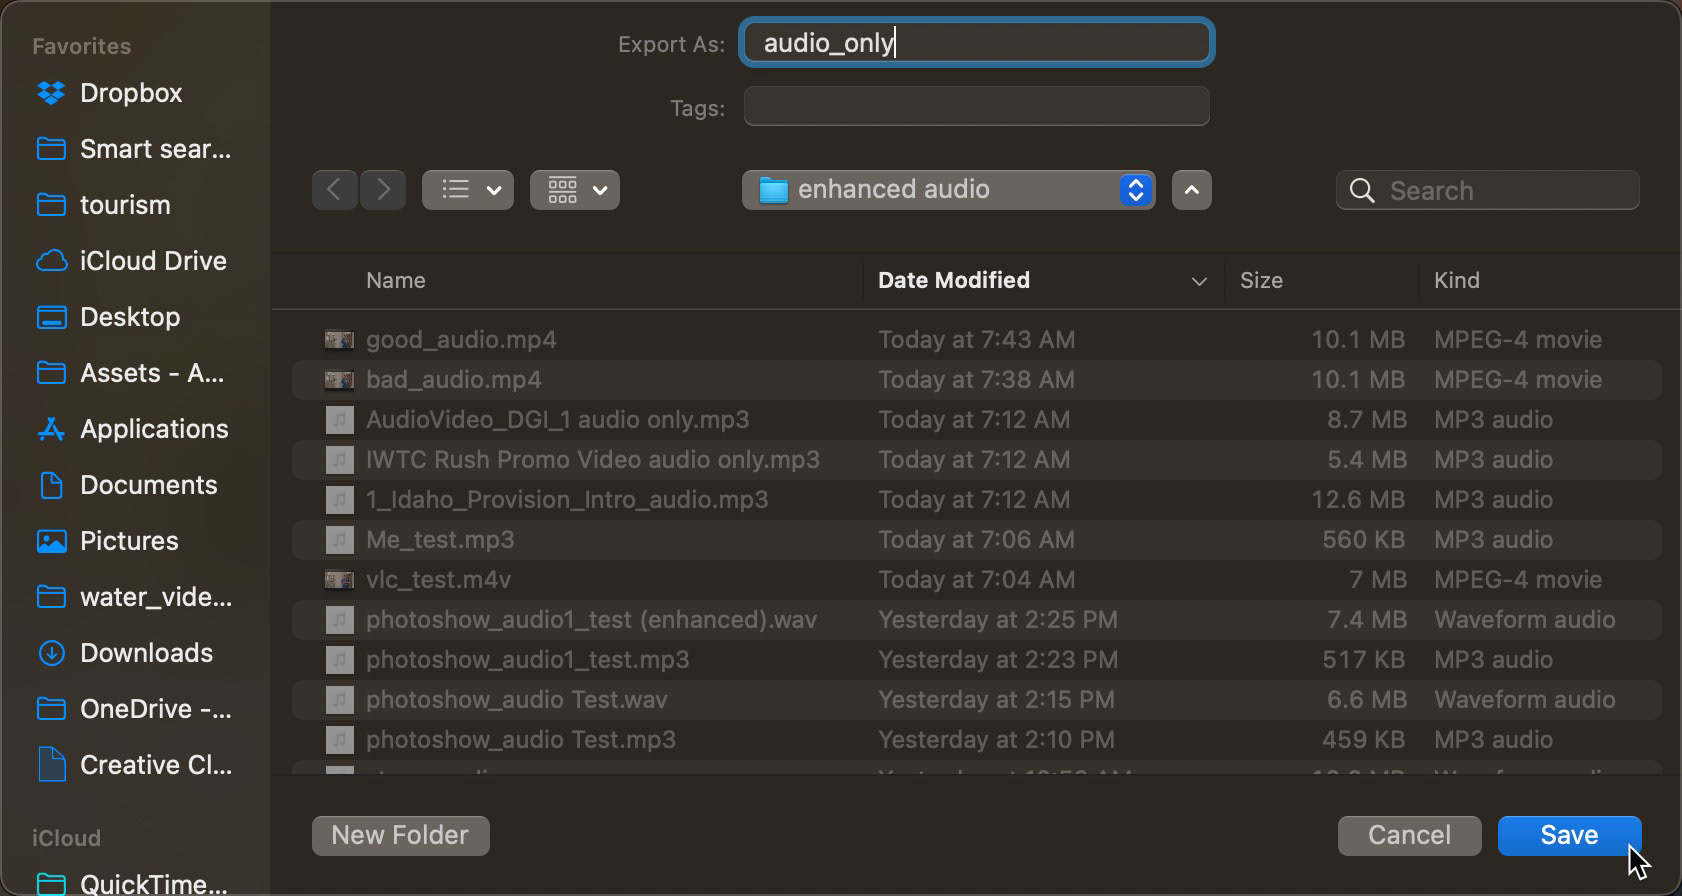
3. Rename and save your file accordingly. Quicktime will only save your audio as an M4A file.
Convert the file format to MP3
1. Locate your newly extracted audio in the Finder.
2. Click once on the file as if you are going to rename it.
3. Select the file extension and change it from M4A to MP3.
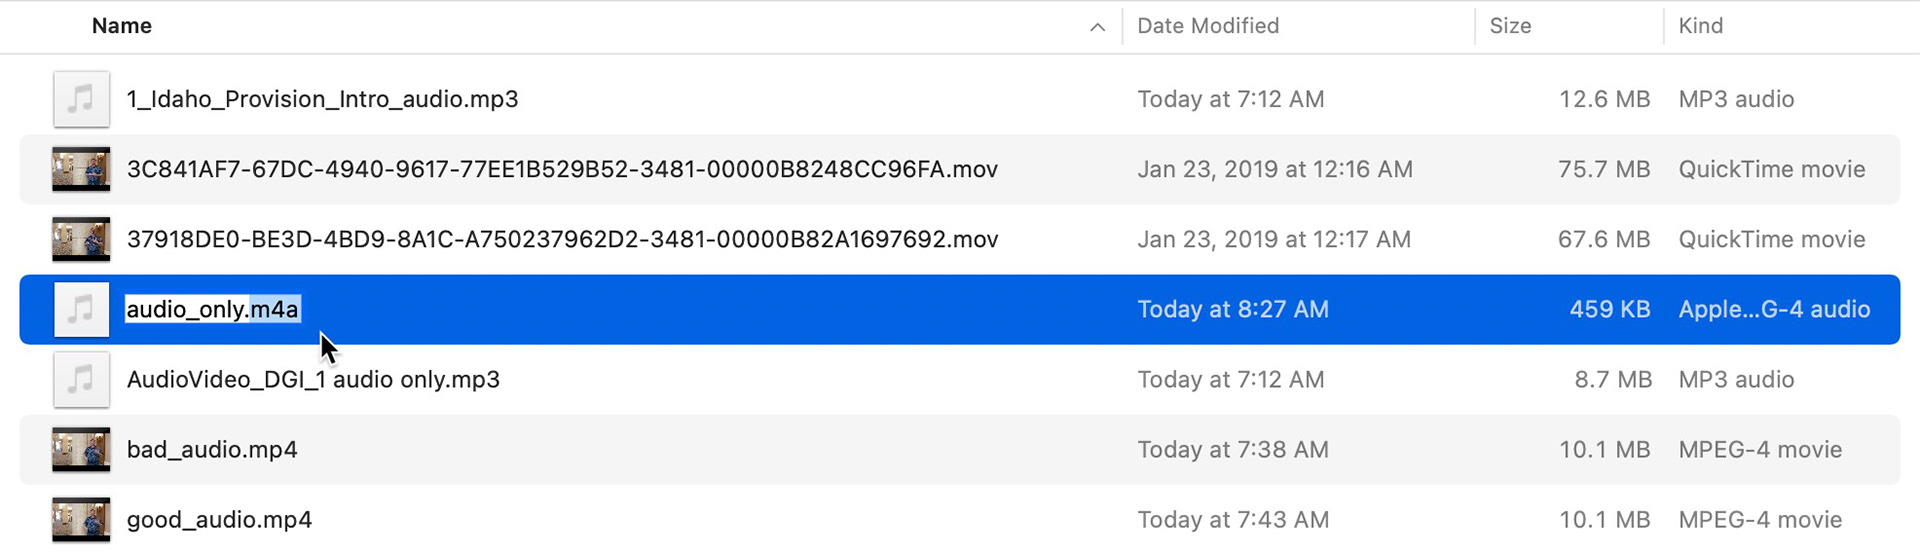
Selecting the file name extension M4A
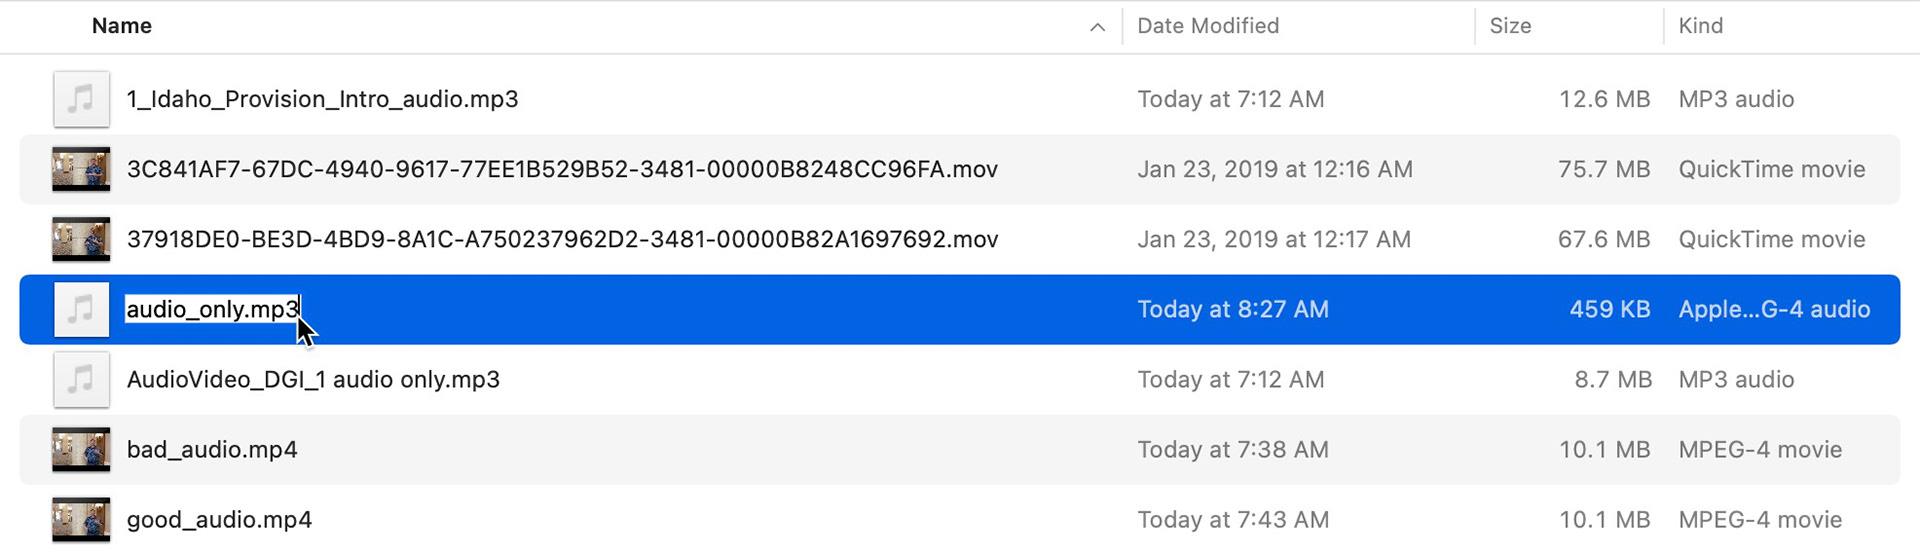
Changing file extension to MP3
4. When you tap return to lock in the change, your Mac will ask you to confirm the the change to MP3. Choose that option. Don't ask me why, but this easy file conversion works perfectly, at least on the Mac.
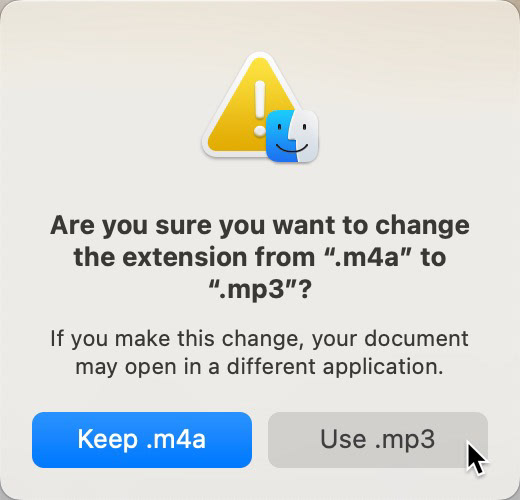
Confirm that you want to use the MP3 file extension.
Alternative Option - Adobe Media Encoder
If the above method does not work for you (it may not work on Windows, for example), you can also use Adobe Media Encoder to extract audio from a video clip.
1. Open Adobe Media Encoder.
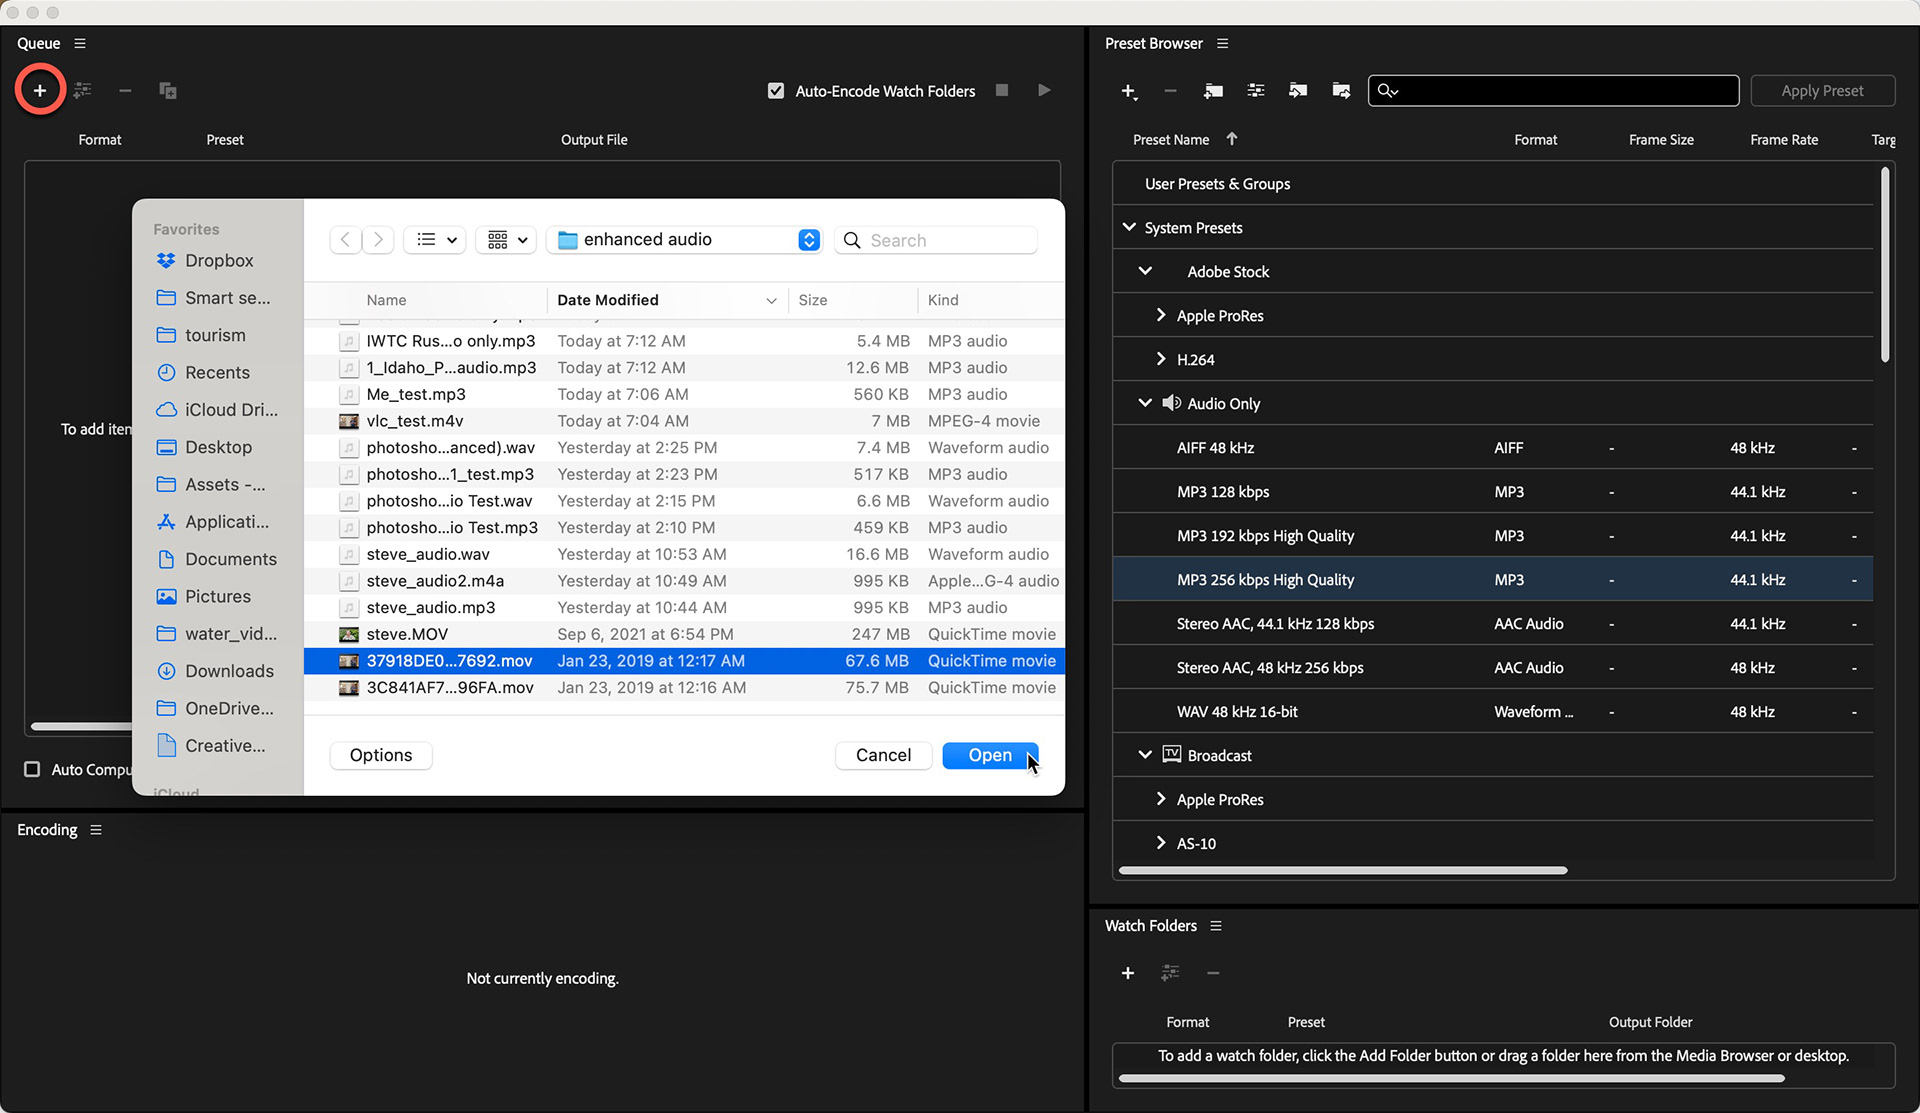
2. In the Queue Window, click the "+" sign and browse for your video file.
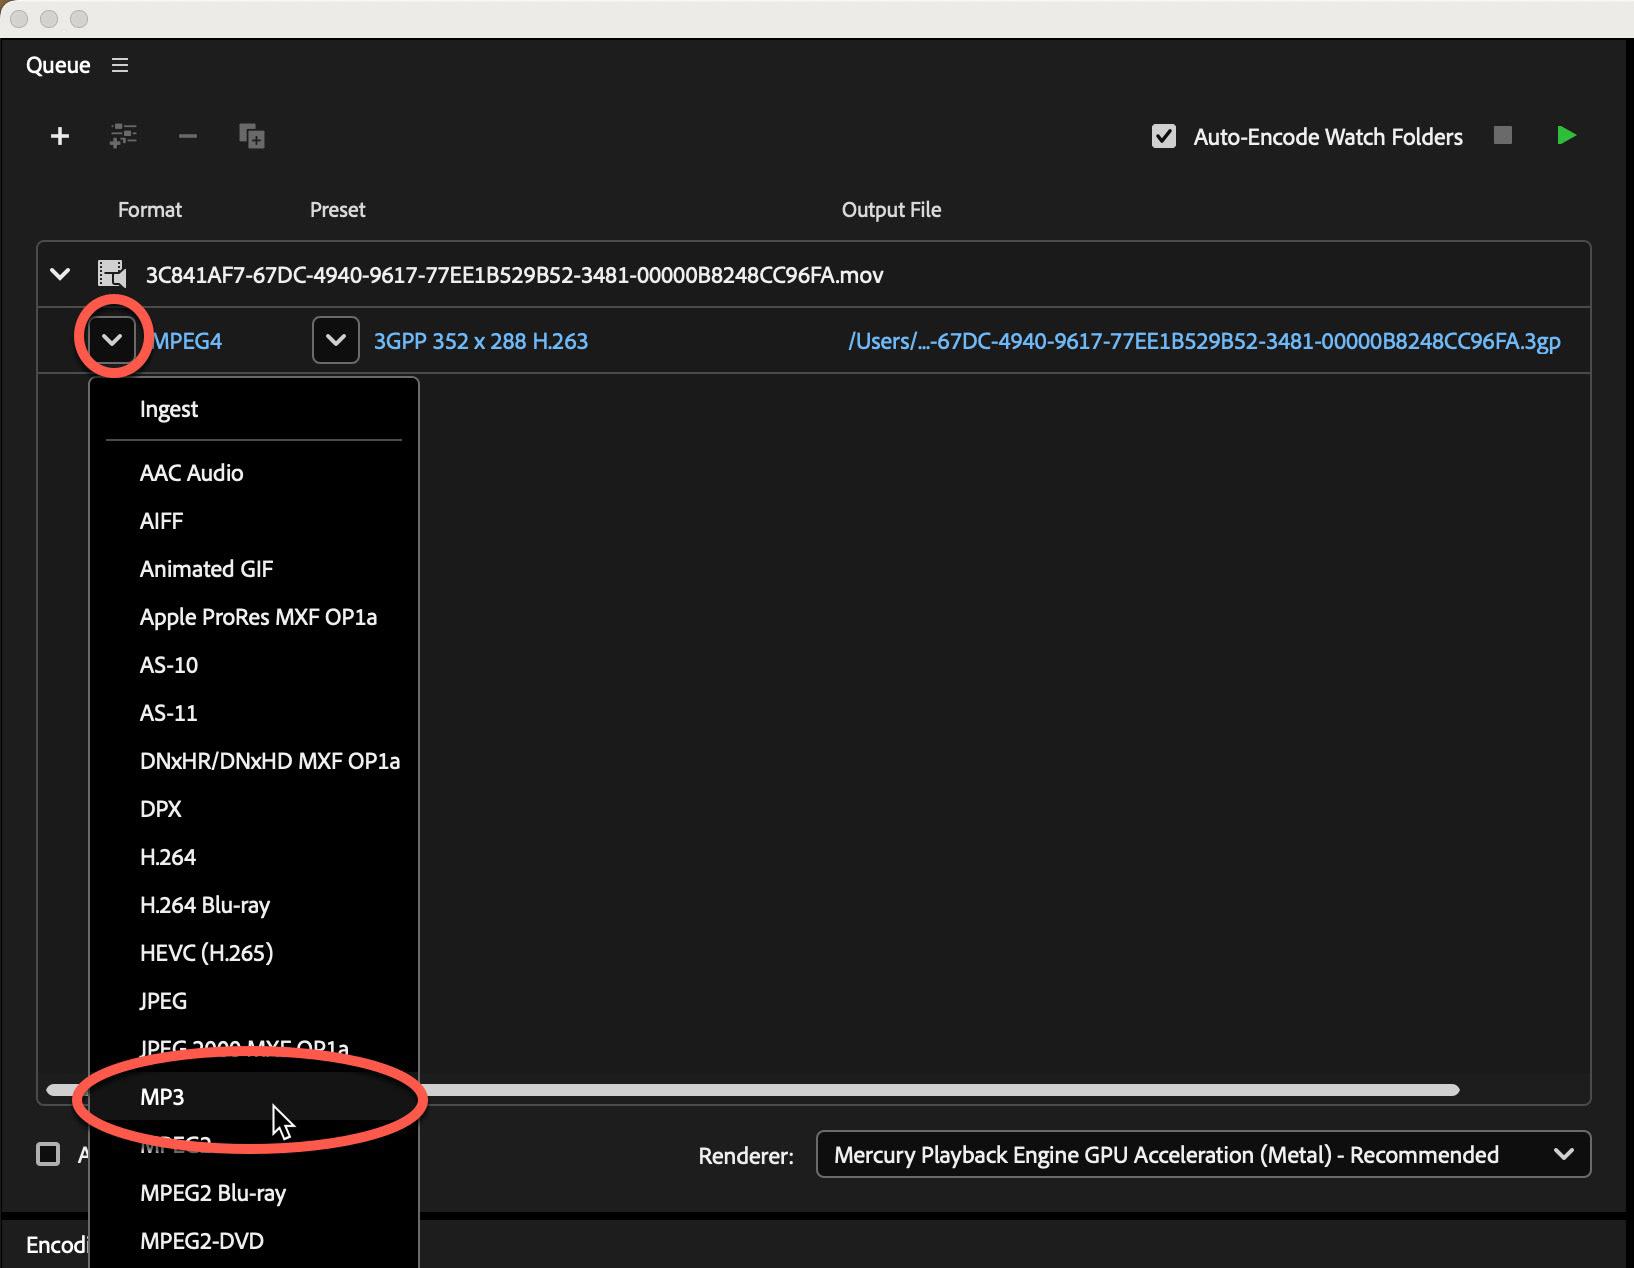
3. Once it's opened in the Queue, change the output format to MP3 by clicking on the Format drop down button
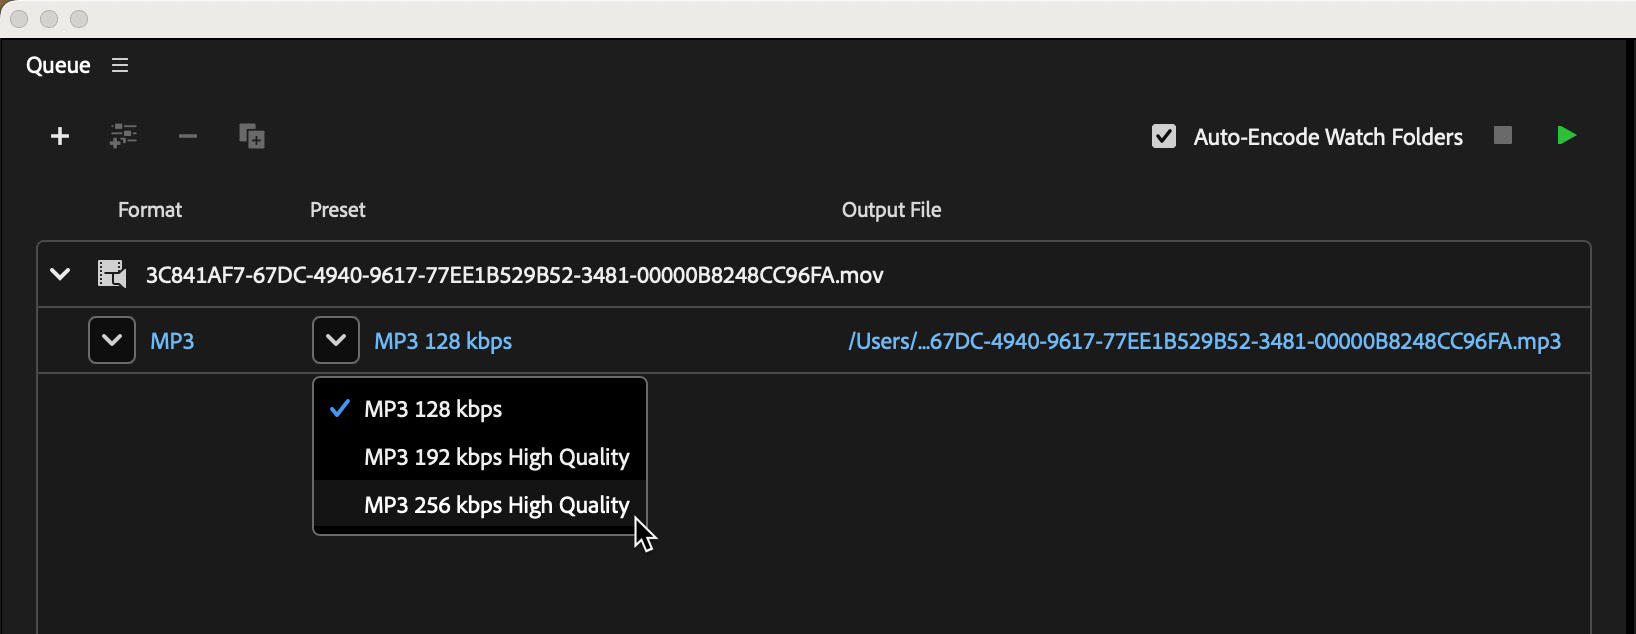
4. Choose MP3 256kps from the Quality Drop Down list. MP3 uses a lossy compression algorithm (like JPEG), so we want the best quality we can get.
5. Click on the file name in the Output File column and choose a filename and location for the new audio file.
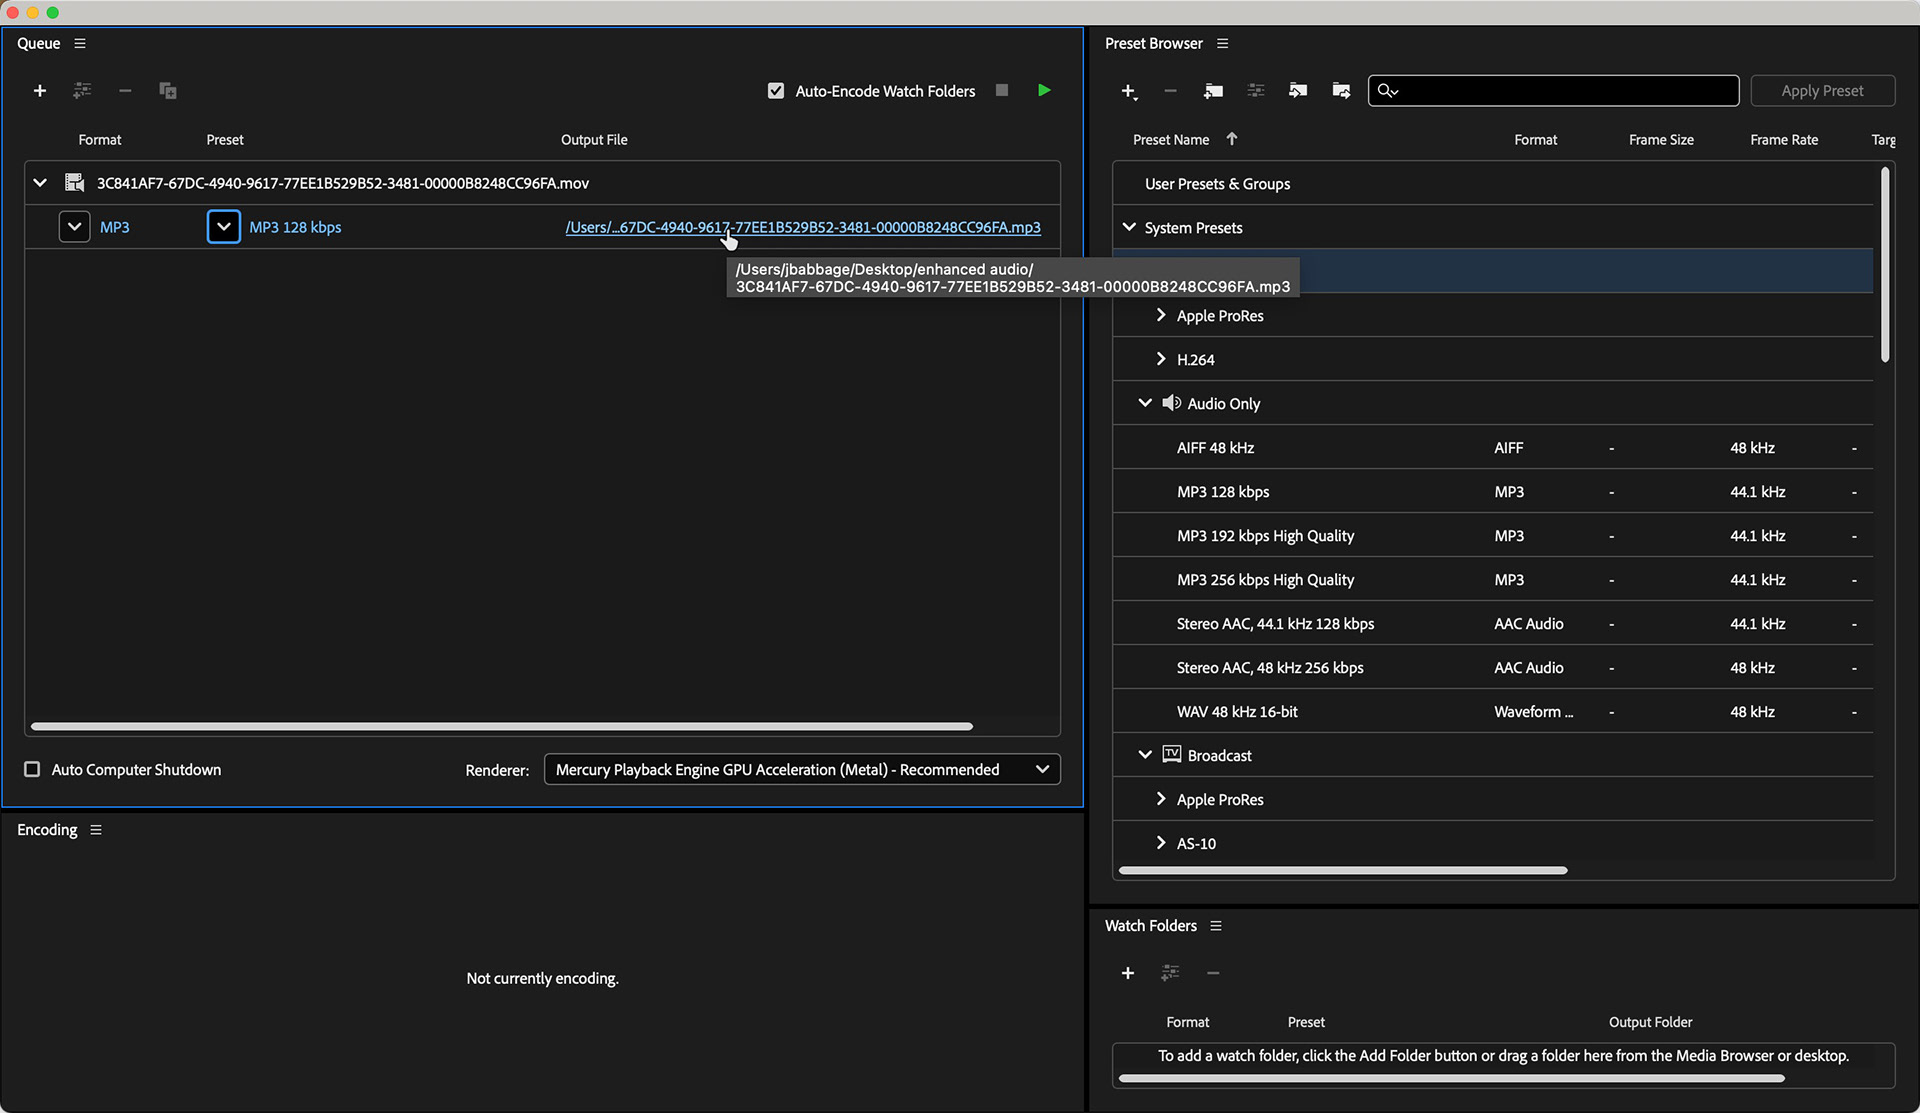
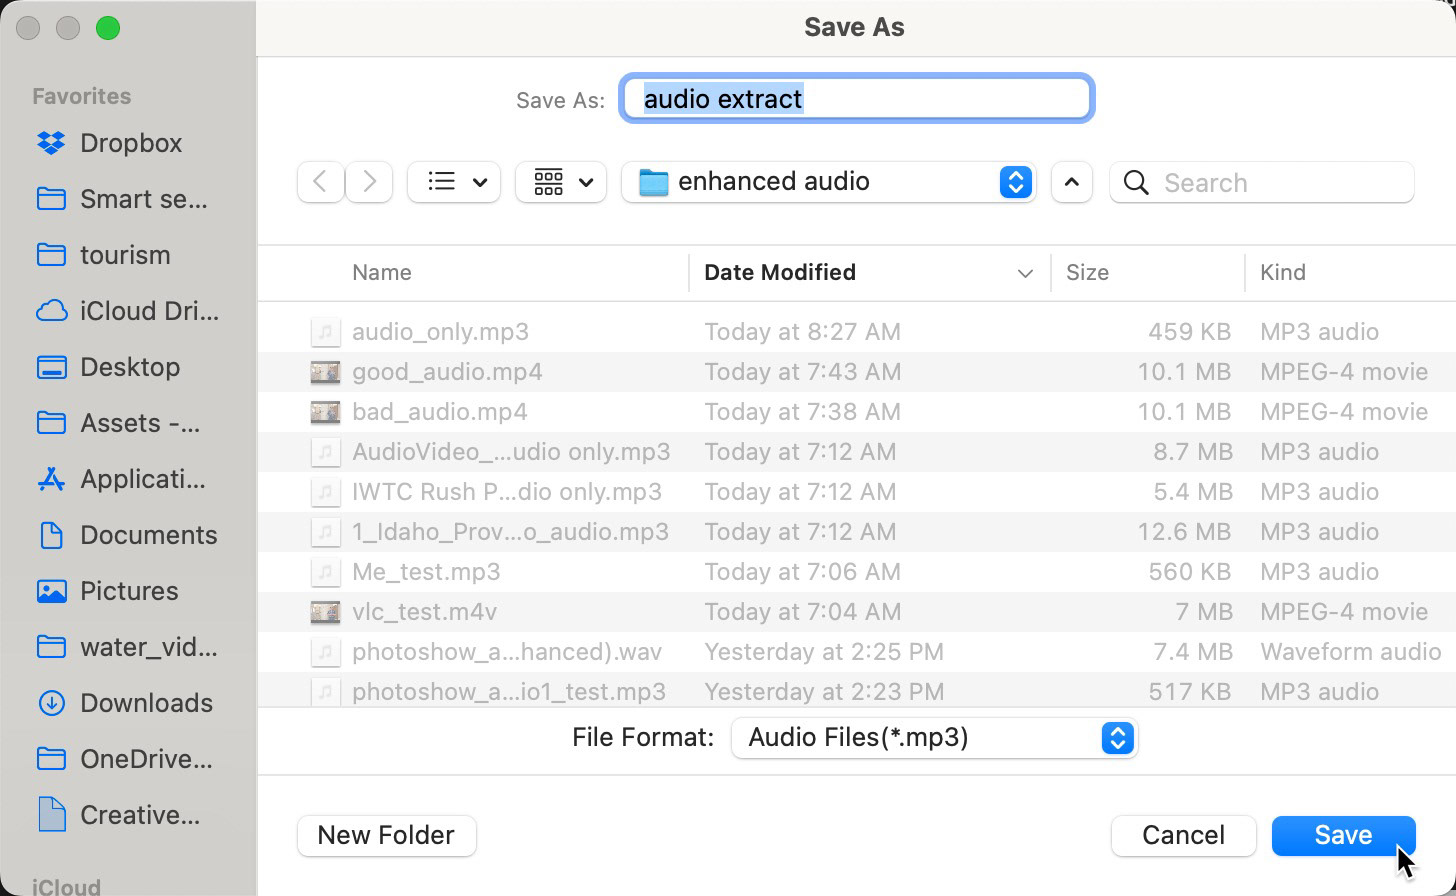
Below is a short video showing the steps.
Short video showing export setting steps to extract audio using Media Encoder.
Tip: Want to learn more about audio formats? Check out this link:
What's the Real Difference Between .wav, .aiff, .mp3, and .m4a?
What's the Real Difference Between .wav, .aiff, .mp3, and .m4a?
Enhancing the Audio
Next you're going to upload your new MP3 file to Adobe Podcast.
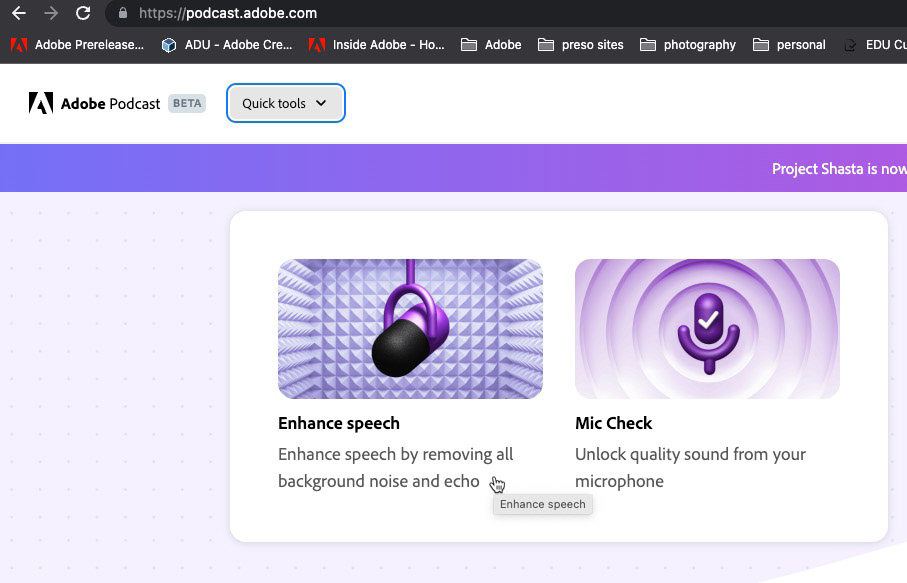
1. In your browser, go to https://podcast.adobe.com/. You may need to sign in with your Adobe ID or school/company credentials.
2. At the top-left of the screen, click on Quick Tools and choose Enhance speech.
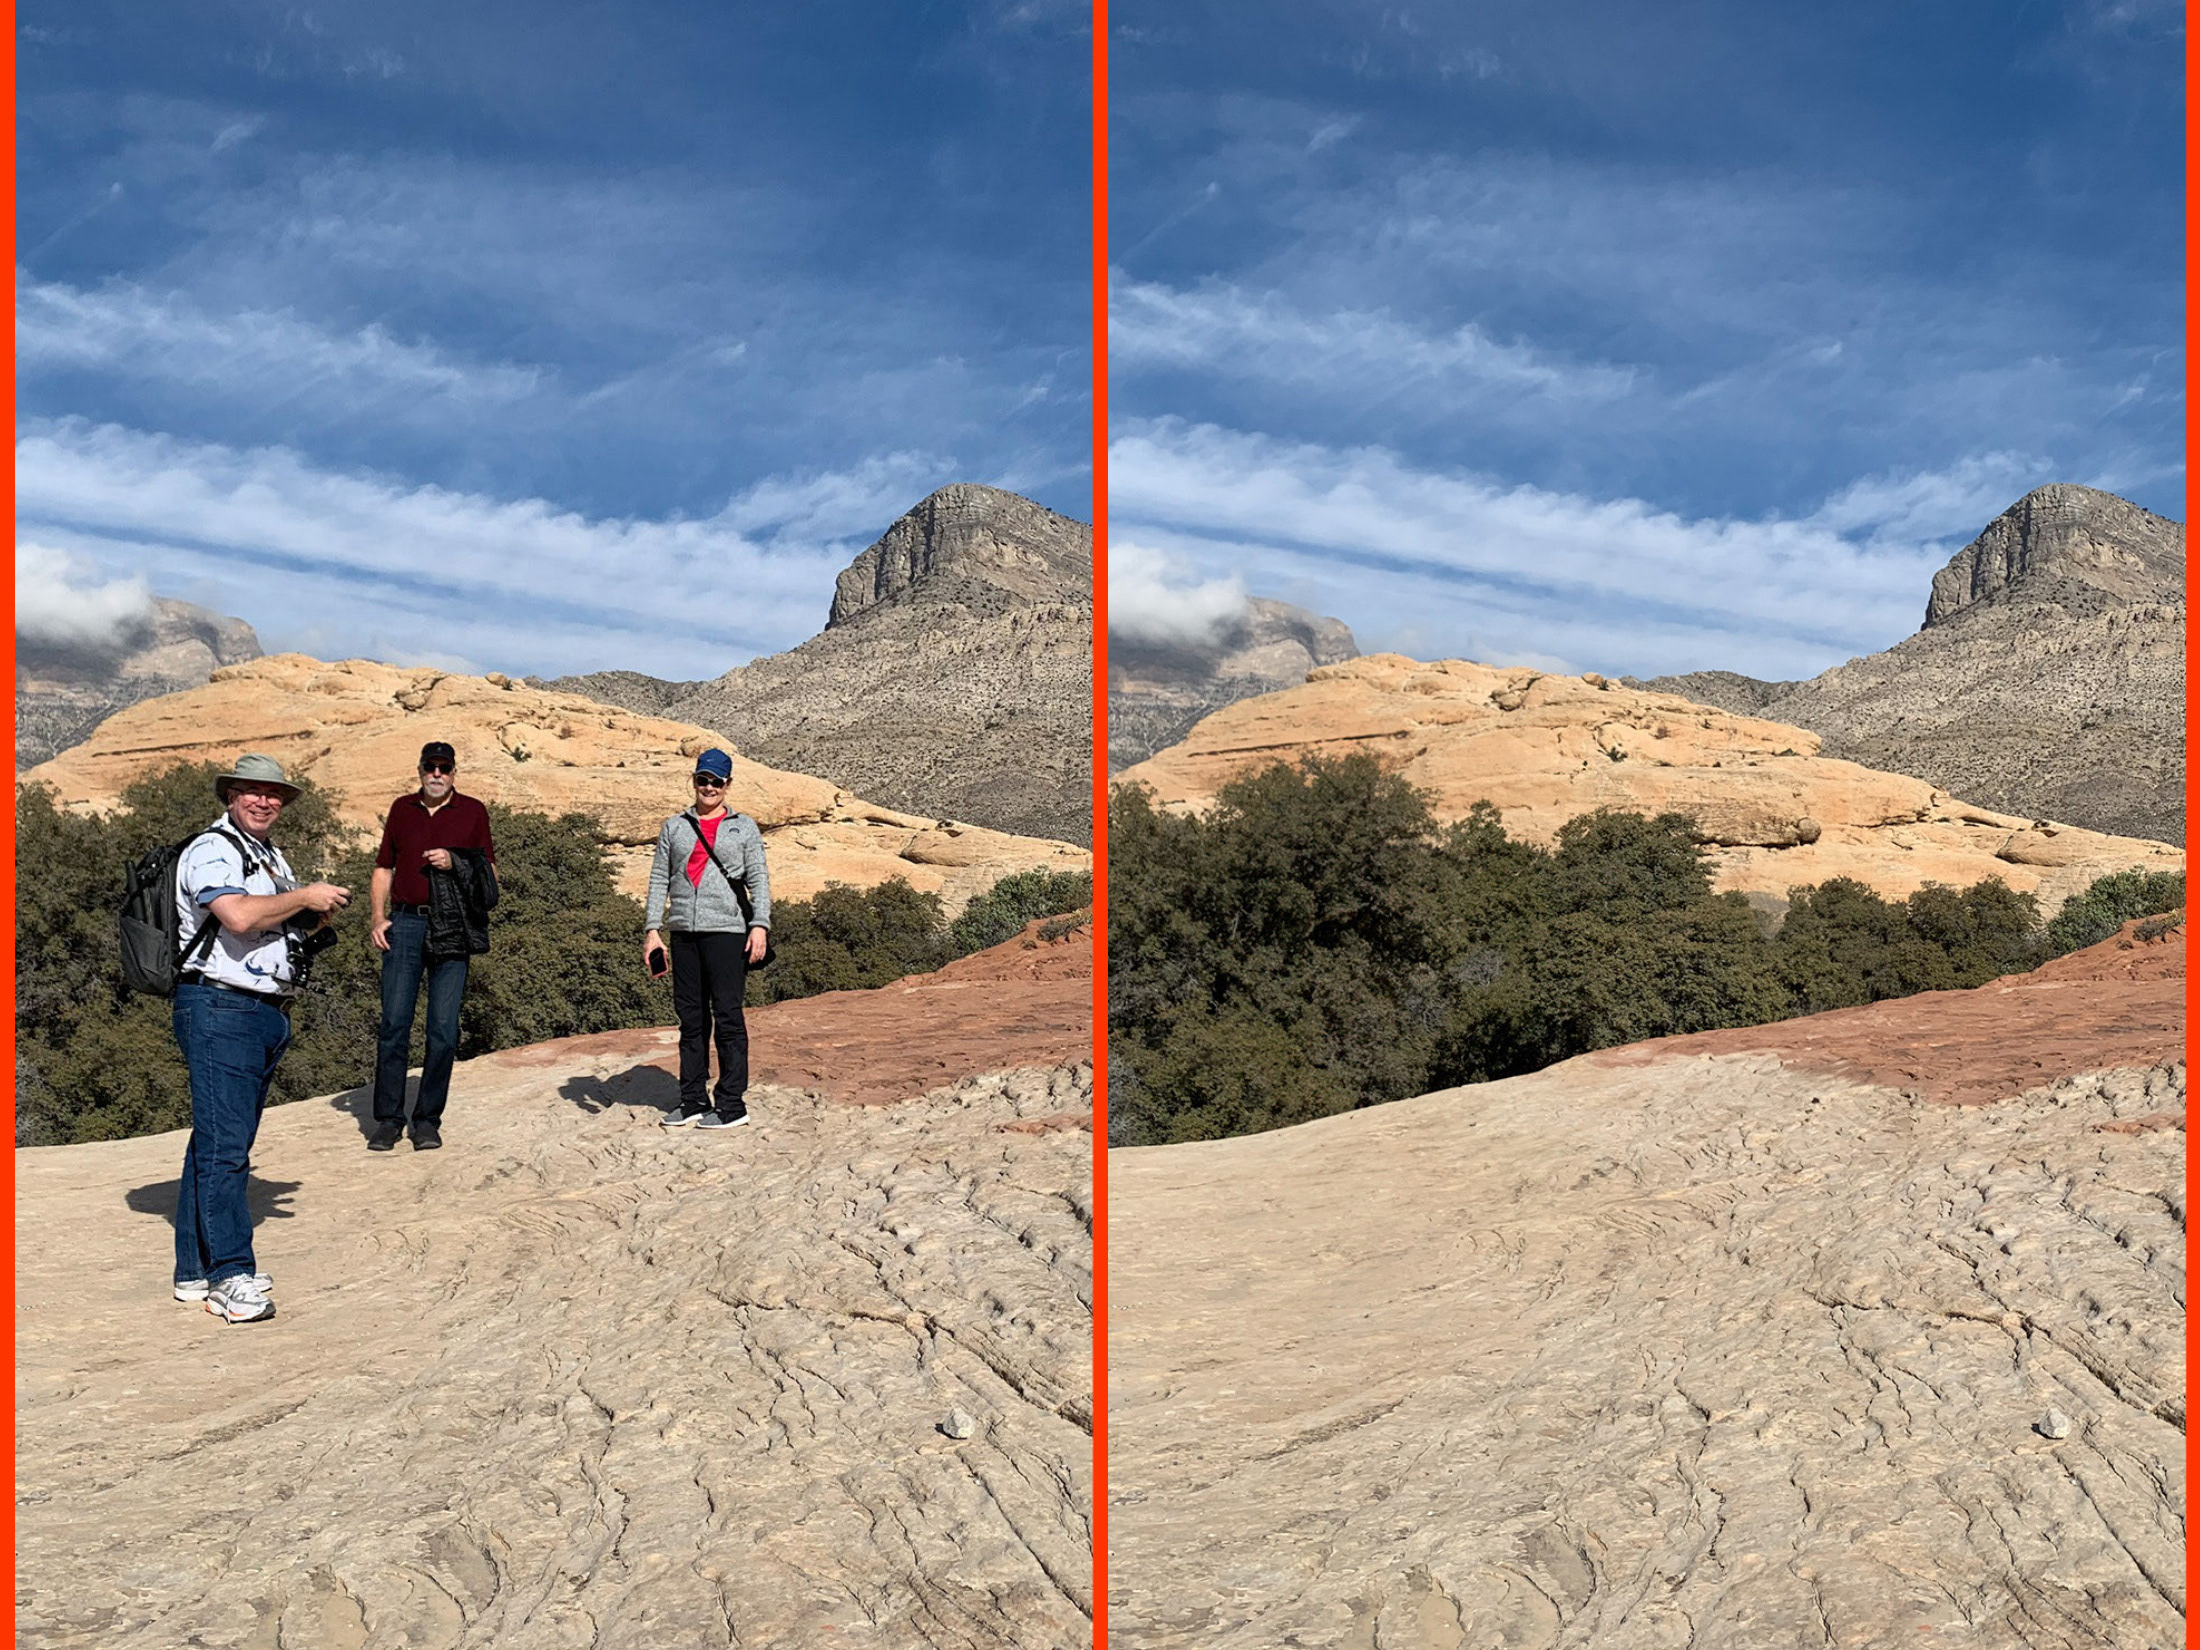
3. When the tool opens, it's pretty easy to understand the steps (image at left, below). Click the upload button to browse for and upload your MP3 file. The tool will start processing your file. Be patient, as it can take a few minutes to completely process the file. This delay depends greatly on the size of the original audio file.
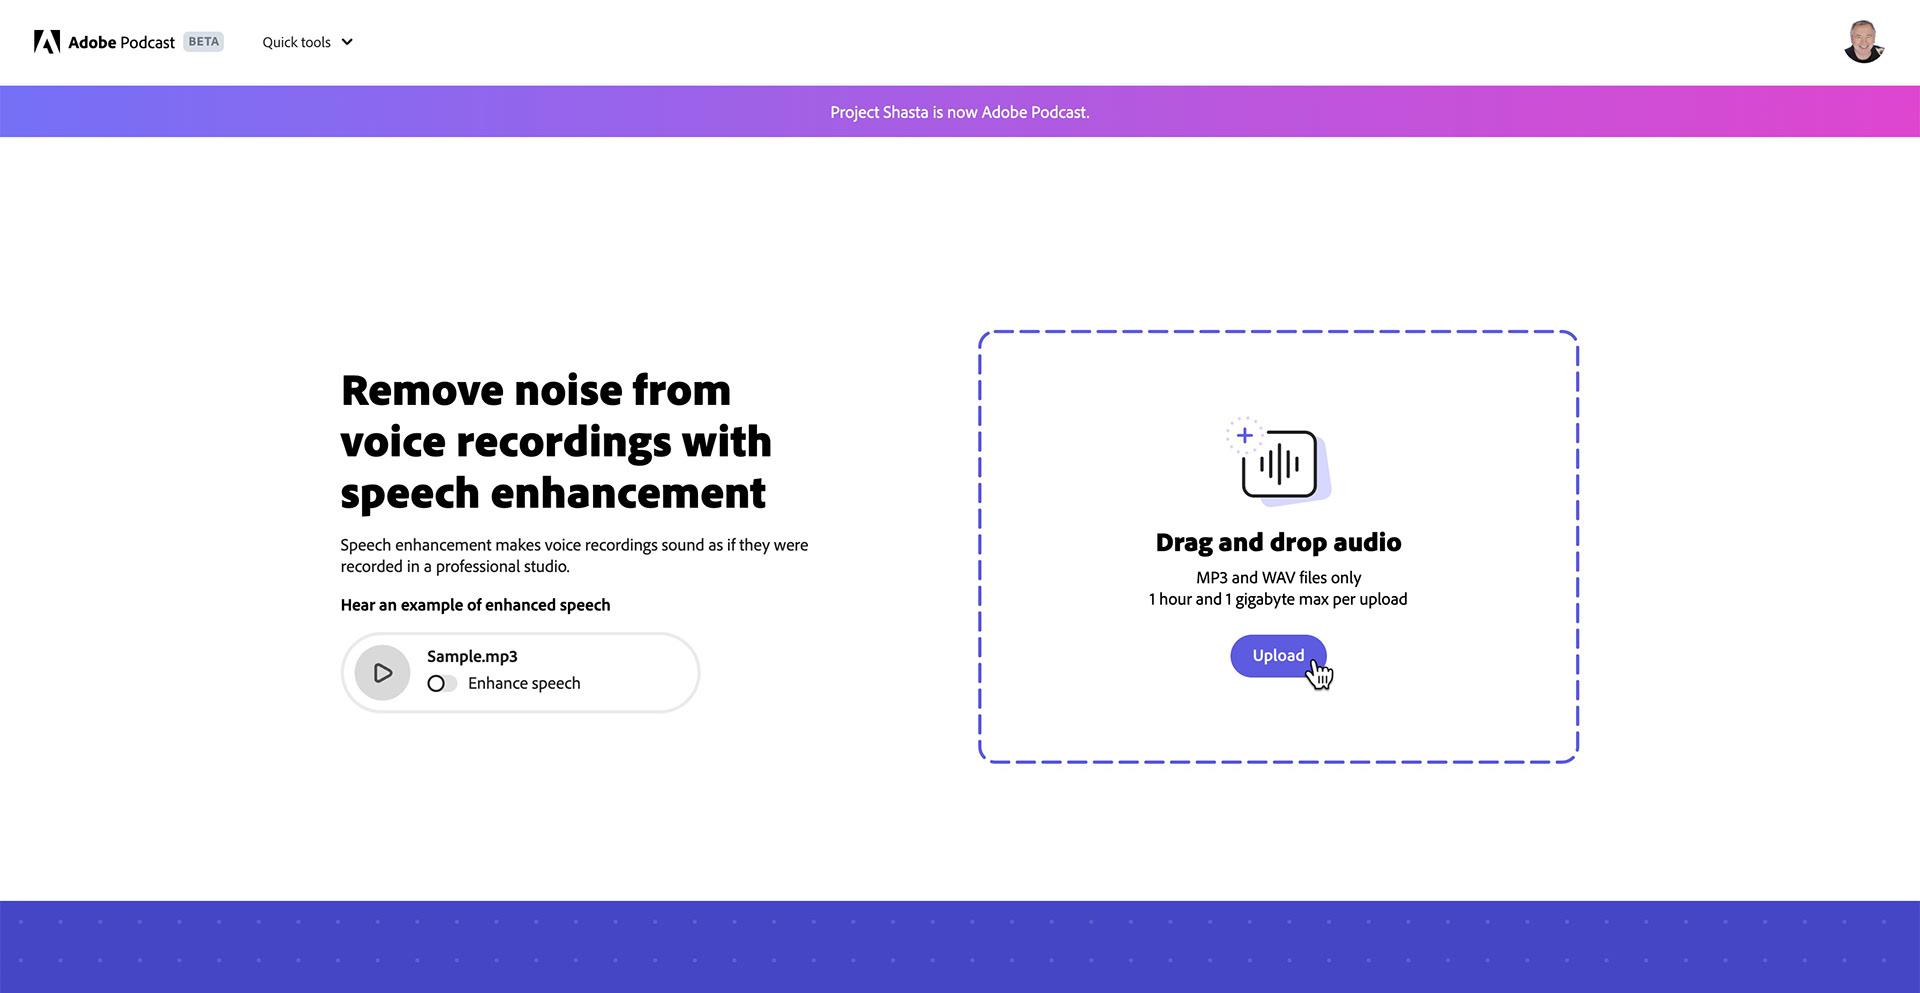
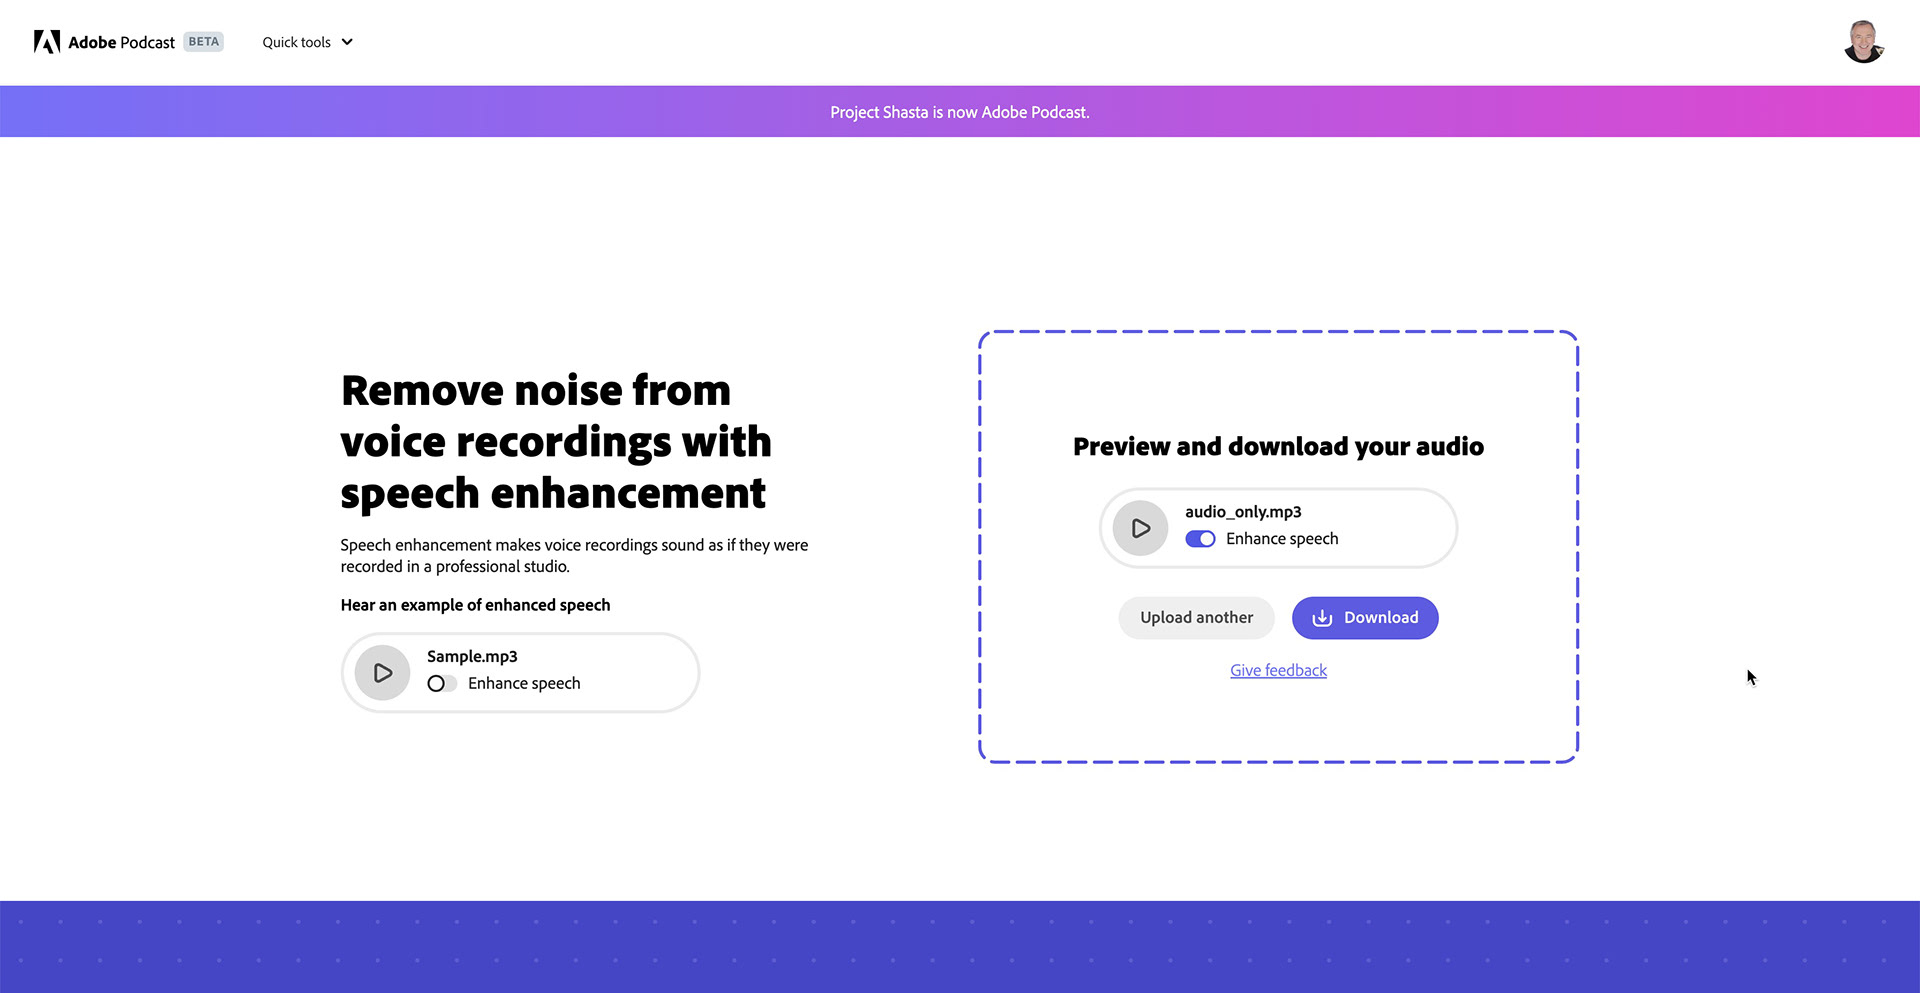
Once the process is complete, you will see a new status message (image at right, above). You can play back your enhanced audio file in the browser and even compare it to the original version by toggling the Enhance speech switch. Without even having heard your original, I can almost guarantee you will hear a noticeable - if not significant - improvement in audio quality.
Tap the Download button. Podcast will download a high-quality .WAV file to your computer.
Adding and syncing the new audio file to your footage
If you don't edit video in Premiere Pro, this will likely be the most complicated part of the process. But I'm so pleased with the audio improvements, I know I will be employing this overall workflow again in the future.
It's beyond the scope of this article to give a full overview of the Premiere Pro interface, but you can find lots of information on learning Premiere on the Home Screen of the application, or in the Creative Cloud Desktop App via the Discover tab, or through the Adobe Learn website.
We will be focusing on the Timeline panel.
Starting a new project
Tip: Before you begin editing video in Premiere, it's a very good practice to put all your project assets into at least one central folder. This could be a folder on your desktop, or documents - or where ever makes sense for you. This makes it easier for you to locate anything you need for your project, from photos, to video clips to audio files. In my case, this means I need the original video file and the downloaded enhanced audio file in the same folder.
1. Open Premiere Pro. The app can take several seconds up to just over a minute to launch, so be patient.
2. Tap the New Project button.
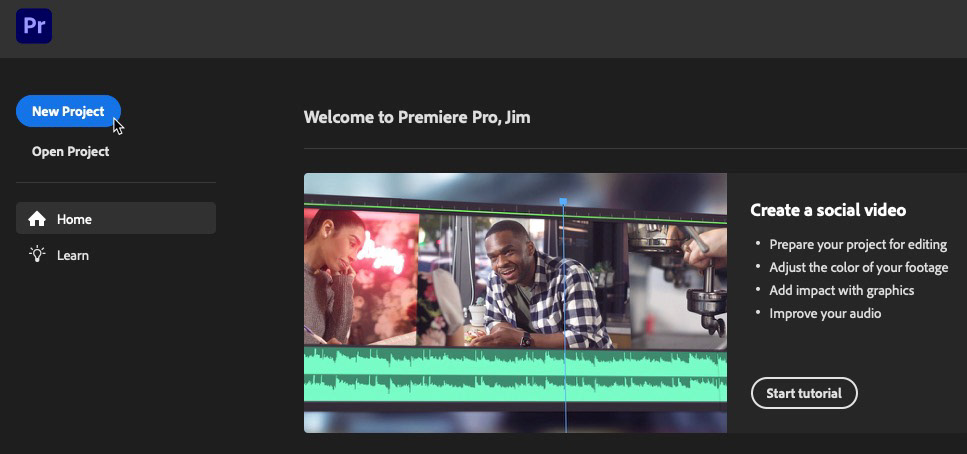
The Import panel opens.
3. Browse to the folder that holds all your assets (see tip, above). In my case, I put my folder - enhanced audio - on the desktop.
4. Mouse over each file you want to use and click the checkbox in the upper left corner to select them.
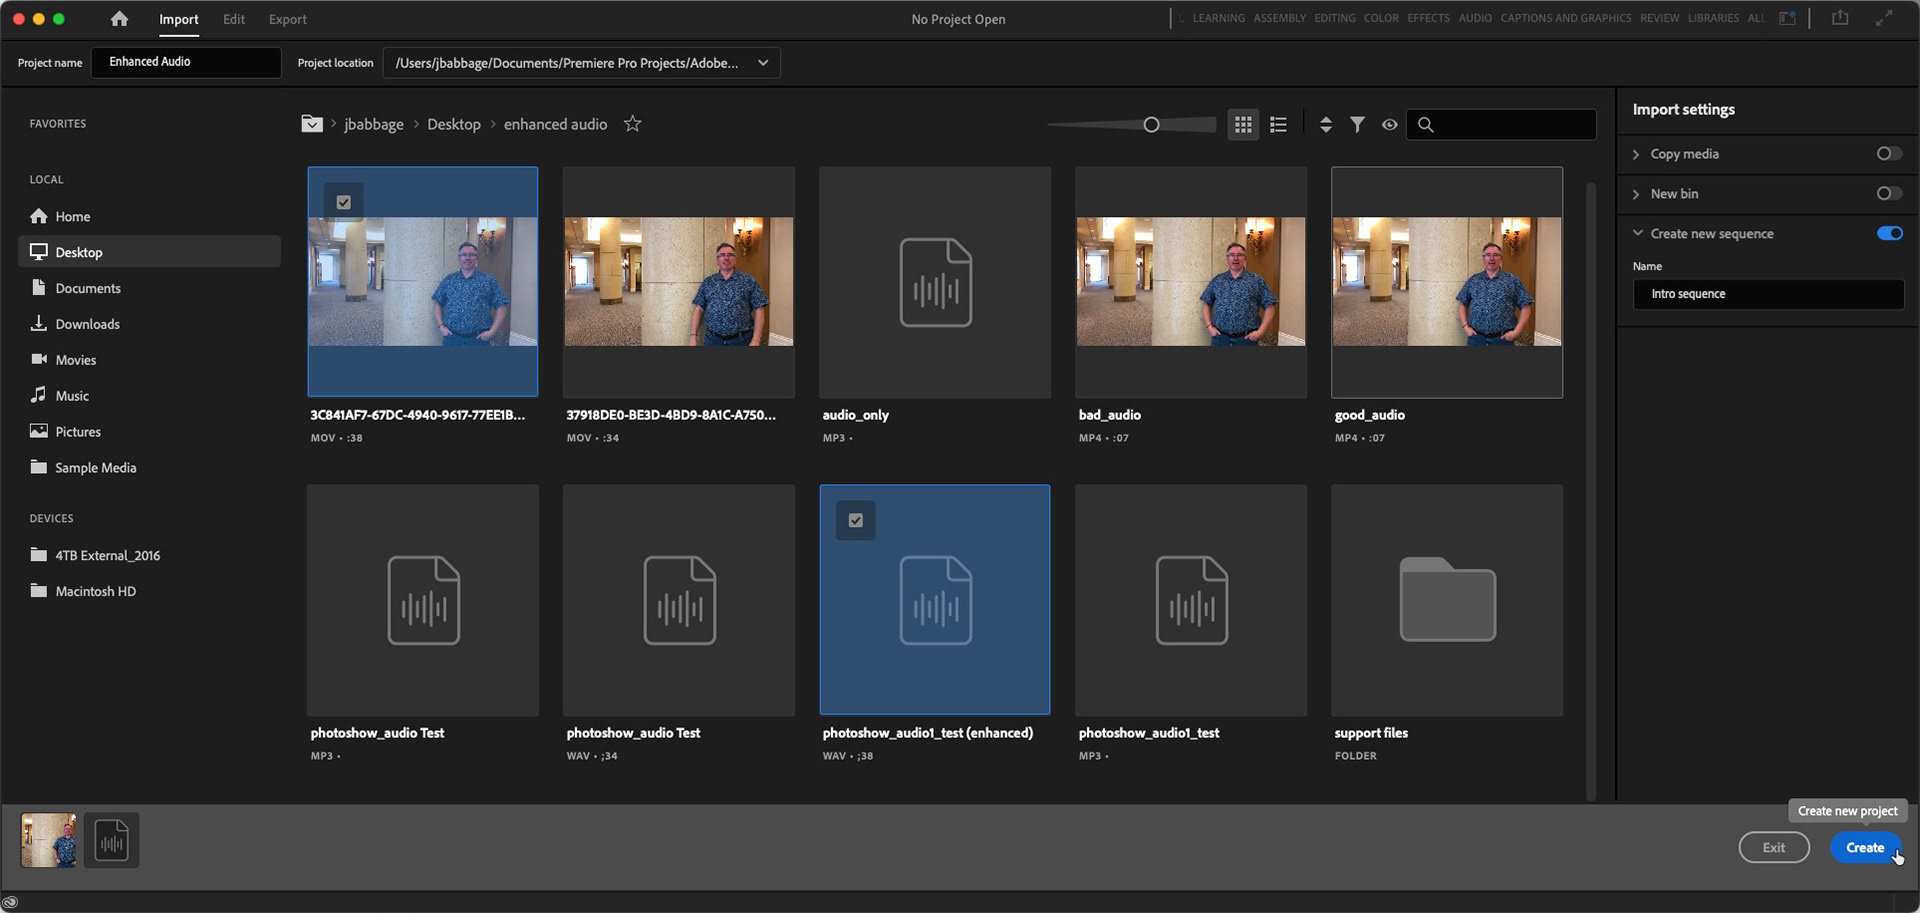
Selecting assets in the Import window.
5. On the right hand side of the application window, make the following change to the Import Settings:
5a - Give your timeline sequence a relevant name, instead of the default Sequence 1.
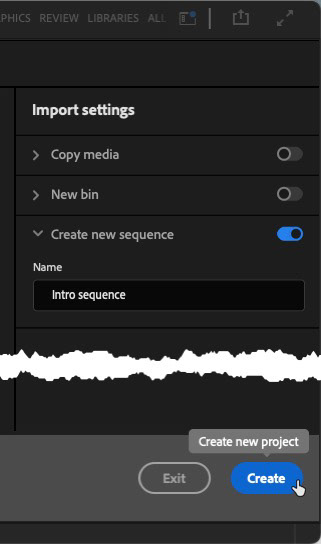
6. Tap the Create button. The editing window opens with a new timeline sequence already created.
What is a Sequence?
A "sequence" is a collection of assets on the timeline. It could be video footage, photos, music, other audio files. The sequence is where you do the majority of your editing. In the long run, the edited sequence is what you export out as a new, final video.
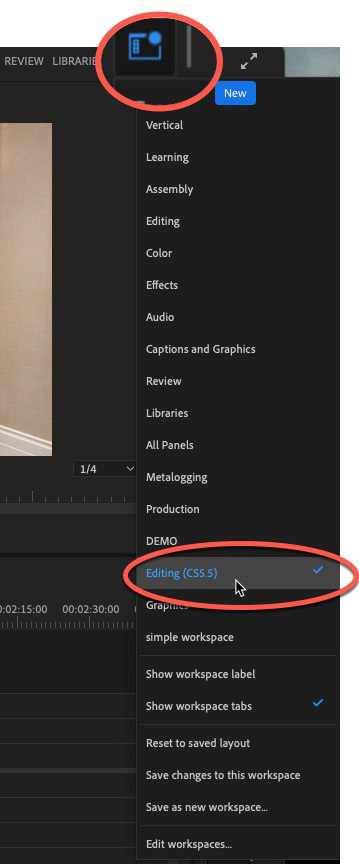
Note: The Premiere Pro workspace is highly configurable and comes with many workspace presets. You can change presets (or even create your own) by clicking on the workspaces icon. For added context, note that my Premiere workspace is using the Editing (CS5.5) workspace view. There is no right or wrong workspace to use, but it may help you in this tutorial to know this from an orientation perspective.
Editing the Sequence
If you look closely at the timeline window, you will see a blue object and a green object. The blue object is the video (top) and original audio (bottom). The green object is the new, improved audio. However, the new audio is in the wrong location and needs to be moved below the video clip.
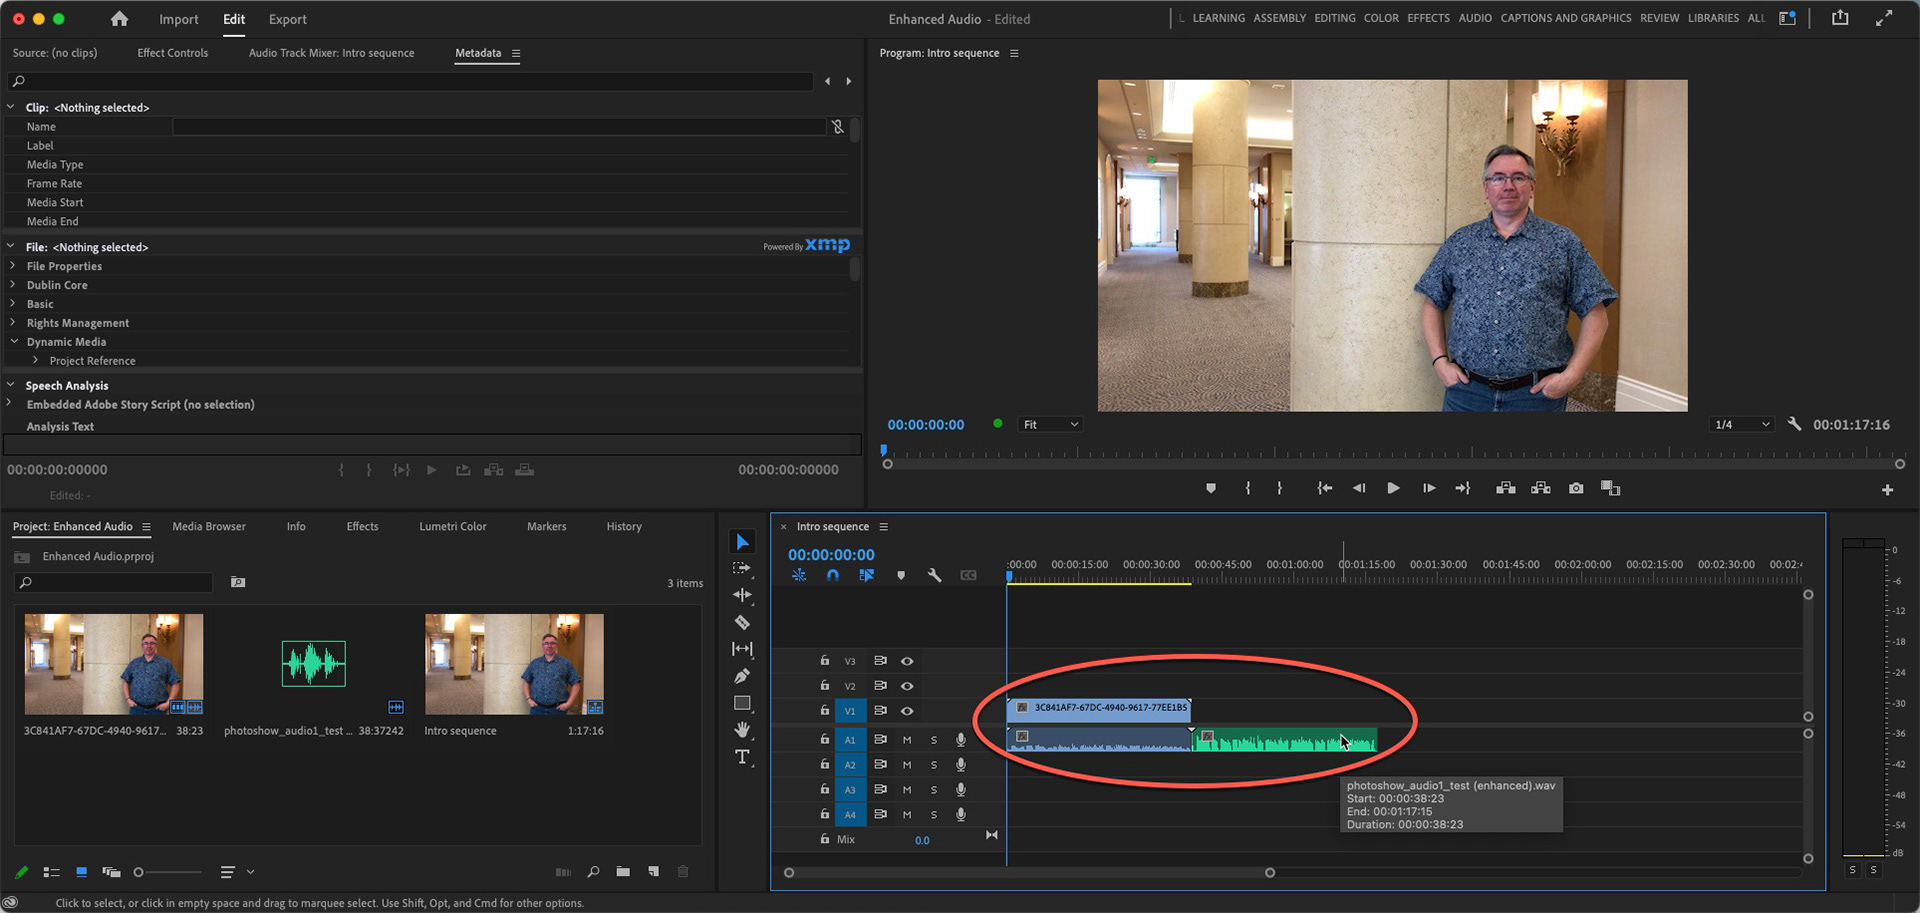
The Import window adds all selected assets - in the order you selected them - to the same main track in the timeline window.
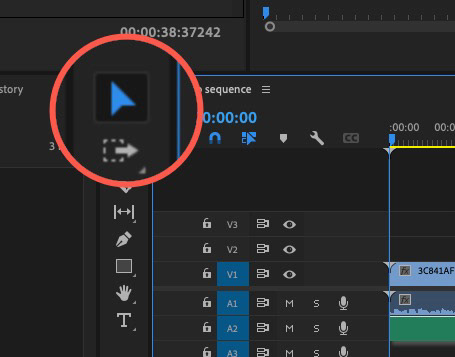
By default, the Selection tool (large arrow icon) should be selected, but to make sure it's active, just press the V key on your keyboard (or tap the arrow).
1. Click and drag the green object to the track (layer) below the video clip and line it up as best as possible with the left edge of the timeline. The audio track should snap to the edge.
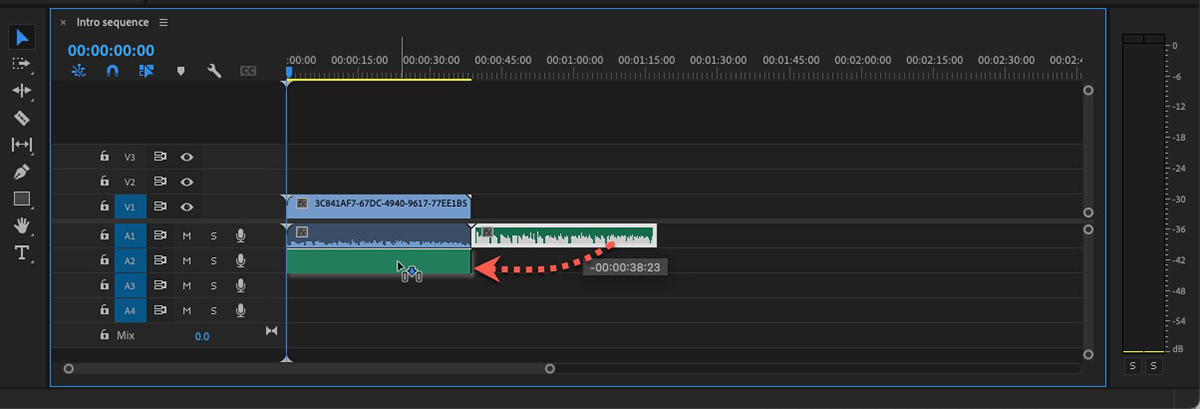
It's important to move the new audio clip below the original video/audio clip.
We've probably all see a movie or show on a streaming service where the audio is not quite keep up with the actors as they speak their lines in the video. How annoying is that?
We need to make sure the new audio is in sync with the action in the video - a very important detail when you can see that someone is talking.
2. Click away from the objects on the timeline to deselect them, then click and drag over both the blue and green objects to select them all.
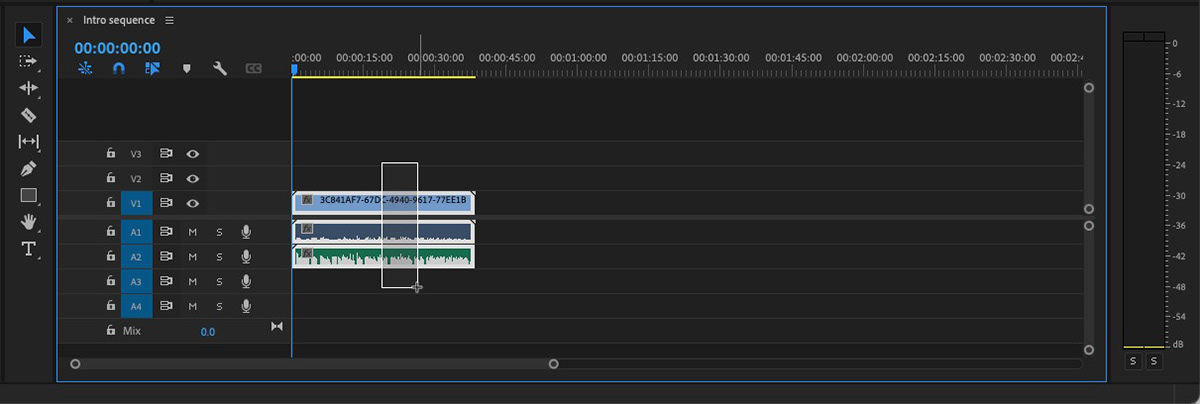
Use the Selection tool to click and drag over all the clips.
3. Right-click/Ctrl+click the selection and choose Synchronize.
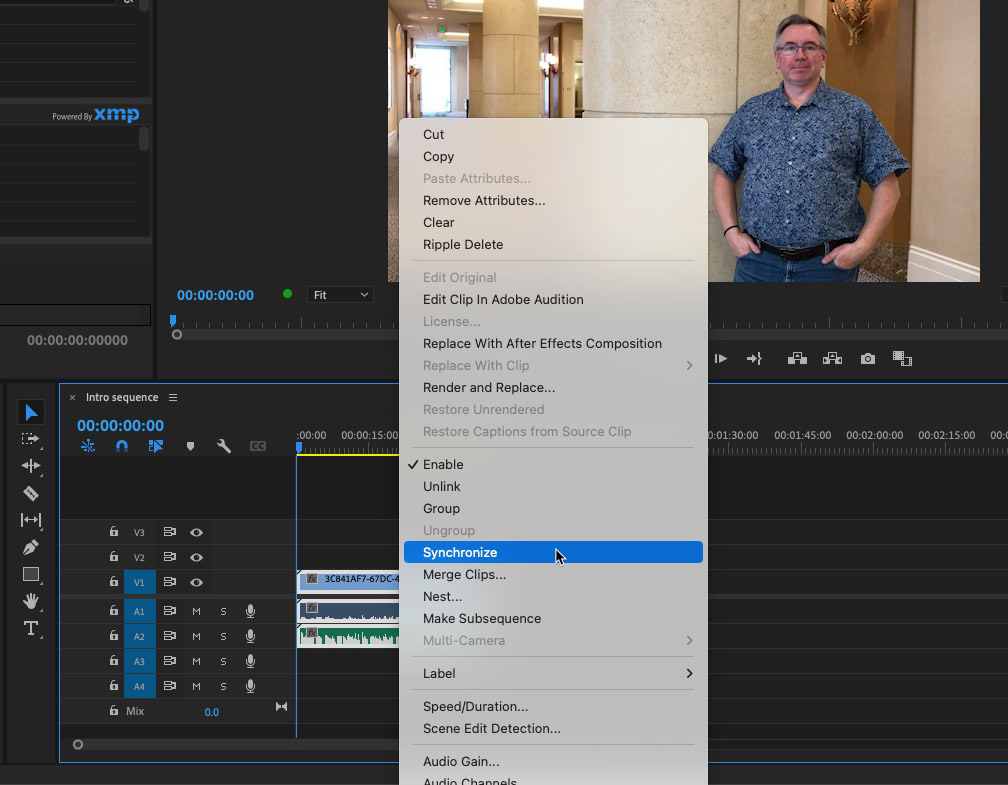
Syncing the clips is very easy, once they are selected.
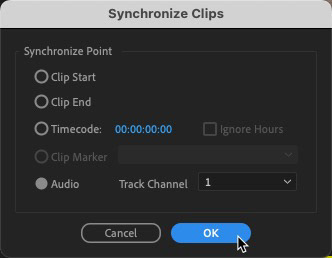
4. In the Synchronize Clips dialog box, choose Audio and select Track Channel 1. Click OK.
5. Mute the original audio (Track A1), by tapping the "M" icon at the left of the track. The icon will highlight in green when enabled. This ensures that only your new audio is exported in the next step.
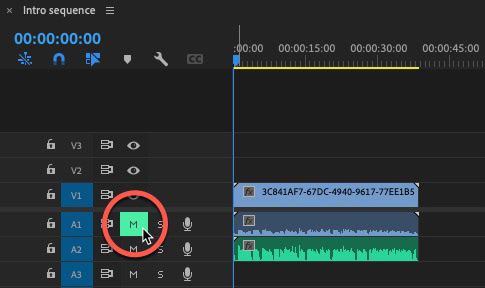
Be sure to mute the old audio track.
Export your new video
Let's use the Quick Export option to save your new finished video, fast
1. Tap the Quick Export icon near the upper right corner of the application.

Export your edited sequence to your desired location.
2. Tap the Export button.
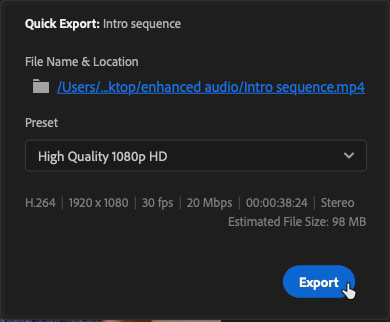
Note: Your video is exported to the location listed in the File Name and Location field. If you want to export it elsewhere, just click on the current blue path and change the location before exporting.
That's a Wrap, People!
And that's all you need to do to sync your new audio to your old video! Yes, if you're new to Premiere Pro, it may still seem to be a lot of steps. but once you do this a few times, it runs rather smoothly.
And if you like the result, be sure to take the time to learn more about all the cool things you can do in Premiere Pro. Everything from home movies to major motion pictures are edited using this application.
If Premiere Pro is just too overwhelming, you can try using Premiere Rush instead as your video editing tool. However, Rush does not offer a way to accurately sync audio to other footage, so be prepared to do some manual tweaking.