I learned a very simple - yet so important - tip today, for processing HDR images in the new Lightroom CC/6.
Pay close attention to the FIRST image you select in your series.
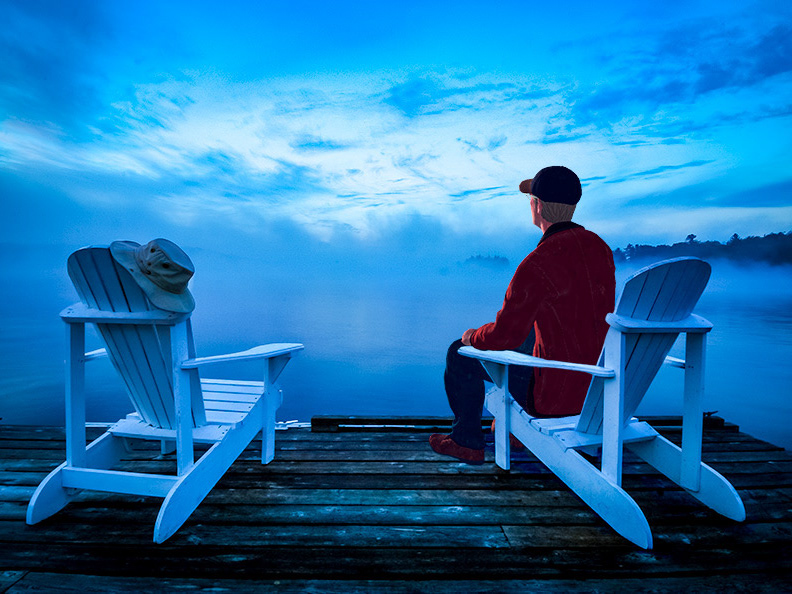
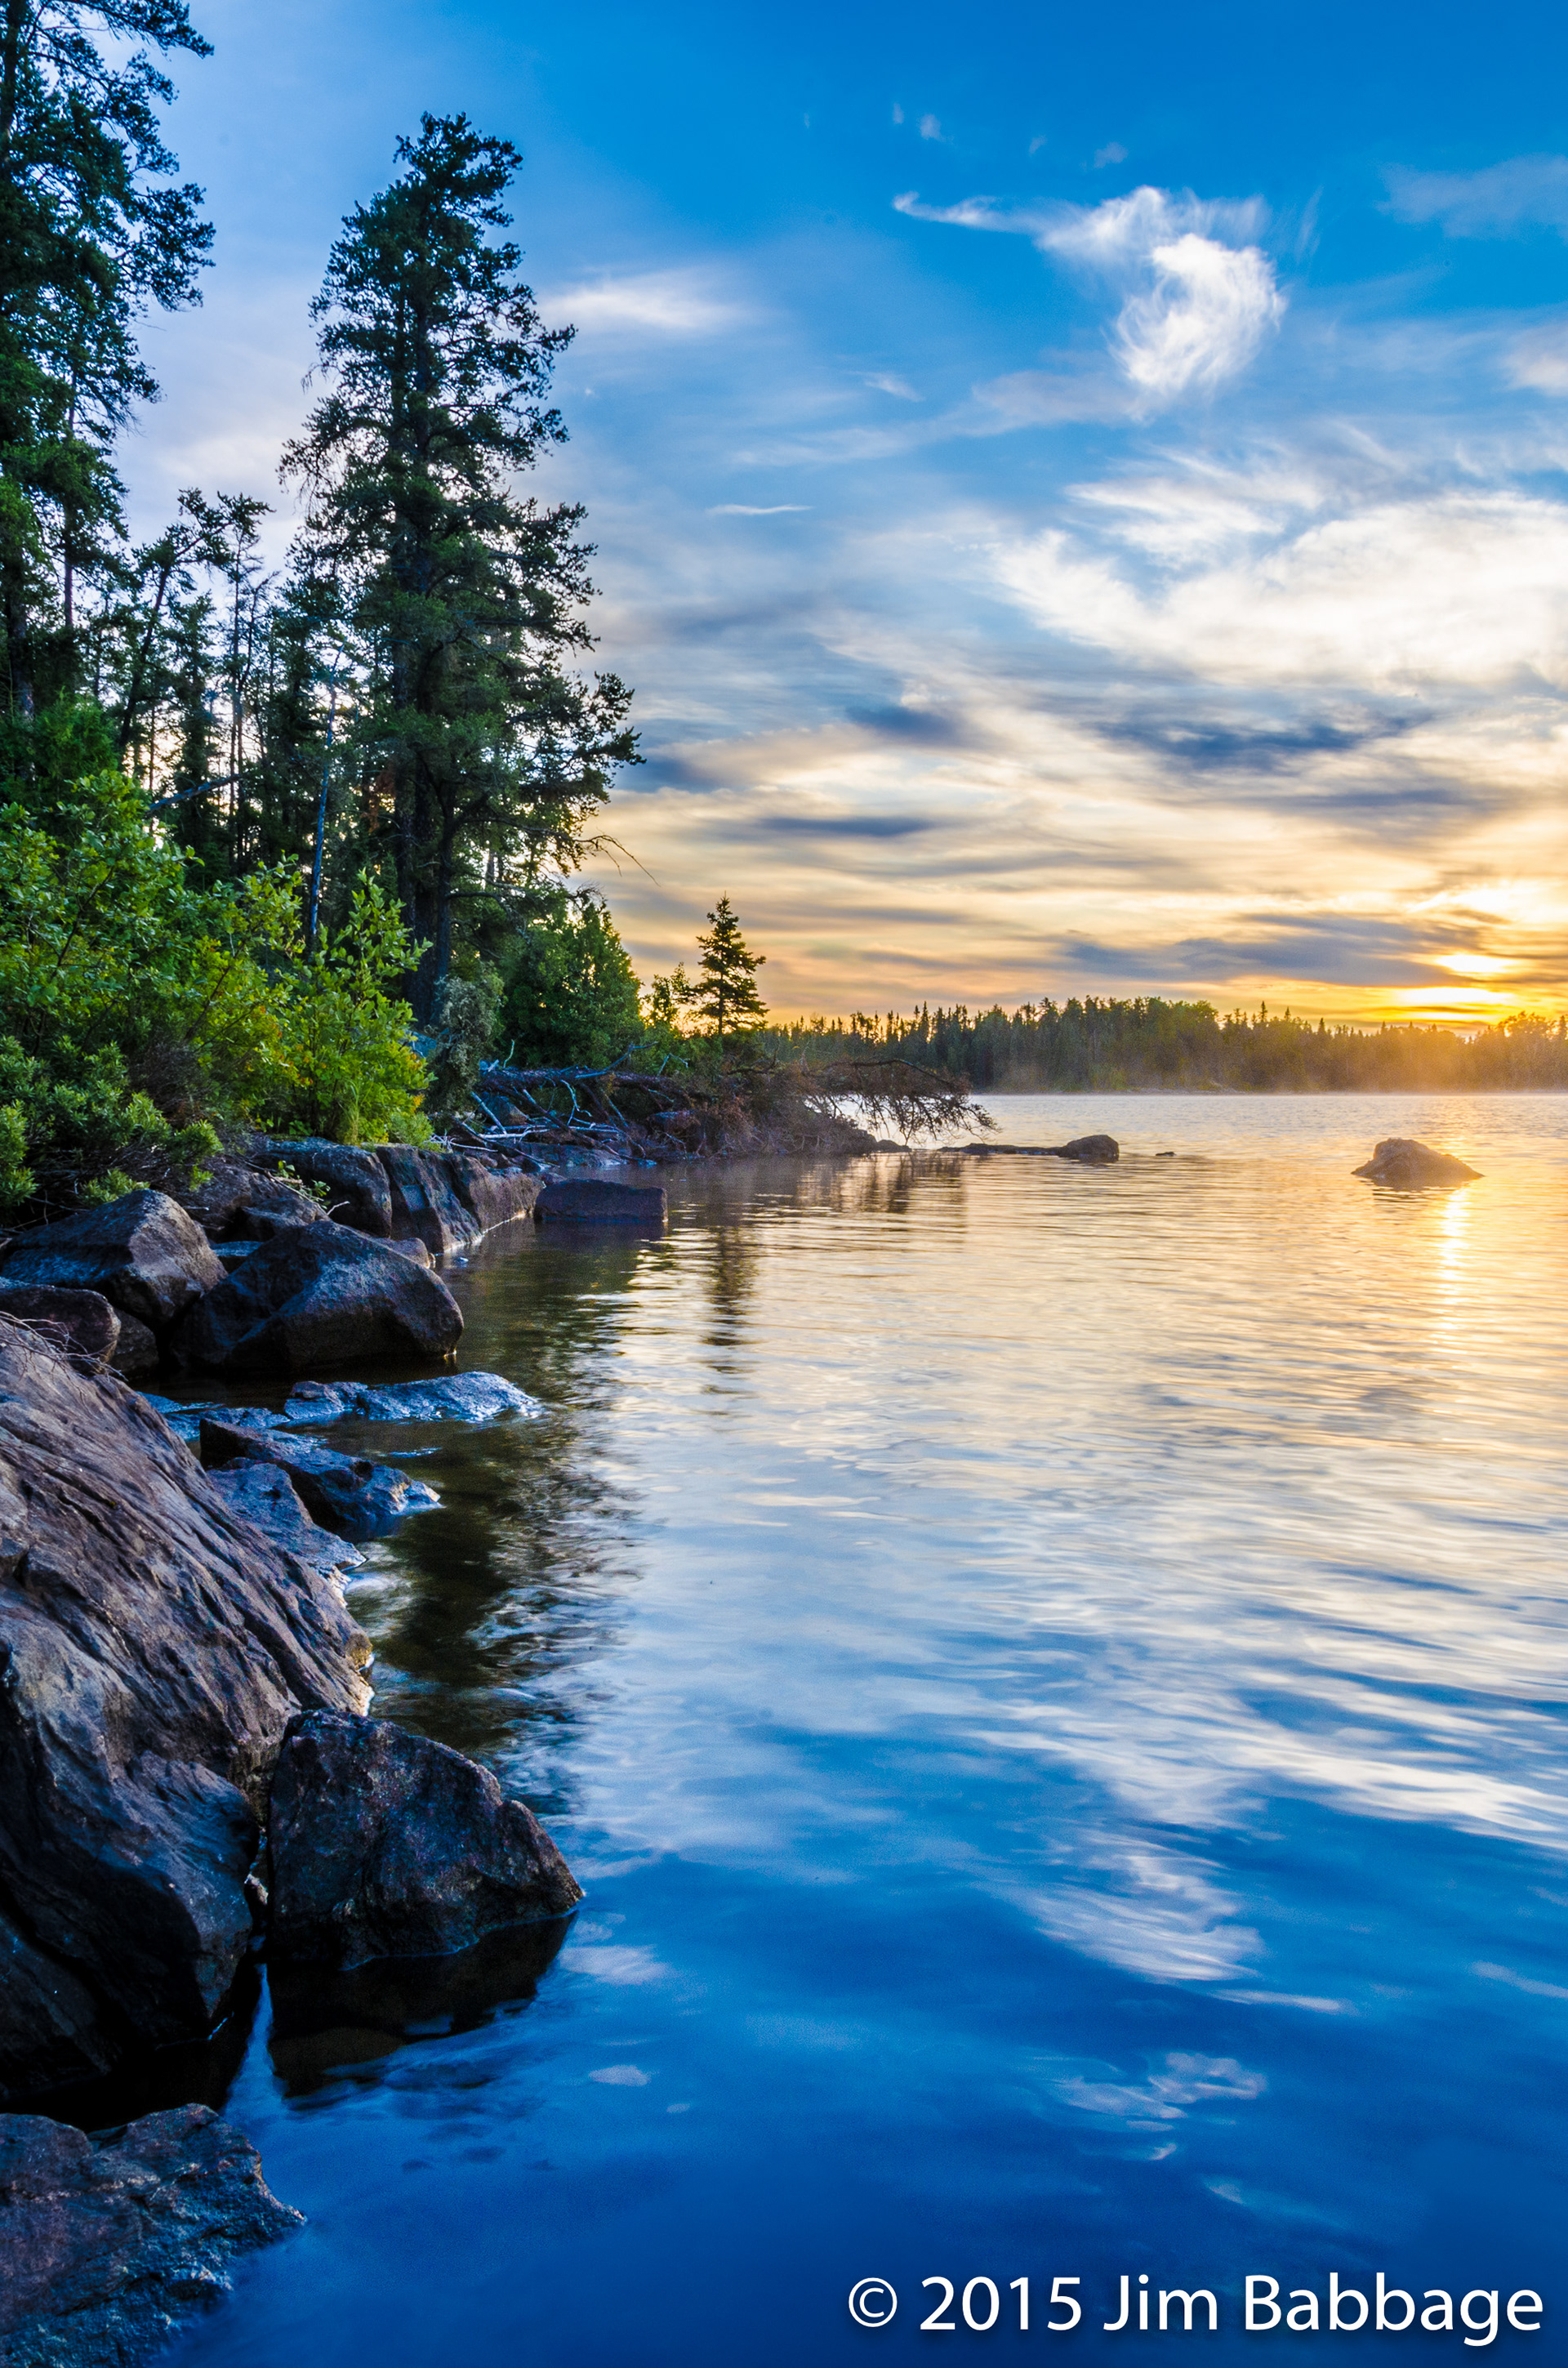
The reason is that Lightroom seems to use that first image (referred to as the "most selected") as a reference point when it comes to distinguishing changes, like movement, in the scene. For example, take a good look at the two images below. Look at the water surface. These two HDR images were made from the same 4 original frames, and processed in exactly the same manner. But the lake surface is noticeable smoother in the image on the left.
Why?
Because in that leftmost image, I selected the longest shutter speed exposure first, before selecting the other three images for the HDR.
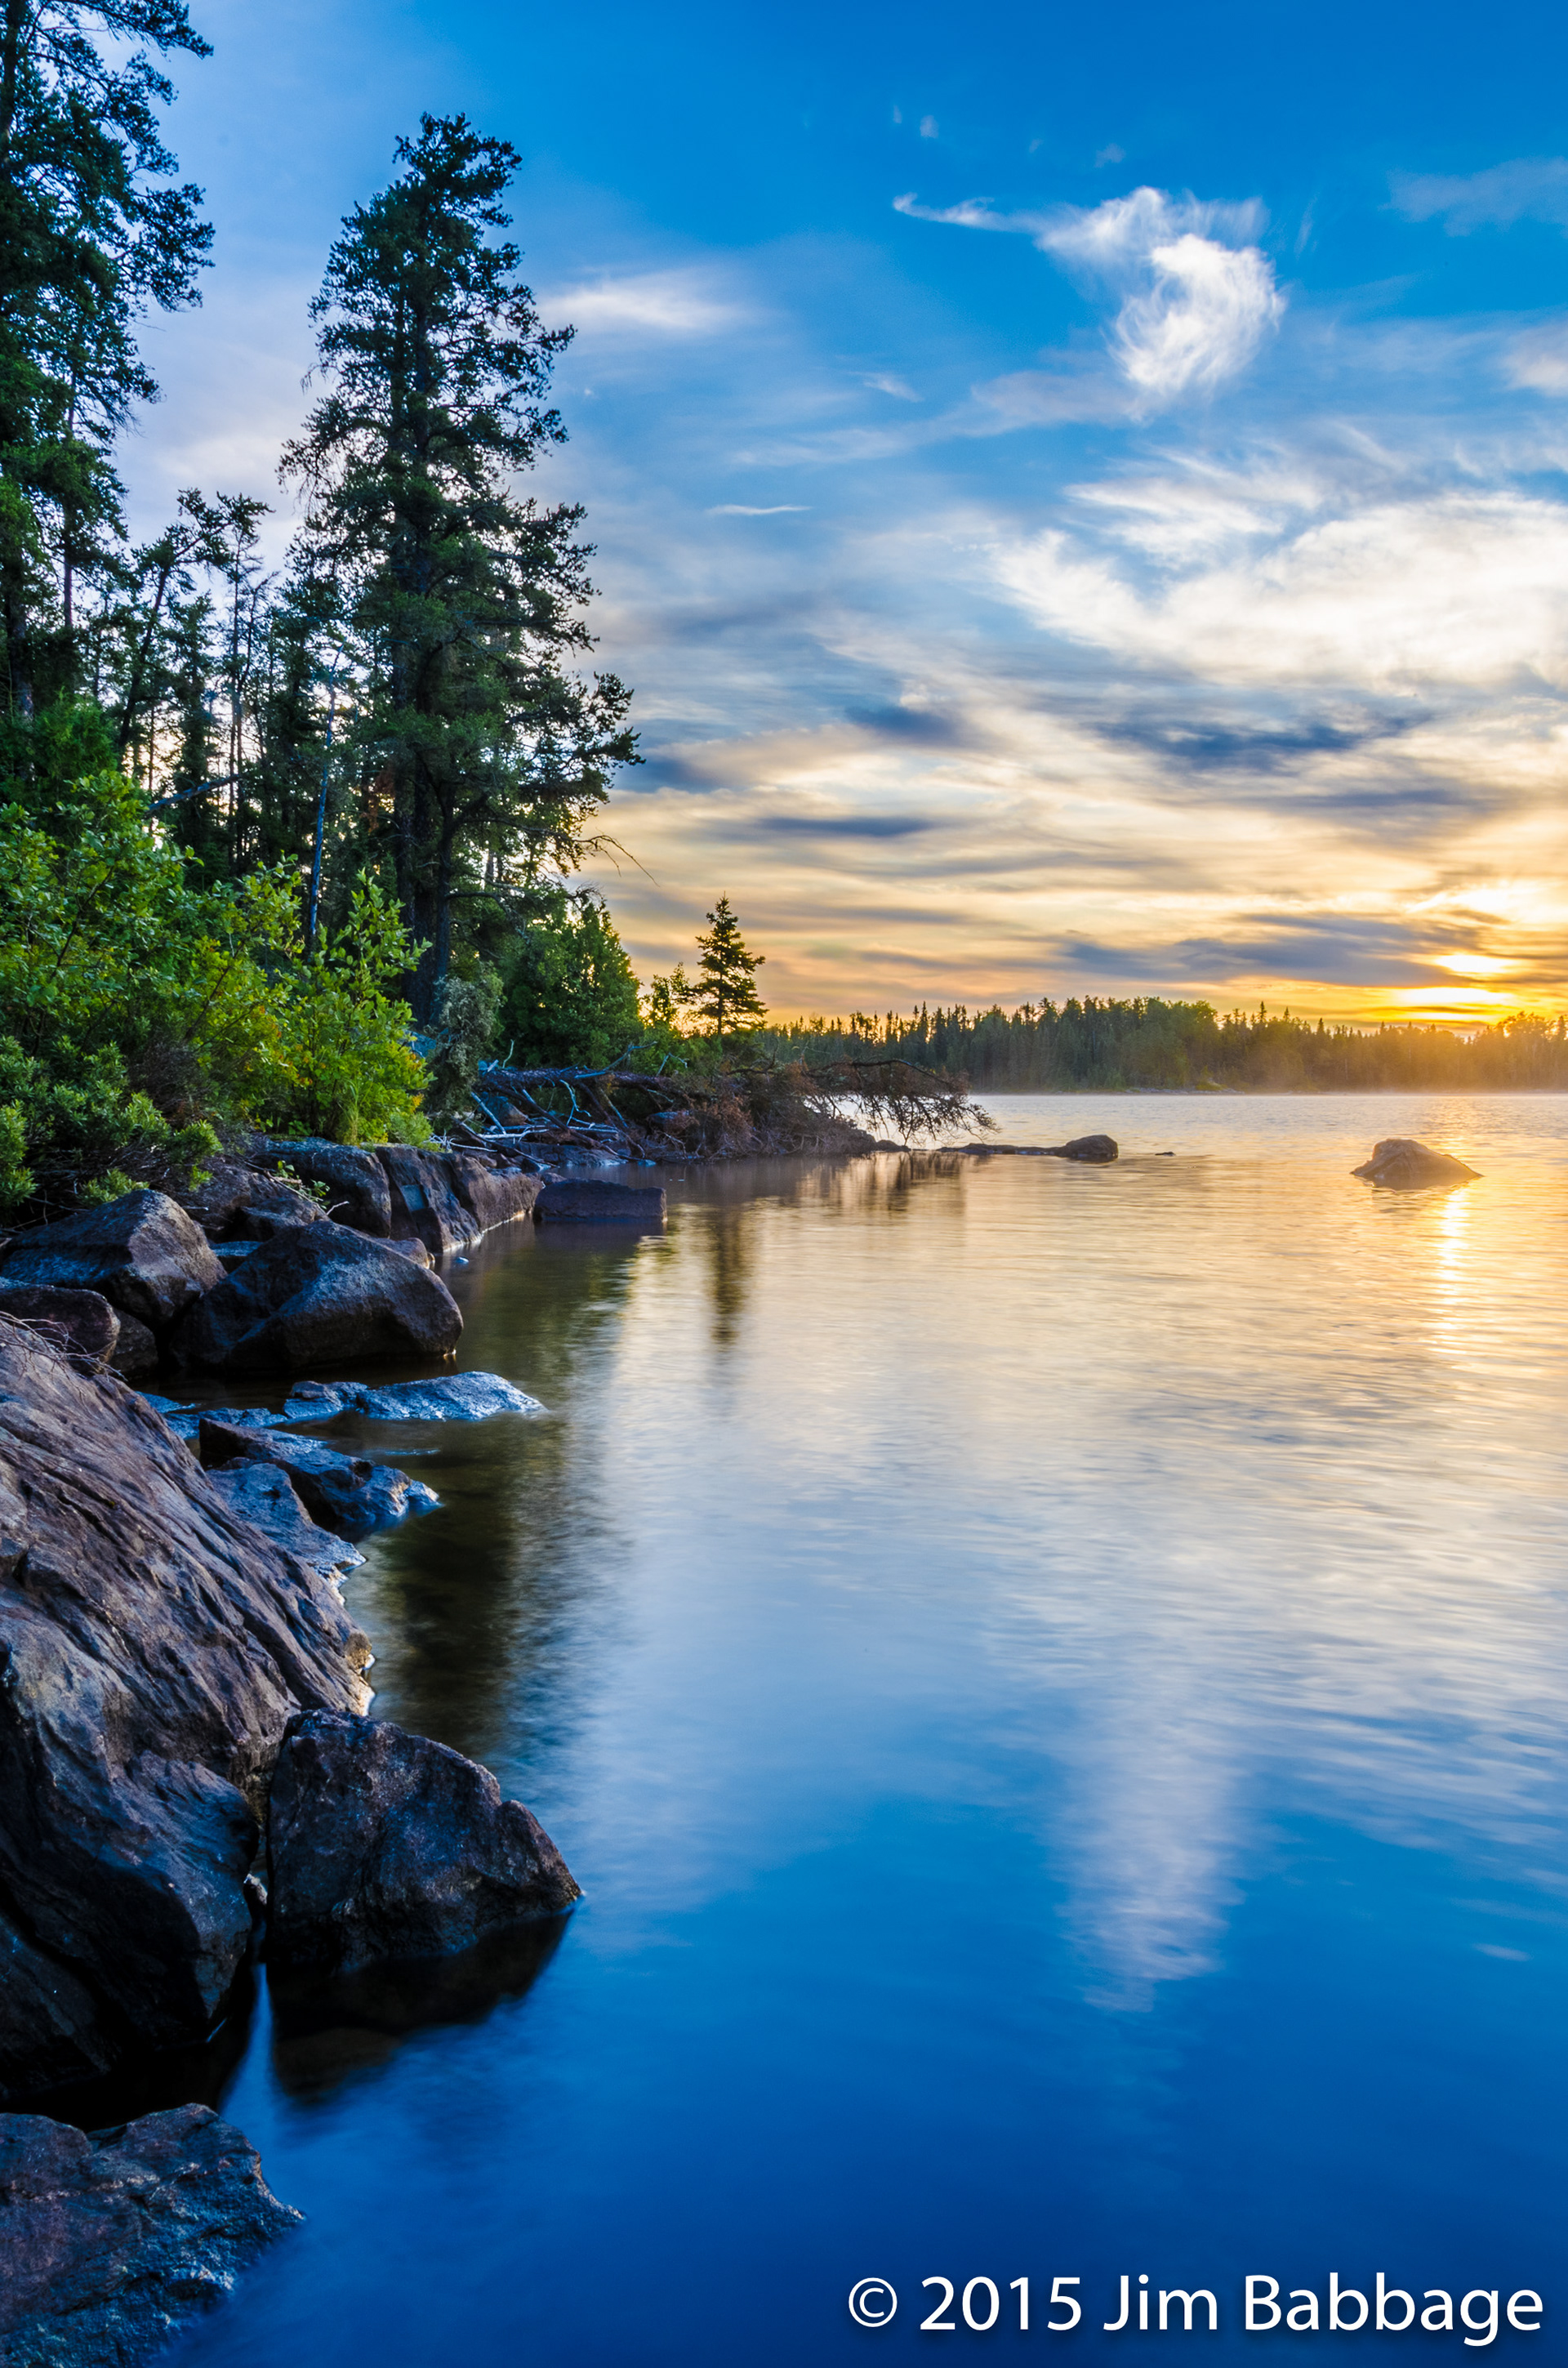
The image on the right, is the result of me selecting the shortest exposure in the series first.


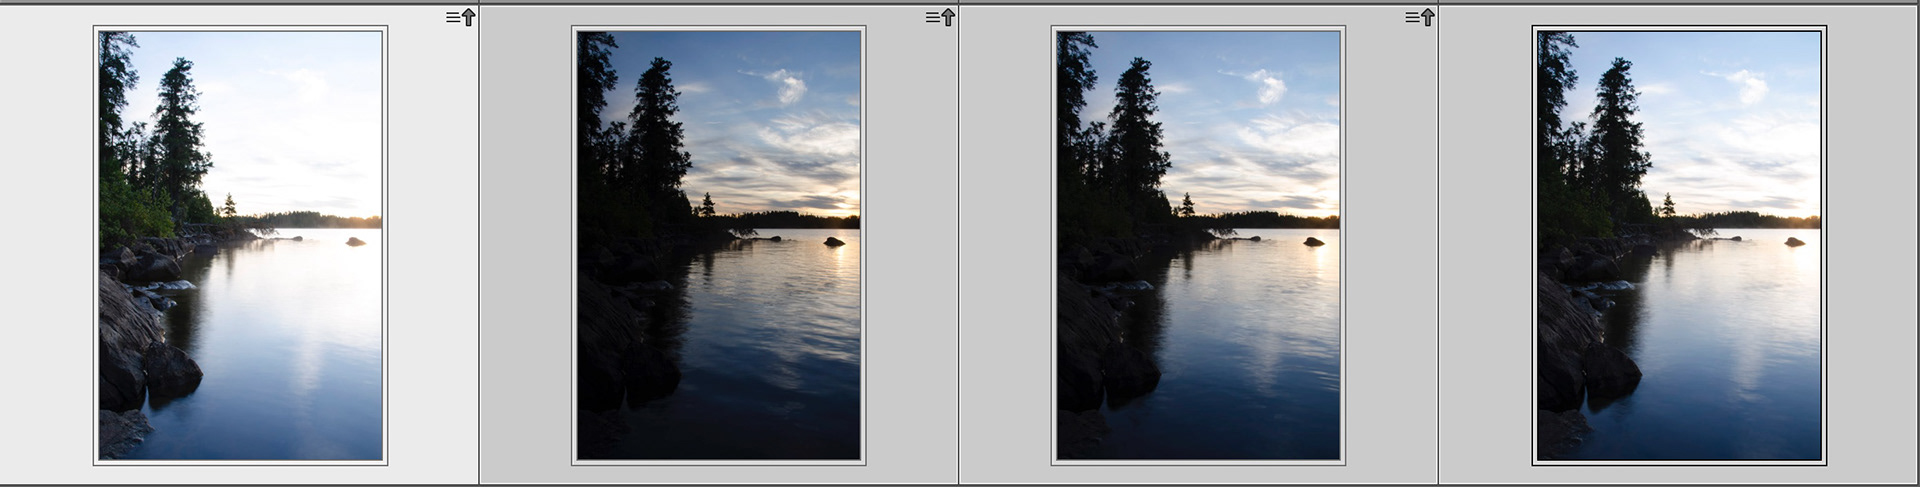
Note the highlighted frame. This was the shortest exposure (1/5 sec), and the resulting HDR is below. Note the ripples in the water.
For the version below, I selected the longest exposure (1.6 sec) first (see above image), and the end result (with no de-ghosting) is more of what I was aiming for. In fact, applying the de-ghost filter actually made the image look worse, in this case.
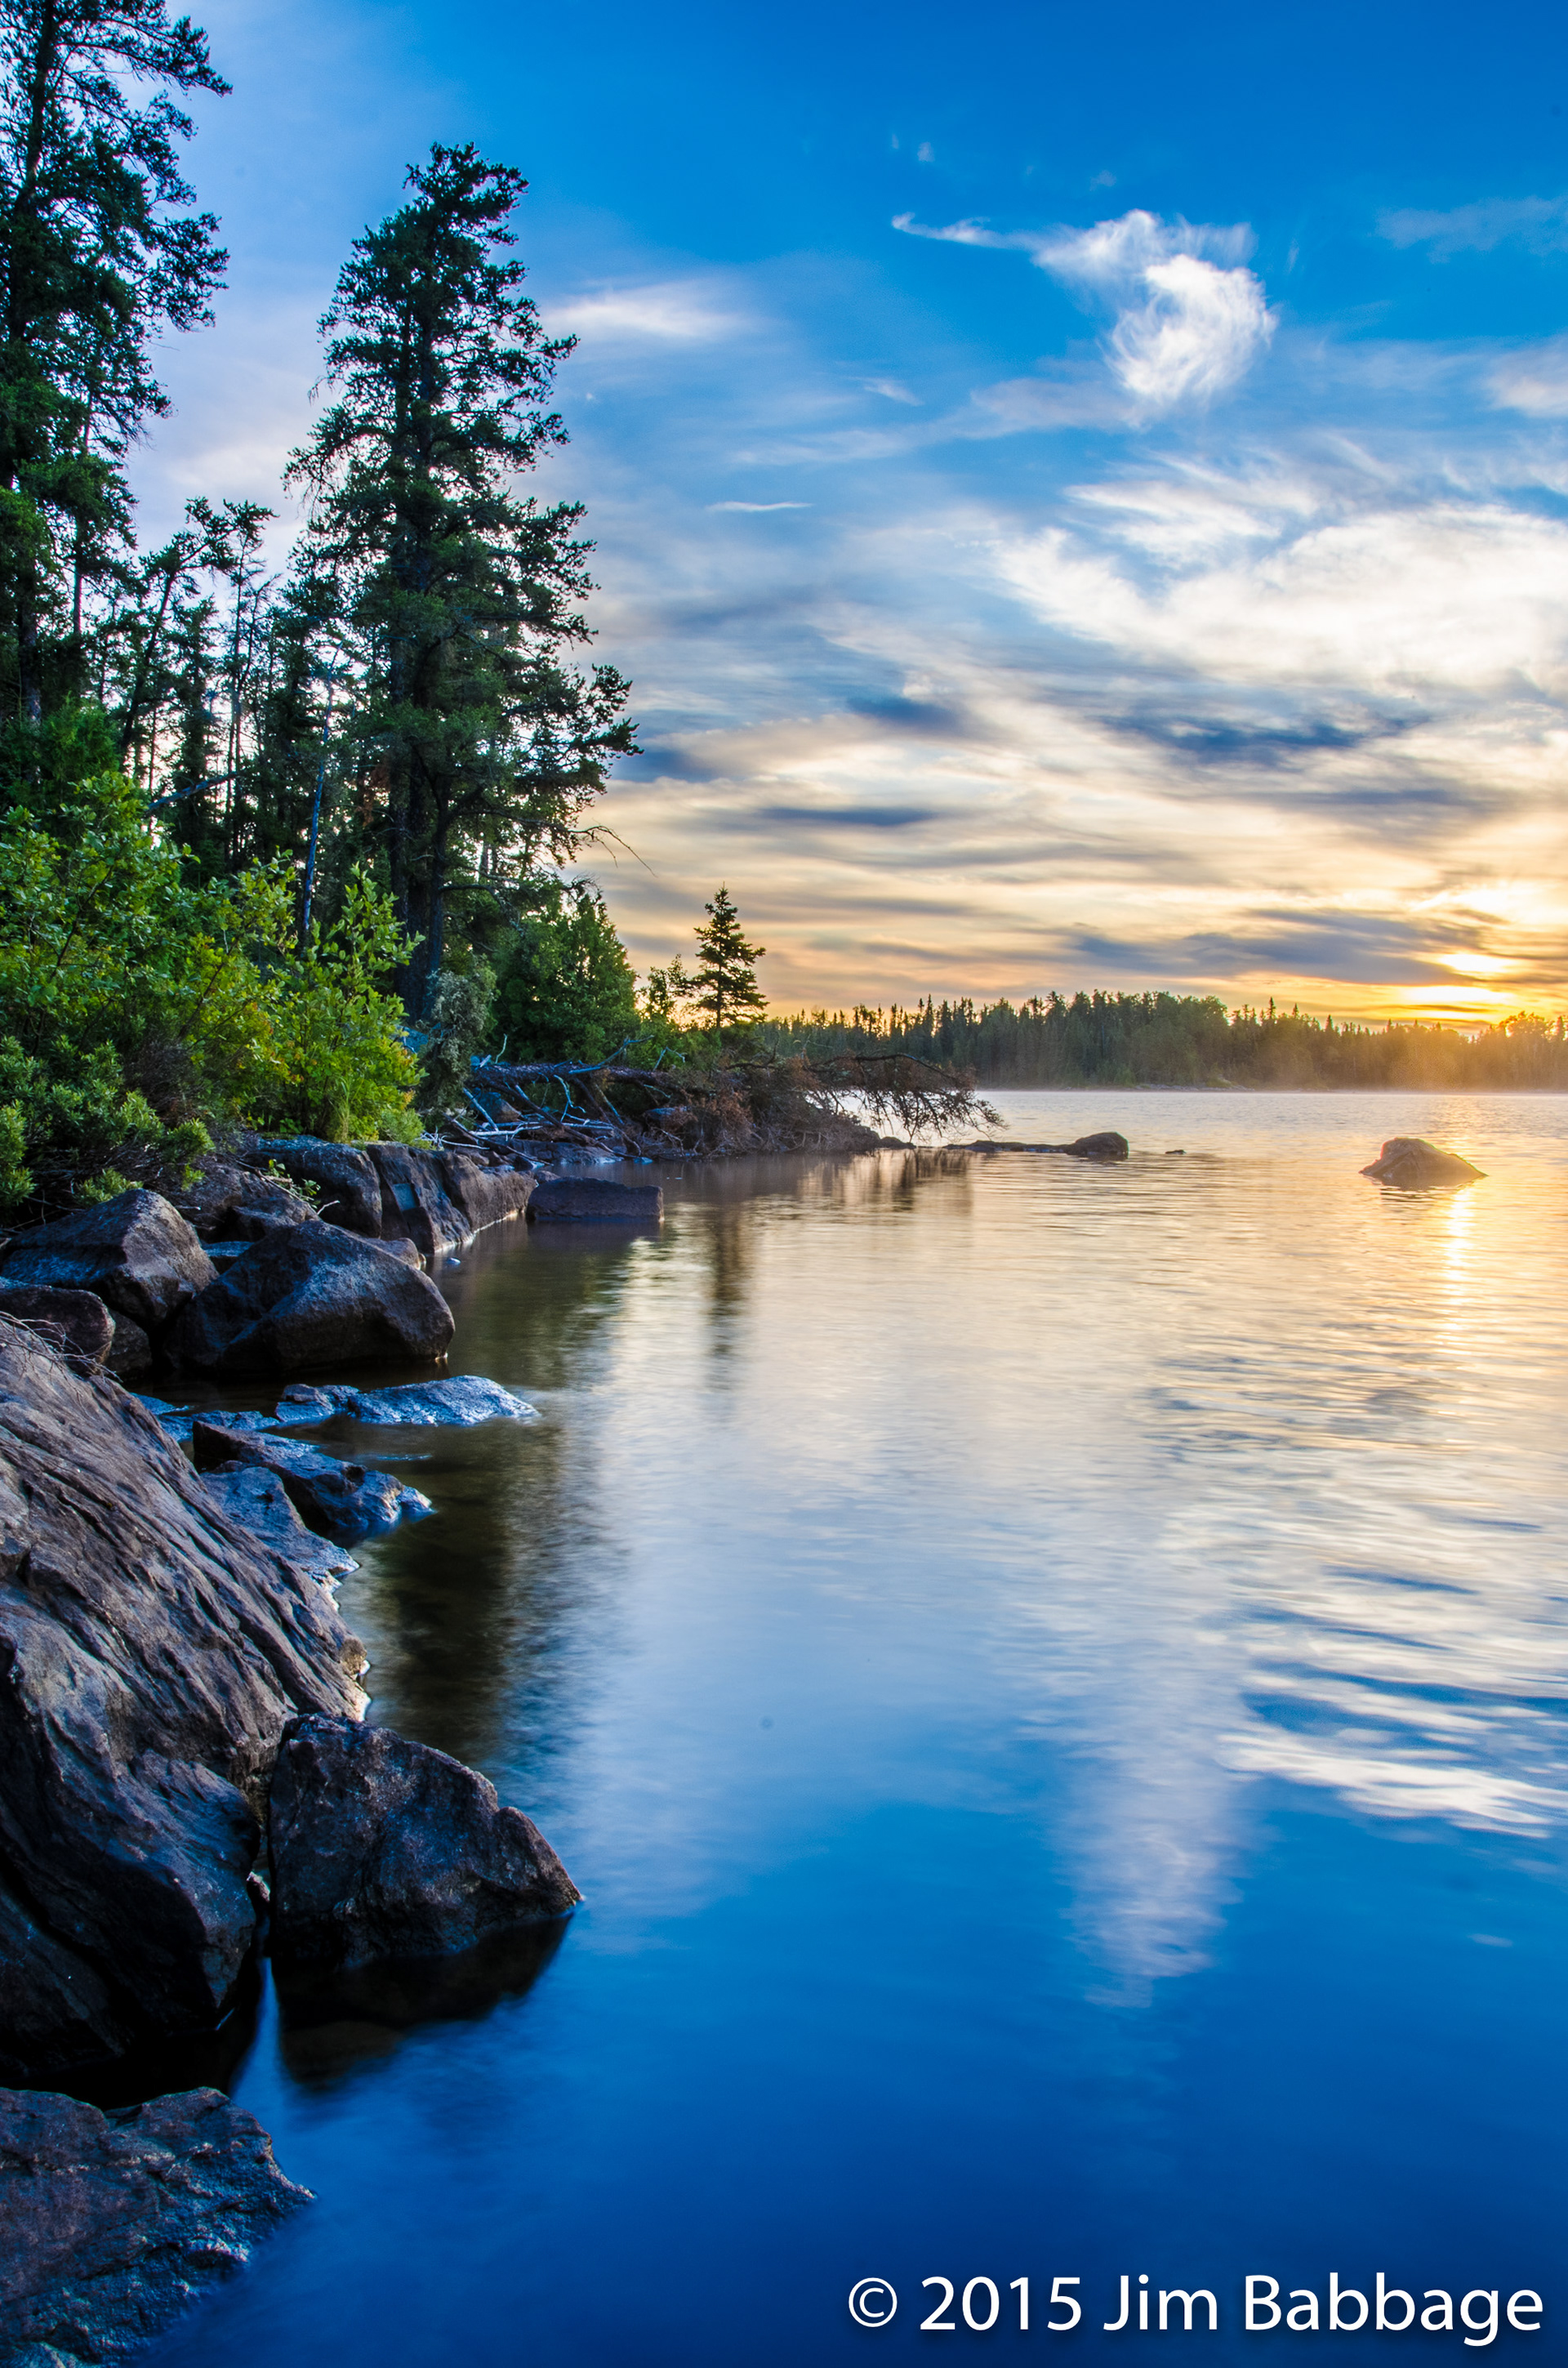
This final image is from when I created the original HDR image, using Photoshop and the Merge to HDR Pro function. Note the look of the water. There's an interesting blur/blend of the ripples and the still water and I must admit, Photoshop did a better job in this area when compared to how Lightroom handled the de-ghosting.
My goal with these images and my testing is to see how much I can do, without having to resort to another application, such as Photoshop or Photo-matix. It's not because I don't like these tools; I'm seeing how far I can go to consolidating my workflow into fewer applications. So far, I've been pretty pleased with Lightroom's ability. Even moreso, now that I've learned this little trick.