Last week, on arriving at the cottage, I set out trying to photograph the Super Moon, shining over Rice Lake. While the image itself has been getting some great feedback here on Behance, and I would LOVE to tell you that the image below was my original capture:
That would be a huge LLPOF fib. In reality, my original capture looked more like what you see below; a 4-second exposure at F/8, ISO 1600. 4 seconds helped smooth out the lake a little, but did nothing to help the visability of the super moon. Also, there wasn't quite enough foreground detail or color for my liking. And the sky was still too bright. As you can probably tell, I was also battling some haze/light cloud cover.
So, based on everything I did to achieve my final result, I thought a tutorial was in order, and here it is!
Getting Started
My first steps were to improve the main image. I'd worry about the moon later.
I usually start with Lens Correction, followed by Auto-toning. I never use the complete Auto Tone, but it gets many values (other than exposure, ironically) to a decent starting point. I am forever resetting Exposure to 0, then applying additional Shadow processing to lighten up in the right places.
I also added a graduated filter to further darken the sky, and pull out a bit more cloud detail with Dehaze and Clarity. If you're interested, my History steps are listed here:
Adding the Moon
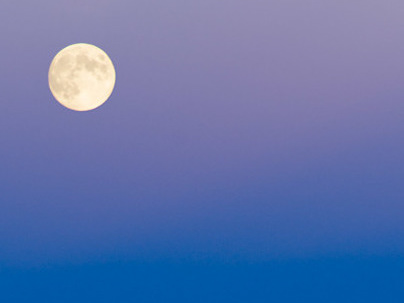
So, with all this done, the moon still, well, sucked. I knew this at the time of capture, so I also made some exposures of the moon itself at ISO 100, 1/30 sec at F/5.6. With a few tweaks (Exposure, Clarity, Highlights, White Balance and Shadows) to bring out detail in the moon surface, it was time to pull these images into Photoshop and make a composite.
Original capture.
The version above shows improvements to color and detail. It also represents the maximum magnification I was able to get with my 28-300mm zoom.
Cropped for effect only. Loving my full-frame Nikon D750. I get excellent detail, even at night.
Enter Photoshop
In Photoshop, I first combined both images, then resized and repositioned the moon so it overlapped the fuzzy moon in the original image. I didn't want the moon so large that it obscured some of the interesting cloud/haze/halo that the original shot provided.
I thought at first I would be smart and fancy, and use a Blend Mode to blend the two shots together, but my attempts with that technique weren't to my liking, and likely are due to my basic experience using blend modes to begin with.
Instead I opted for masking. I used the Eliptical Marquee to select the moon, and then inverted the selection. I did not want a crisp circular cutout, so I first expanded the selection by 4 pixels (Select > Modify > Expand) and then feathered the selection by 2 pixels (Select > Modify > Feather).
Lastly, with the moon layer selected, I applied some uniform, monochromatic noise, so that the moon more closely matched the noise/grain of the background image.
I then clicked on the Mask icon in the Layers panel to add a mask, hiding everything on that layer, save the moon. With the mask created, I saved the file as a PSD and returned to Lightroom.
Selective Saturation adjustments were applied to the canoes and kayaks in the foreground, to bring out a little color.
And then I went back to Photoshop one more time to improve the blending of the moon with the background image.
I used a large feathered brush to paint around the edges of the mask to blend the new moon with the background image. You can see the edits to the mask below, temporarily converted to a selection.
I saved the file one more time as a different PSD, so I could compare the two easily when back in Lightroom.
Once back in Lightroom, I felt the image still needed a little tweaking in the Shadows and Highlights.
The Finale!
And the end result is what you see below. Overall, I think the final composite turned out pretty well. And it's getting some great feedback here on Behance. I hope this "under the hood" perspective of my Moon over Rice Lake has been of interest and helps you in some way in your own photography.

