Visual Storytelling with Original Art and Gen AI
Article #19 in the Generative AI for Photographers series
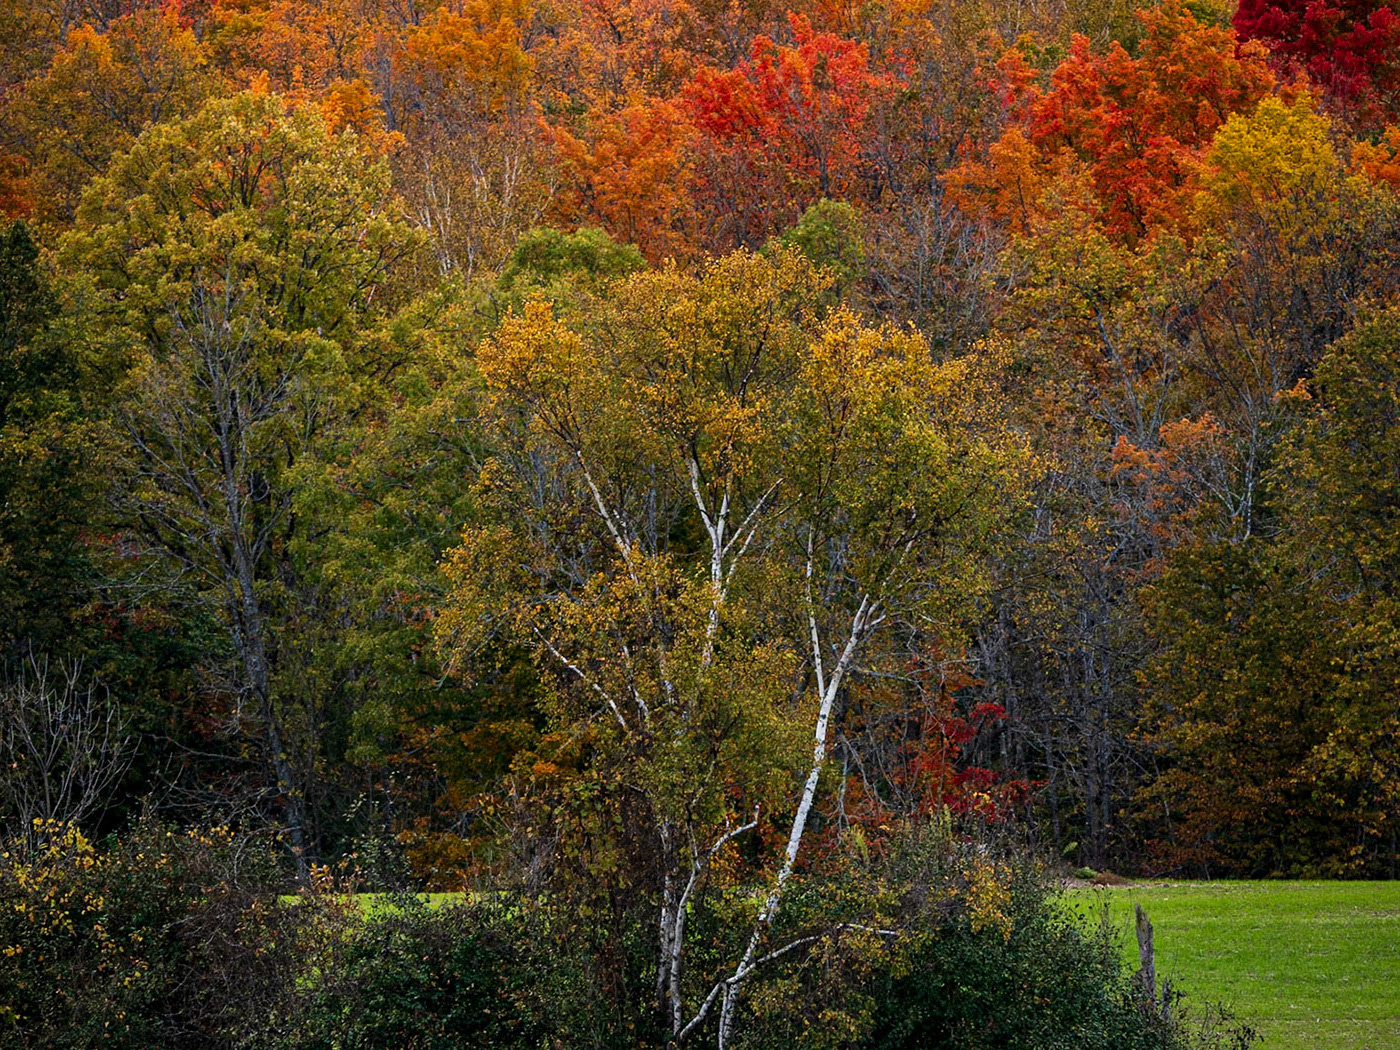
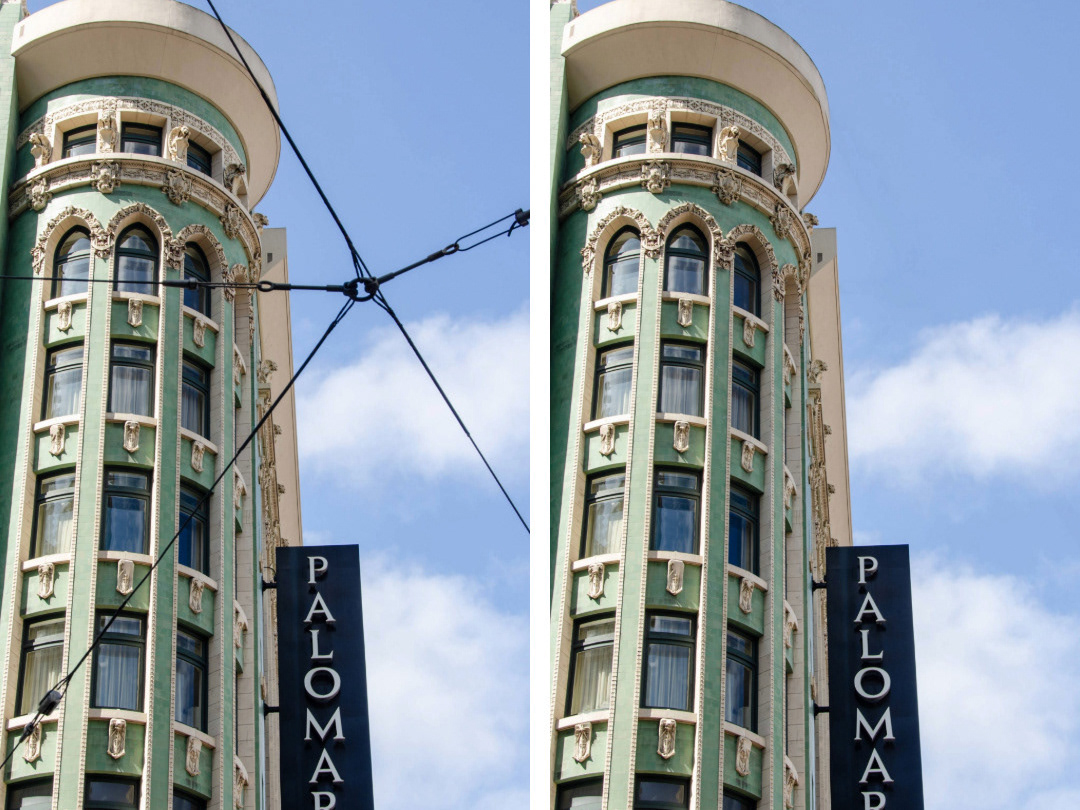
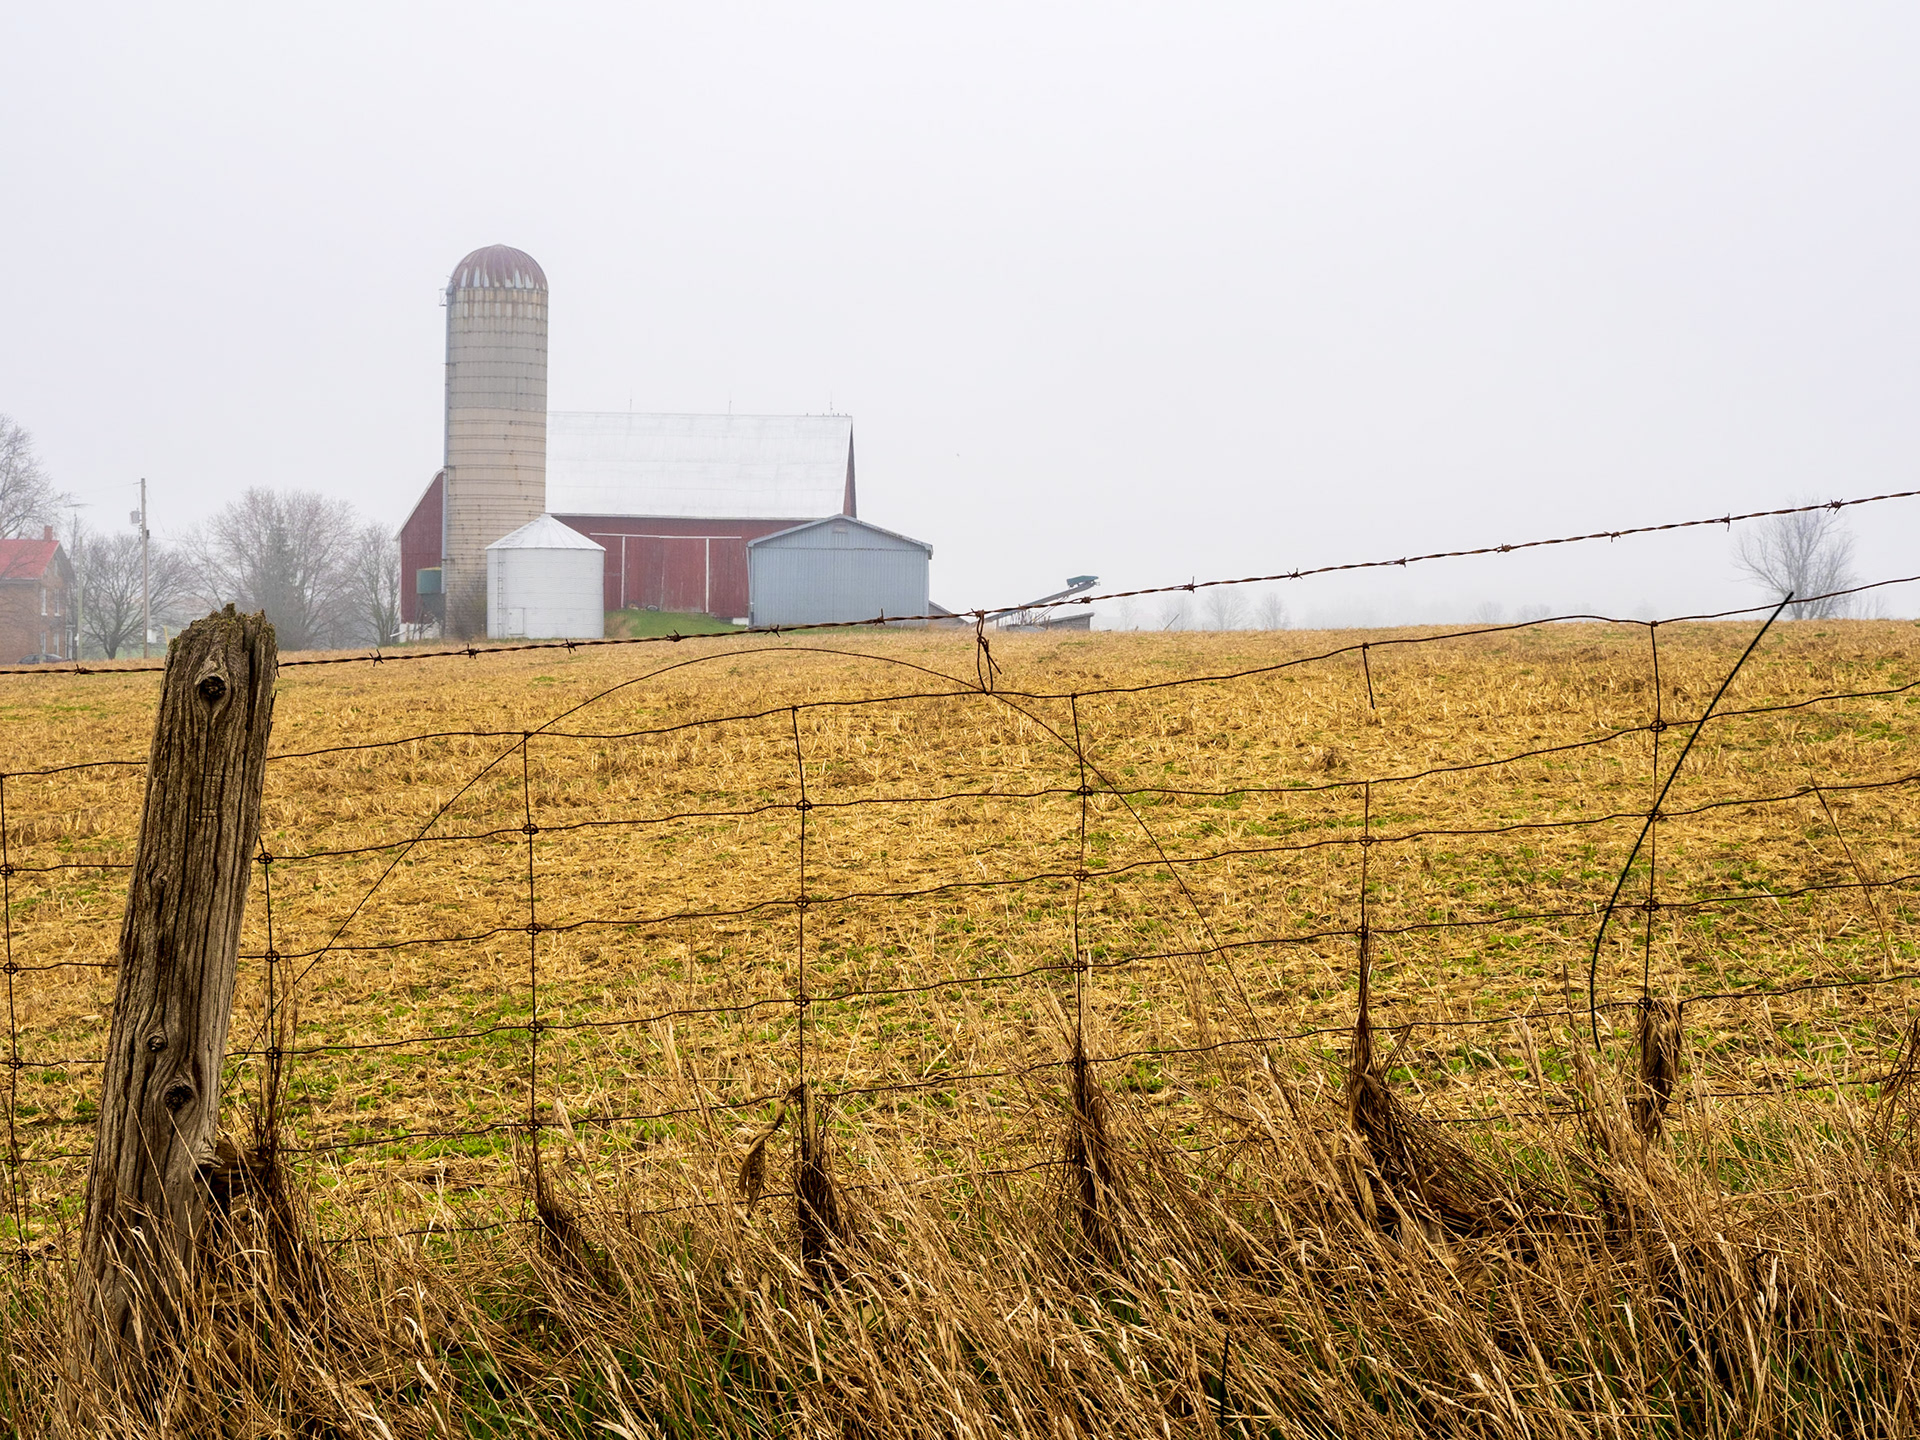
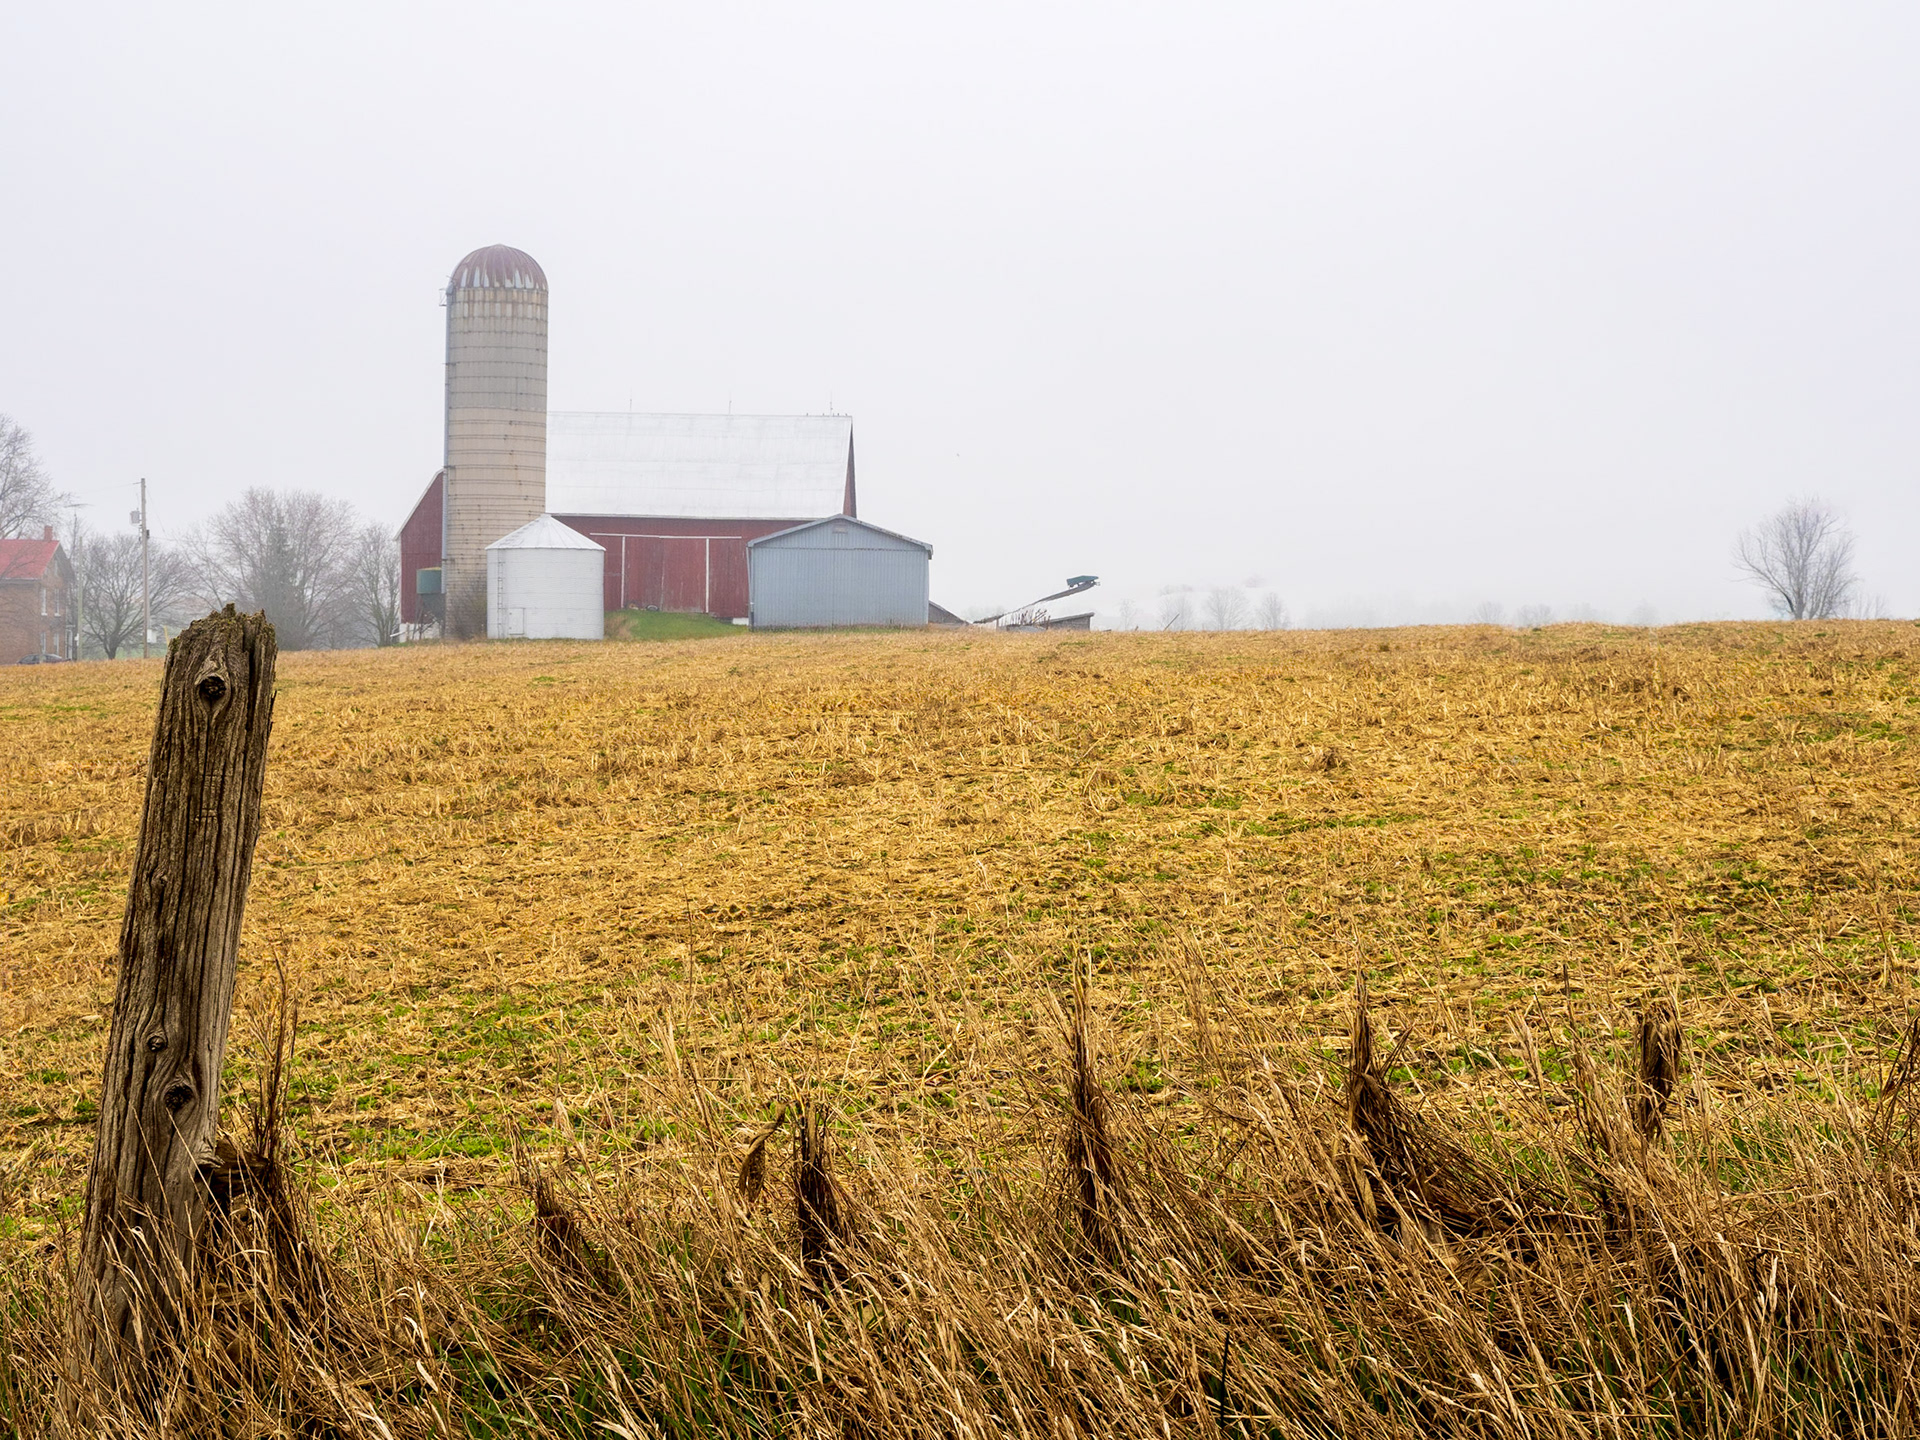
Over the past few months, I've been using this landscape image to showcase the new-ish Remove Distractions feature in Photoshop. This feature uses on-board AI to detect wires and cables and remove them in a single click. This feature does not use Generative AI.
Recently, Photoshop has added some additional powerful features: additional controls for detecting and removing visual distractions, rotate object and more powerful/accurate Gen AI models, including Firefly Fill and Expand (replacing Firefly models 3 and 4 in Generative Fill). These capabilities open up some amazing opportunities when it comes to creating image composites, a skill I freely admit that I have not mastered. I like to think I have the imagination to determine what I want, but making the end result appear realistic is a challenge for me.
Below is a brief visual progression from start to finish. I'll walk through these steps in this article.

Why is this important to me as a photographer, you might argue.This capability opens up options and visual alternatives for me. I'm sure if I drove around enough, I could find a farm field with a tractor and a cow already in the scene. But compositionally, they may not align the way I want. Or, the weather/lighting may not be to my taste and - lastly - do I really want to come upon a cow who has found its way out of the field?
However, by combining original photography and using Generative AI sparingly, I can create and enitrely different visual narrative - and avoid being chased by Bessie.
This project also becomes a teachable moment in regards to critical visual thinking, discerning what is real from what is imaged or fake/generated.
Getting Started
As I mentioned, I had been using this landscape image to demonstrate the power, accuracy and ease of use of the Find Distractions feature in Photoshop.
1) Open your file and select the Remove Tool.
2) From the Options bar above the canvas, choose Find Distractions
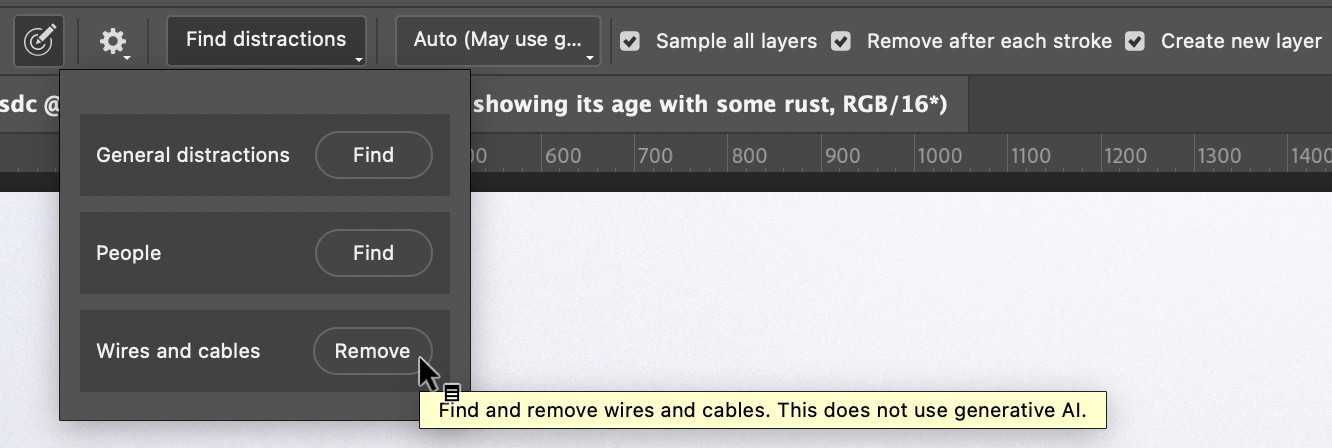
The feature now gives you three choices:
Find General Distractions (NEW) - This option can find and select up to 26 different types of distractions and label them using color-coded masks for objects like vehicles, vegetation, signage, spots, barriers and much more. Once identified, you can choose which of these distractions you want Photoshop to remove (there's that human component, again!). You can also refine these selections using a brush. Then, simply click the check mark to commit the actions.
Find People - Similar to Find General Distractions, but specifically designed to locate people who are not the subject of the photo. Again, you can choose whihc people to remove before committing to the action.
For both of the above tools, you can elect whether or not to use Generative AI, or you can let Photoshop decide the best option.
Remove Wires and Cables (1-click) - One click locates wires and cables and automatically removes them using Content Aware Fill. It does not remove objects thicker than a wire or cable (like posts or telephone poles). Overall, very fast and impressive.
Removing Distractions
I chose to use Wires and Cables for the fence, and put that change on a new layer, as the edits were small enough that the detail provided by Gen AI was not necessary. But I will point out that Find General Distractions did locate and select the fence just fine, along with the fence post (which I wanted to retain).
Adding Bessie the Cow
Originally, this is where my simple demonstration ended, but with the recent addition of Rotate Object, I decided to take things further and include a cow from another photo I had made, under different lighting conditions and a different camera viewpoint.
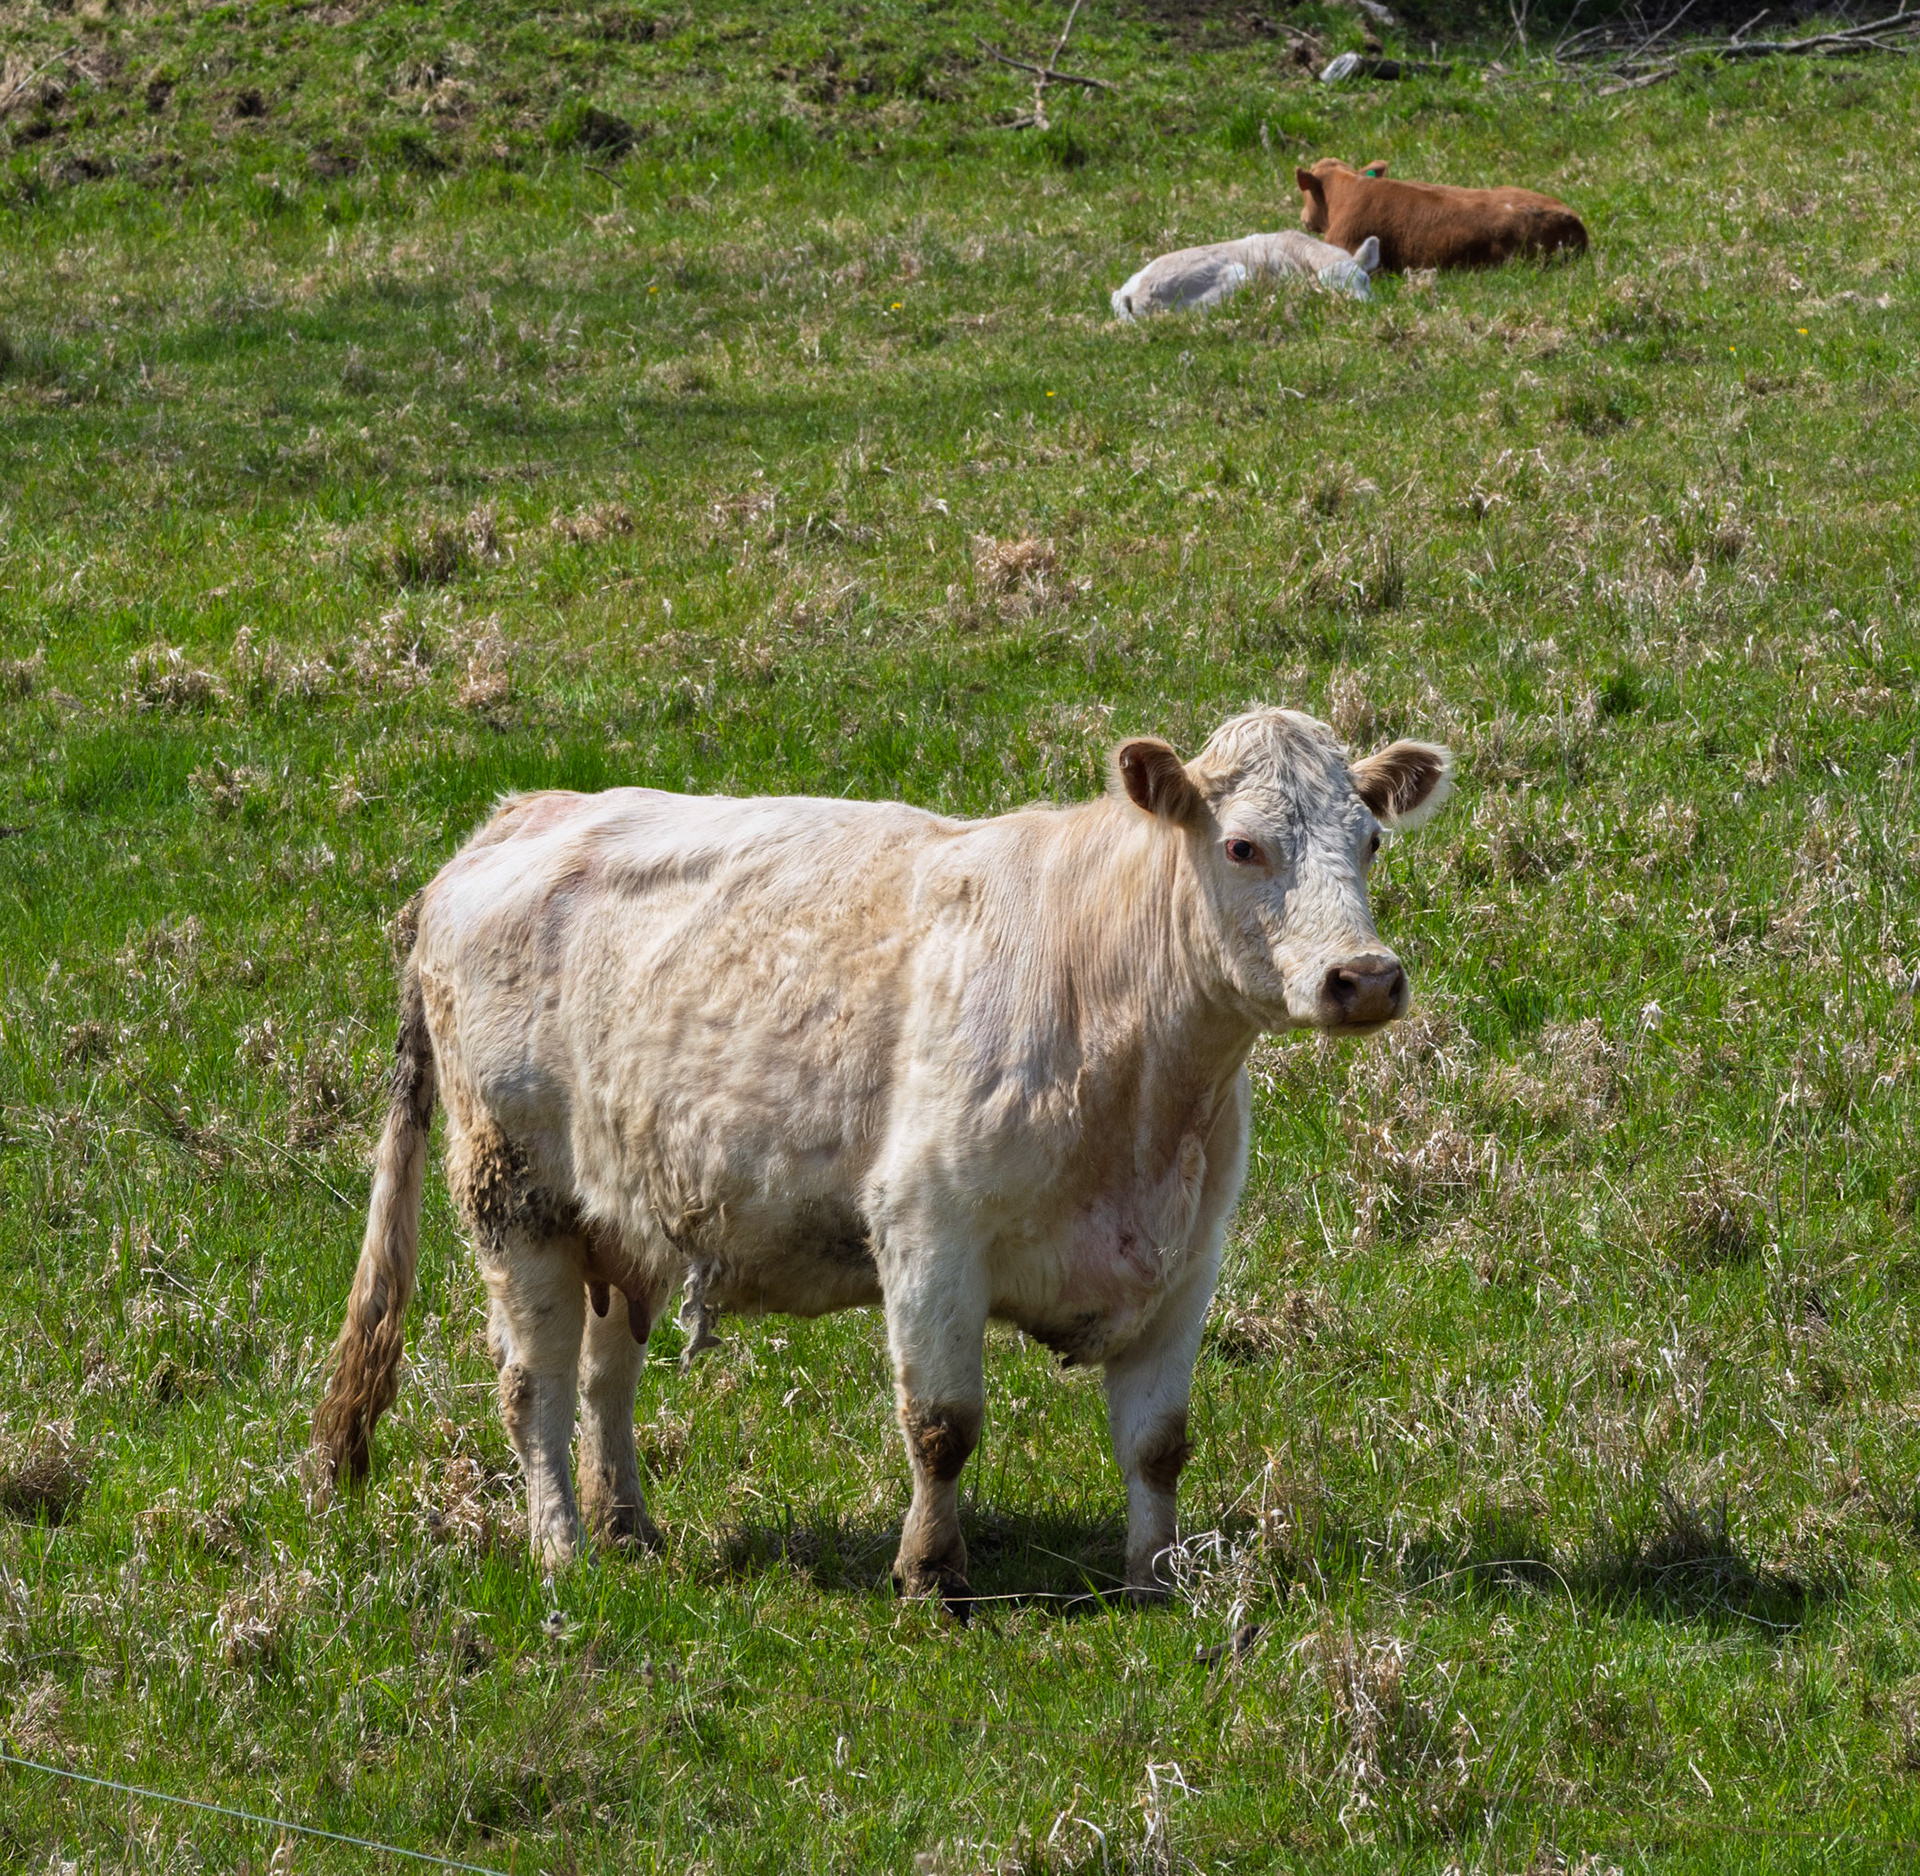
Photo of Bessie, cropped for illustration purposes. Not the difference in the quality of light and the viewpoint, when compared to the photo of the field.
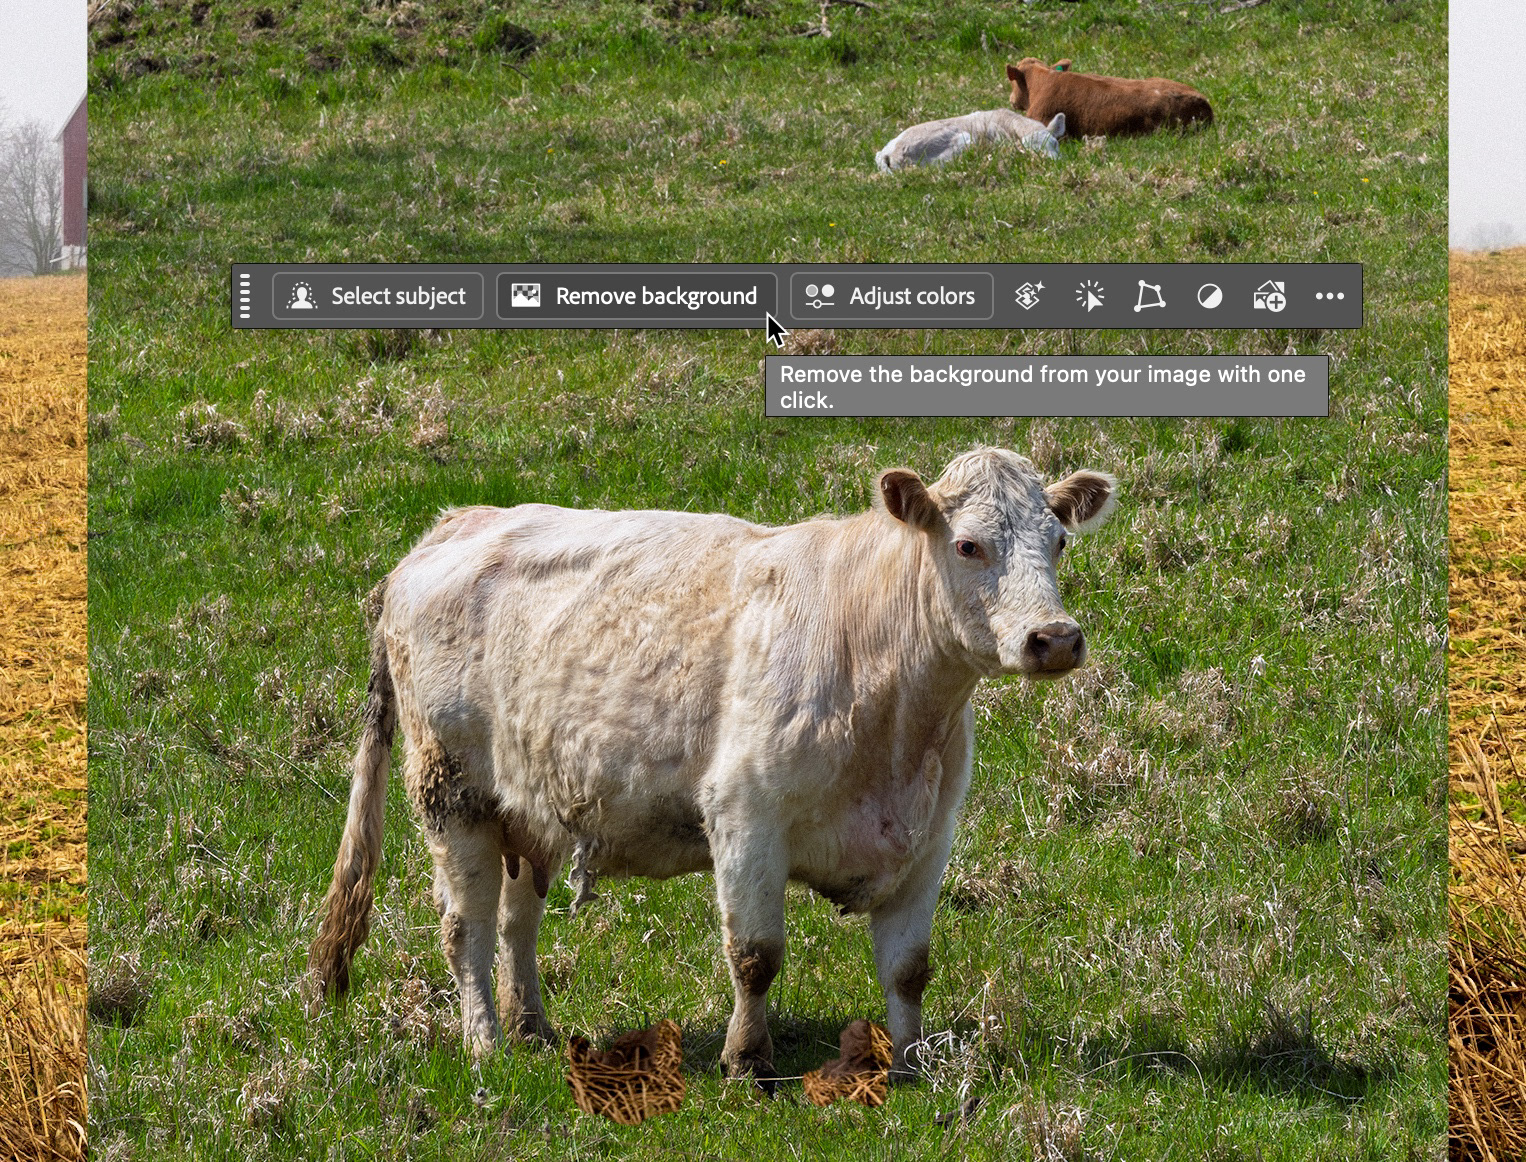
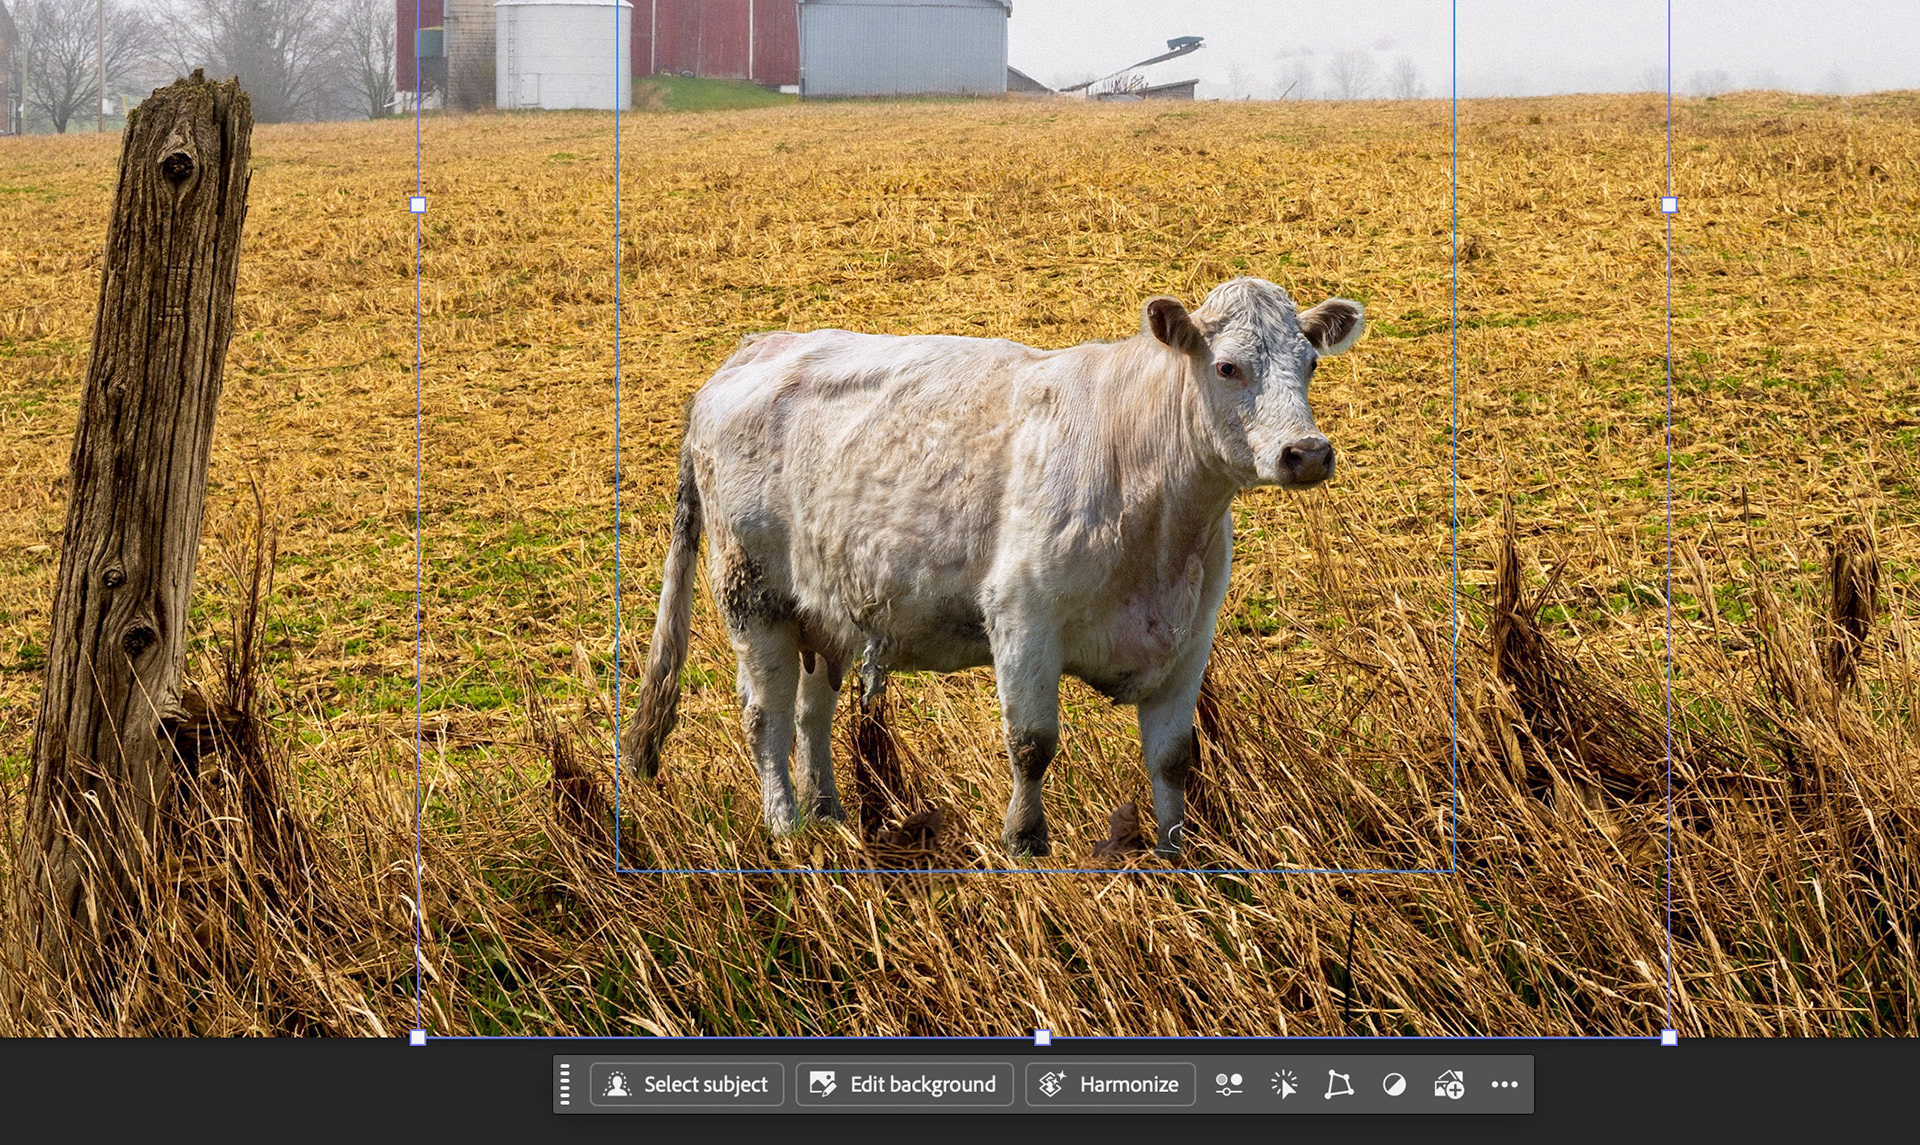
I added Bessie by choosing File > Place embedded and browsing for the file. The image came in as a smart object layer.
The next step was to remove the background, a process that is really no longer a process; it's just so darned easy, now. I clicked on the new layer in the Layers panel first, to commit to placing the image. As soon as that was done, the Contextual Task Bar gave the me option to remove the background with a single click. Which I did! What used to take minutes, took only seconds, with a relatively high degree of accuracy. (I did have to do an extra bit of masking to remove the calves in the background)
So the cow was in separated from the background, but there were still several issues: lighting, perspective, color balance and scale - the important details that give me compositing nightmares.
Fine-Tuning the Composite using Rotate Object and Harmonize
As I was dealing with a Smart Object (the cow layer) I knew I could (within reason) scale the animal to be larger in the frame, bu I also neede to make changes to viewpoint/perspective. This is wher the new AI-powered Rotate Object tool became very useful.
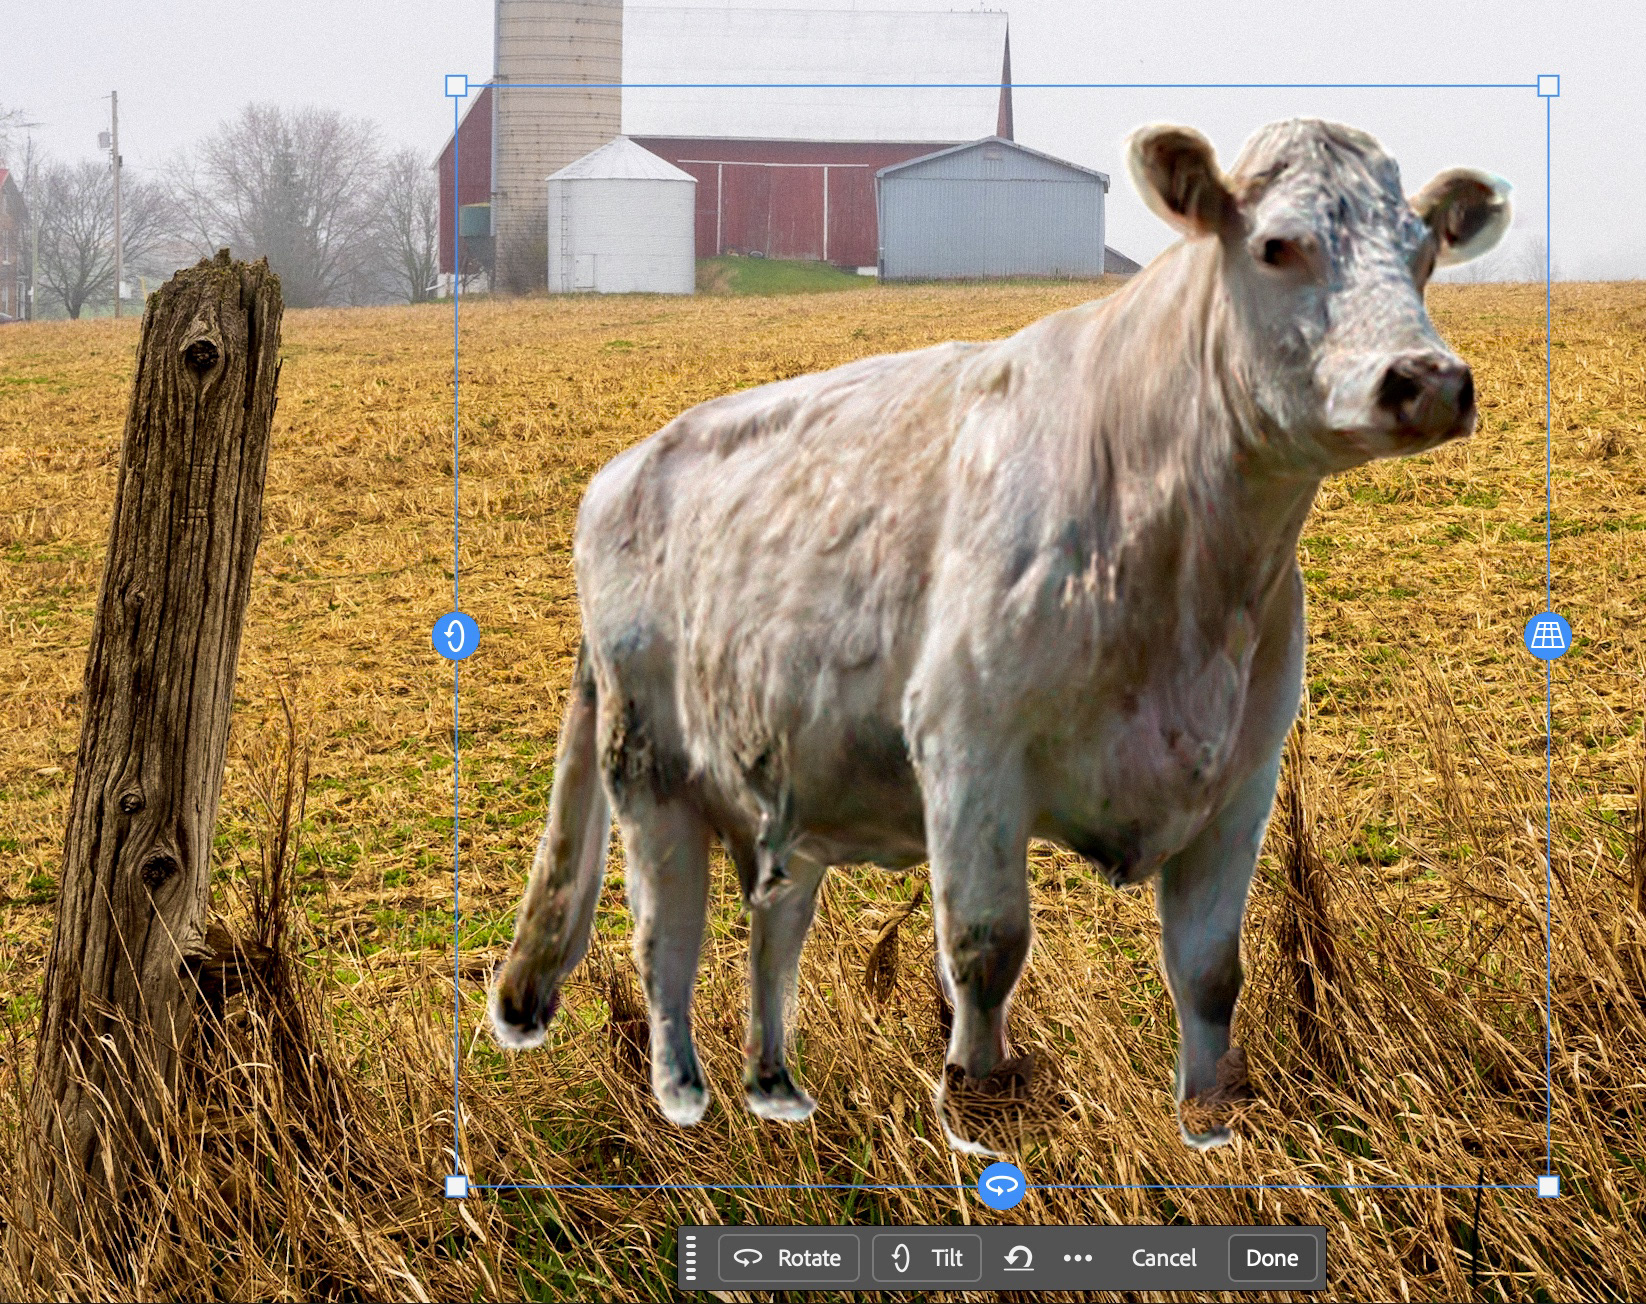
Rotate Object (Edit > Rotate Object) does more than rotate your layer; it gives you 3D capabilities on a 2D surface thanks to Generative AI. So I can rotate, tilt, scale and even adjust perspective. In this example, I needed to do all of these things.
I tilted the cow so that it appeared the camera was lower or close to eye level, rather than above the subject.
I slightly tweaked the perspective to try to match the wider angle lens used to capture the original field image.
I scaled the cow larger to match the size with the fence post in the scene; the cow had to appear to be at least a little bigger than the post, so that it's position/proximity to the camera made more sense.
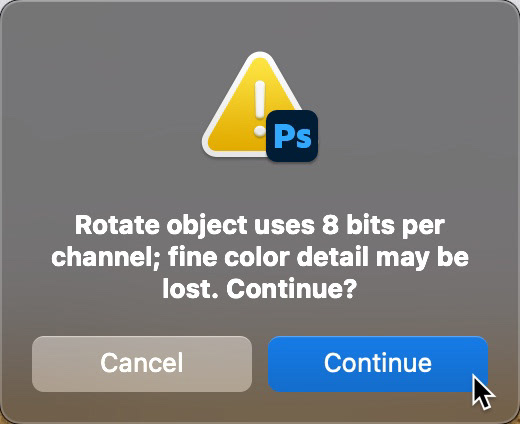
Note: Currently, Rotate Object only uses a 8-bit color channels, which could impact fine color detail. Also, a low-res proxy is used to make your adjustments. The image quality gets better once you commit to your changes.
In Perfect Harmony
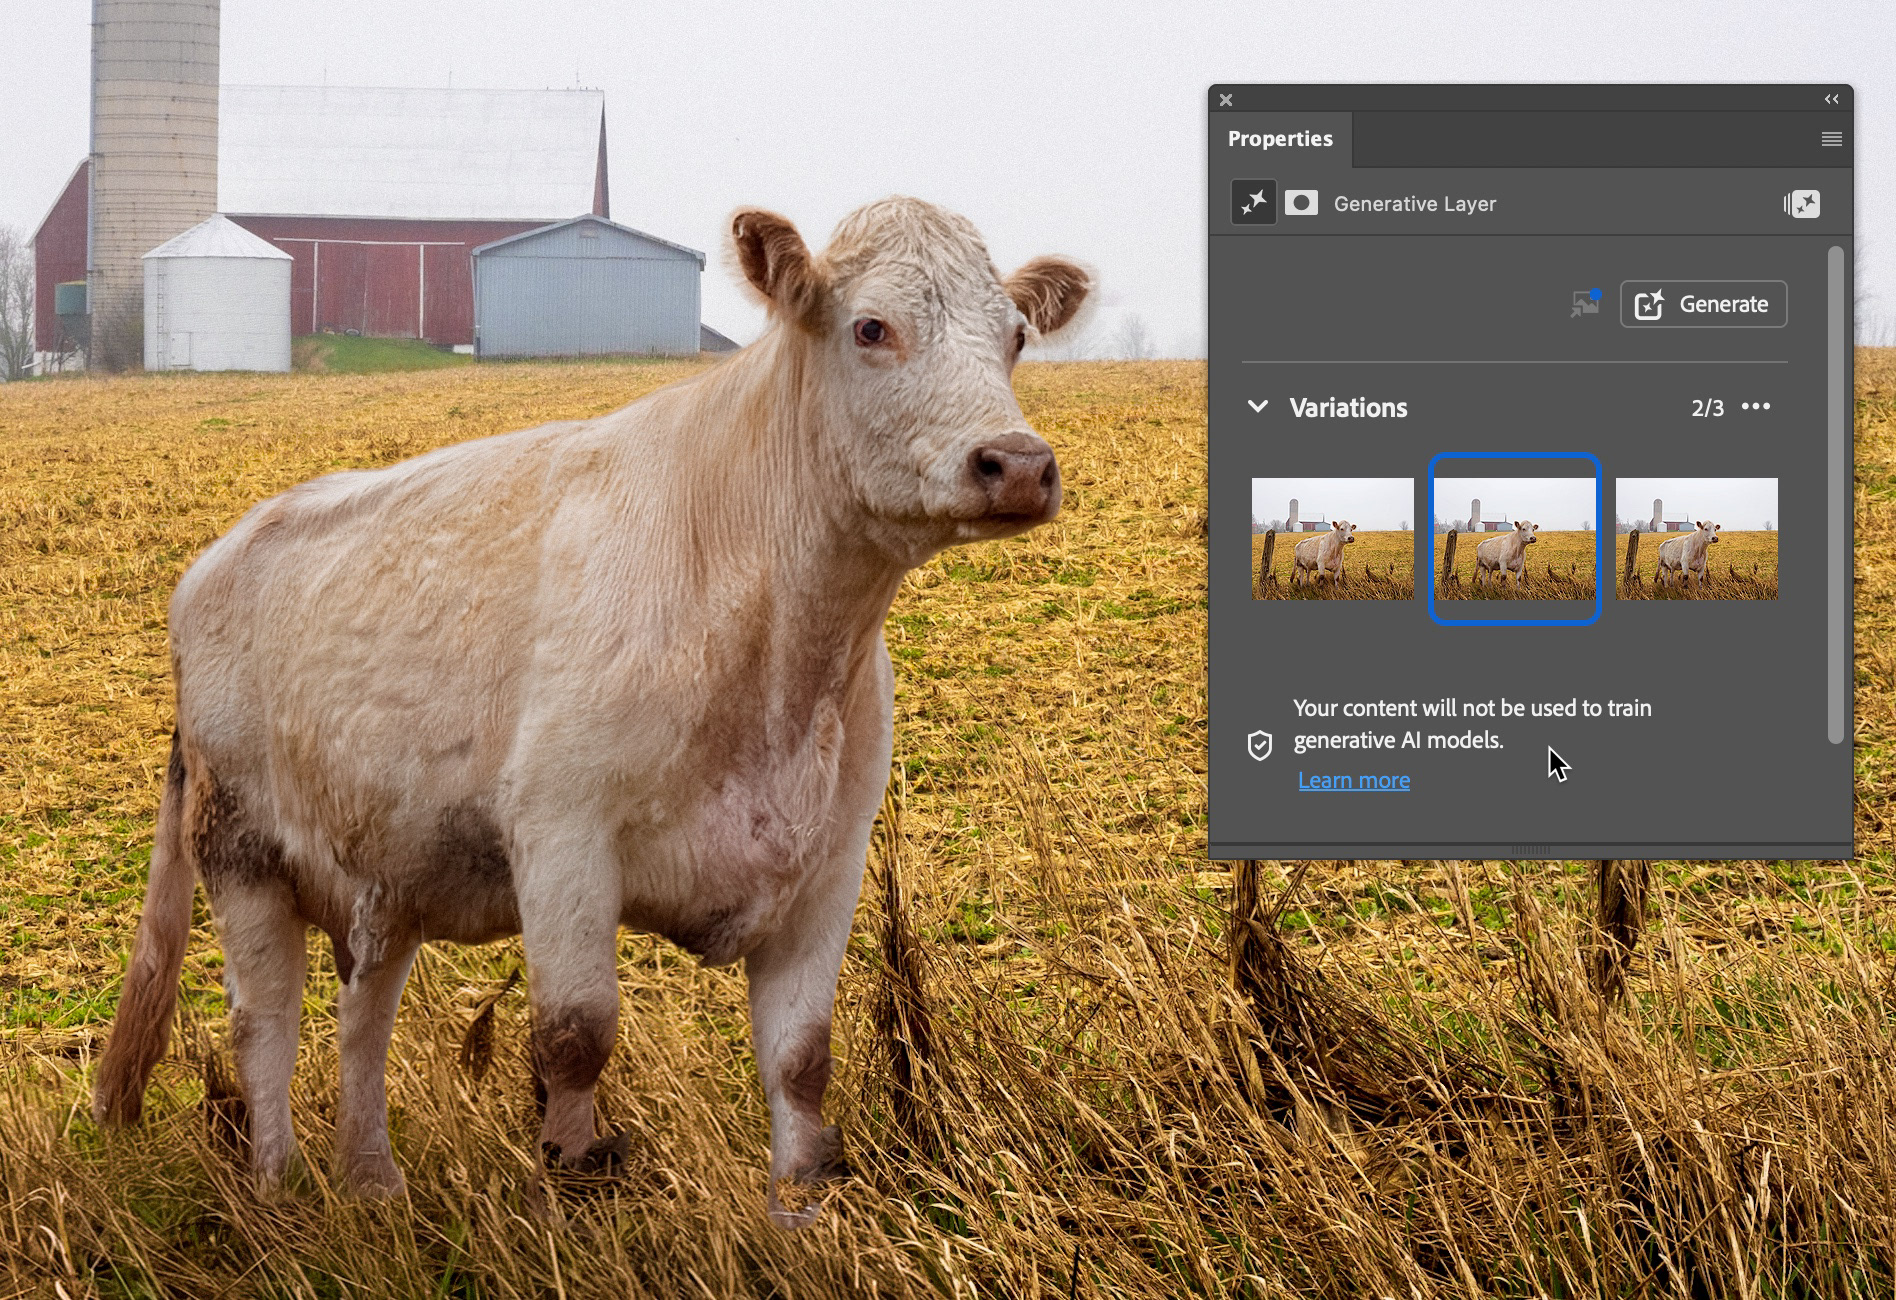
The next step to make this truly realistic is to harmonize elements such as color balance, layer blending, lighting quality and layer blending. You may recall that Bessie was original photographed under weak sunlight, which added contrast and shadows that don't work with the background image. In olden days (a few weeks or months ago), this process was done manually by eye and in my case, not always successfully.
Now, all I had to do is make sure the layer was selected, and the Contextual Task Bar provided an option to harmonize the layer. Note that this option does use Generative AI (Firefly only at this time) and will consume generative credits.
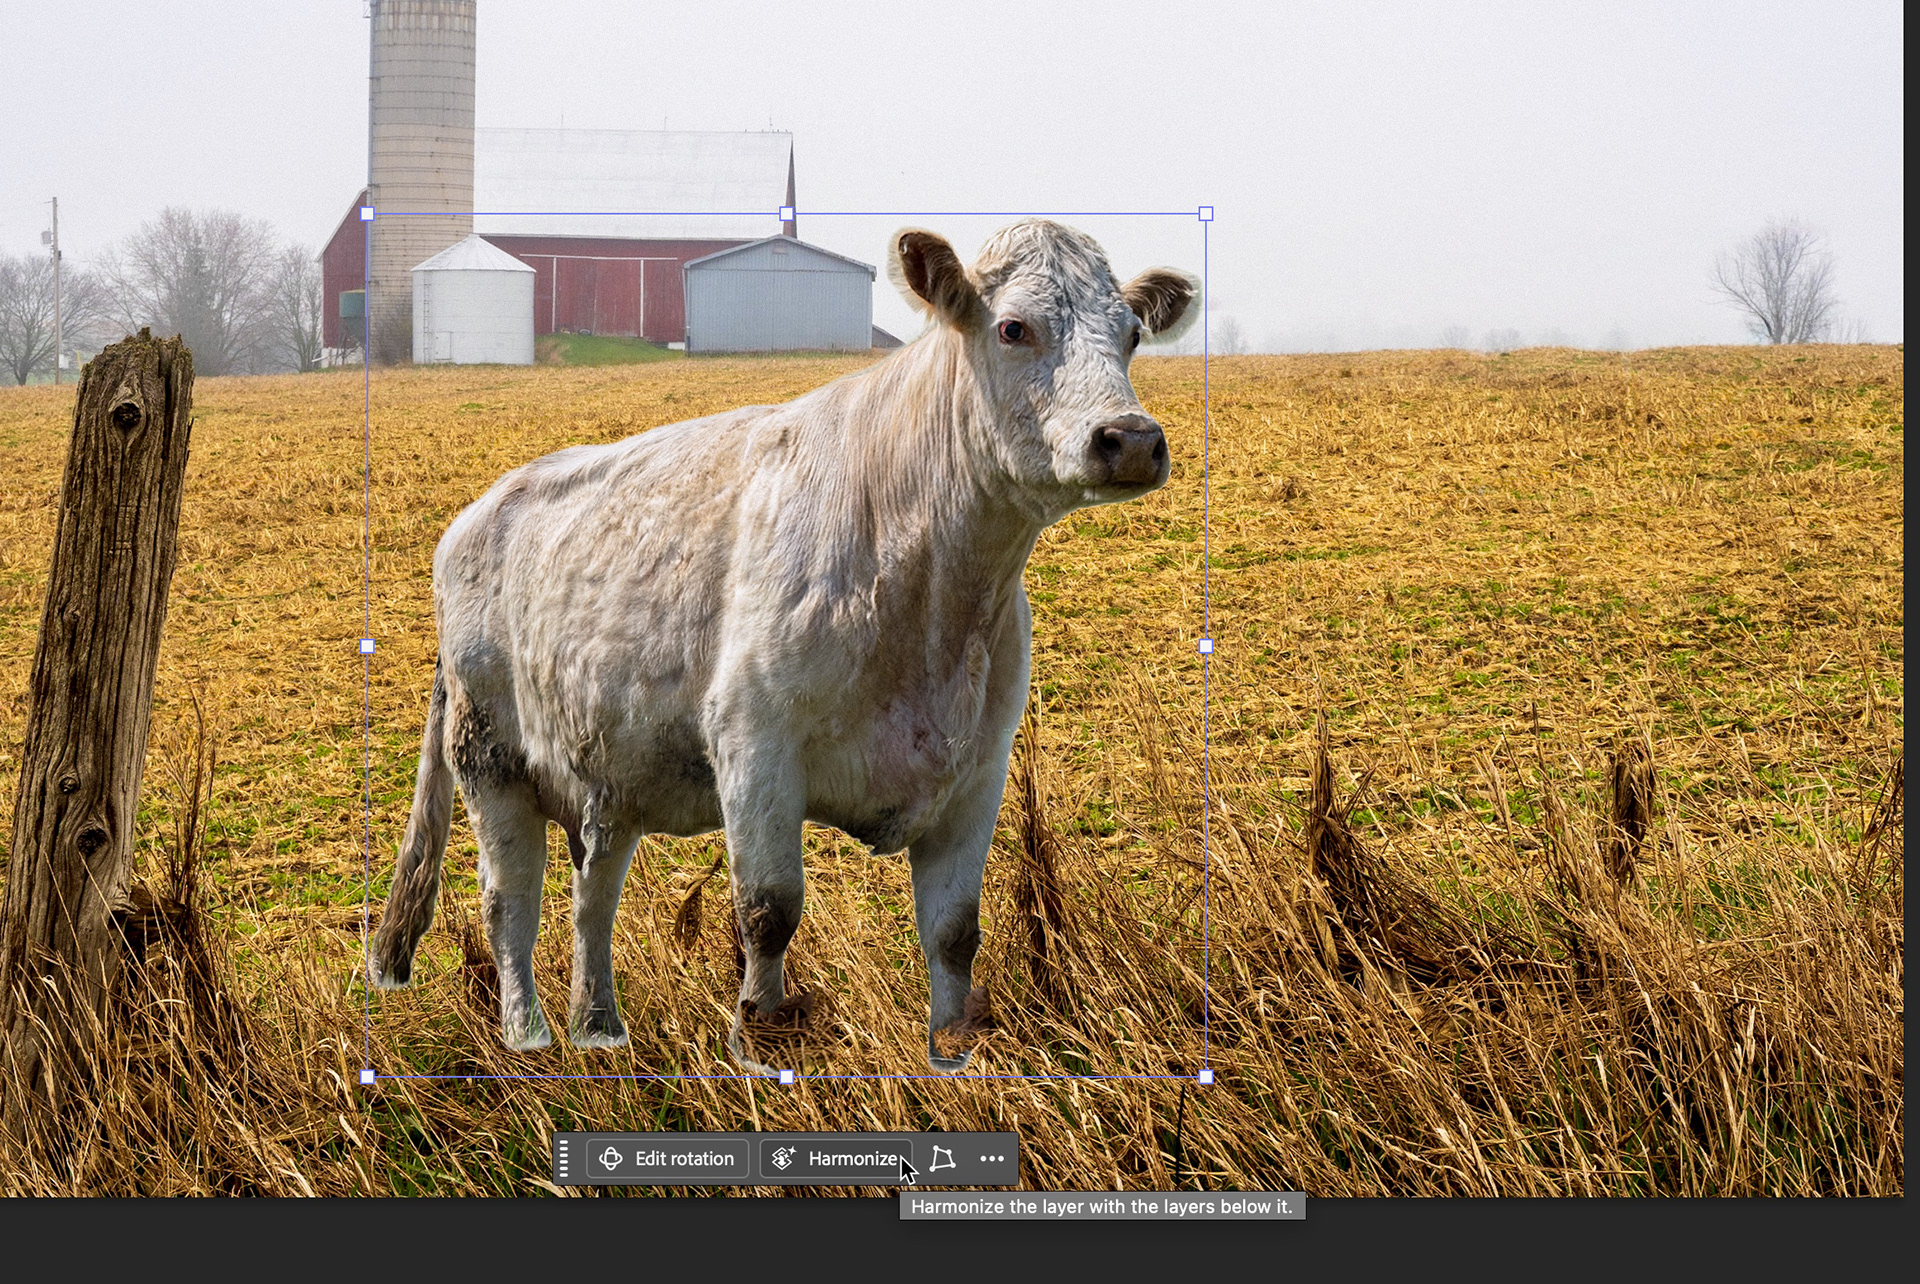
When the Harmonize action is complete, a new harmonized layer is created, and the Properties panel displayed 3 variations. I just chose the most suitable.
From this stage, you can use whatever tools - traditional or generative AI - to make any desired touch ups to the harmonized layer.
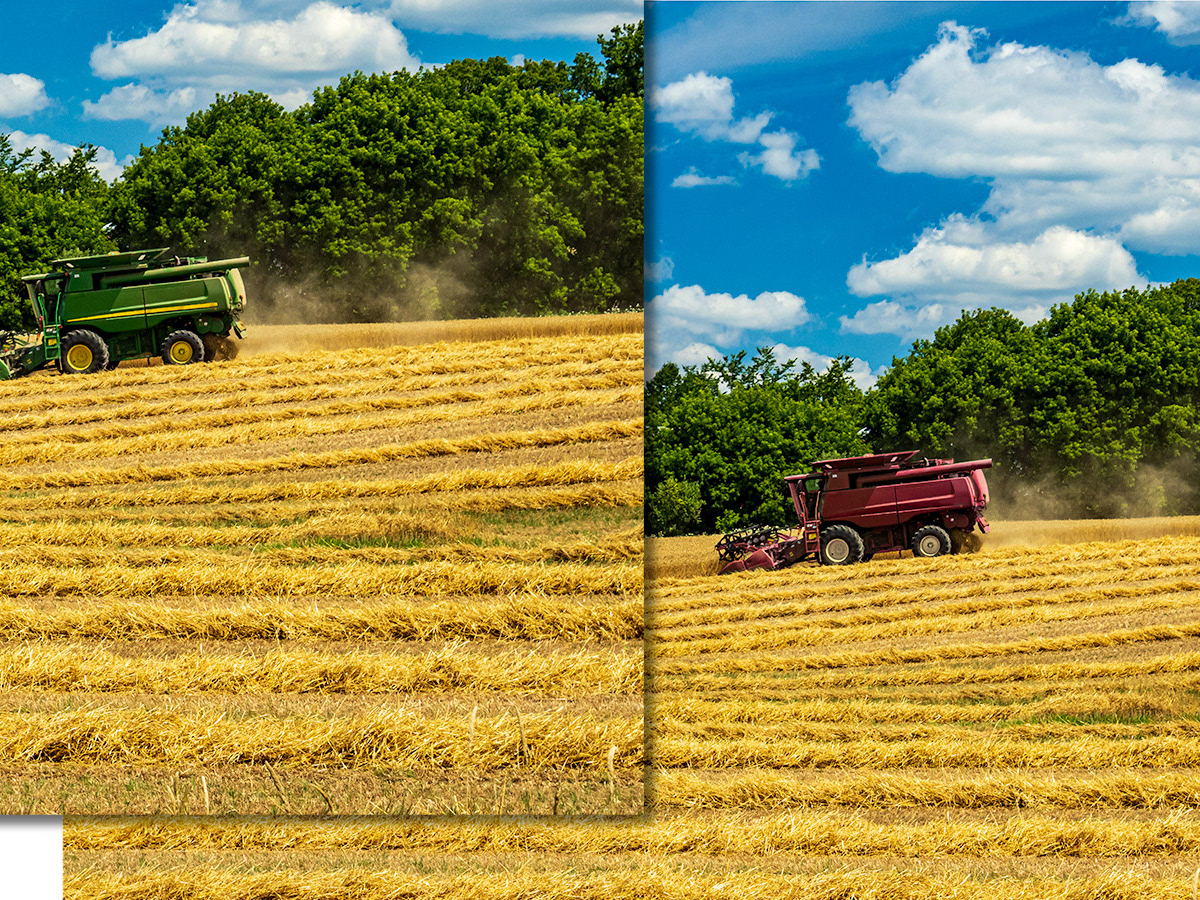
Adding the Tractor
The final part of my visual story ends with a tractor. I wanted this in the scene for four reasons:
1) additional storytelling element
2) pop of color
3) additional sense of depth to the scene
4) promote eye movement through the scene
I would add that these decisions are not elements that AI could fix or decide to fix on its own. I am the creative arbiter of this final image and these are decisions made based on my experience as a photographer and content creator.
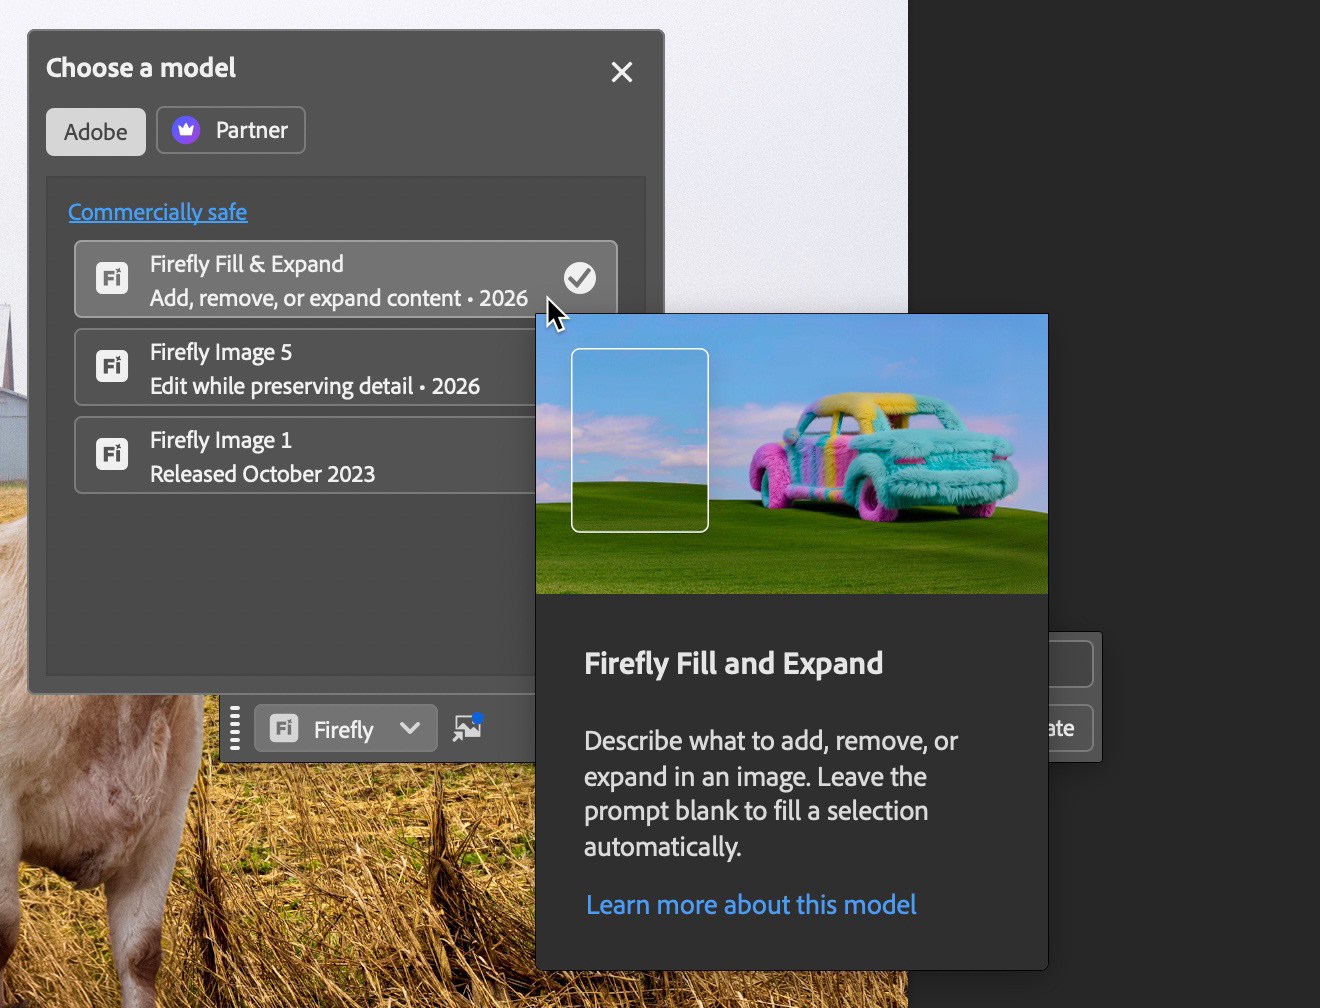
However, I did not have a suitable tractor in my photo files. One option would have been to use Adobe Stock, and repeated similar steps as I did with Bessie the Cow, but I opted to see well the new Firefly Fill and Expand model would work.
With the Harmonized Bessie layer still selected (as it was top of the layer stack), I drew a rectangle with the Marquee tool at a size I felt was appropriate for a tractor in the middle ground of the image.
In the Contextual Task Bar, I chose Generative Fill and made sure I had Firefly Fill and Expand as the chosen model. I kept the prompt simple but descriptive: old dull red vintage tractor showing its age with some rust.
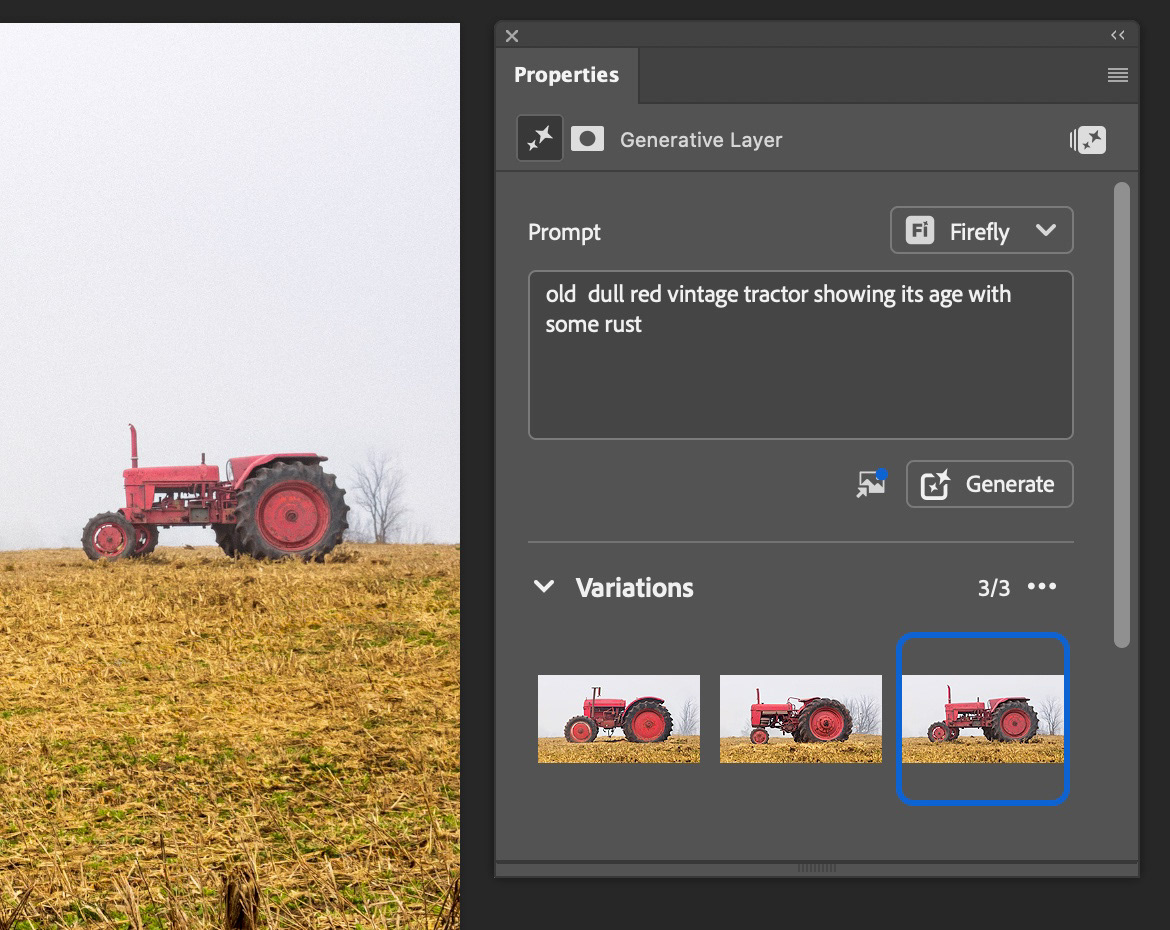
When the three variations appeared in the Properties Panel, I chose the one I liked (which was also the least - well - weird of the three). More accuracy could be had by including a reference image and/or adding more detail to my text prompt.
Tip: If you are doing more than just messing around, I would strongly recommend the use of a reference image and a detailed text prompt so that you are making the best use of your generative credits.
Final Touches
To help things blend a bit more seamlessly, I also used the new non-destructive Grain adjustment layer. It's amazing what a touch of texture can do to make a composite feel more cohesive.
The Story is Told
And that is basically a wrap on this project. I had a lot of fun building off my original work to tell a deeper and more informative visual story. The final result reminds me of creative writing exercises I had in public school, where we were given an image and ask to write a a few paragraphs to tell a story about the photo. I think there are a lot of ingredients here to promote creative thinking and writing.
I hope your found this tutorial informative, entertaining and that it inspires you to try something new.
Until next time!