Generate AI Video directly in Adobe Lightroom
Article #20 in the Generative AI for Photographers series
As of June 2026, you can now generate a video from one of your still images directly within Lightroom Desktop!
Prior to this update, Lightroom Desktop would send you out to the Firefly website to generate the video, but now it's all in-house, making it super convenient to breathe more life into your images.
Note: for a more in-depth look at this process, using Firefly, check out these two articles:
Before and After
Before diving in, you'll see below the original image from Lightroom and a final, edited version that was cut in - believe it or not - Adobe Express!
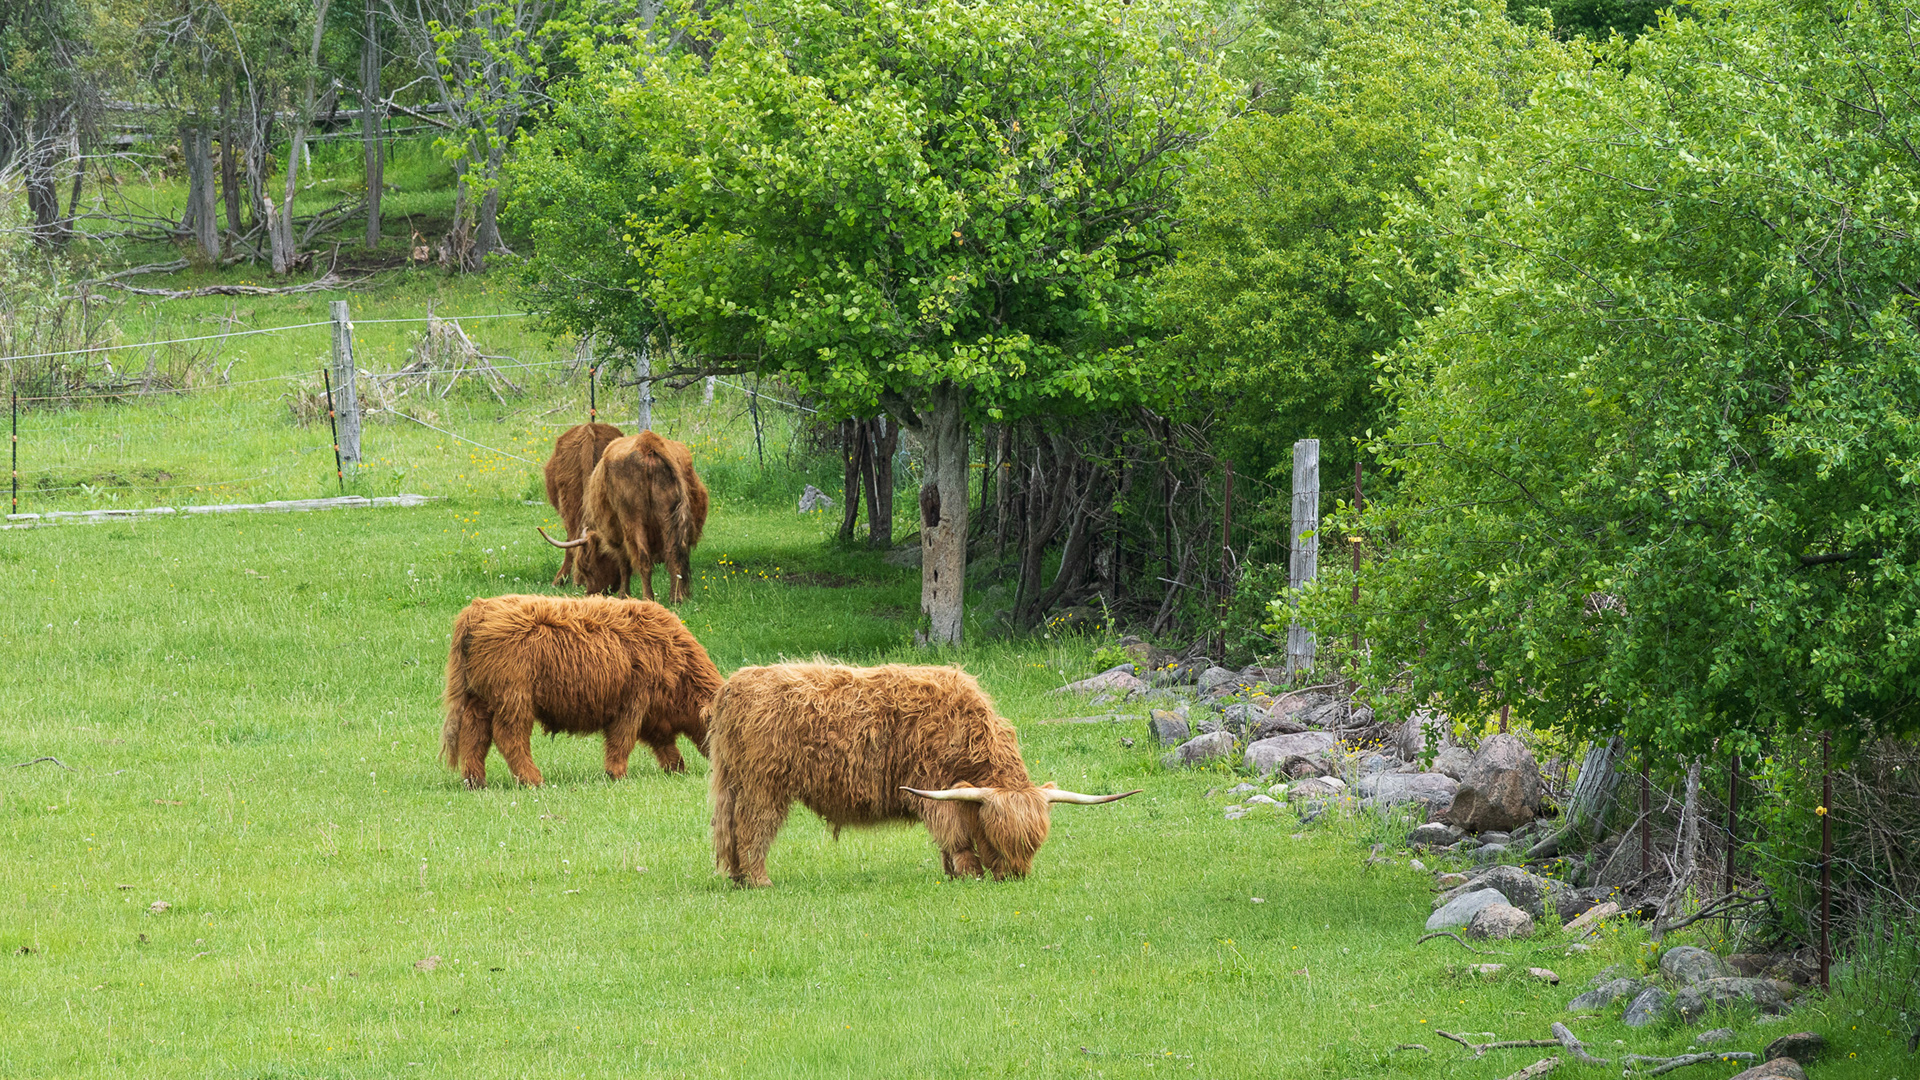
Generated (and edited video of Scottish Highland cows grazing in a field.
This article will cover the video generation from Lightroom Desktop and also my editing workflow in Adobe Express.
Creating the Action
Turning a static image into a short video couldn't get much easier, so, for someone like me, who is always forgetting to capture video, this can be of huge benefit.
1) Select and process your image to your personal taste.
Tip: I would also recommend cropping the image to the desired aspect ratio, rather than letting Firefly decide your framing for you.
Tip: I would also recommend cropping the image to the desired aspect ratio, rather than letting Firefly decide your framing for you.
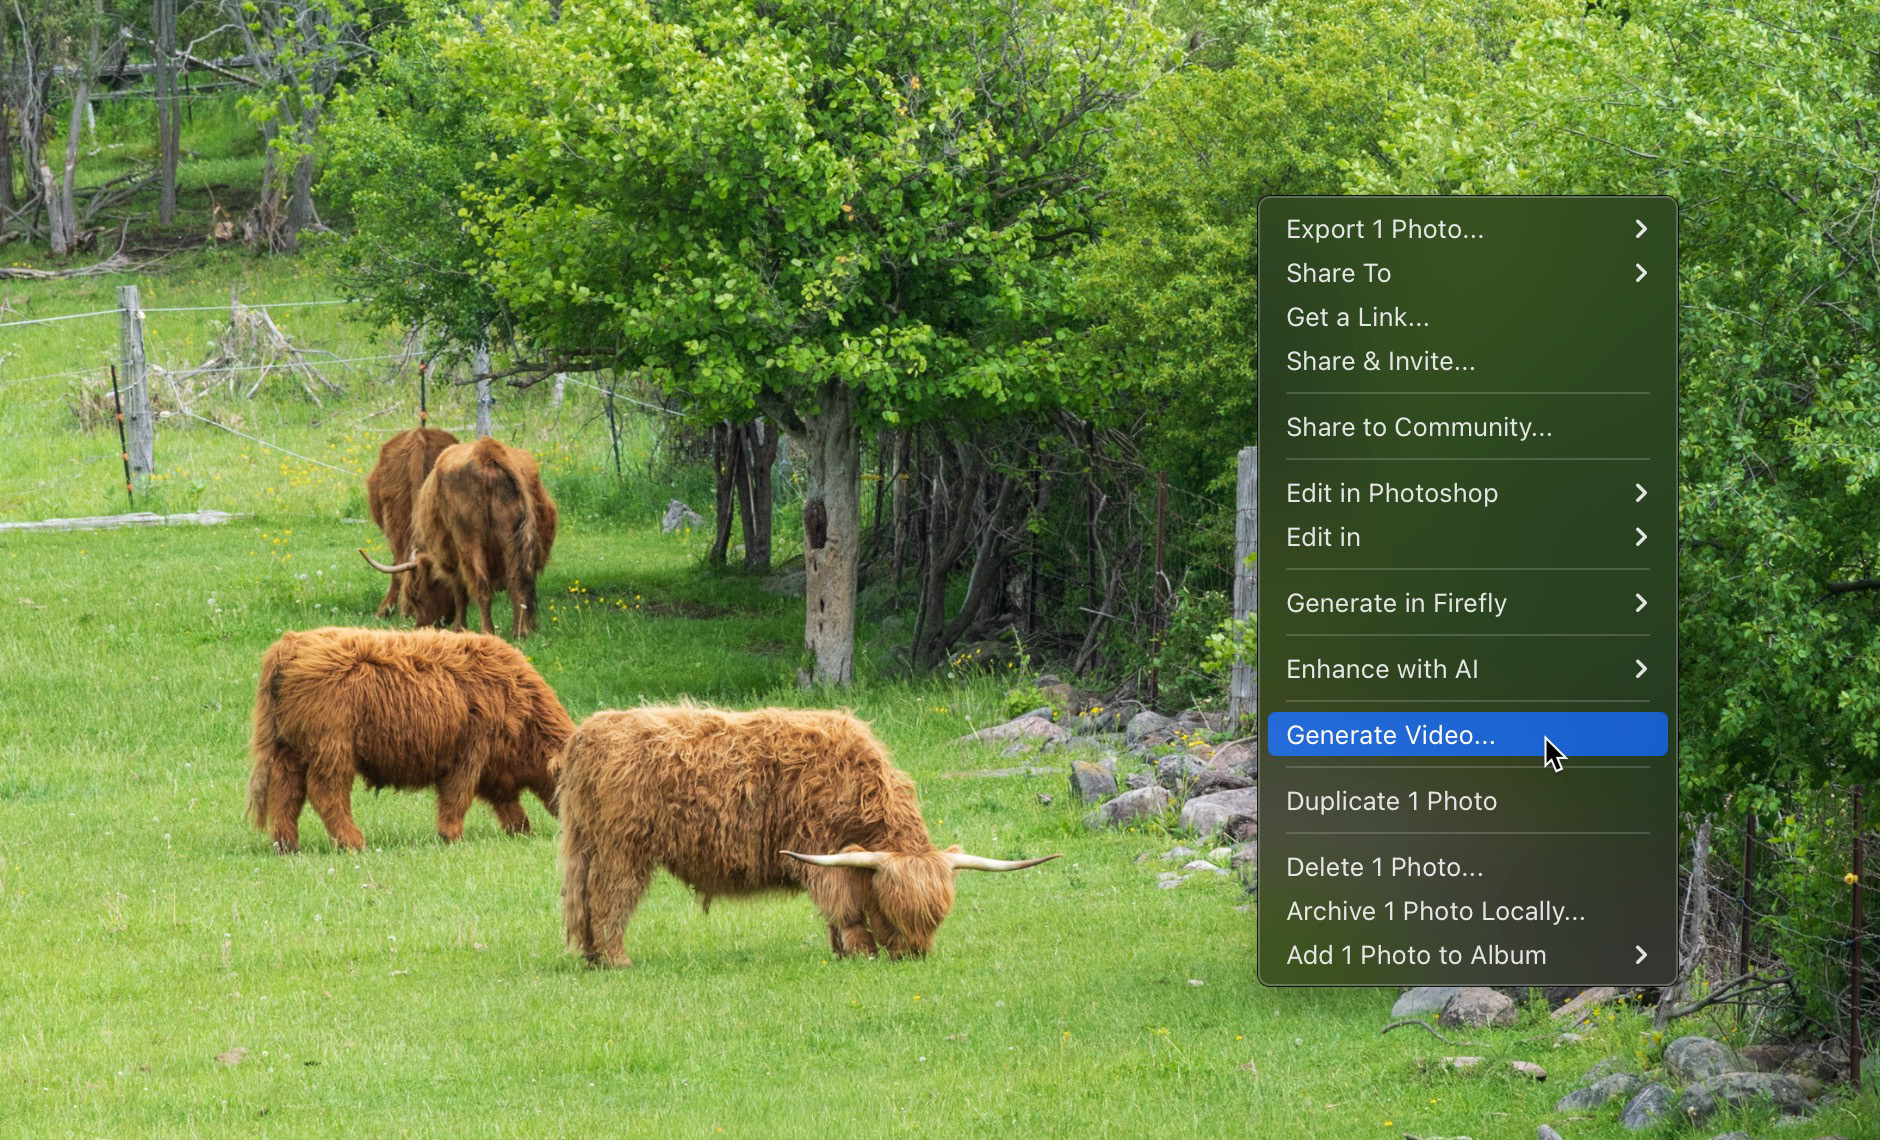
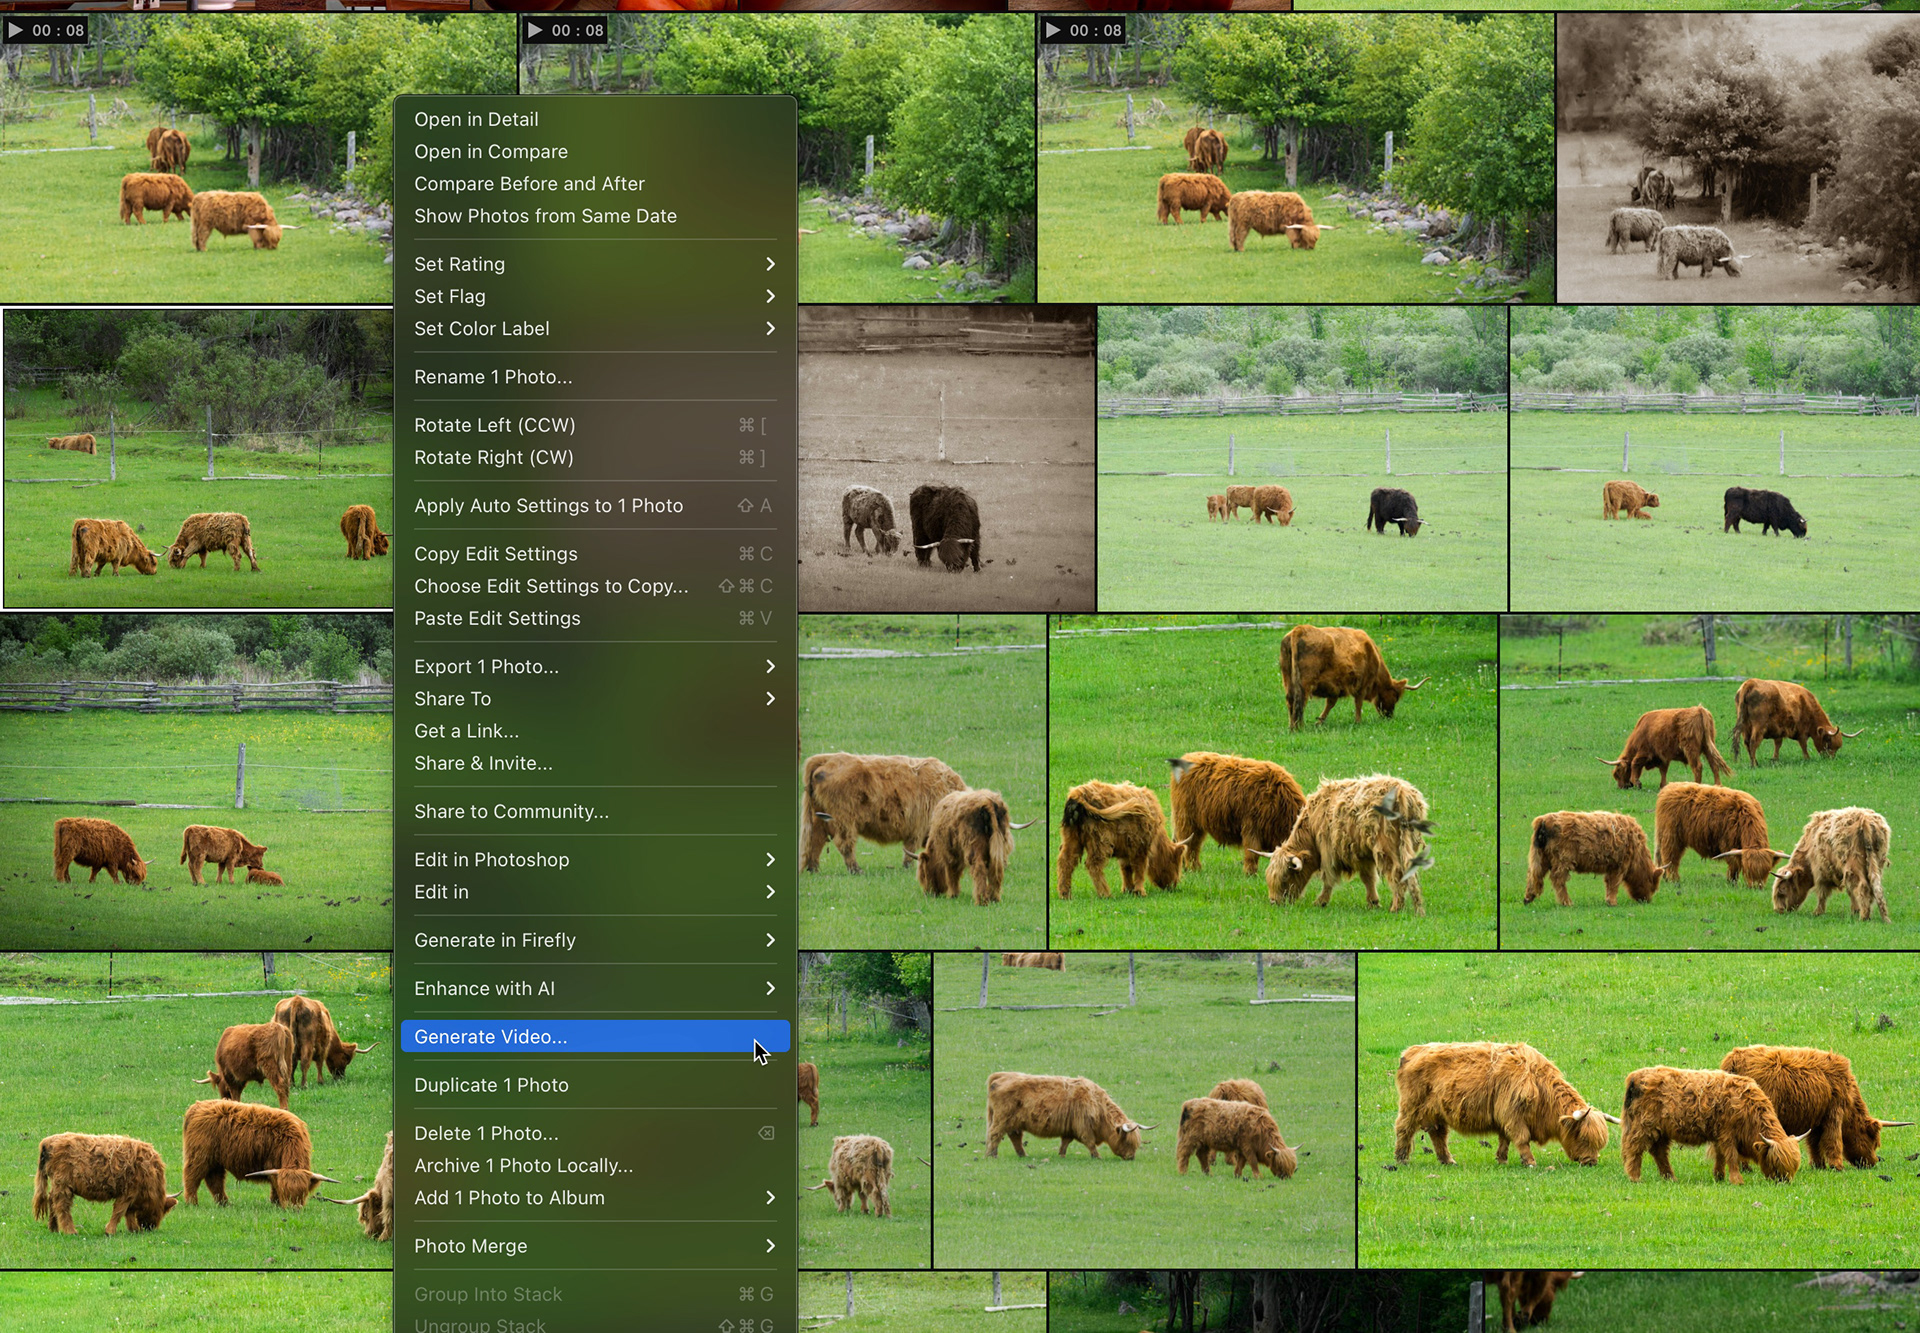
2) In grid view or edit view, right-click on your image to launch the pop up menu.
3) Choose Generate Video. You can also get to this action through the menus: Photo > Generate Video.
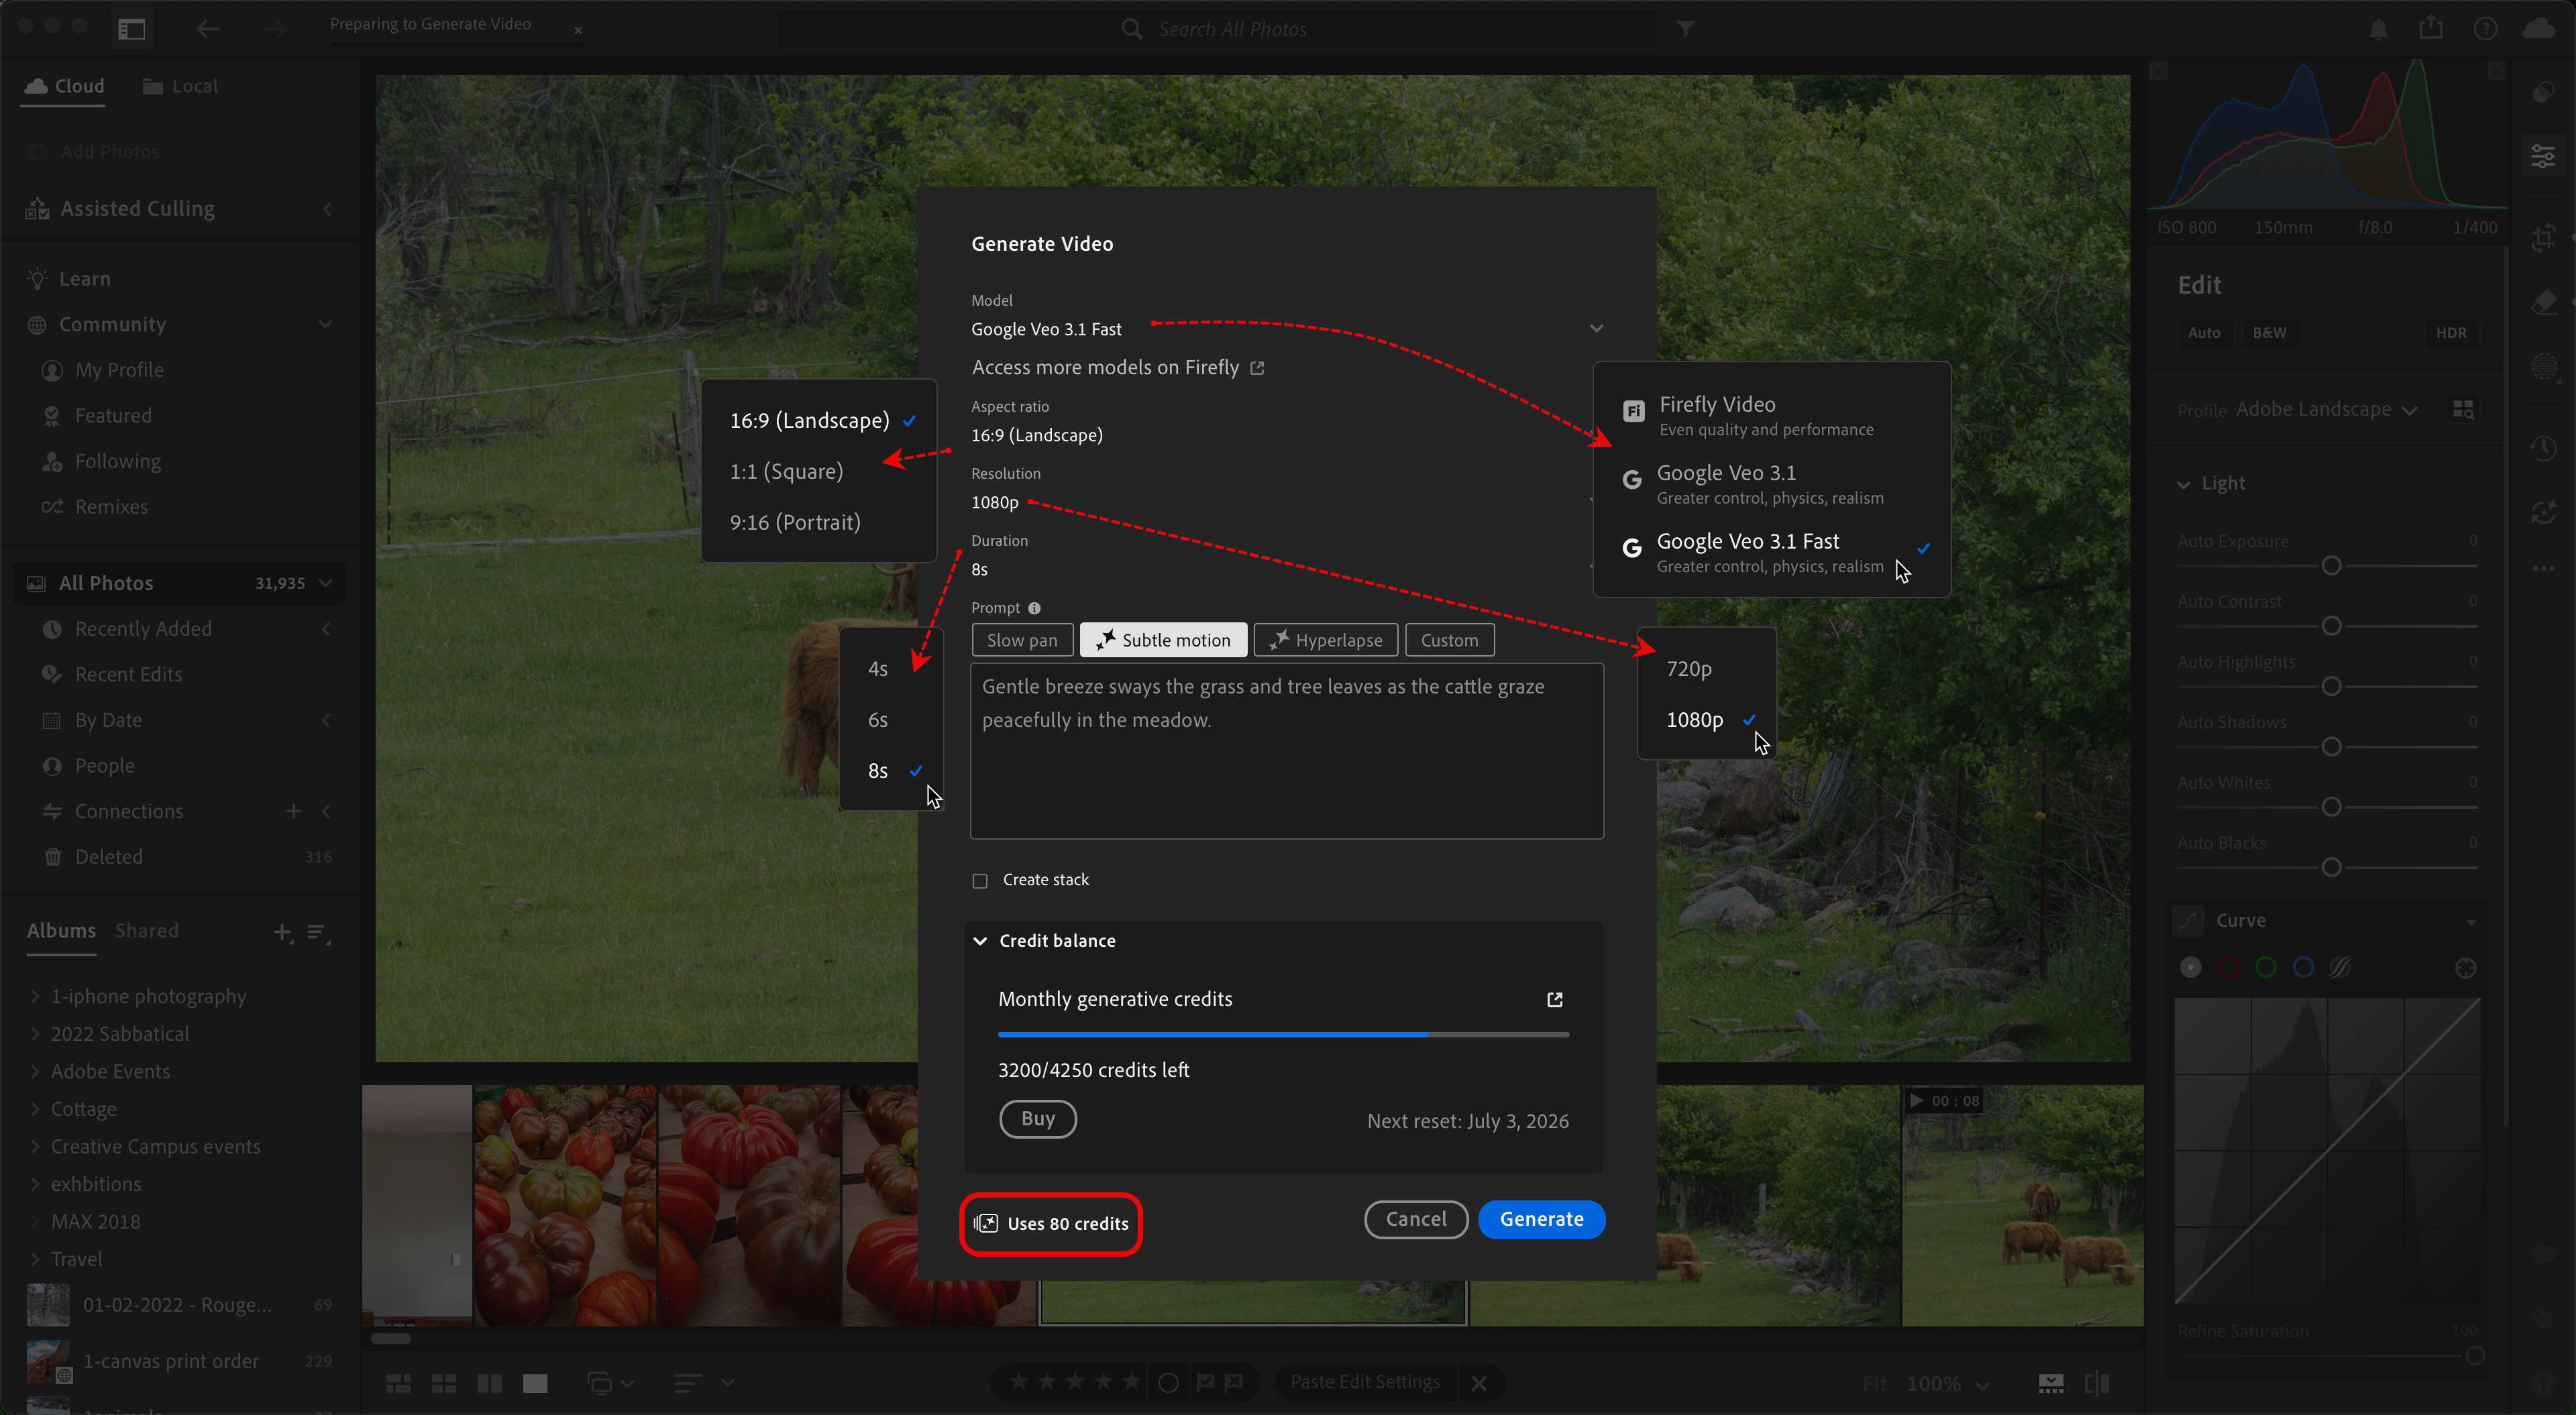
Choosing video settings
4) At the time of publishing, you can choose between three generative AI models: Firefly (commercially safe), Veo 3.1 and Veo 3.1 Fast. More models will likely become available over time, but for now you can always go directly to the Firefly website for other options.*
5) Set your aspect ratio - remember the tip I gave, earlier...
6) Set your resolution*
7) Choose your video duration*
8) You can choose from some prompt presets, or write your own custom prompt. In my example, I went with the Subtle Motion prompt. A,s you click on the presets, thumbnails, you're given a sense of the video that will be created from the text that is added to the prompt box.
9) Optional - You can elect to stack the video with the original static image, so the tunmbails take up less room in the Grid View of Lightroom.
10) Click the Generate button and wait for the magic to happen.
*Note: your choices of model, resolution and duration can all have an impact on the number of generative credits that will be consumed. Fortunately, as you make these choices, this dialog box updates to tell you how many credits you will spend. You can even check your generative credit balance in this box!
I tested this process out with all three models. I was overall pretty impressed with the Veo models but unfortunately, with my admittedly limited testing, I can't say the same for the Firefly model; the results appeared blurry or pixelated. I will be doing further testing with the Firefly model.
Firefly 1080p
Veo 3.1 Fast - 1080p
Veo 3.1 - 1080p
Pay close attention and you will notice that Veo wasn't without its own weirdness; one of the cows in the background transforms from a facing away to facing towards the camera. Later, when I edited in Express, I trimmed the clip to exclude that strangeness.
Editing the Video in Adobe Express
I opted to use the Veo 3.1 video file (sorry, Firefly), and - along with some simple techniques and tools, produced that nifty little video you saw at the top of this article.
Looking at the new footage, one thing that quickly became apparent (other than the transforming cow) was that these cows were moving far too fast. I've watched them graze; they don't build up a head of steam unless it's feeding time or the've been spooked by something. So, I knew I wanted to slow things down, maybe add some other elements like a title and music. All things that could easily and quickly be achieved in the Adobe Express multimedia editor.
Below are my basic steps.
1) Export the video from Lightroom using the Share button, choosing MP4 as the format.
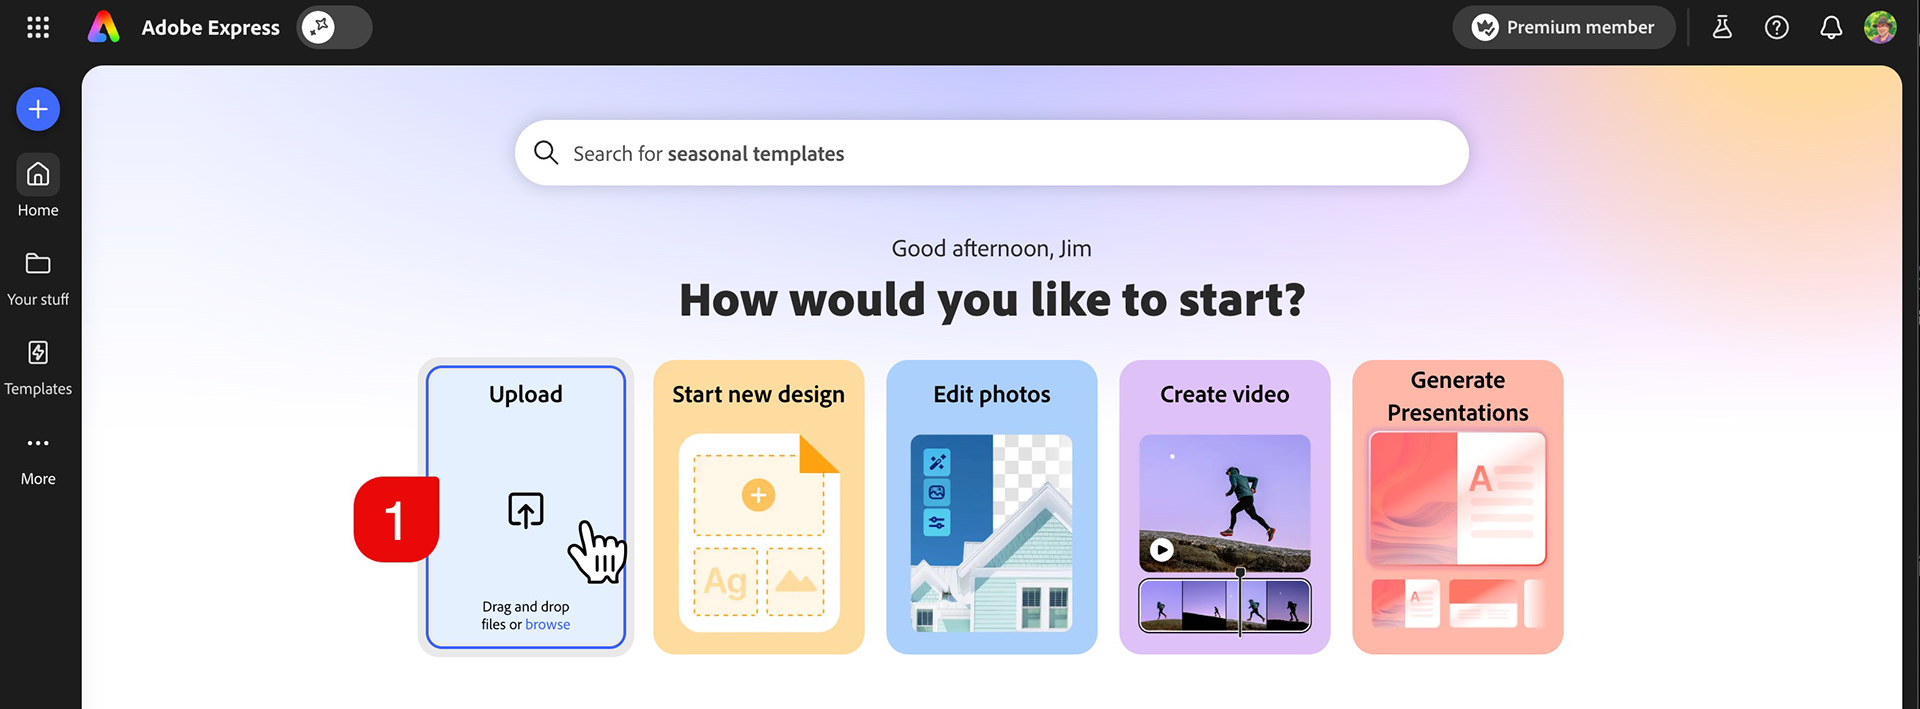
2) Launch and sign into Adobe Express.
3) Choose the big Upload icon to browse for your video or just drag and drop it on the Express workspace.
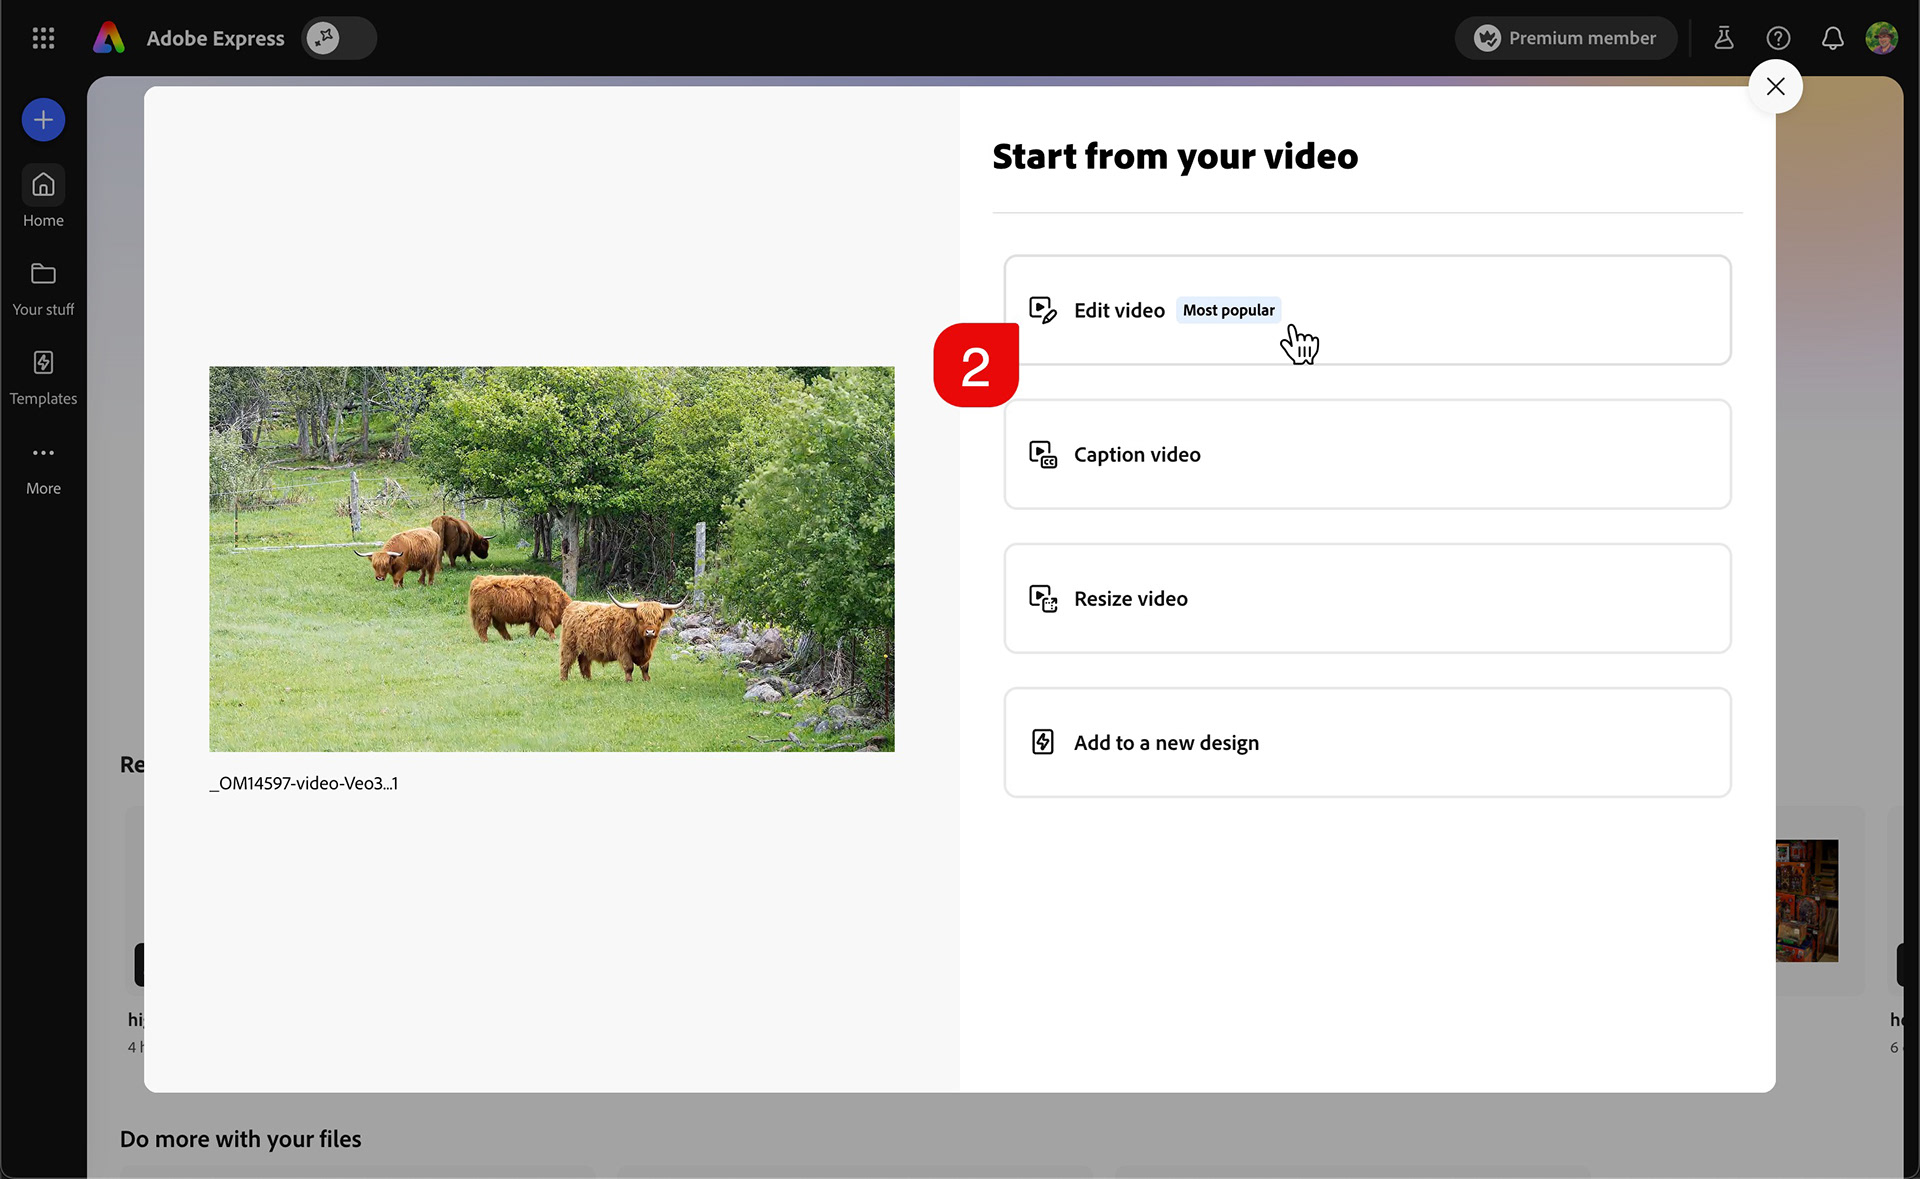
4) Select Edit Video.
Note: from this point forward, your steps may vary if you are using your own footage.
Slowing Things Down
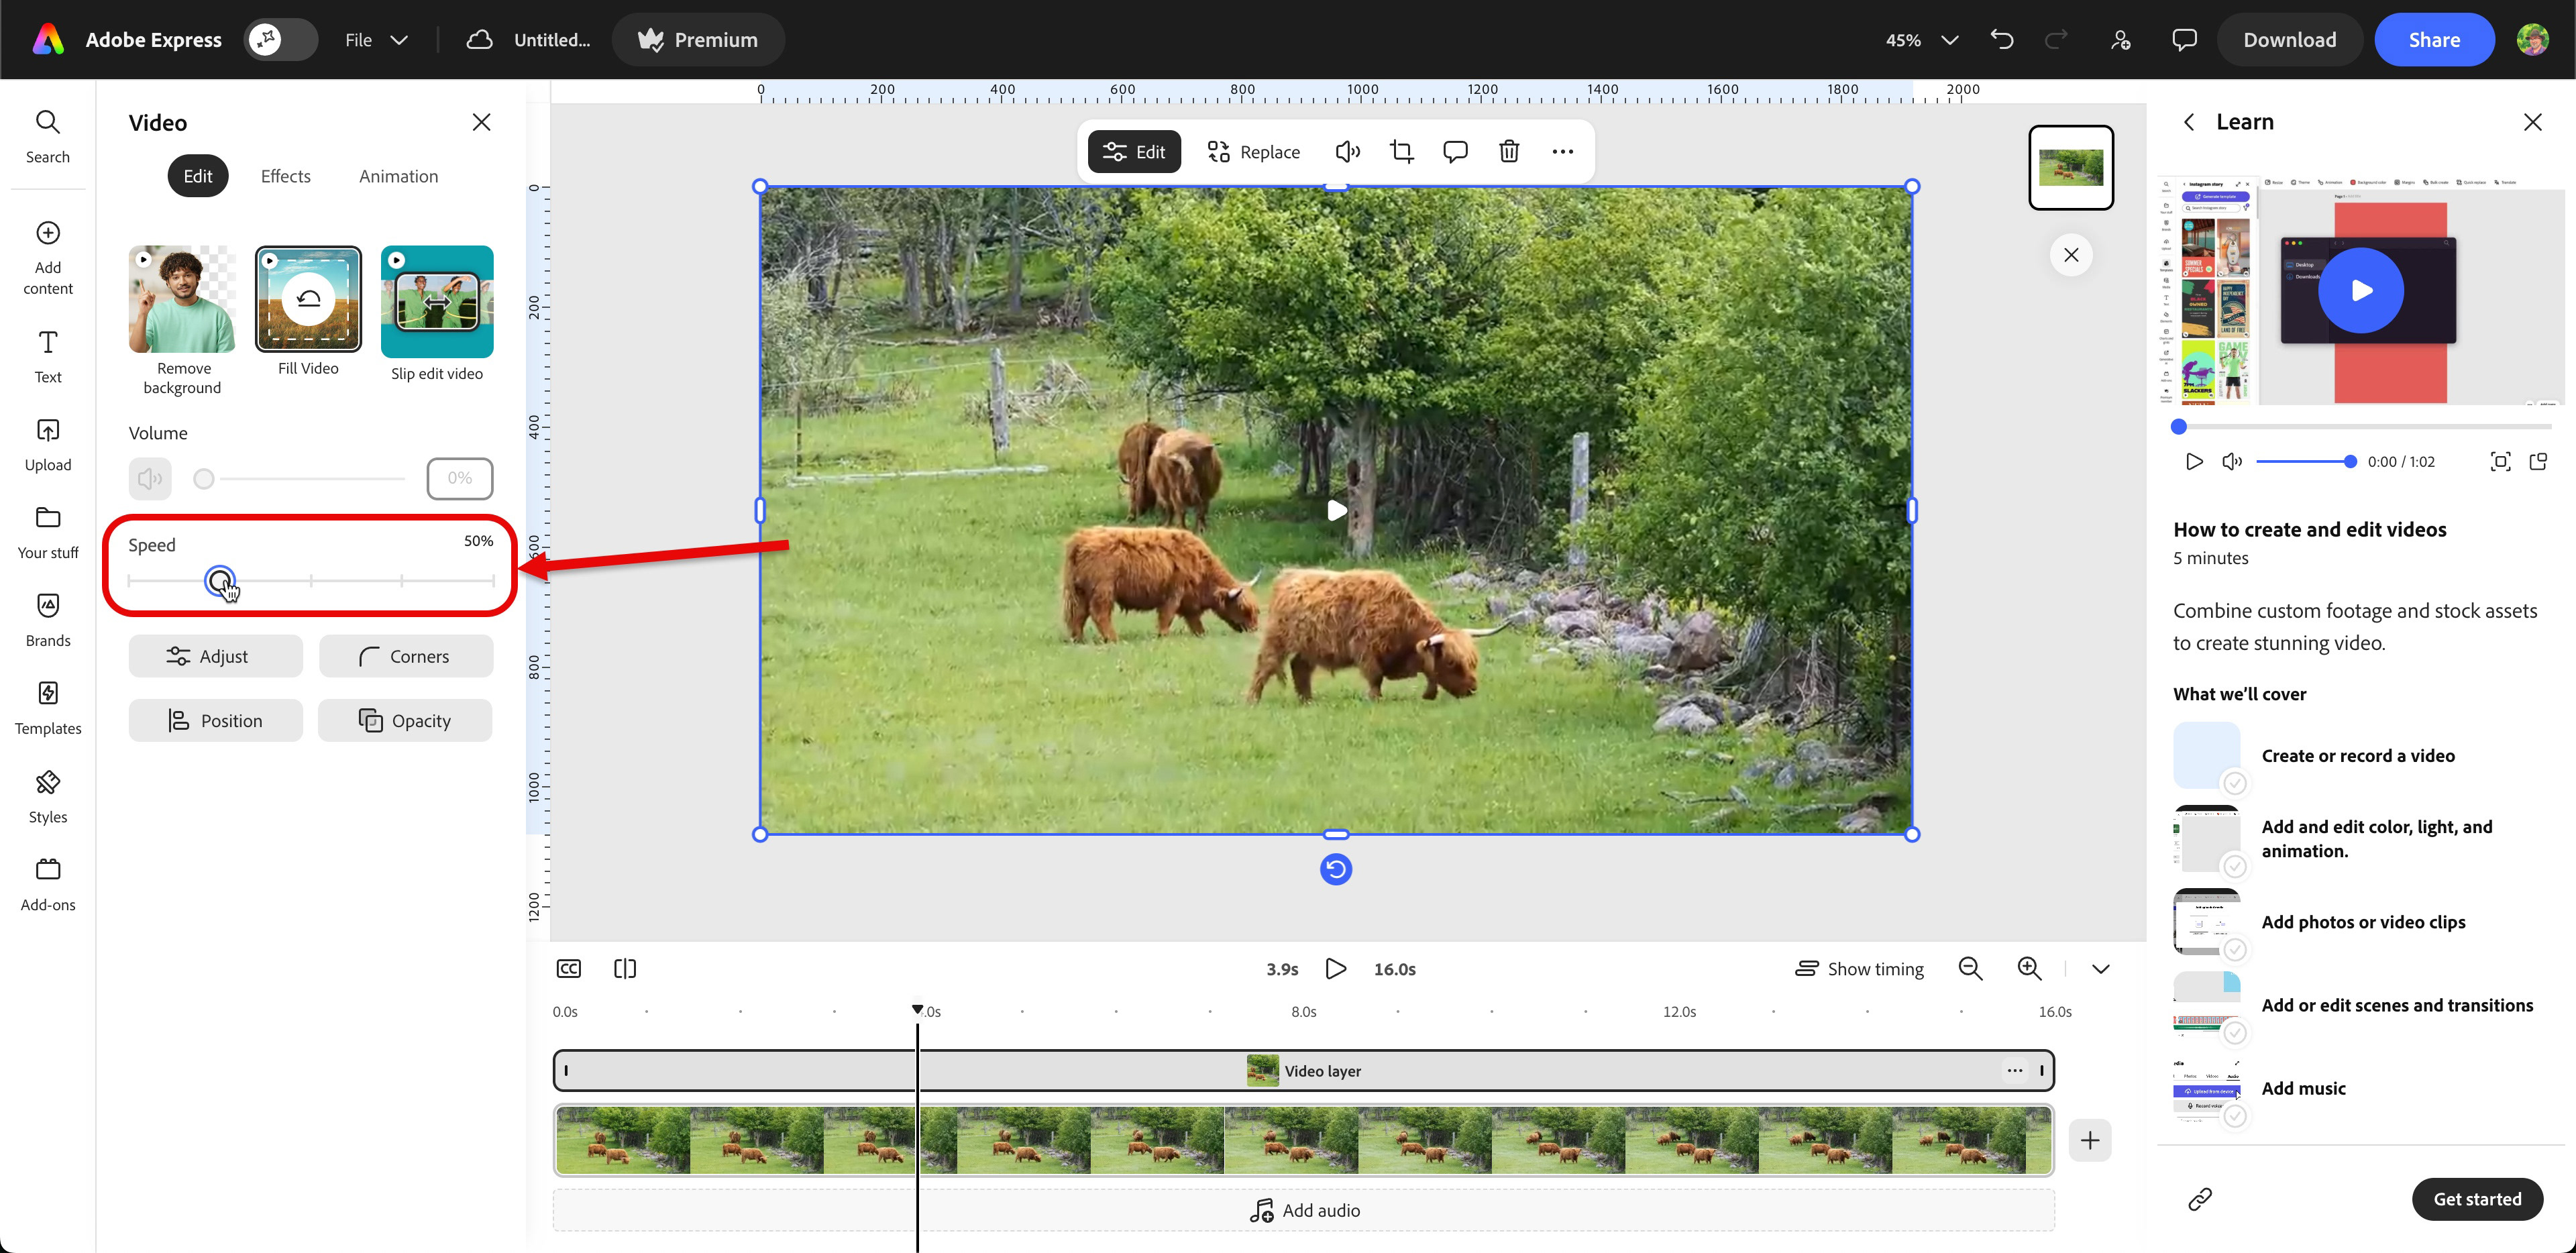
5) I wanted to slow the video down, so my next step was to select the video in the edit window (not the timeline clip at the bottom).
6) In the Properties panel on the left, I dragged the Speed slider to the left by one step. This decreased the speed by 50%, doubling the duration of the entire video, but not unnaturally so. In my case, I went form 8 seconds to 16 seconds.
Trimming or Cutting the Clip
There are two ways to remove footage from a clip; trimming or cutting/deleting. Both are non destructive. Trimming is often the easier method. Cutting takes more steps and is more useful if you are wanting to do something between two sections of the same clip, like add a transition or drop in other media.
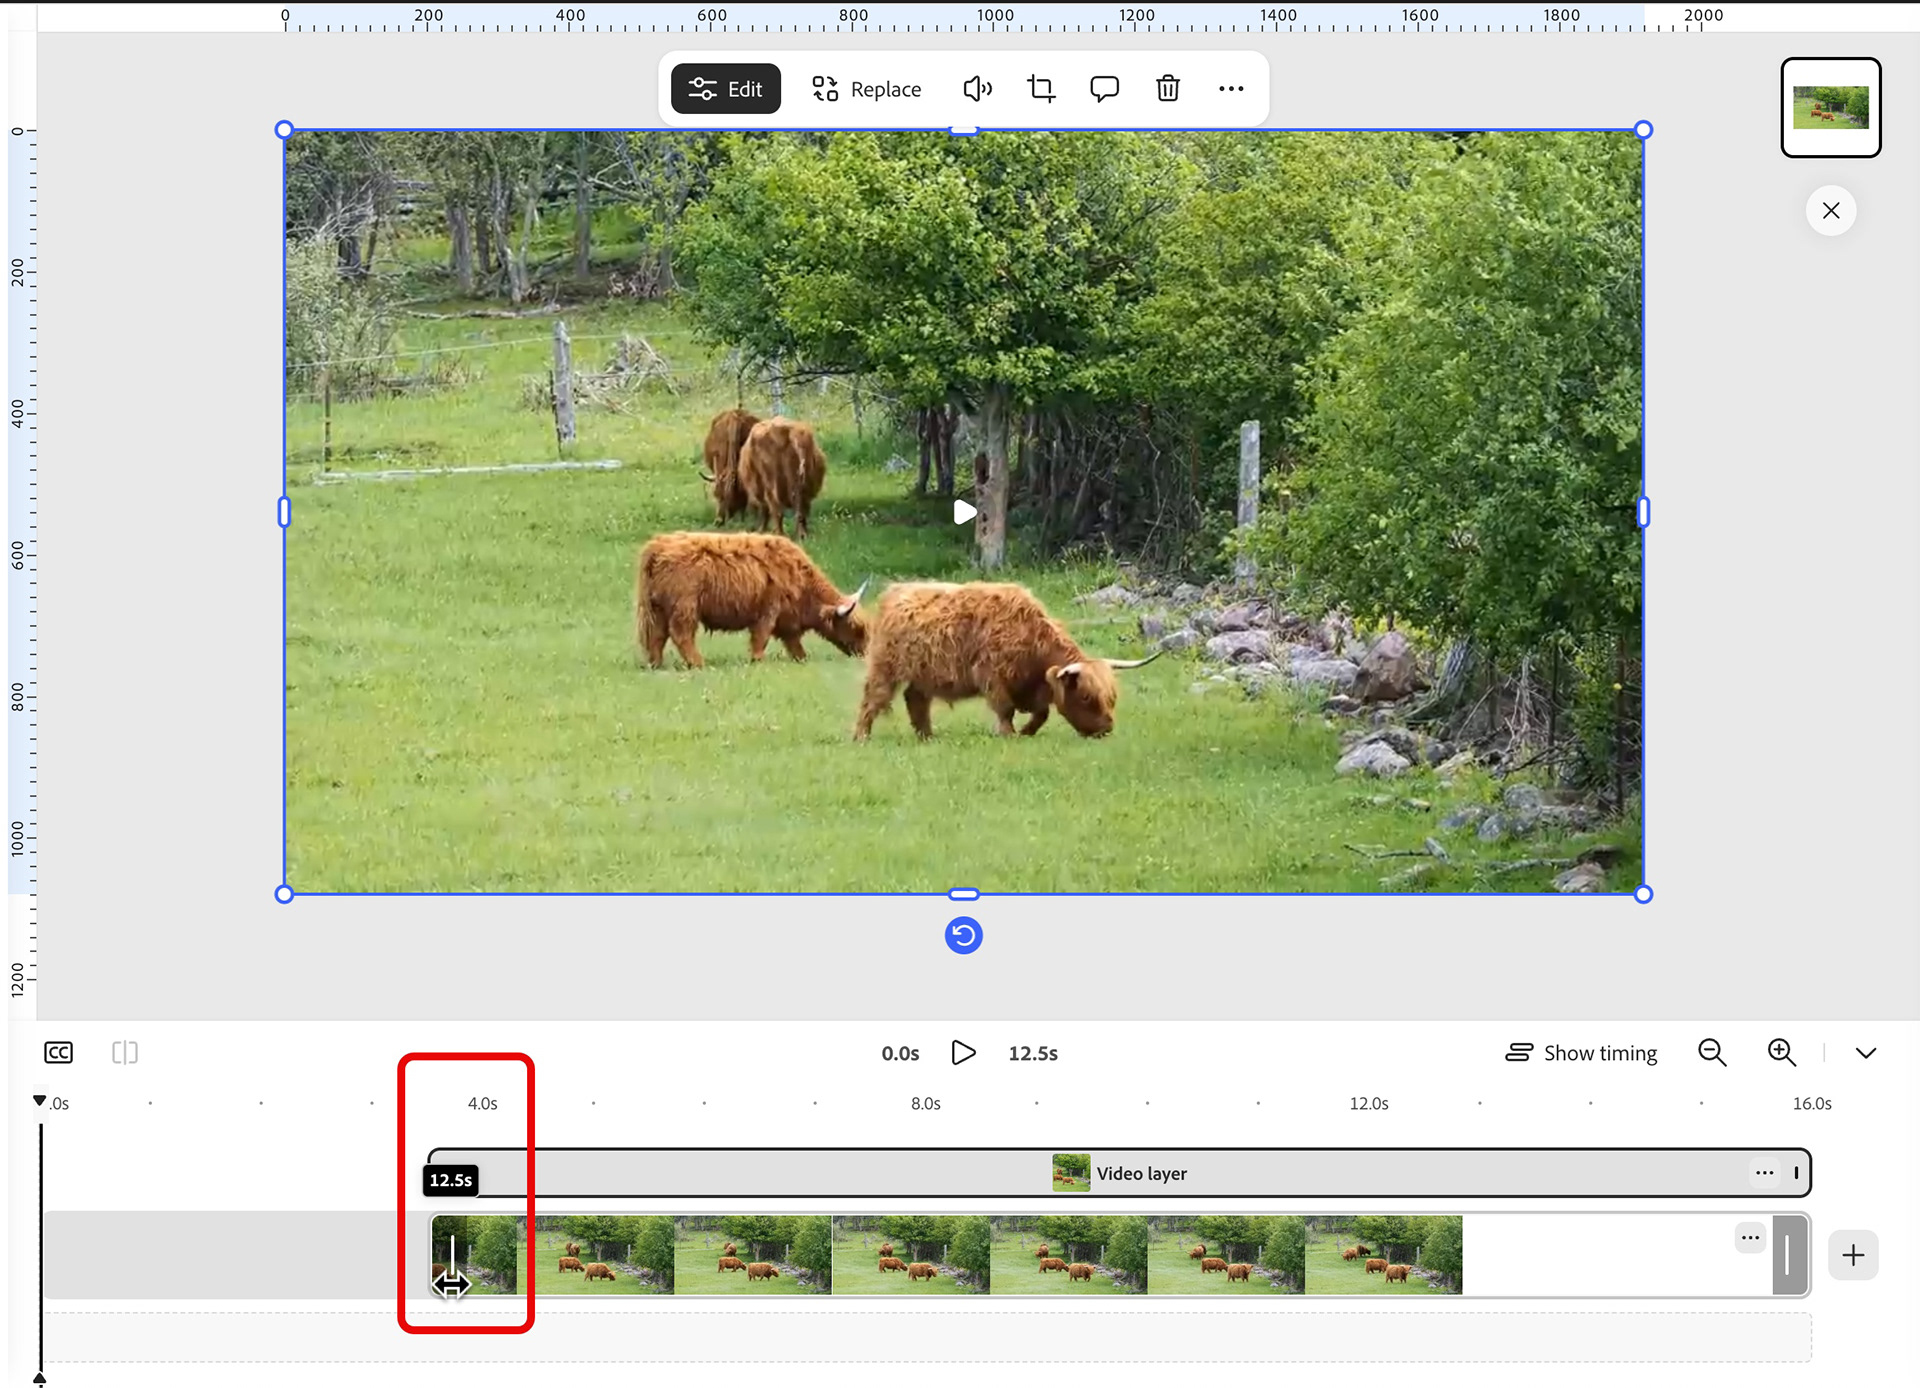
7) To trim and snap to the original starting place in the timeline (called a Ripple Delete), place your cursor over the visual timeline strip (not the Video layer). A drag handle will appear. While watching the large preview window above, click and drag the handle until you reach the spot you want to end the trim.
8) Release the cursor. The video trims to that point and snaps to the start of the timeline.
Fade to Black
I knew I wanted some space at both ends of the video for an intro and and outro (title and credits). The easy way to to this in a non-distracting manner is to add empty scenes for the text to sit on.
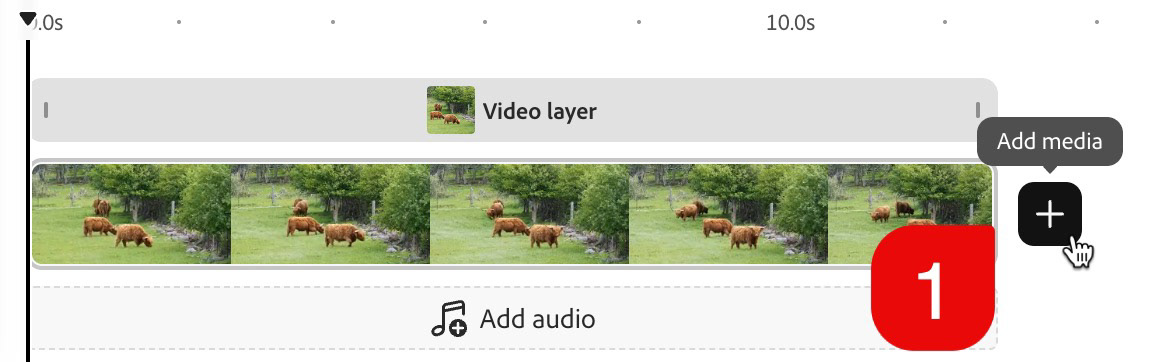
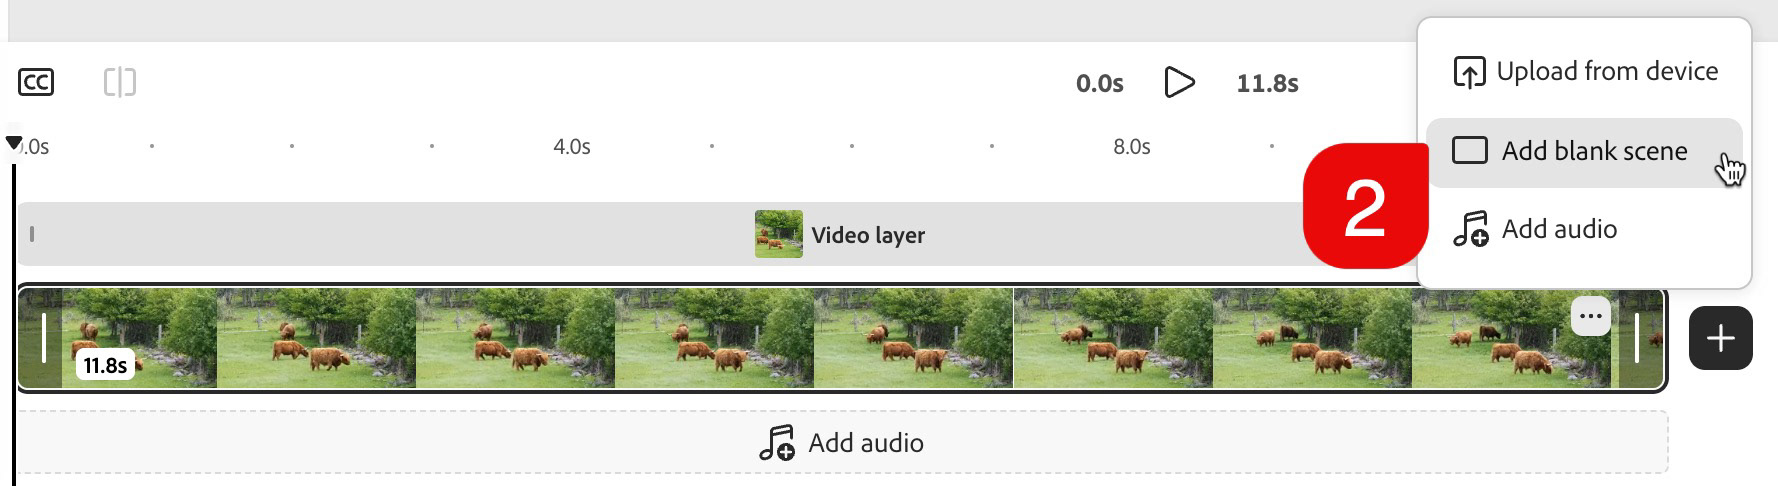
1) Click on the "+" sign at the end of your video clip (Add Media).
2) Choose Add Blank Scene.
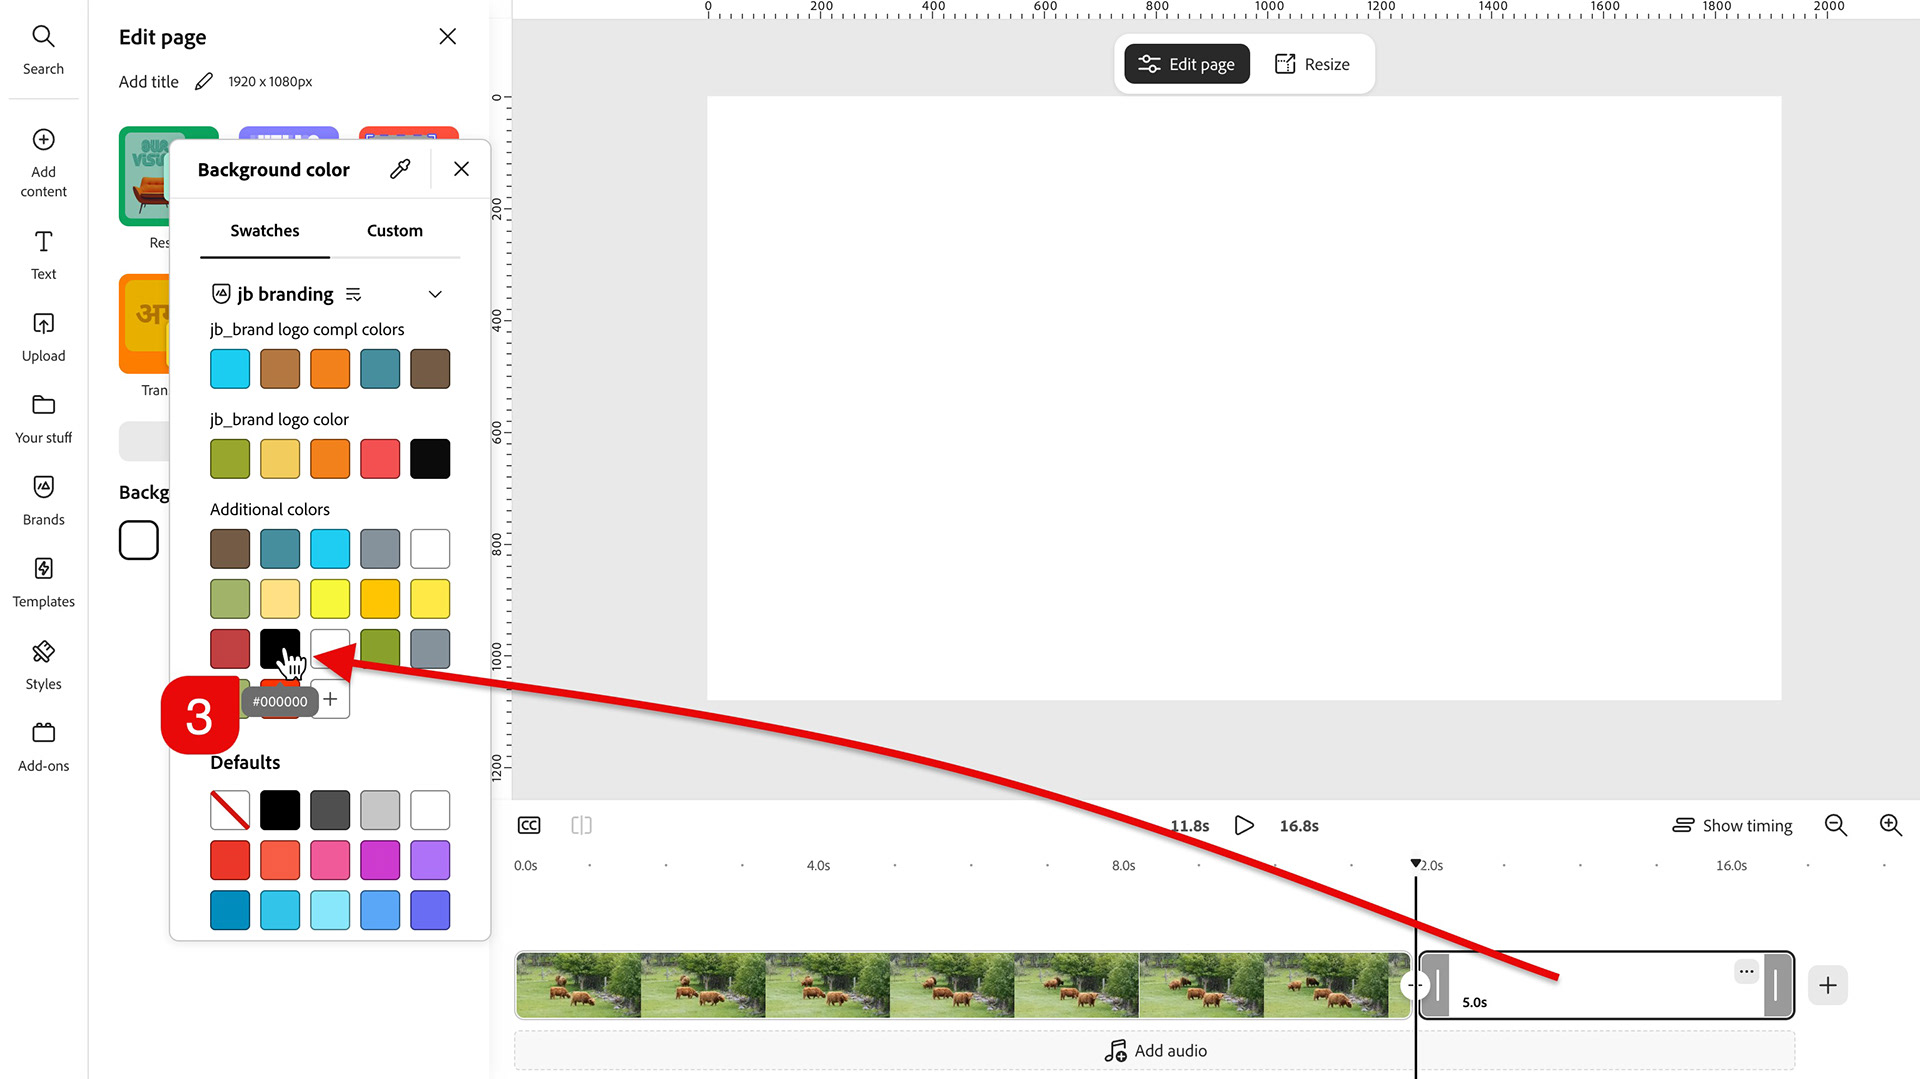
3) With the new blank scene selected, change the background color of the scene if desired (I switched to black).
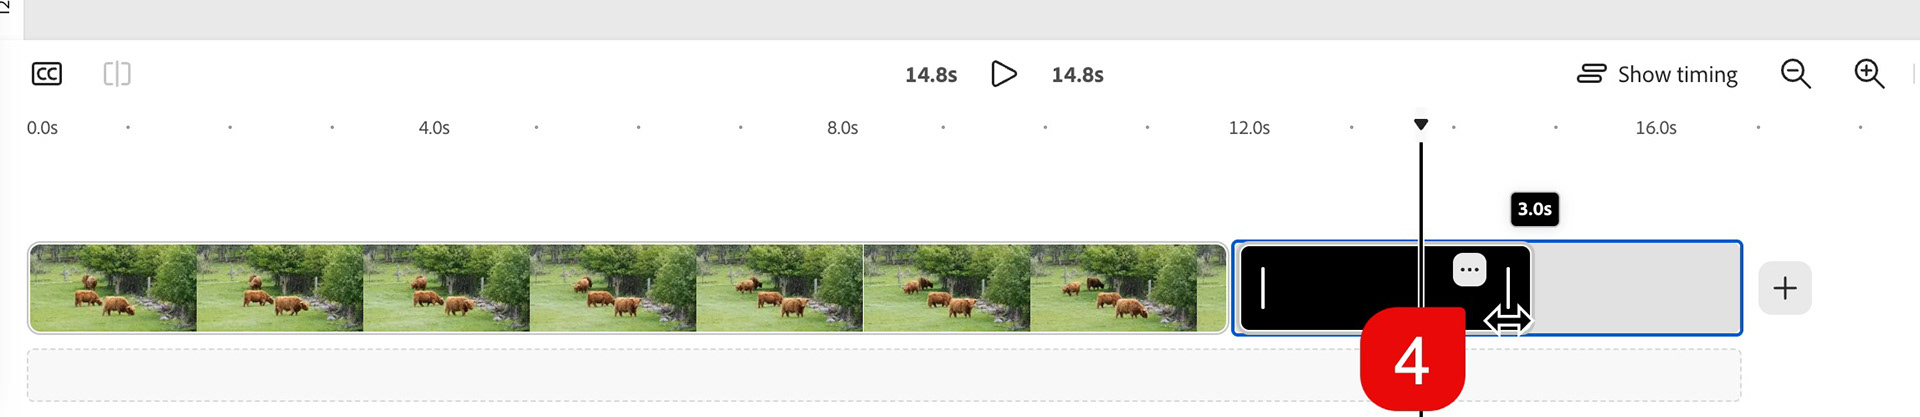
4) Trim or extend the scene to the desired duration (the default is 5 seconds).
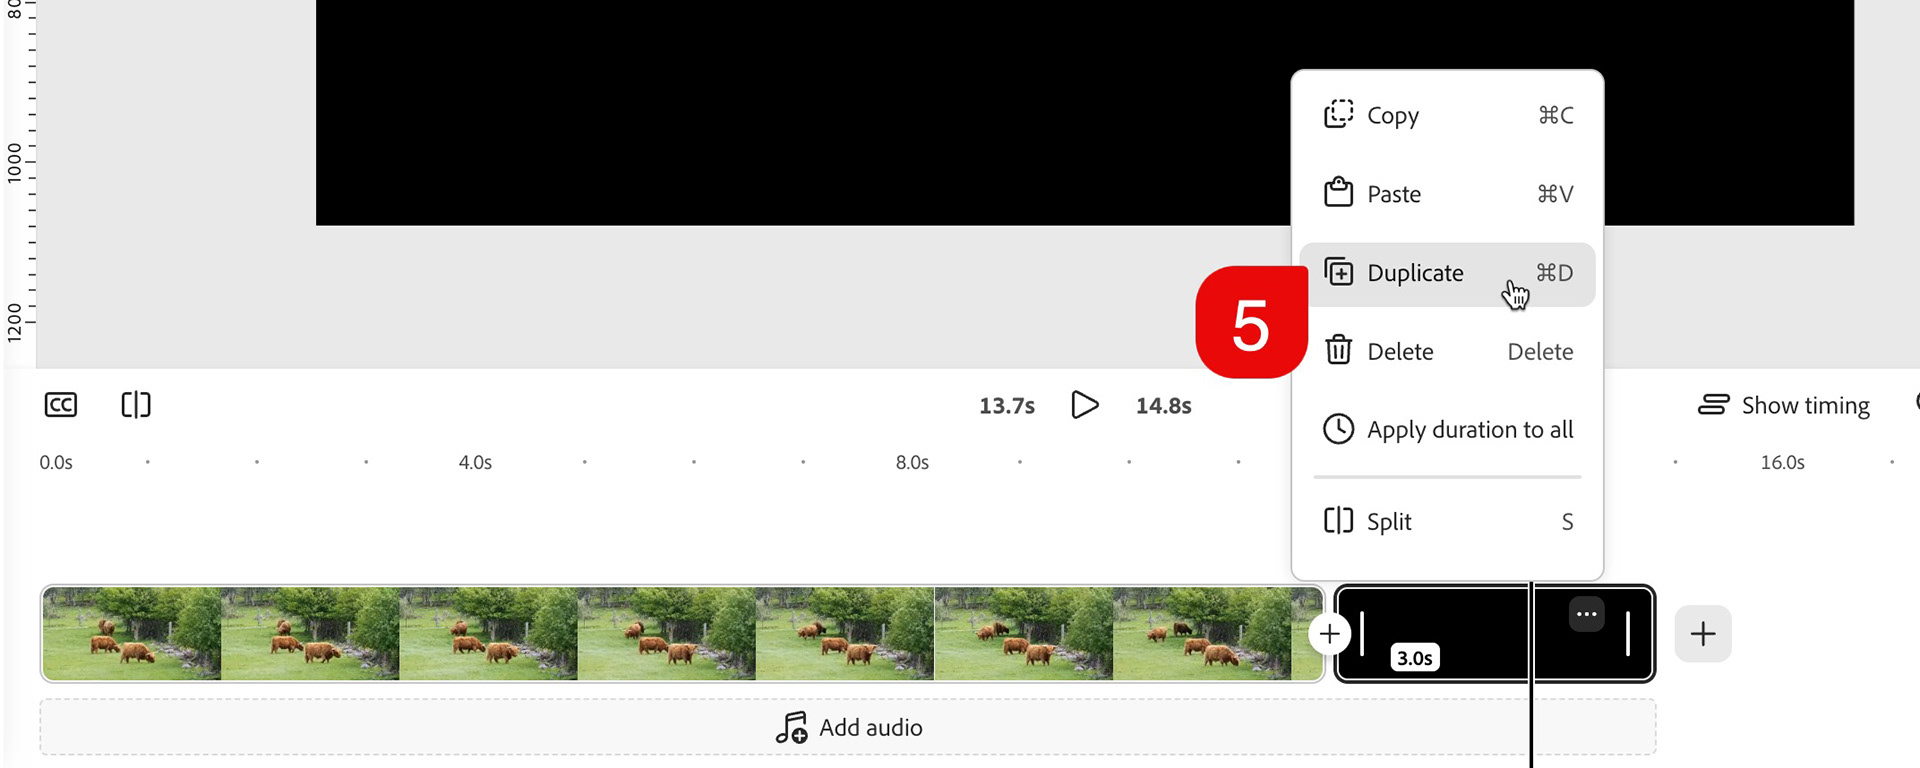
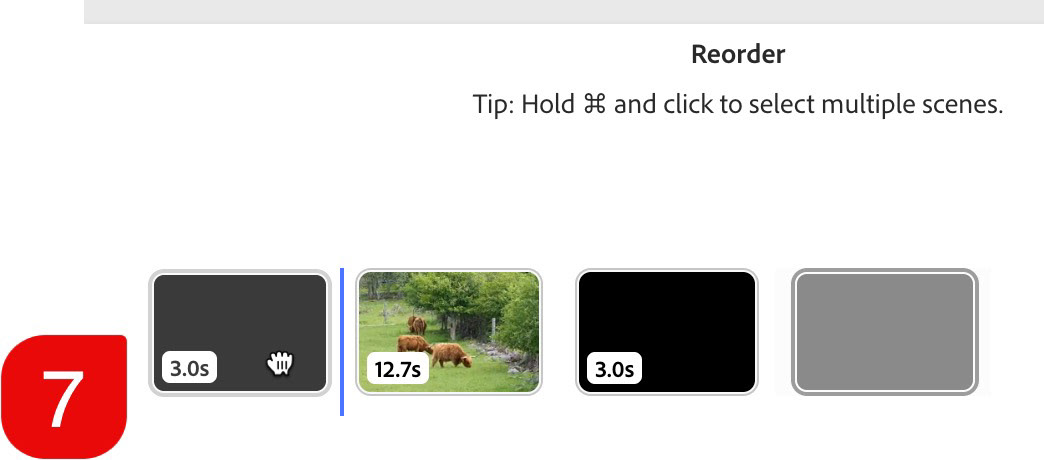
5) Duplicate the scene by click on the ellipses (3 dots) and choosing Duplicate.
6 & 7) Drag the duplicate screen to the beginning of the timeline.
These steps gave me a space to add a title in the beginning and some details at the end.

Adding Scene Transitions
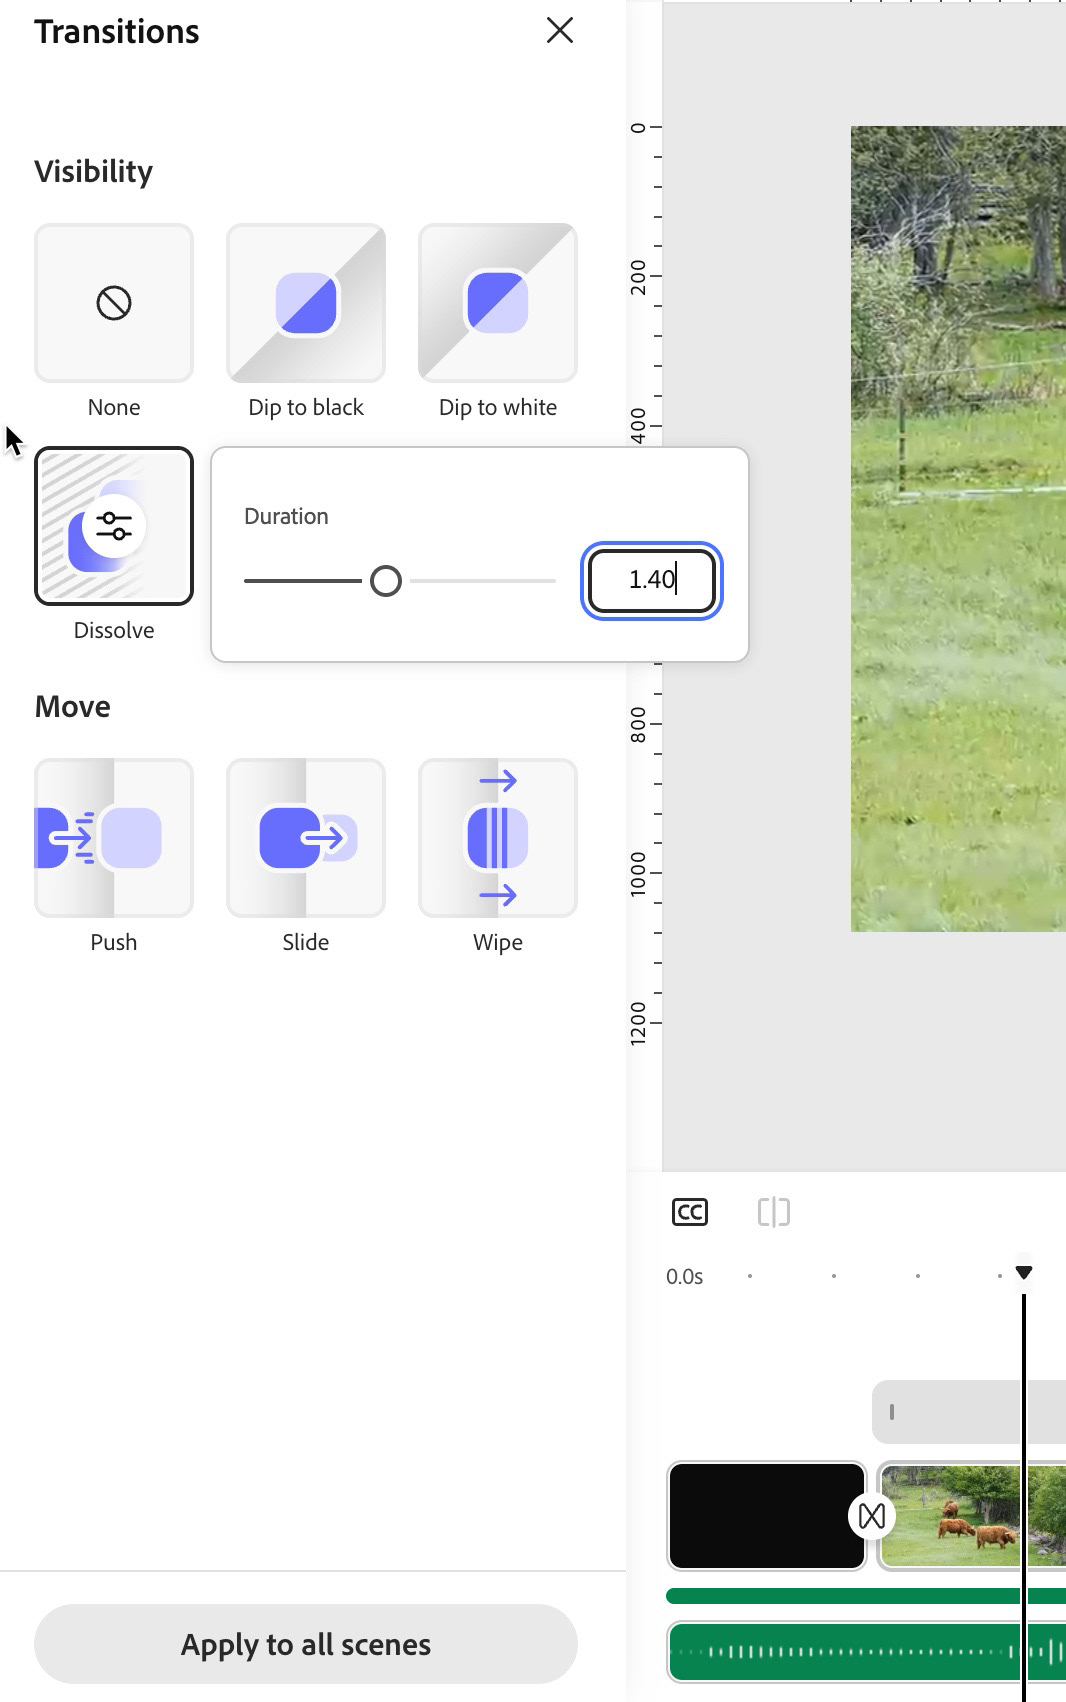
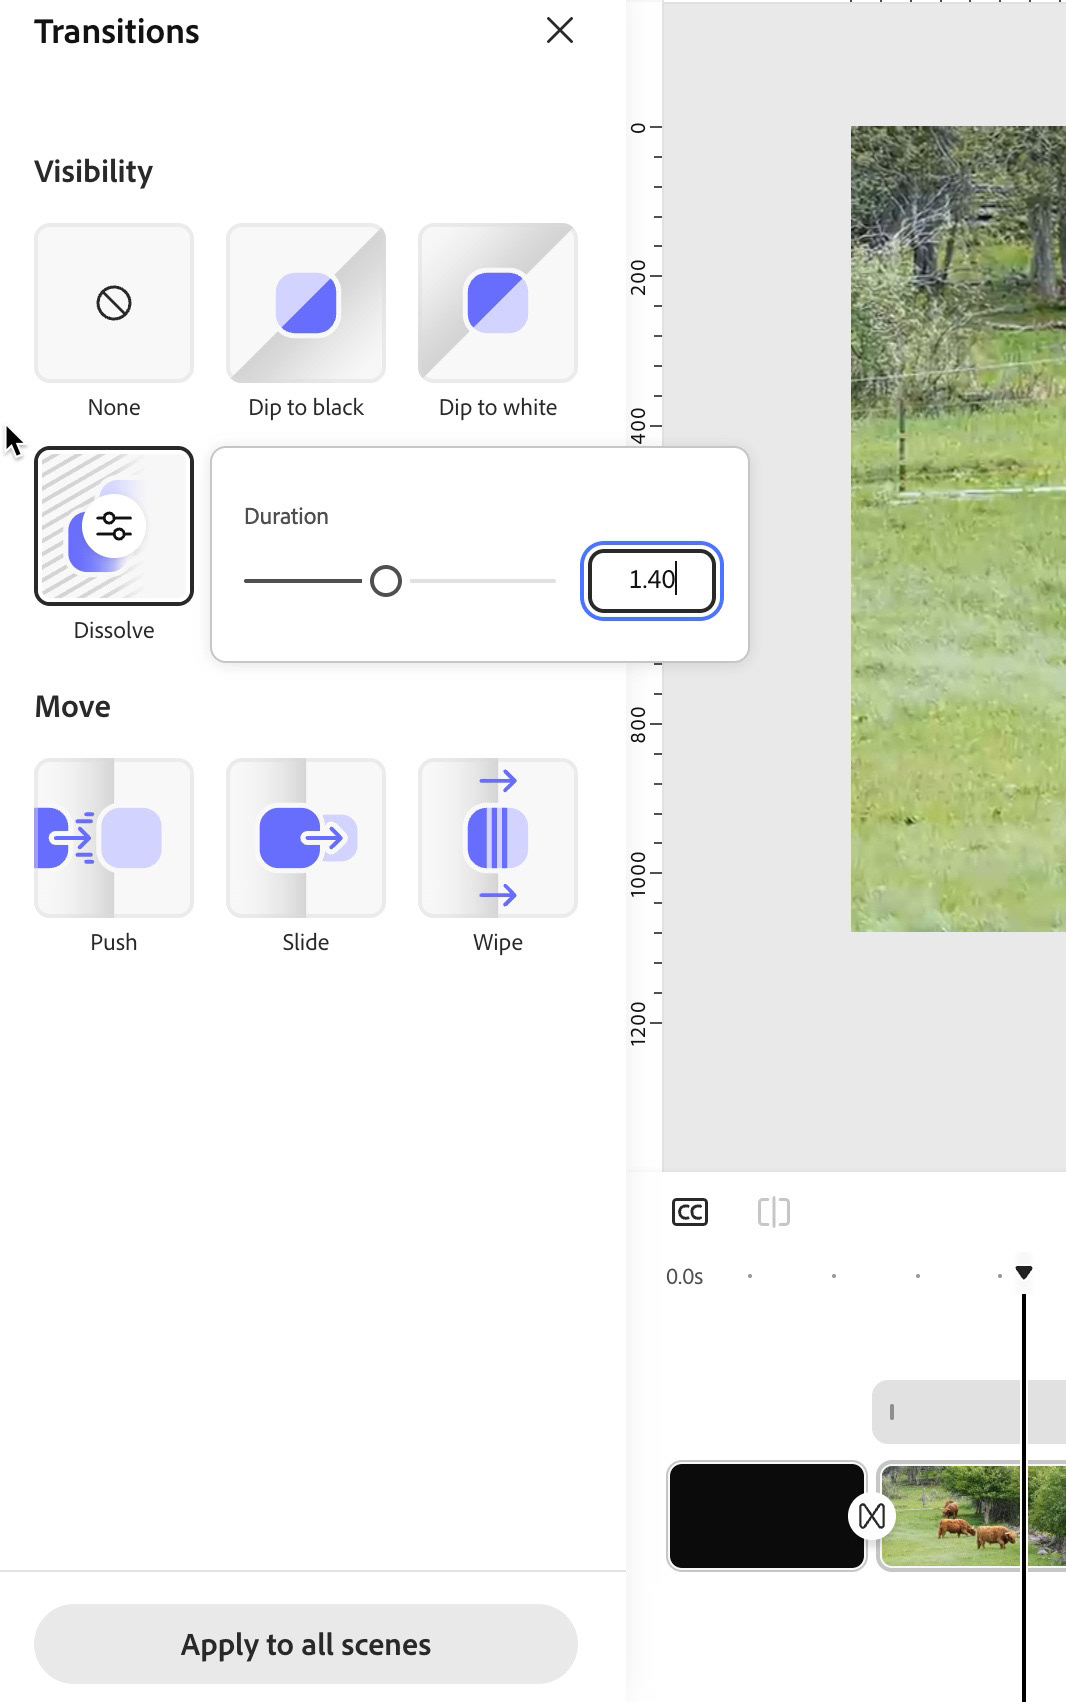
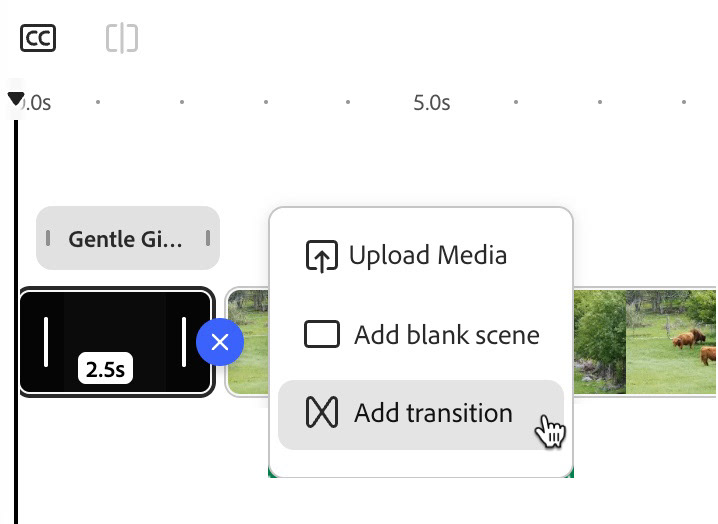
1) Click on the plus sign between two scenes and choose Add transition.
2) Choose your transition. I'm partial to dissolves. You can customize the duration for transitions as well, select a timing that feels right for your video. You can always change it later.
Note: if you want the same transition for all your scenes, click the Apply to all scenes button. This can be a big time-saver if you have a lot of scenes in your timeline.

Adding Text
Use the text tool to add text. In my case, I went for a more decorative font for the title, and something more traditional for the outro.The test is always editable and I also chose to centre the text blocks vertically and horizontally. Some people prefer centre alignment for the multi-line text, but I'm not one of those people.
Tips for adding text:
1) If you have more than one scene and you want the text to appear in a specific scene, moved the video so that it is positioned somewhere within that scene. I moved the marker to each blank scene to add the text. The text defaults to the duration of the scene, but you can use the trim handles for the text to adjust its timing.
2) Because text is its own object, you can also control how it appears, or the animation of the text. I'm partila to a fade, but there are several options available. You can also customize various options, such as duration, depending on the animation effect you choose.
Adding Music and Sound Effects
Two final steps for my little video were to add some ambient sound and a music track, using the extensive collection of Adobe Stock audio files available in Express.
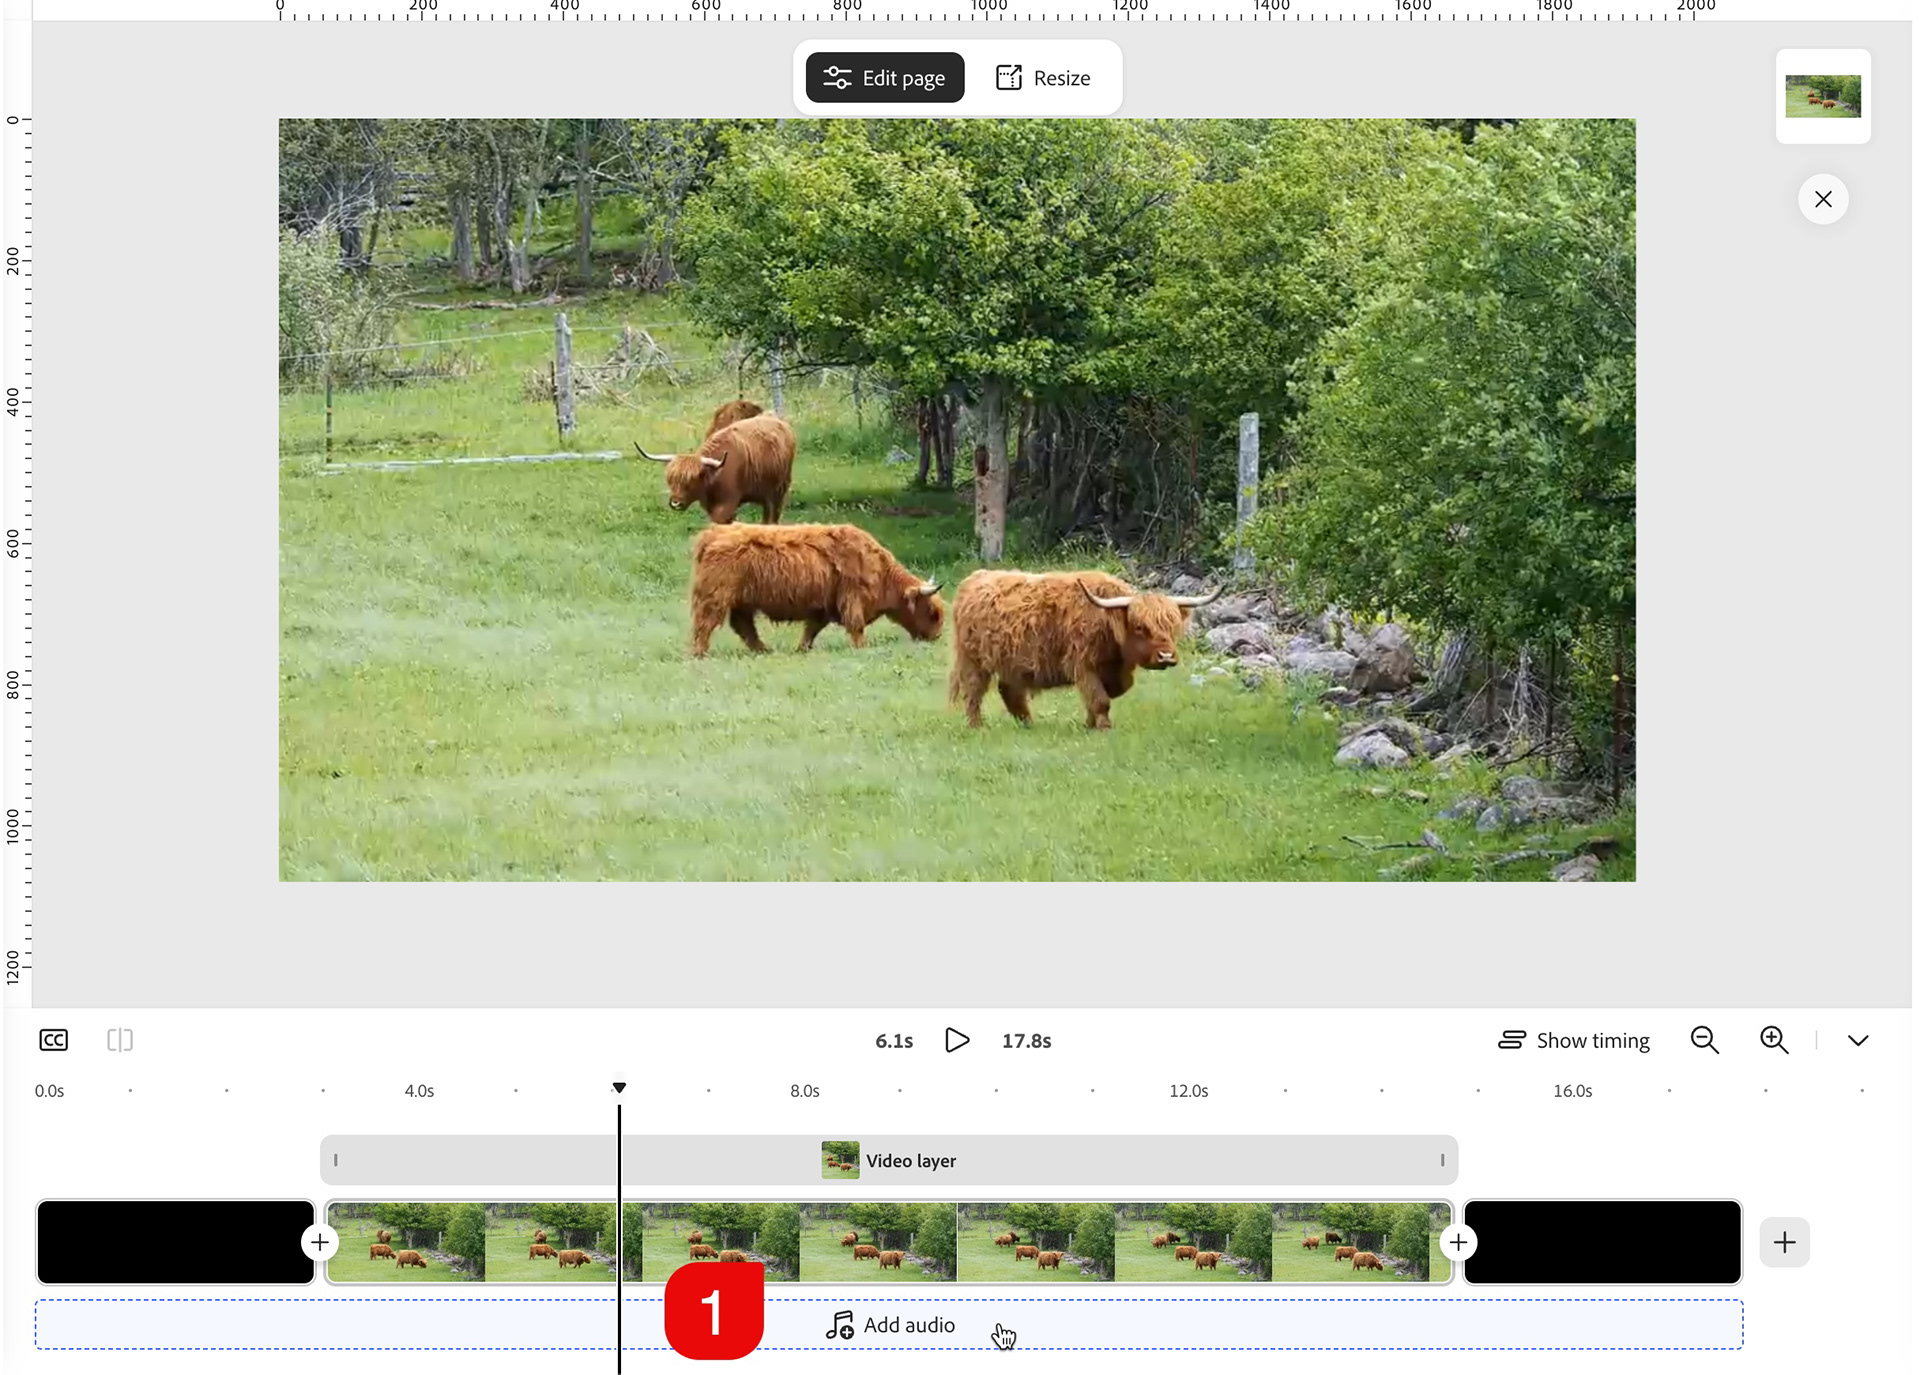
To start, click the Add Audio bar below the timeline.This option only appears when there is no external audio on the timeline and will snap your file to the start of the video and run for its duration or to the end of the content timeline, whichever comes first. From my testing, it doesn't matter if this audio is music or sound effects, but typically the music clip would likely go on this track as it would normally extend the duration of the video.
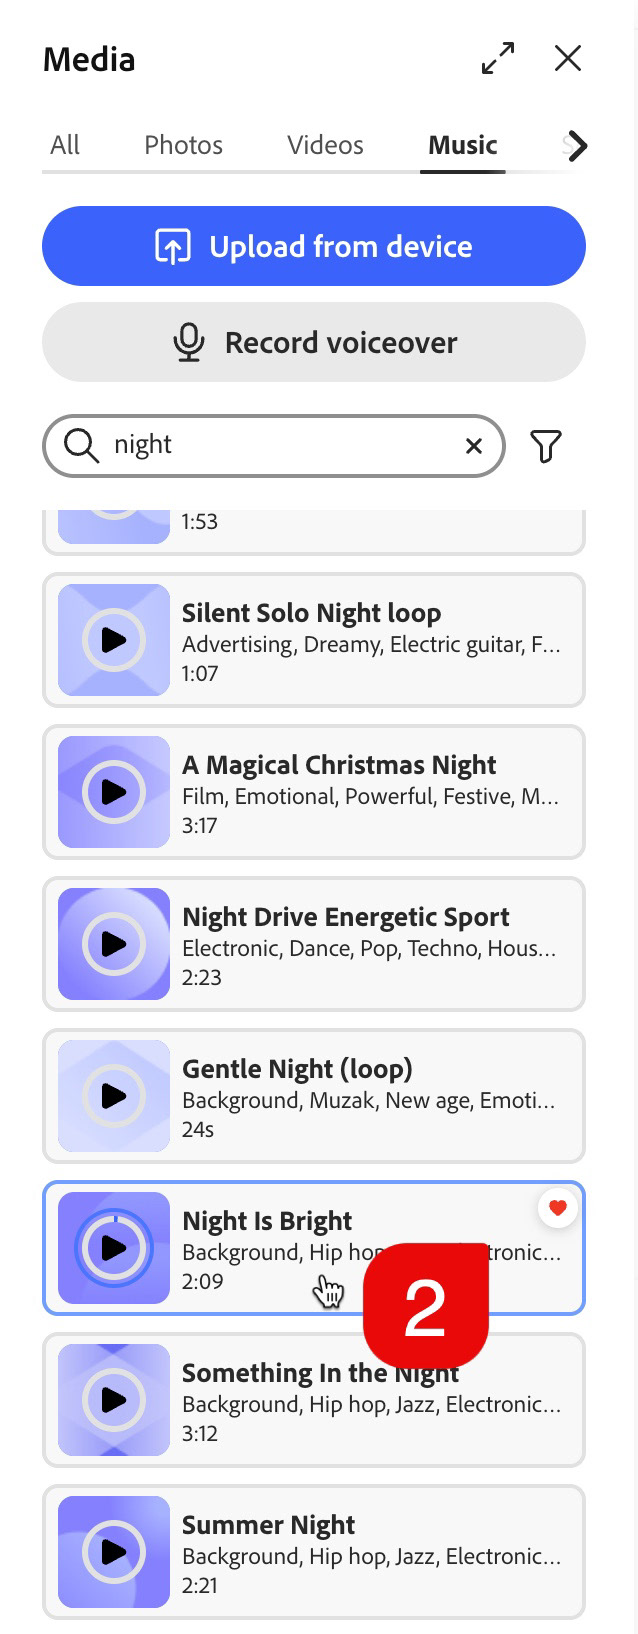
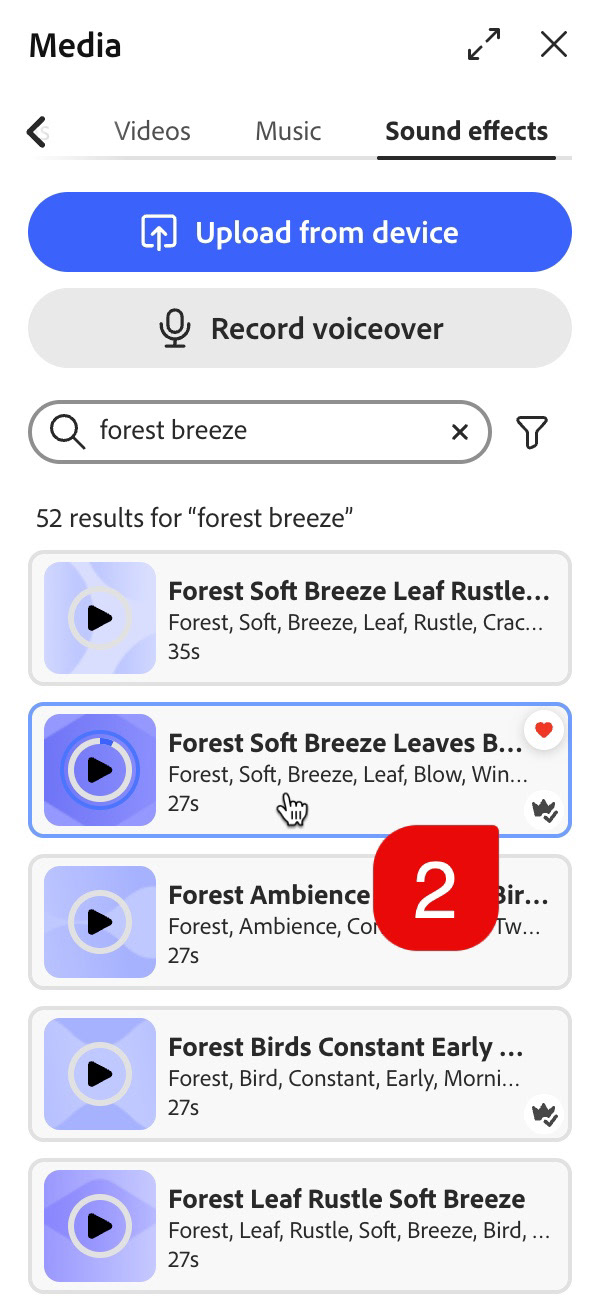
You can search for music using keywords, or scrolling through genre and mood types. Listen to your choice before adding it by clicking on the play icon in the Media > Music panel. Click anywhere else on the file to instantly add the music track to the timeline.
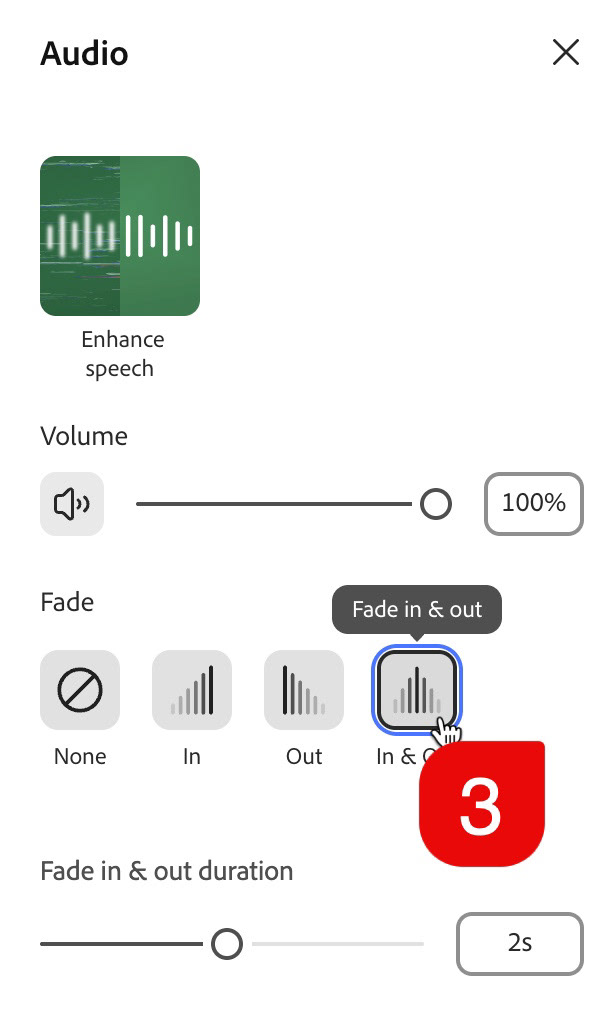
When adding audio, you can control over volume, as well as fade in and out functions. There is no control - automatic or otherwise - for ducking audio playback.
Take it to 11, Mate!
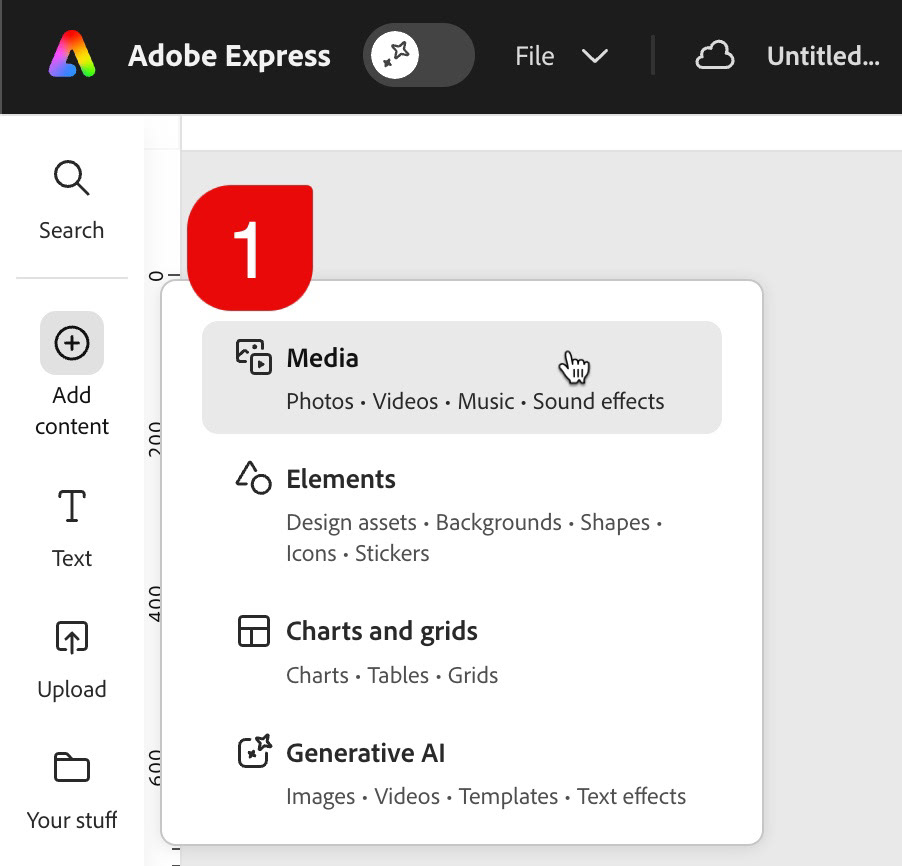
To add additional audio, click the Add Content button in the Tools panel on the left, choose Media and scroll the categories at the top until you see Sound effects. Browse or search for sound effects just like you do for music. I found some great ambient sound that included some bird song, crickets and wind through the trees. You will have the same controls for sound effects as you do for music.
Note: Adding content in this manner will add it at the location of the playback marker. You can always drag the audio anywhere on its timeline to change when it plays.
That's a Wrap!
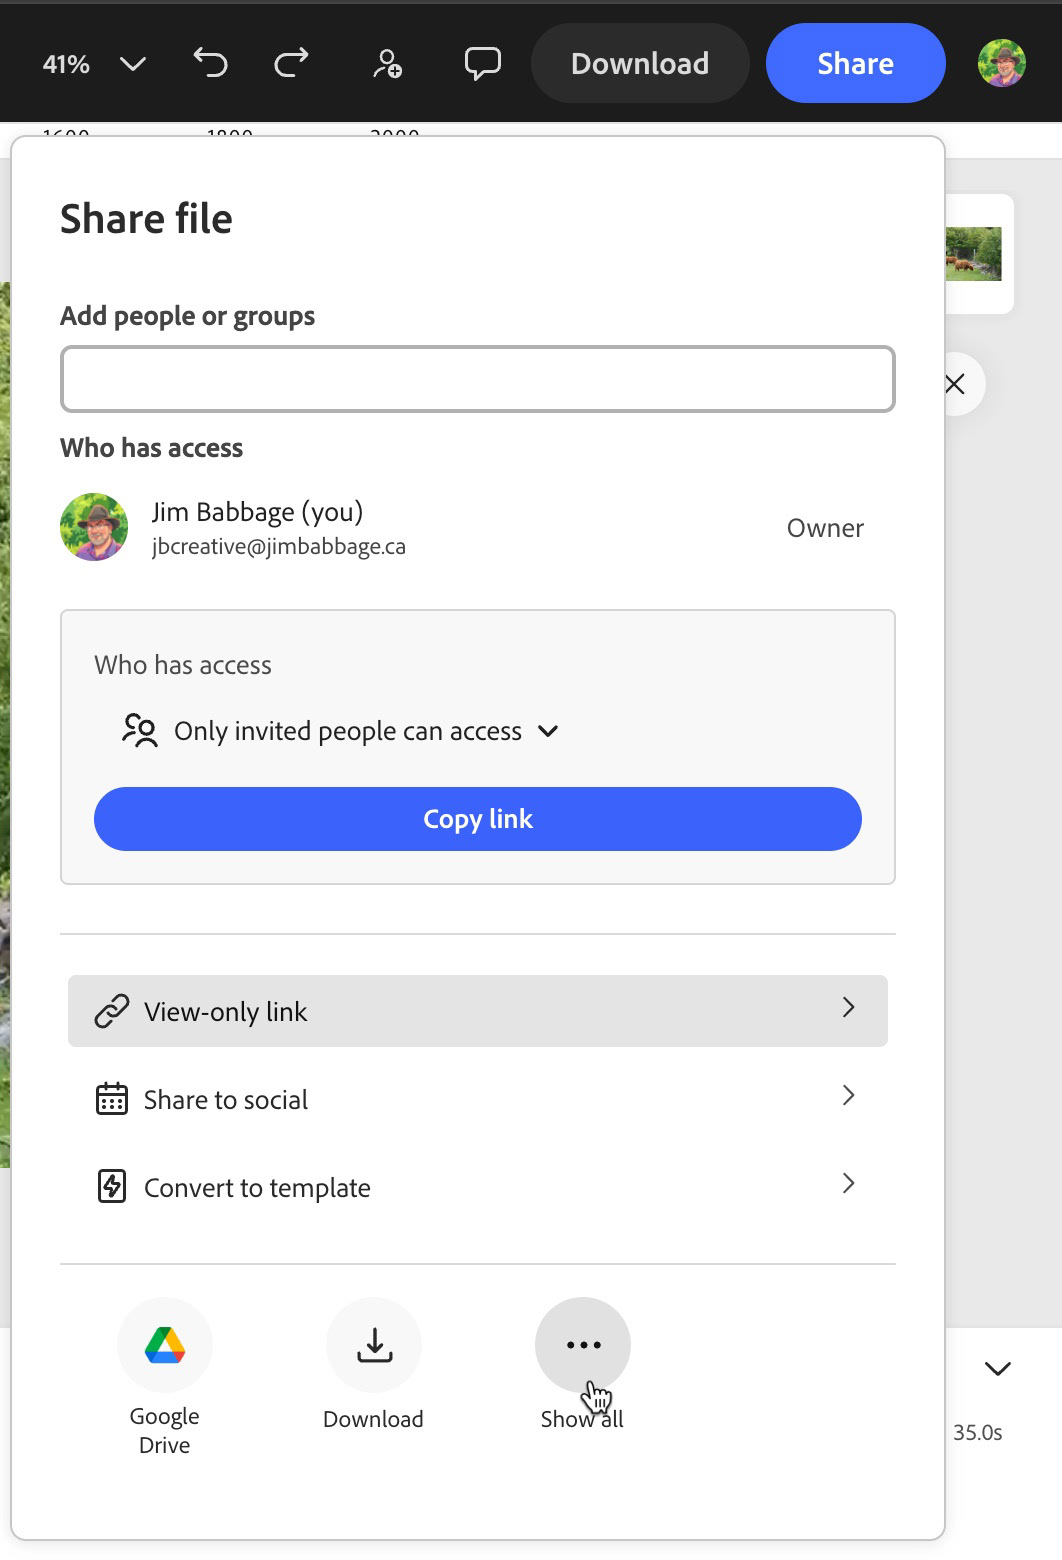
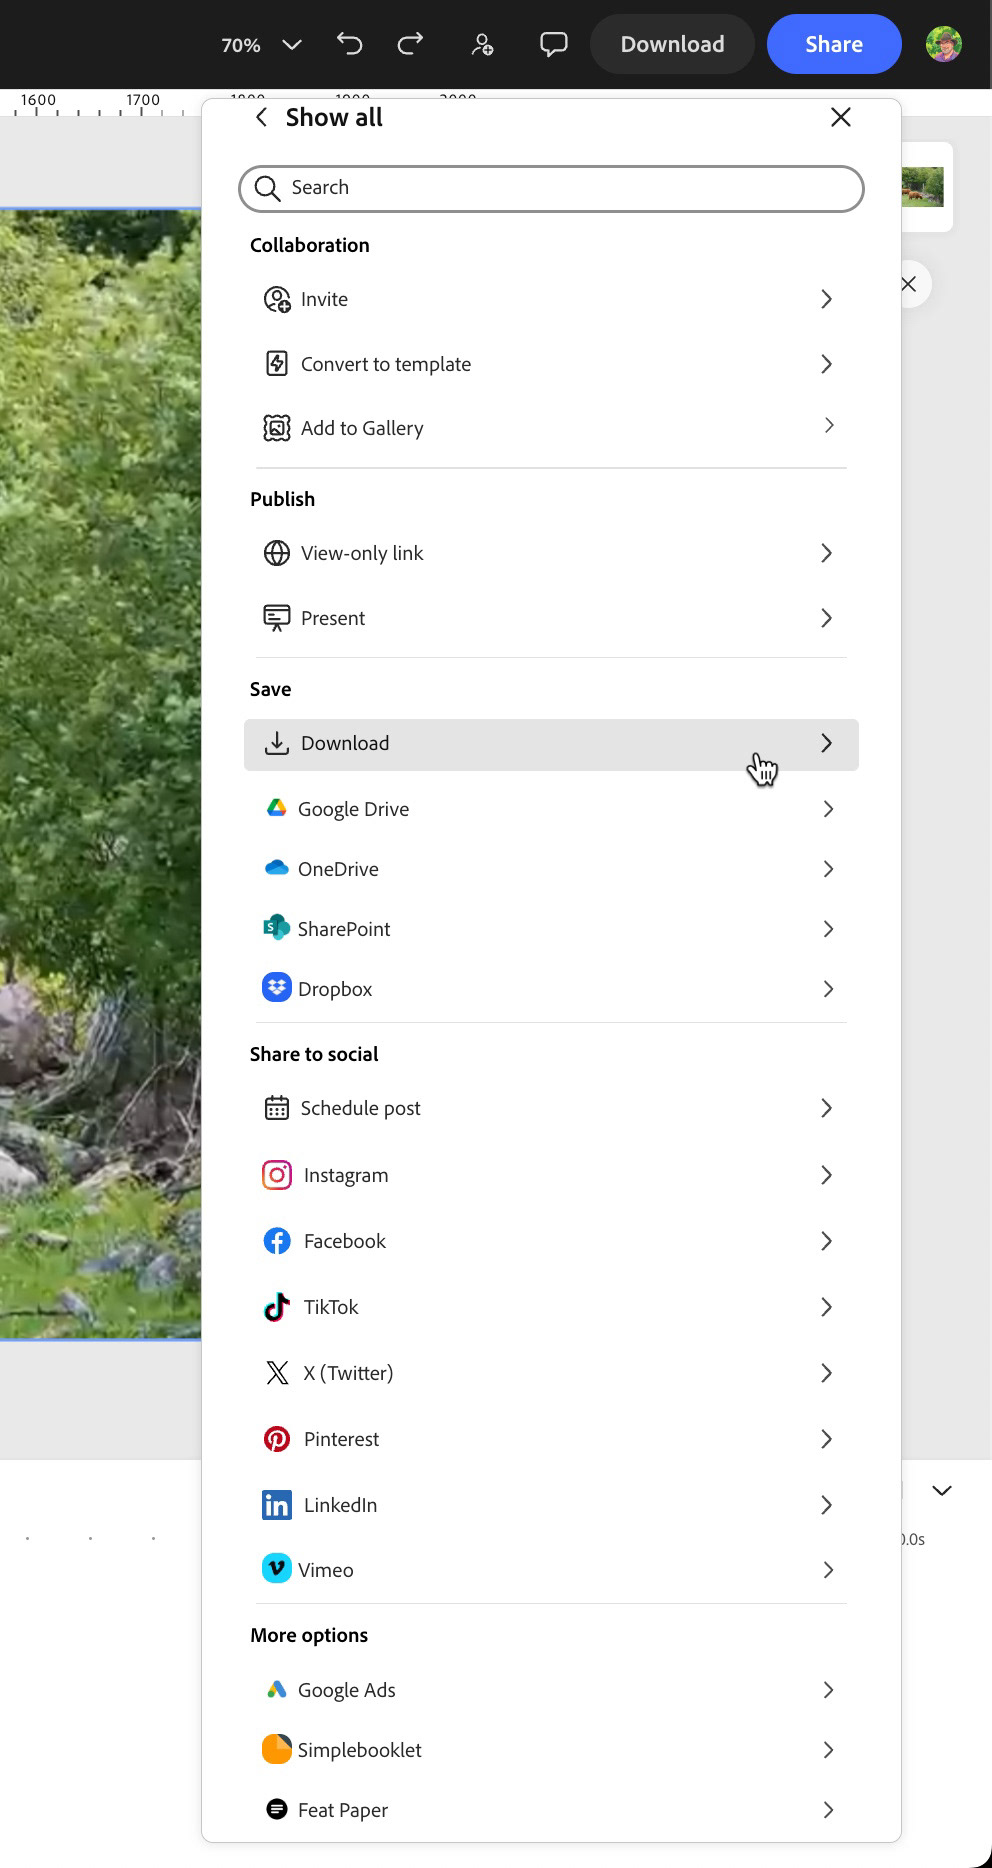
As far as editing goes, that pretty much it for this project. The final step is to click the Share button, where you can choose to download a new MP4 for GIF file, or other static image formats.You can also share directly to your social media channels, create a view-only Express link, add it to an Express Gallery (one of my new, favorite features for sharing multiple projects) and several other options.
I hope you found this article of interest and that it inspires you to try something new in Lightroom or Adobe Express. If you do create something, I'd love to hear about it!
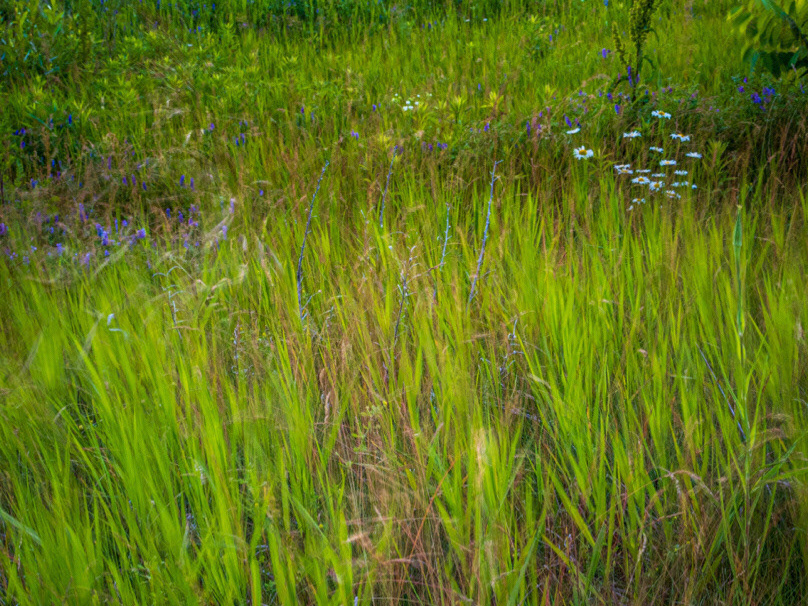
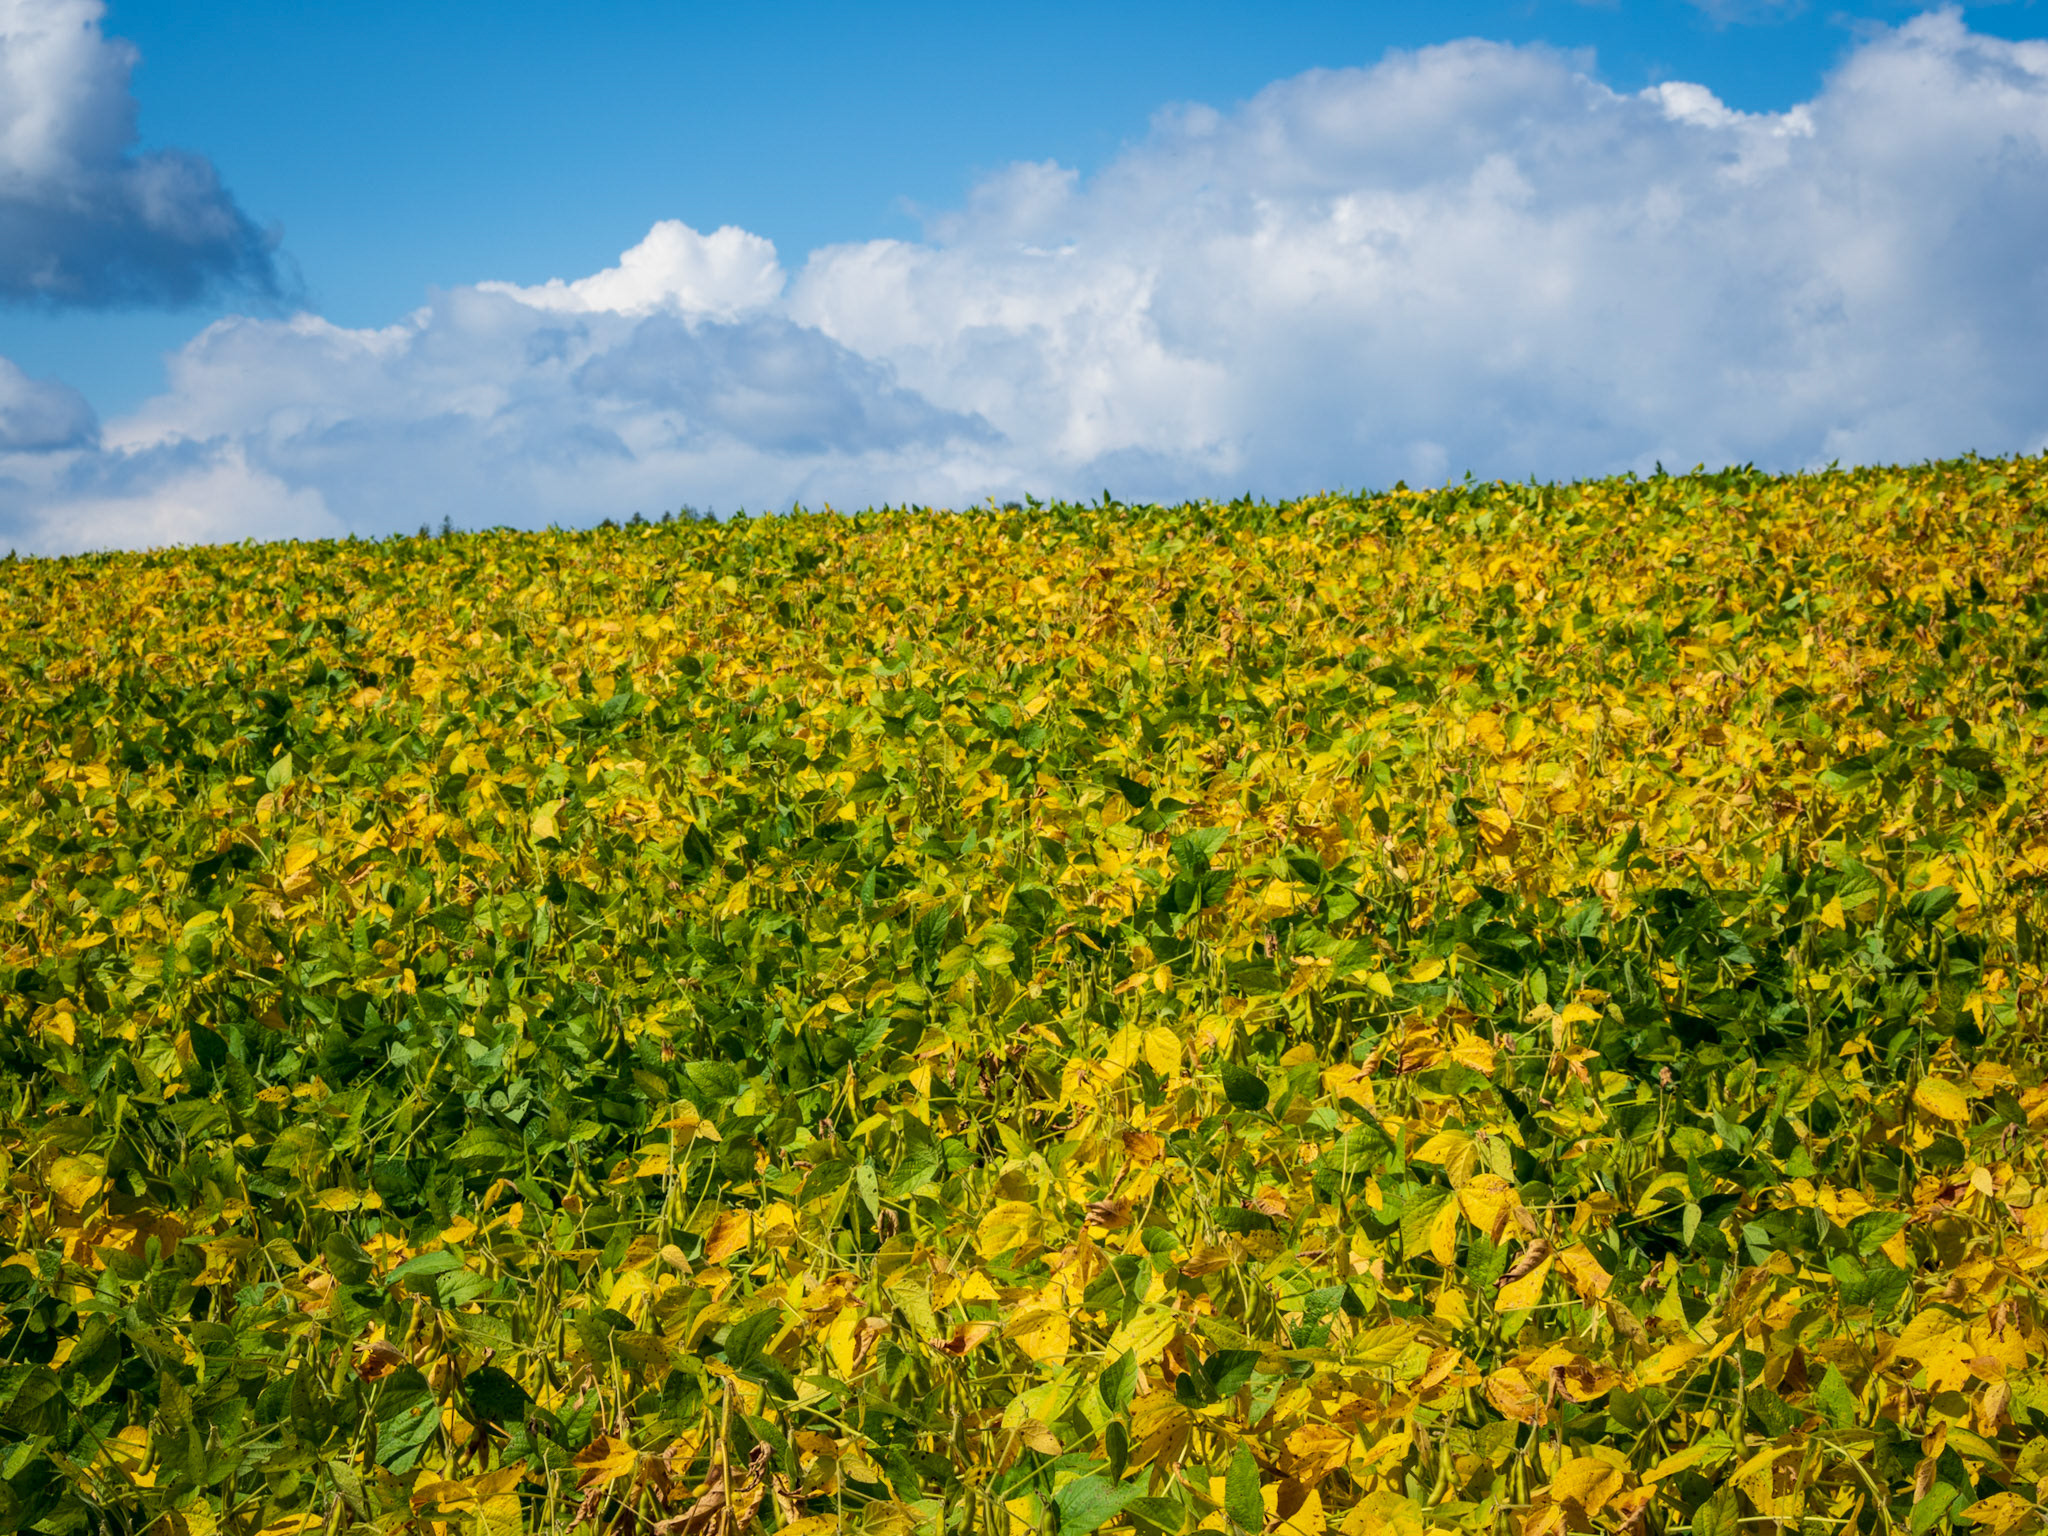
Until next time, I'll leave you with one more example, a hyperlapse generated video of a hayfield, captured after sunrise.NO edits on this one, just the video, generated using Veo 3.1 Fast, right from Lightroom.