Stillness to Motion
Creating B-Roll Footage Without a Video Camera
Recently, Adobe released a new mobile app; Premiere Mobile, designed to be powerful, easy to use video editor, and an eventual replacement for the much-loved but not very performant Adobe Rush.
I've been experimenting with the app, both on my iPhone and my iPad and overall, I'm quite enjoying it. There is a good mix of intuitiveness and powerful features.
Image to Video - A Simple Project
As a long-time stills photographer, one personal challenge I have yet to conquer is the act of capturing video when I take the time to make a photo. Far too often, I forget to simply flip that switch and capture 10 seconds of footage.
While certainly not the same as original footage, using Generative AI to create those short sequences from static images is a great secondary option, producing very realistic results when combined with a reference image for the AI model to play off of. Very helpful if you just need a short b-roll sequence! So when I opened Premiere Mobile and noticed the new Generative AI features, I decided to give Image to Video a test run.
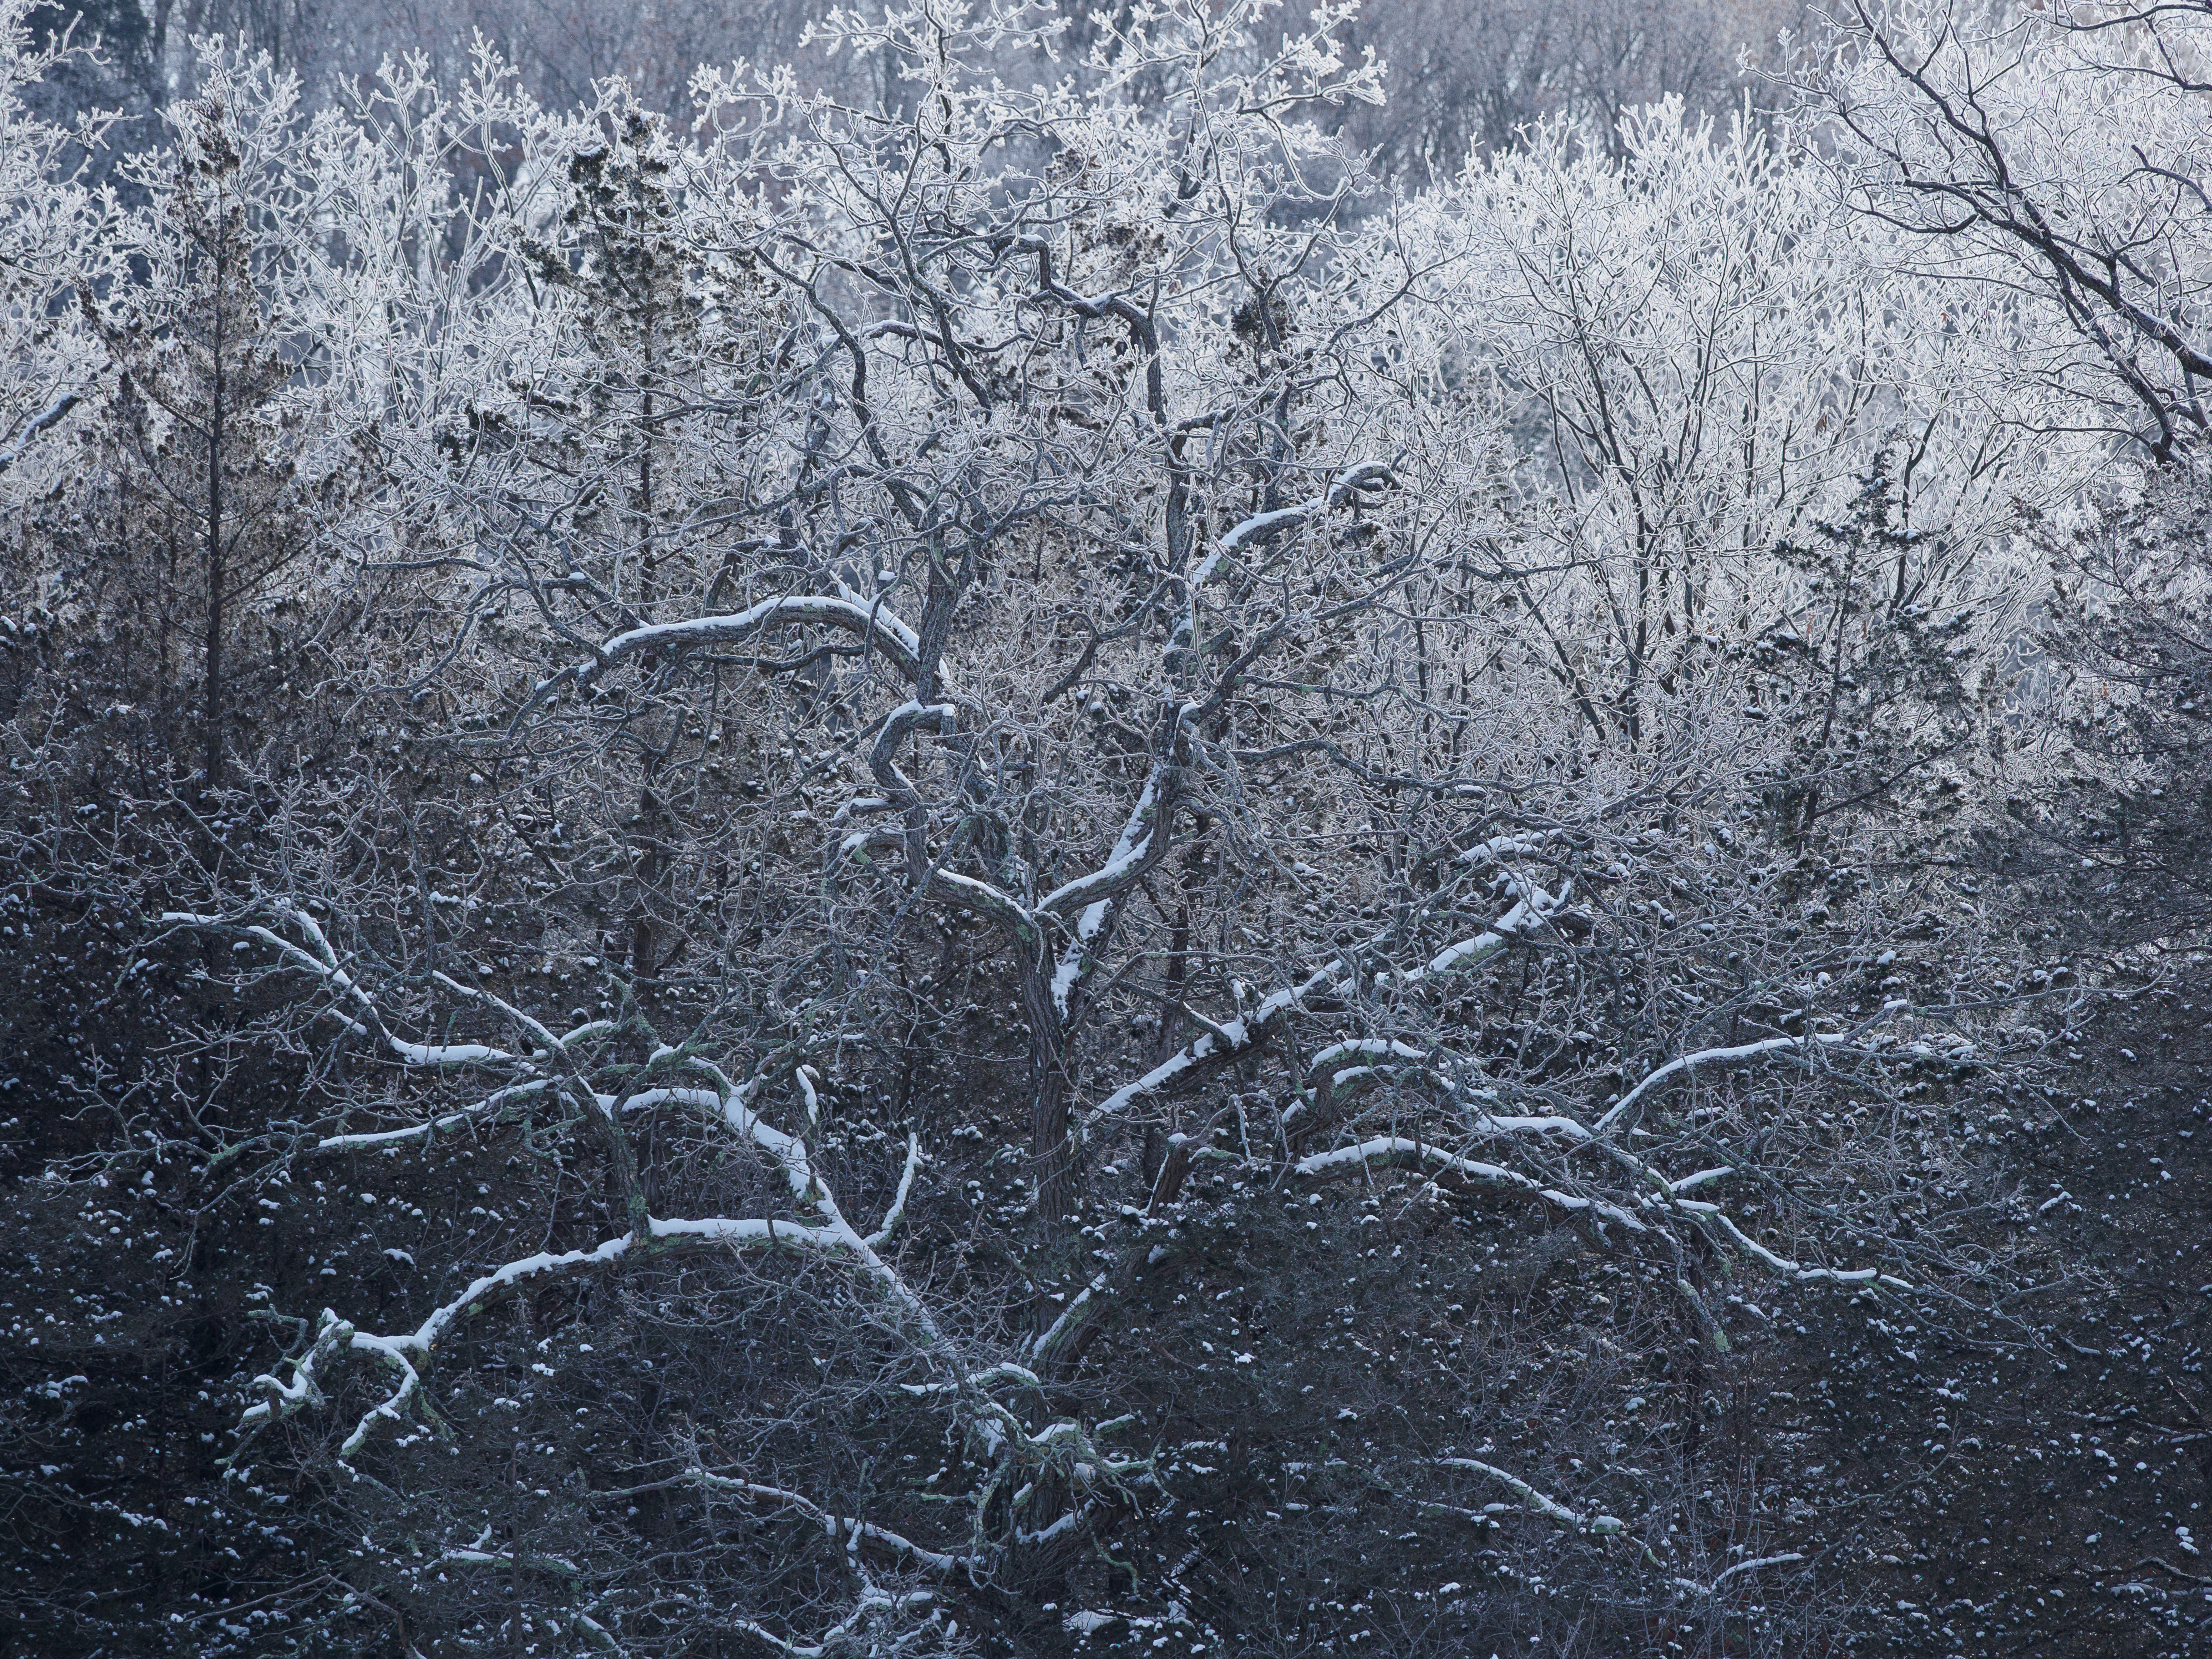
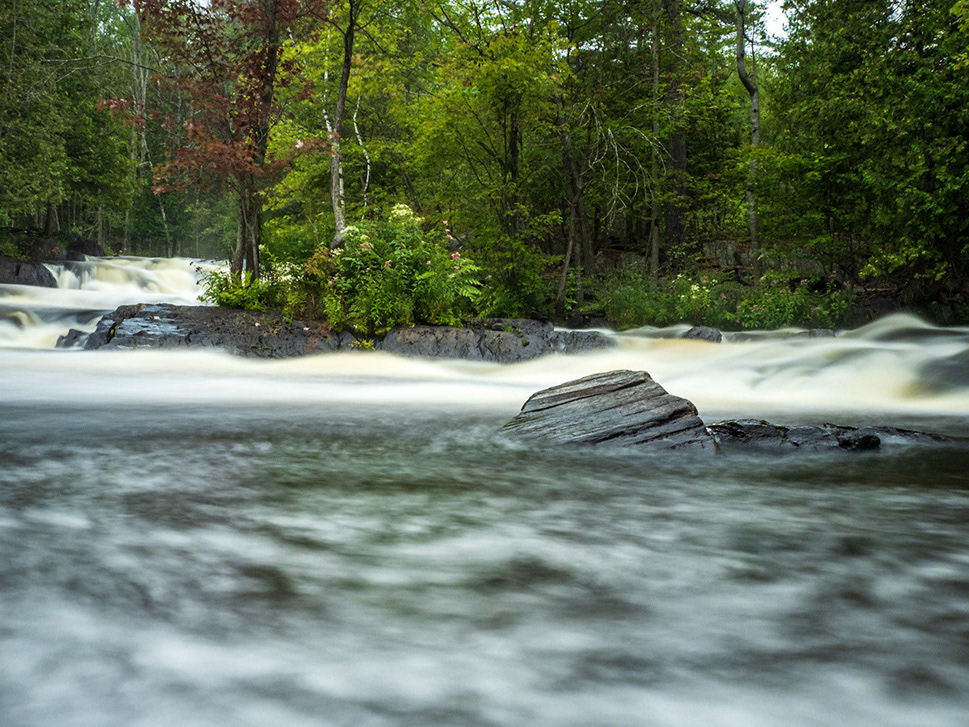
The image below of Ohara Mill near Madoc, Ontario, is one of those situations where I left without shooting video. I had seen another photographer's images from the location and on this bitterly cold, but also a beautiful sunny day. I decided to try to find the spot and capture my own images. I came away with some great images, but not a second of video. A perfect test!
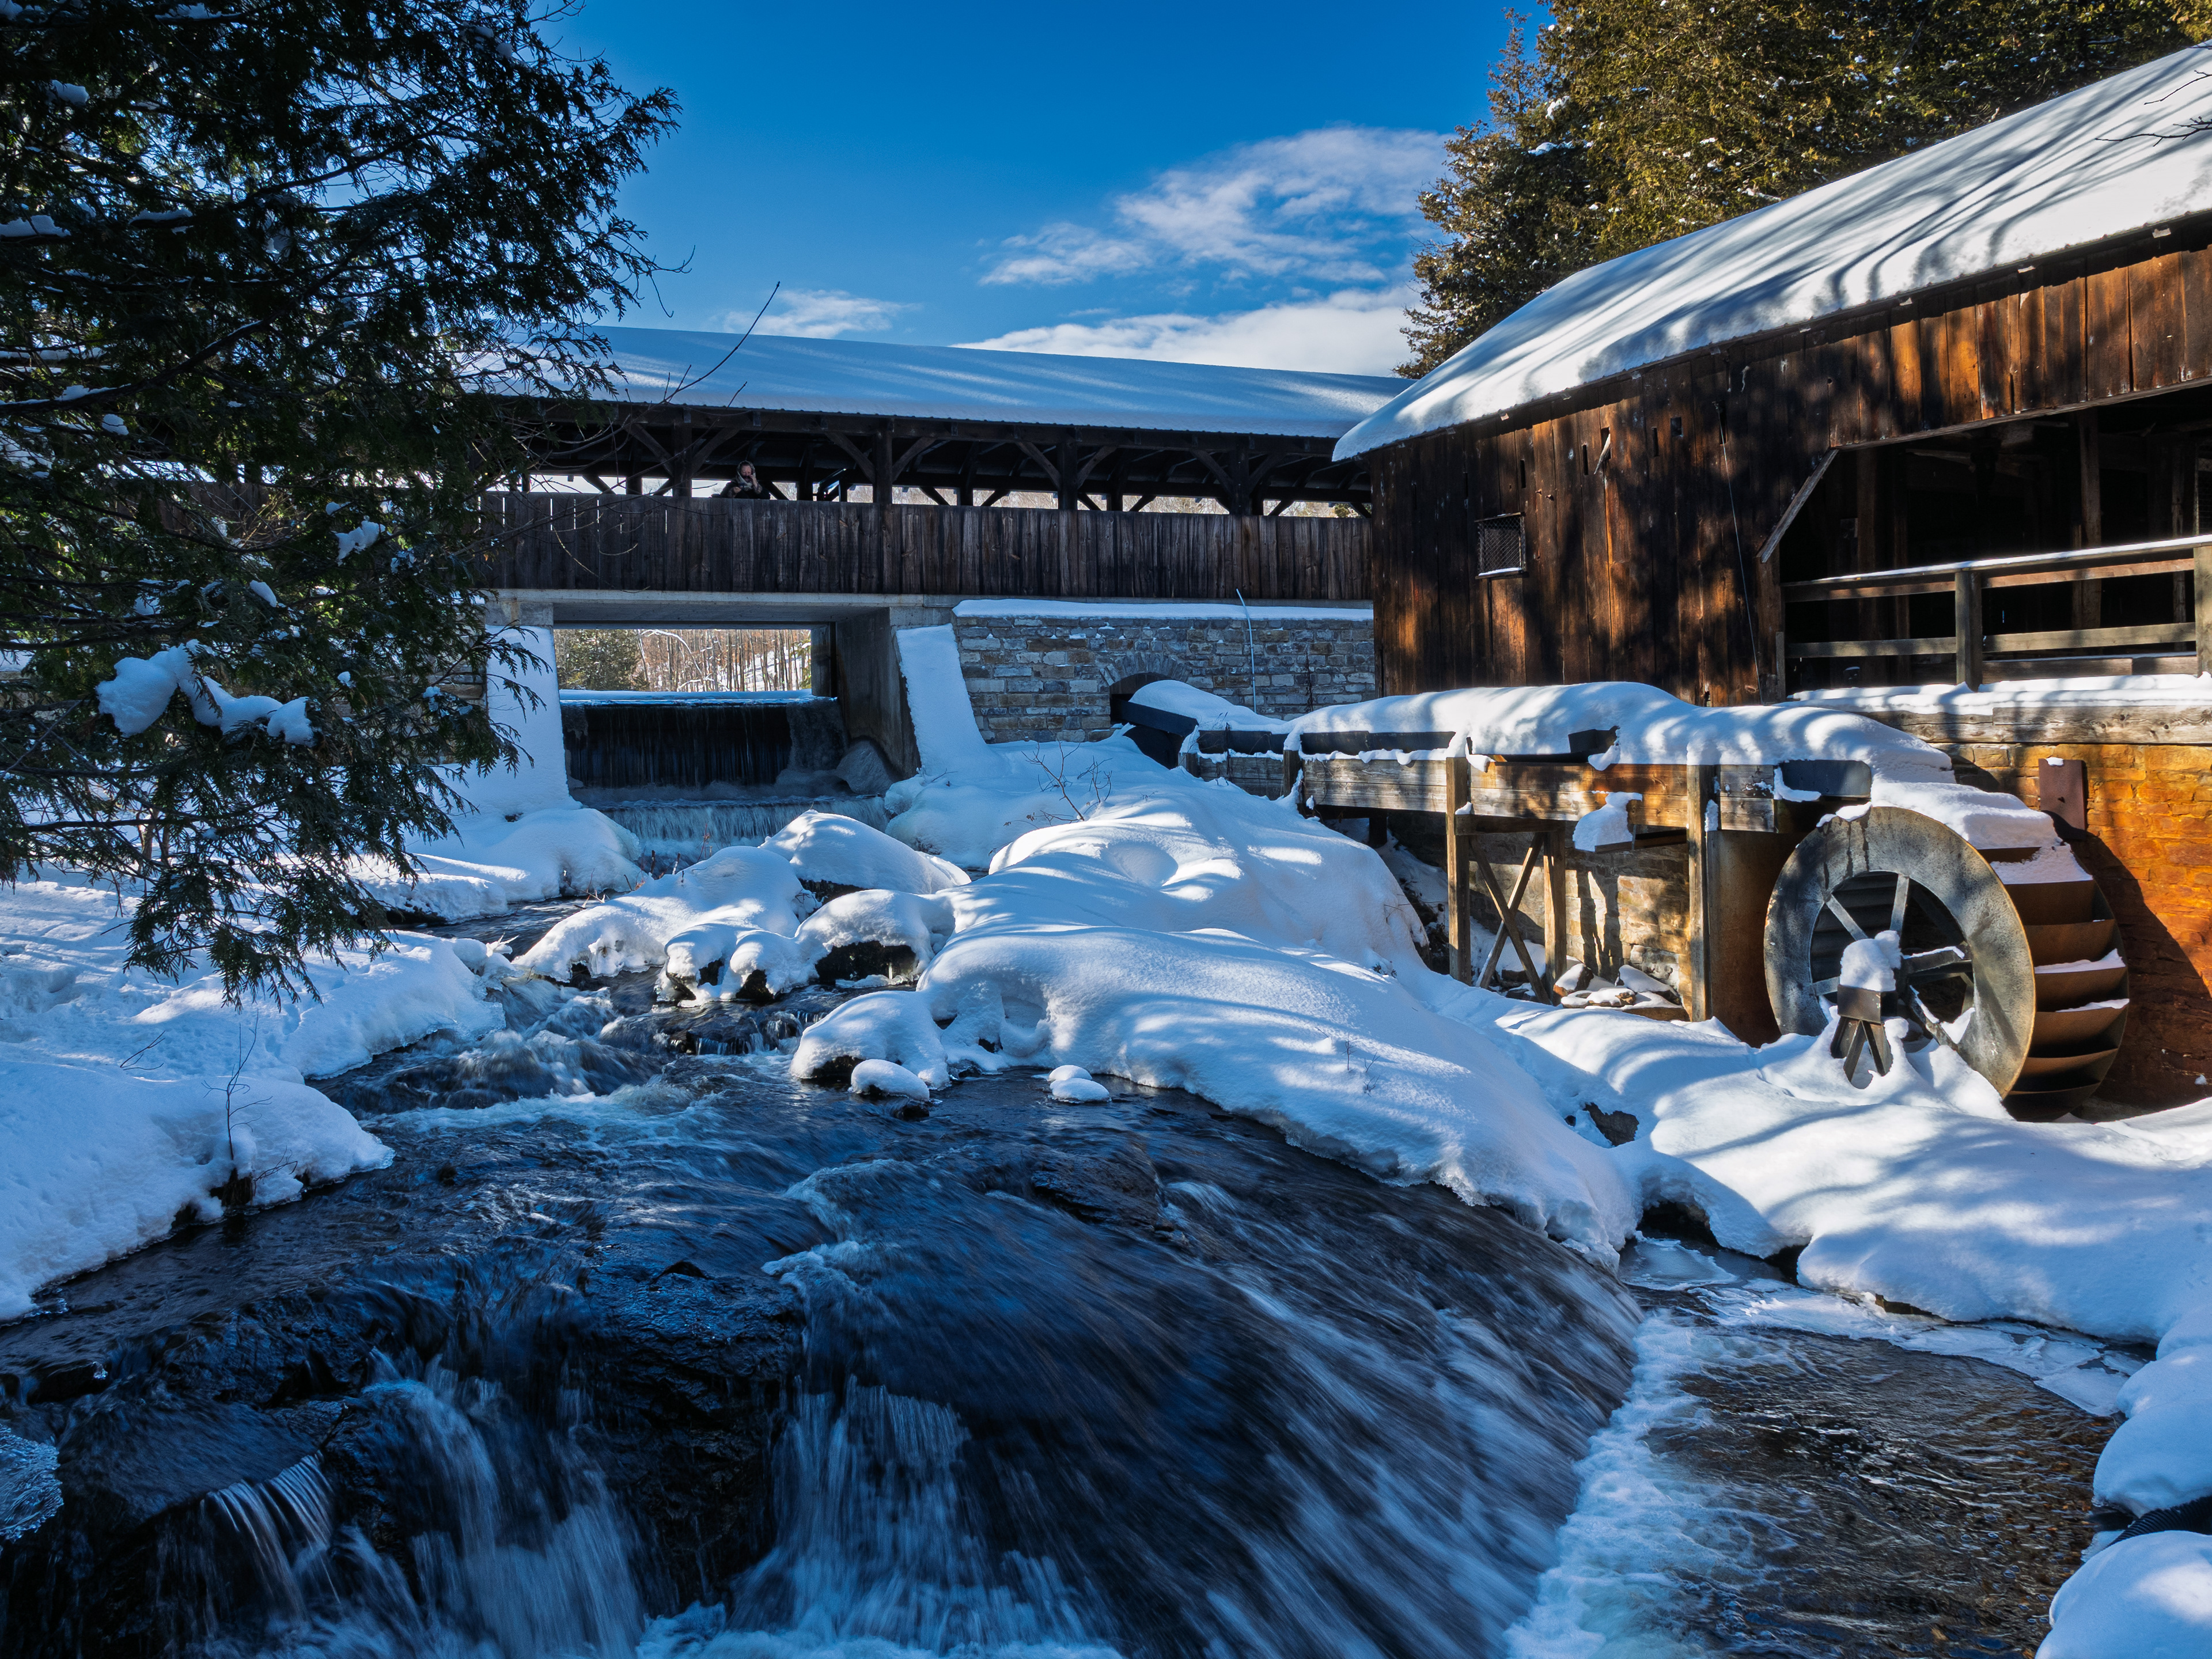
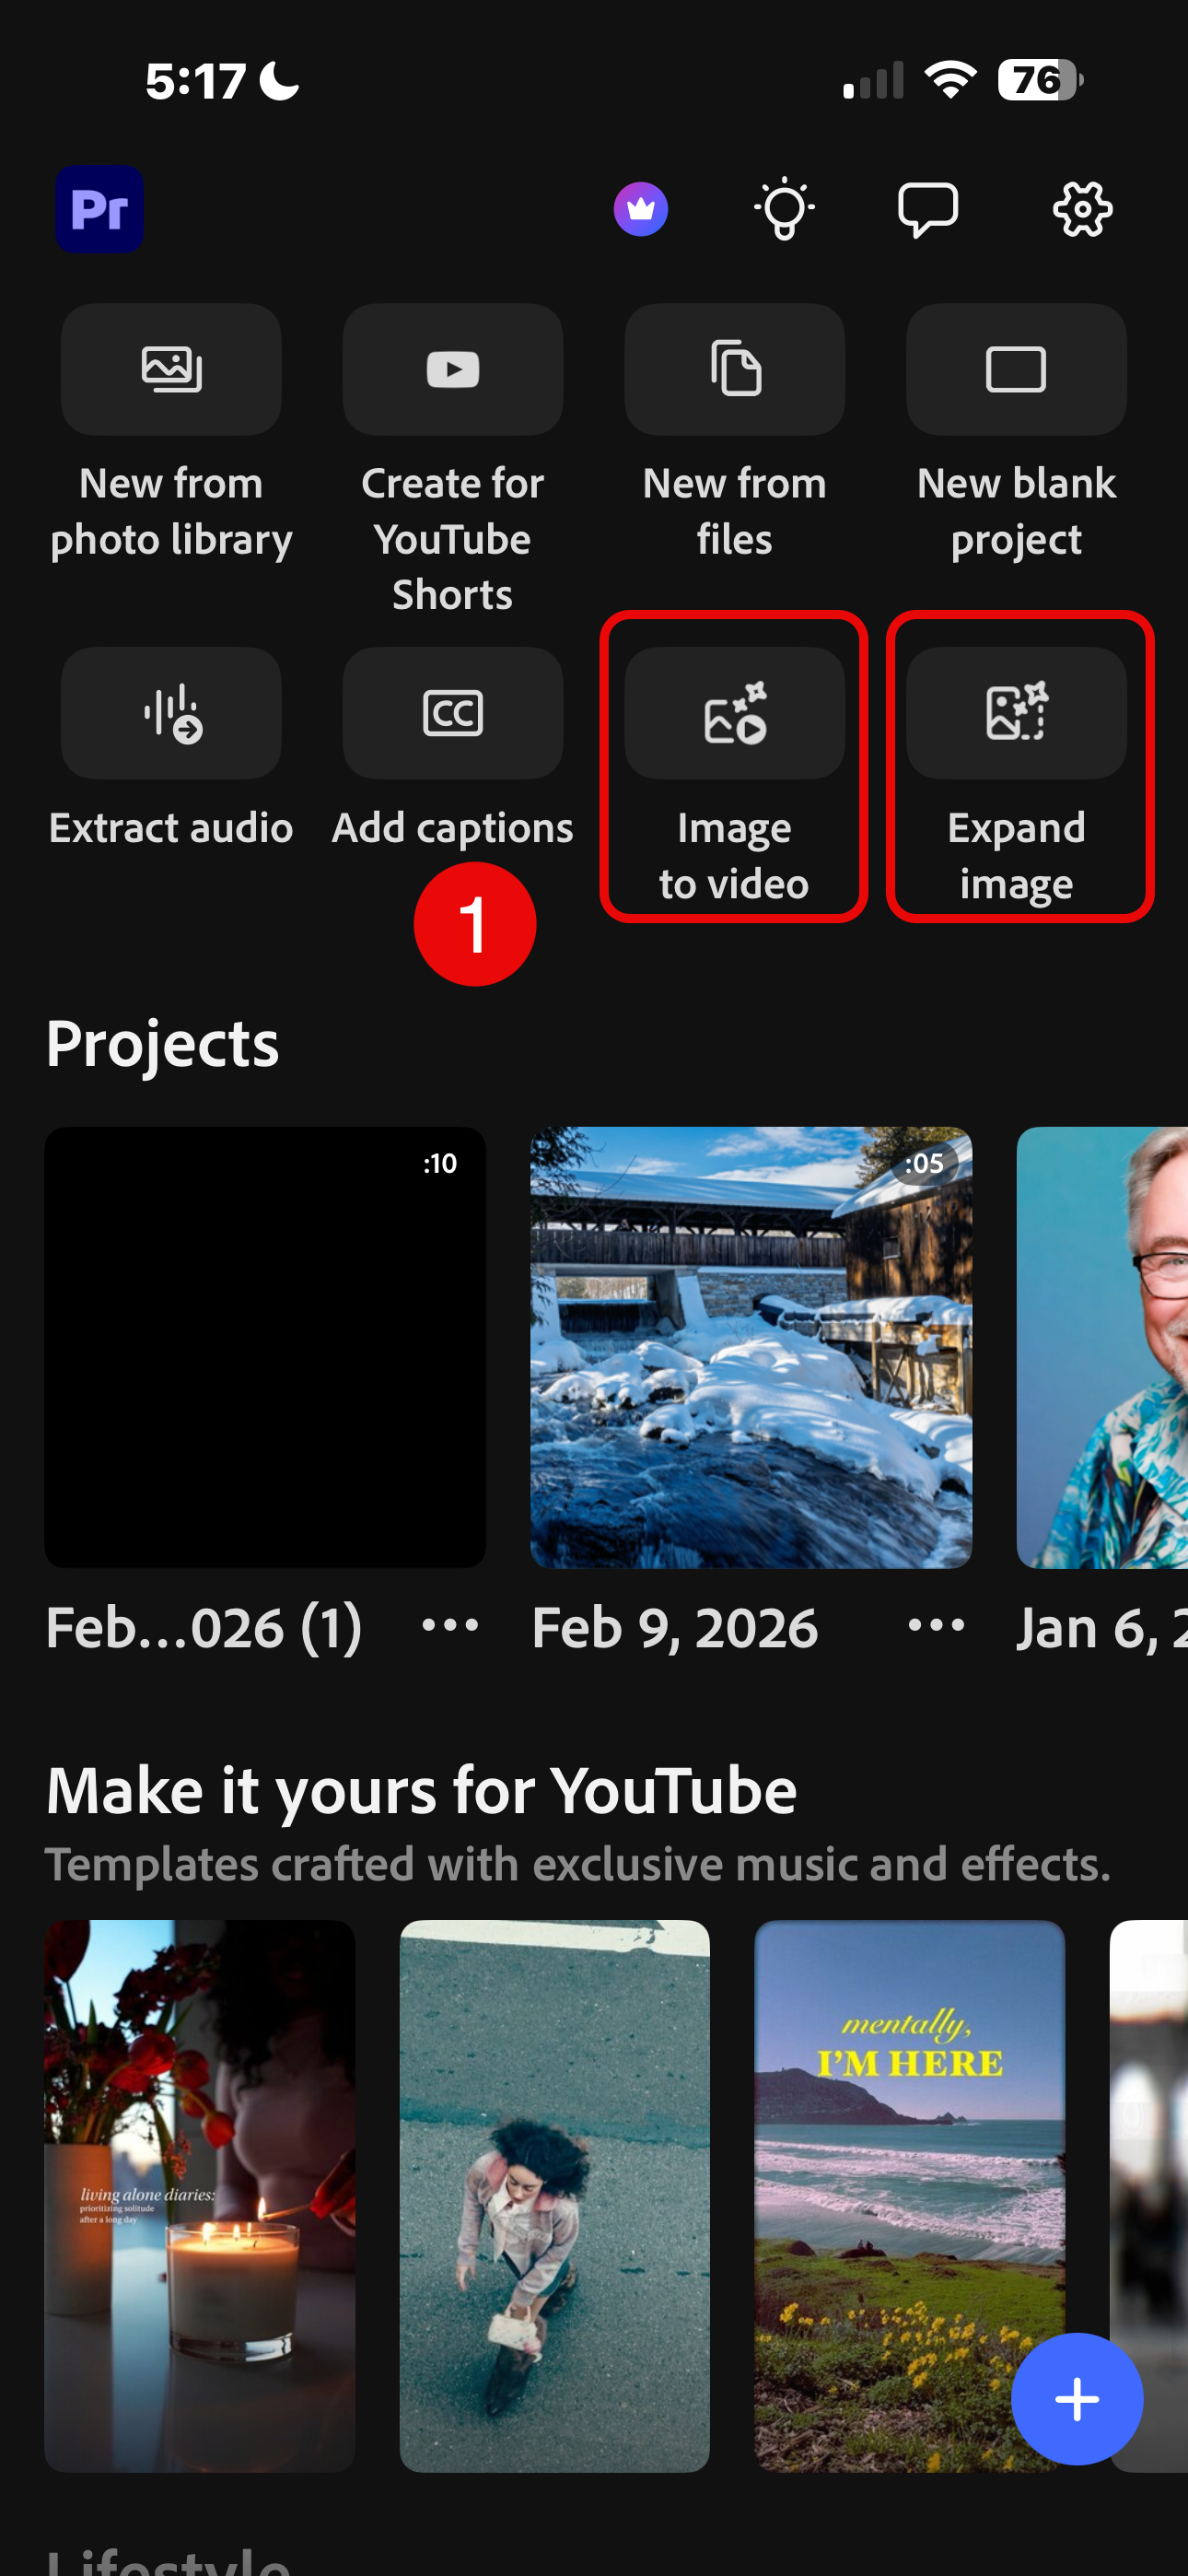
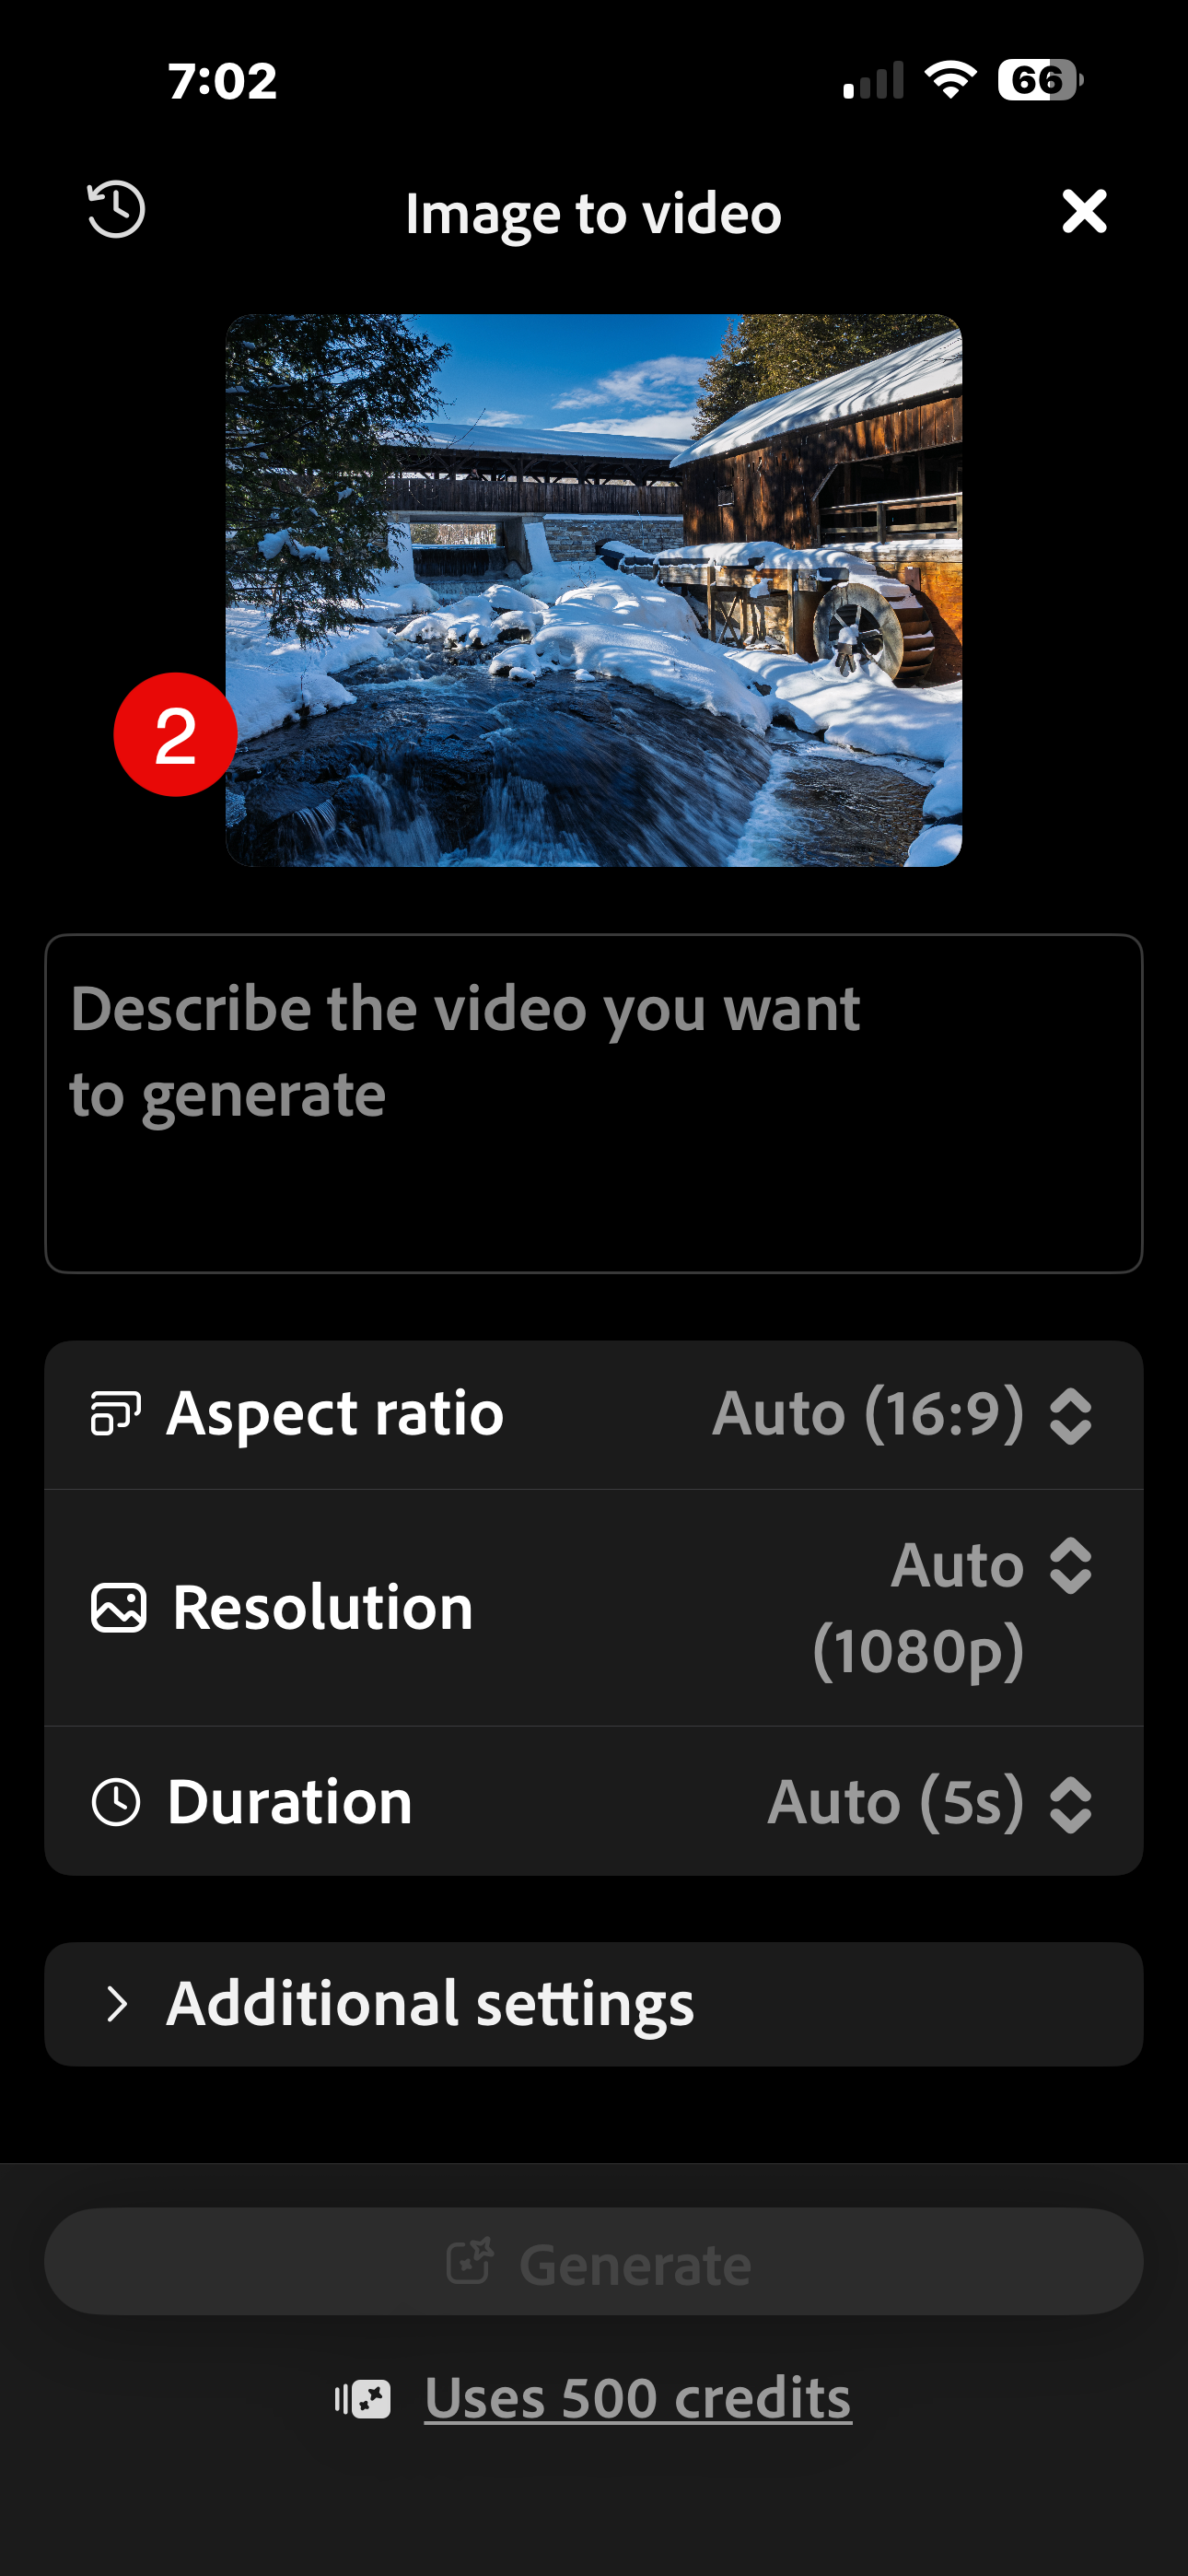
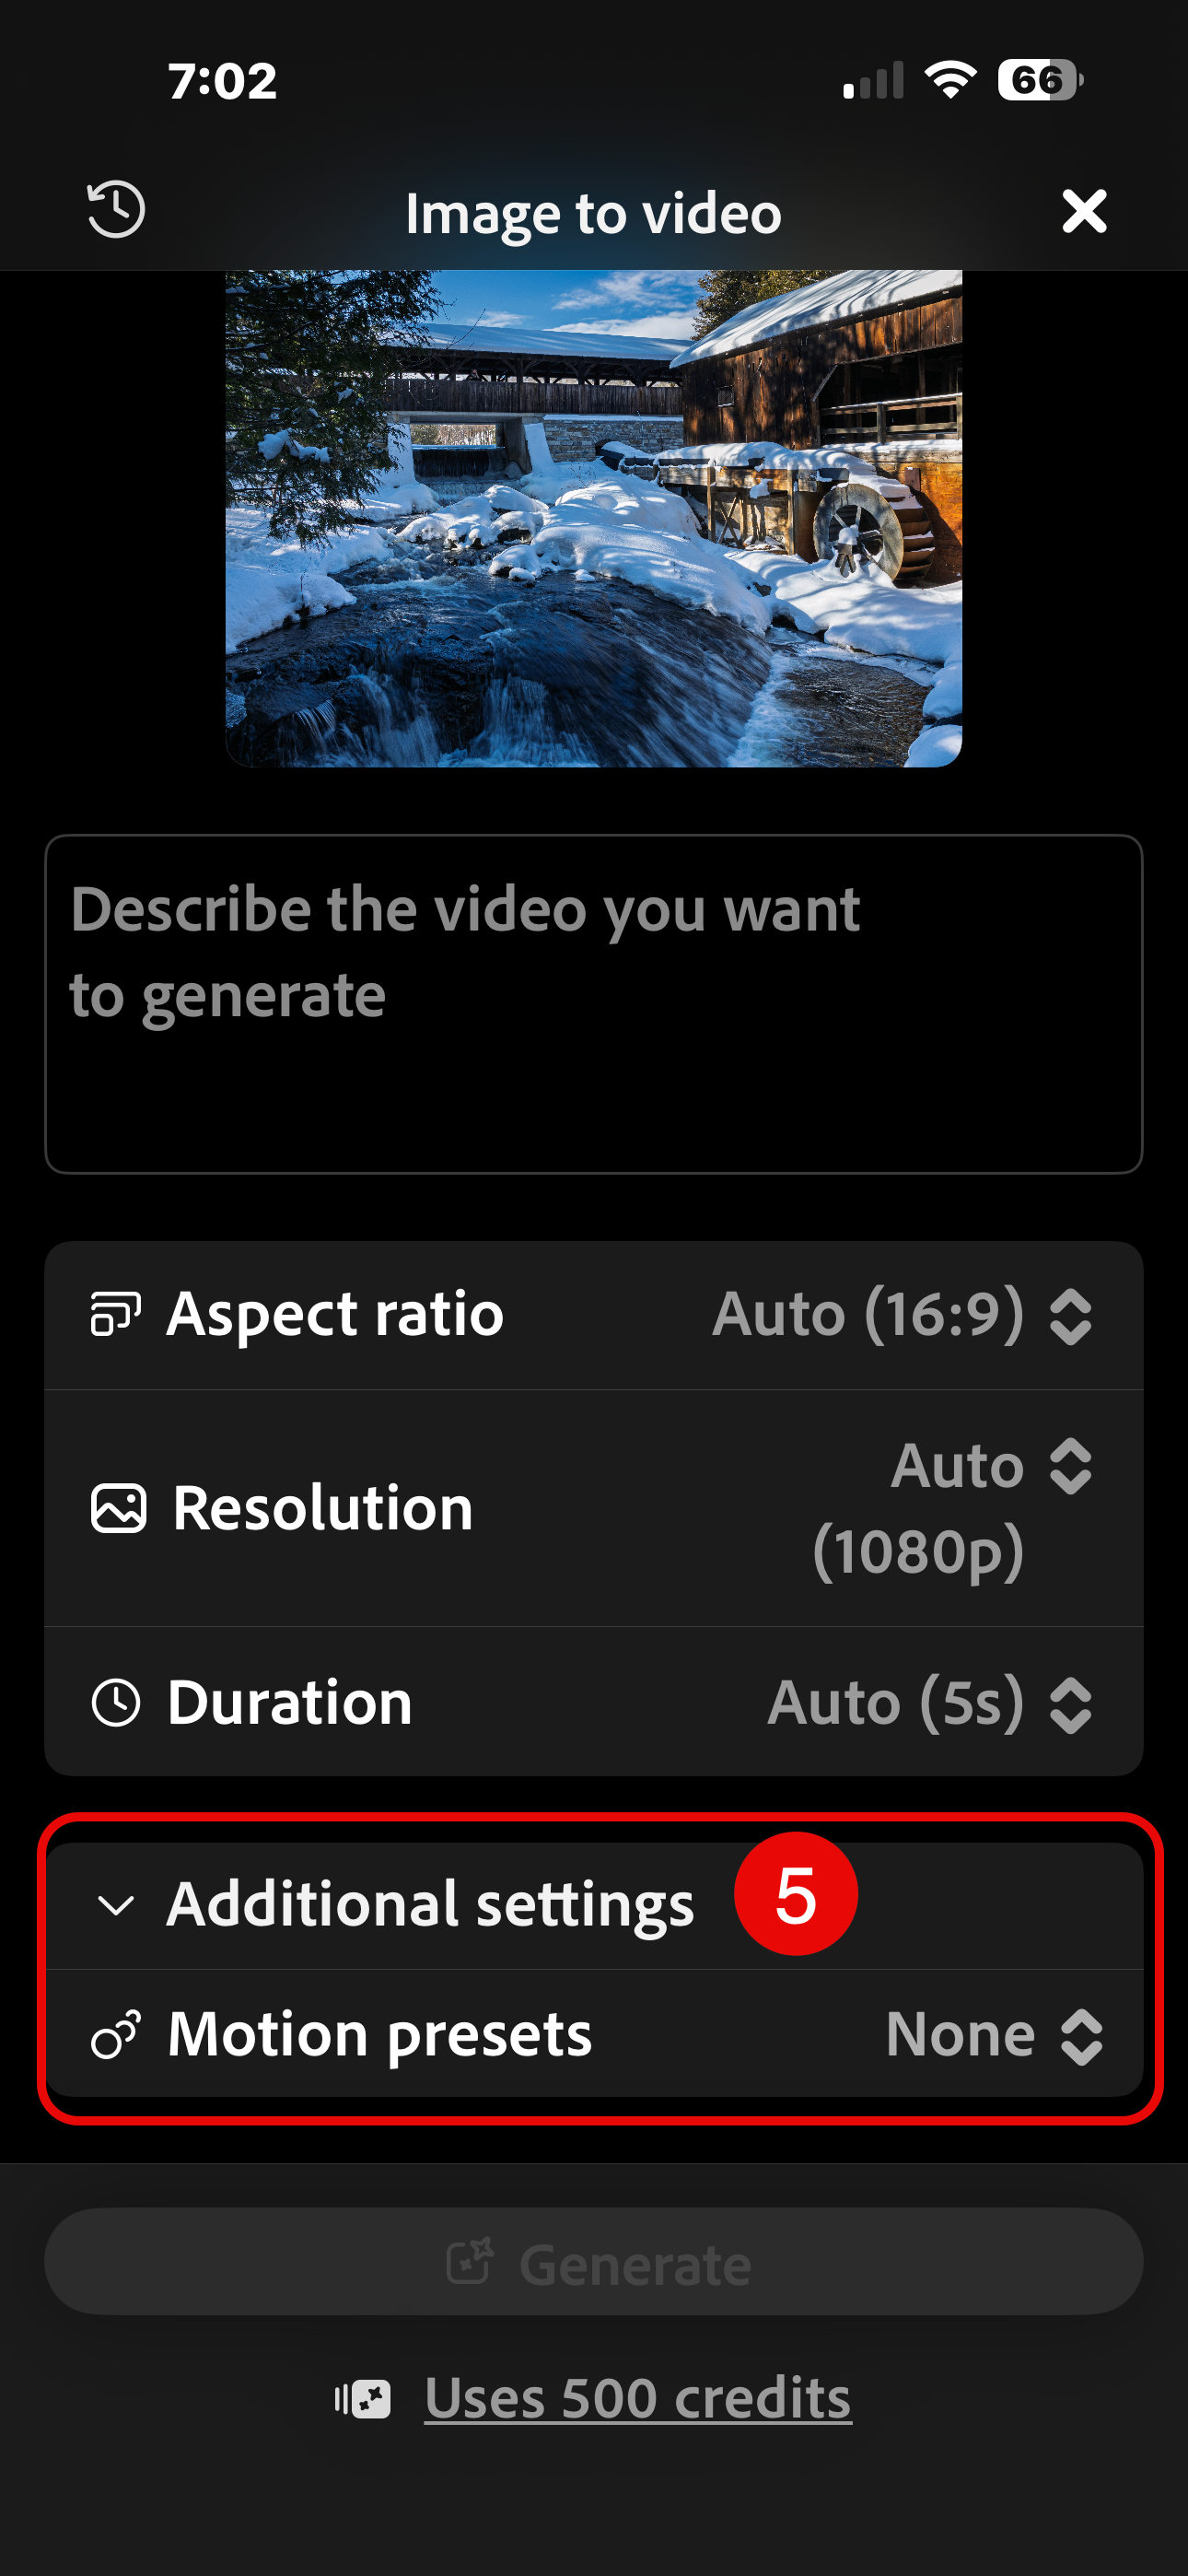
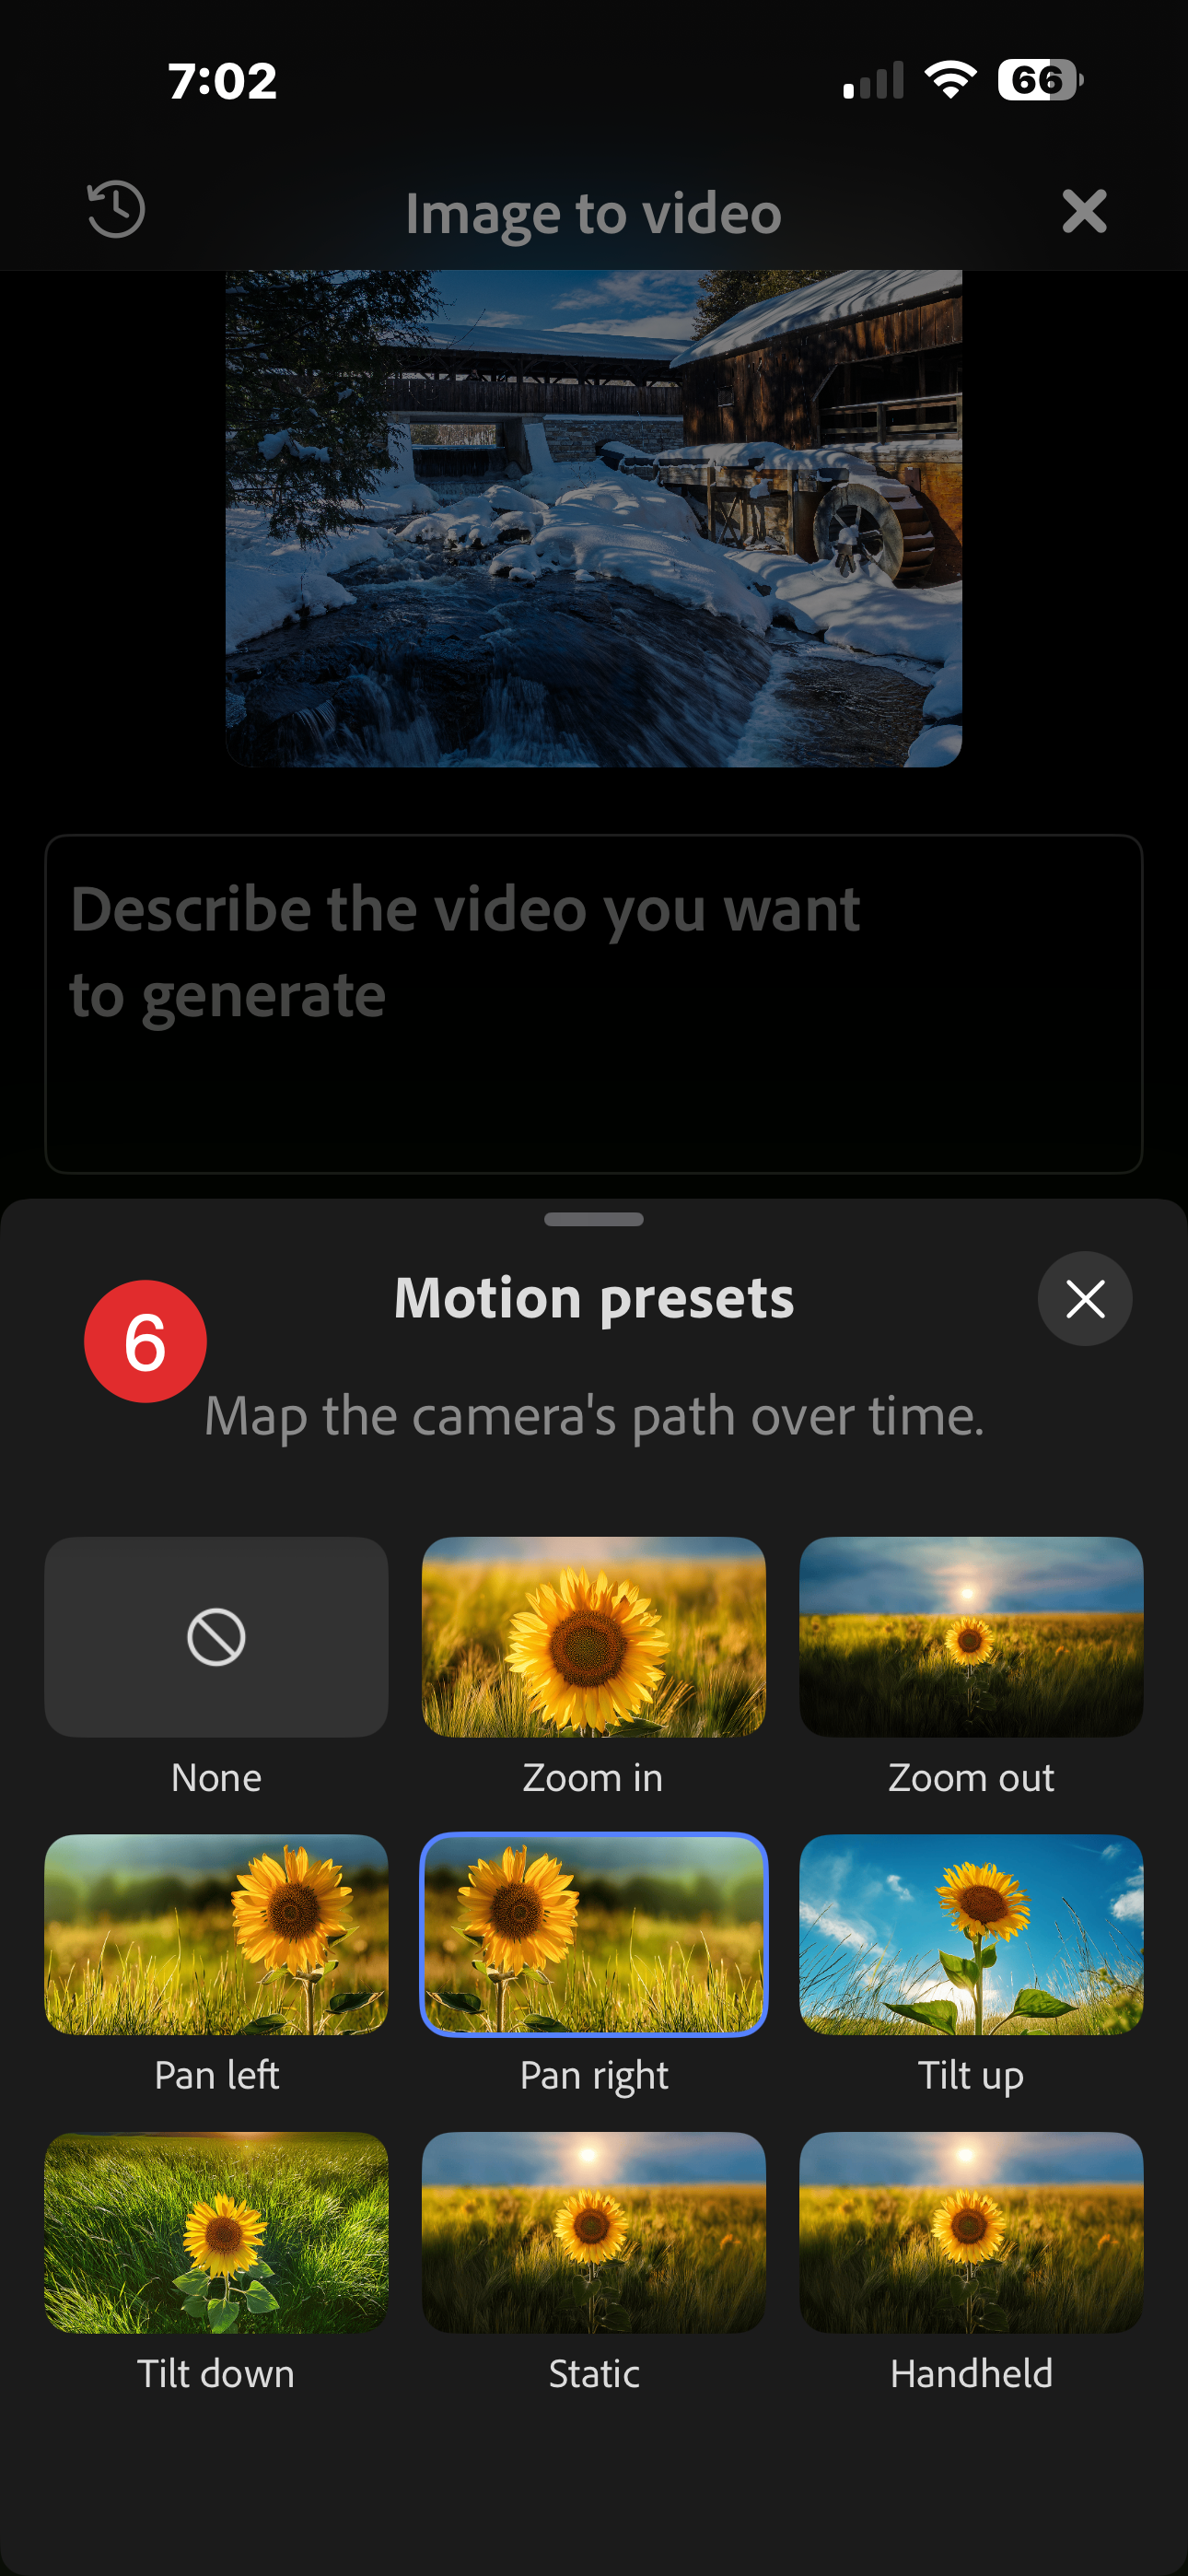
Choose Image to Video (Expand Image is also powered by Adobe Firefly, but not what I needed). Then simply browse for an image and choose your settings in the app. In my case, I used a simple prompt: Gently flowing water in a shallow waterfall.
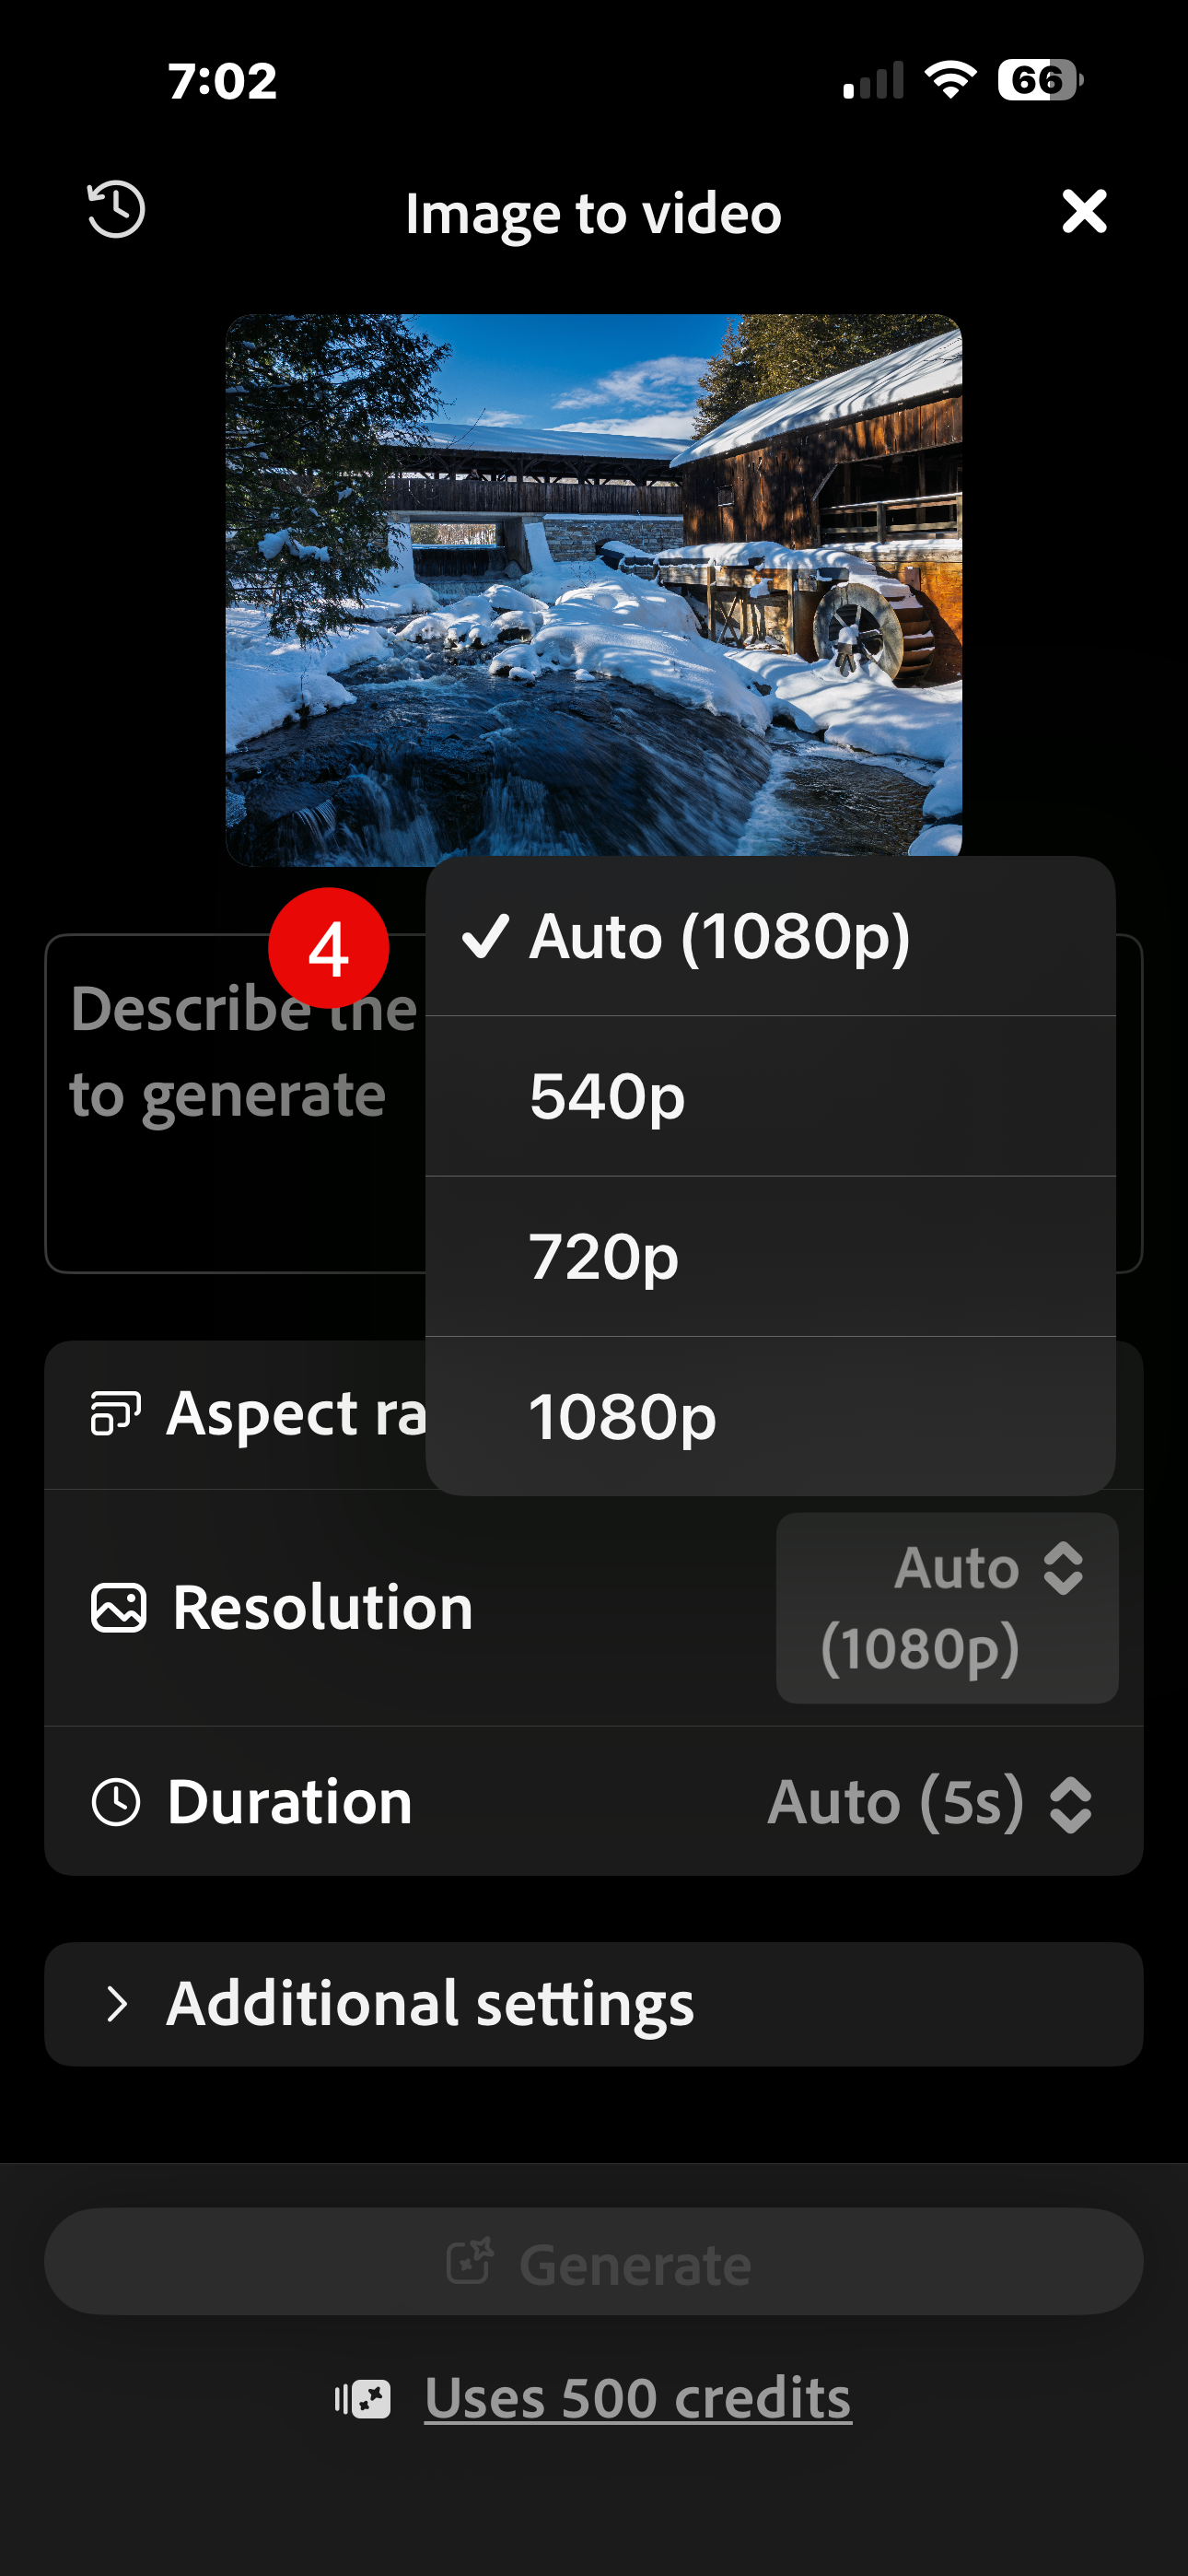
Note: the quality of the video you choose has a huge impact on how many generative credits are consumed. The default quality of 1080P consumes 500 credits per generation, so if you are just messing around, choose the lowest quality (540P) to reduce your credit consumption down to 100 credits per generation.
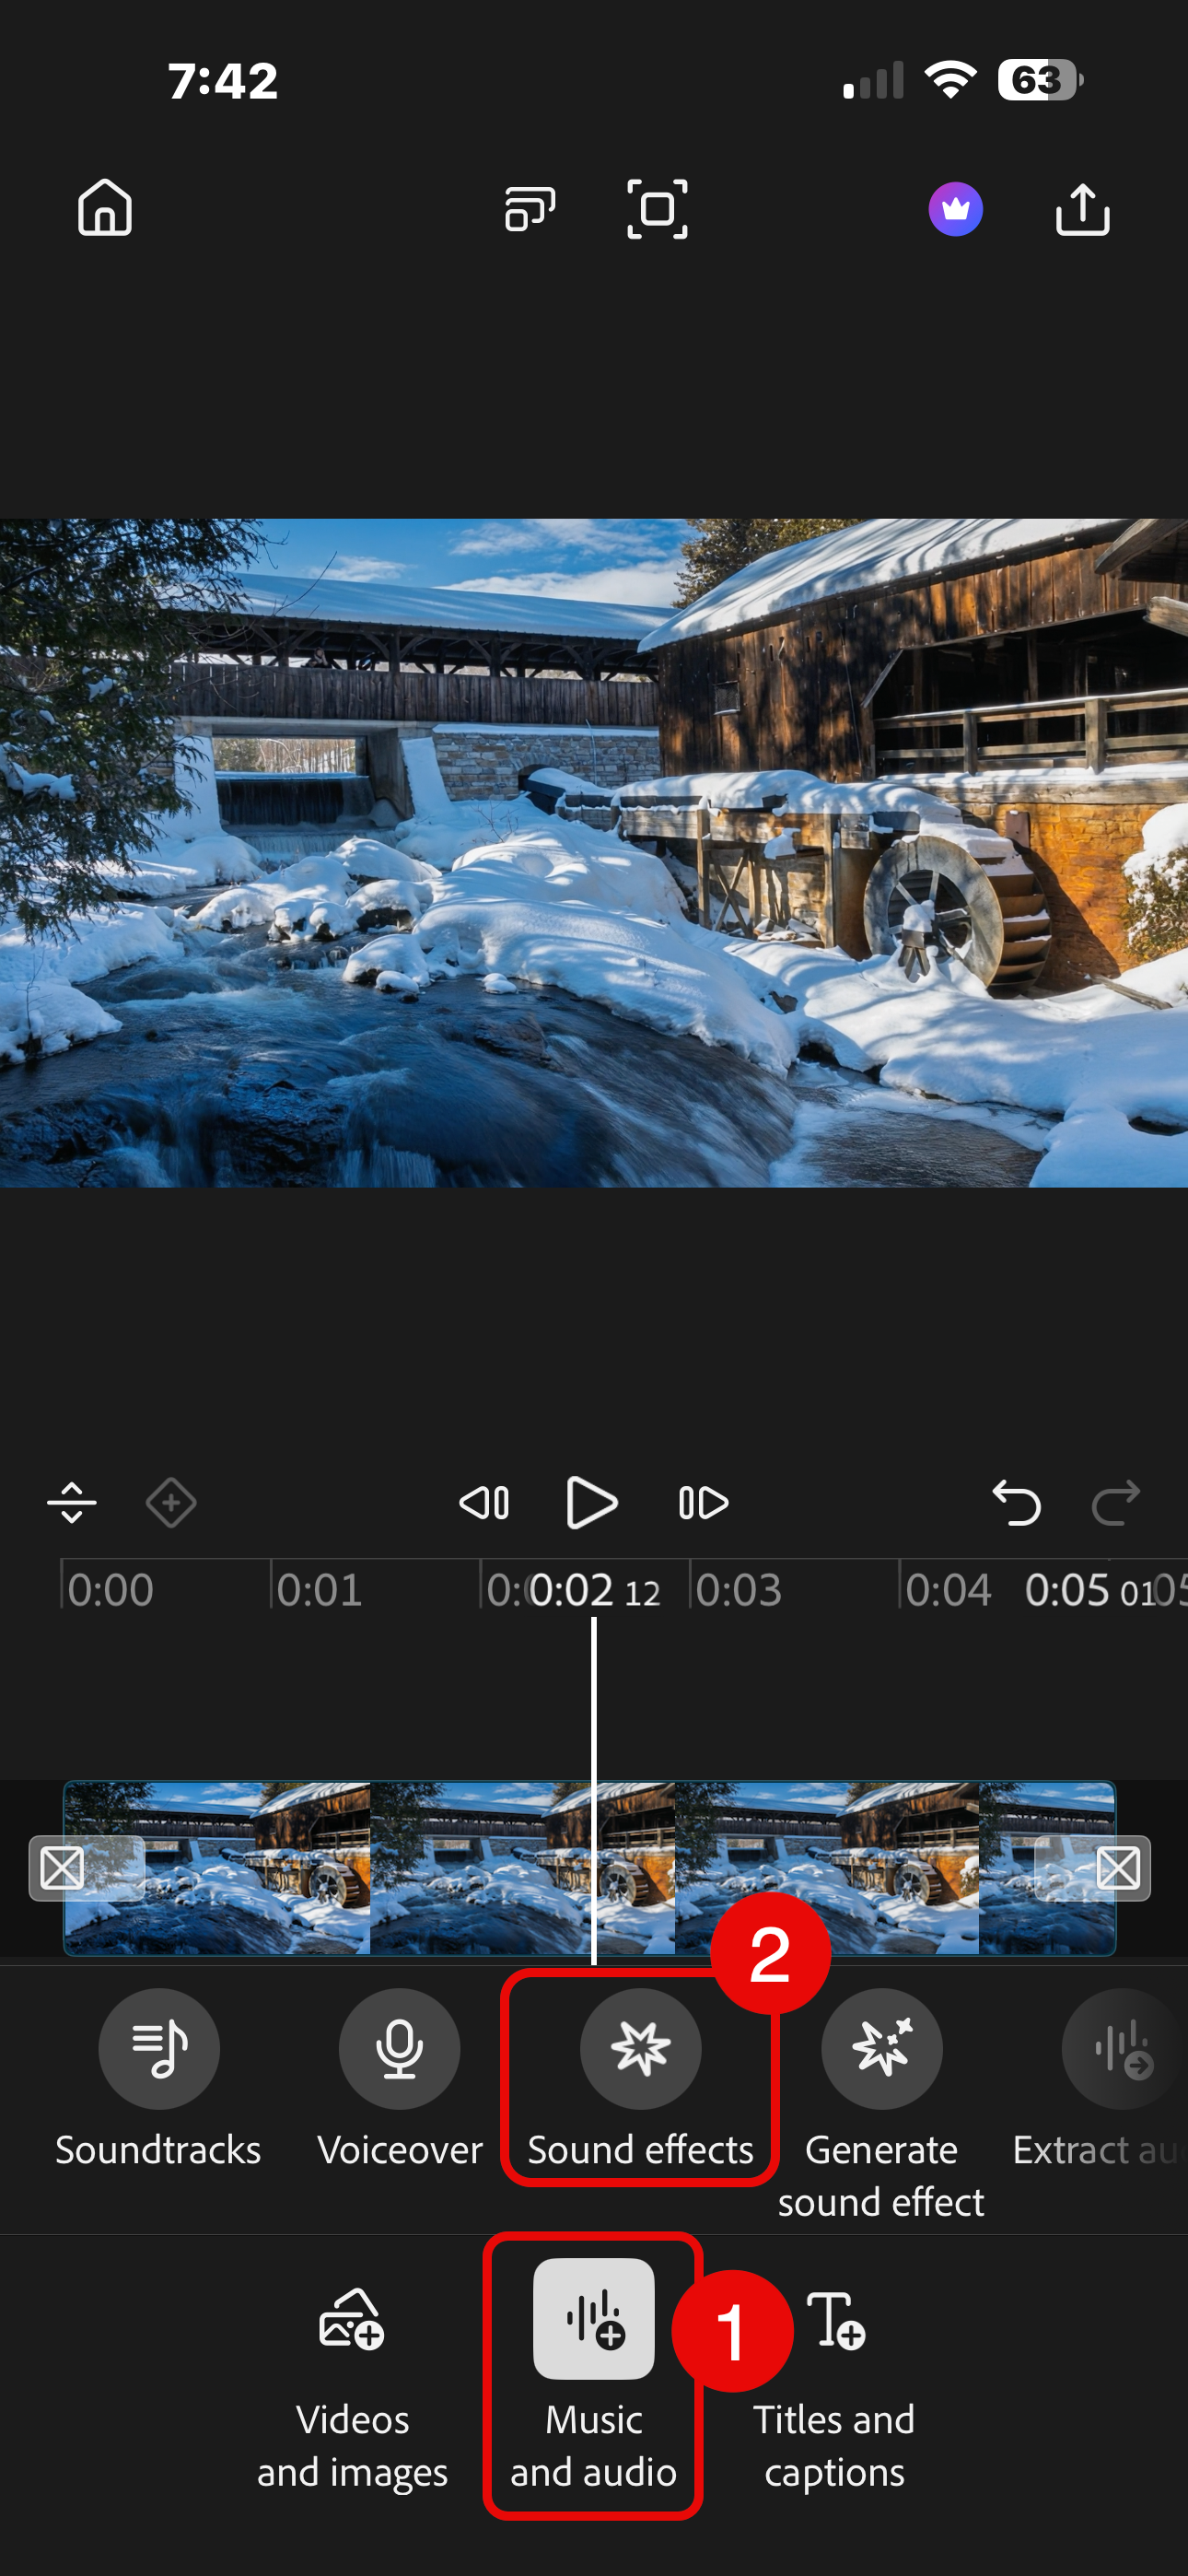
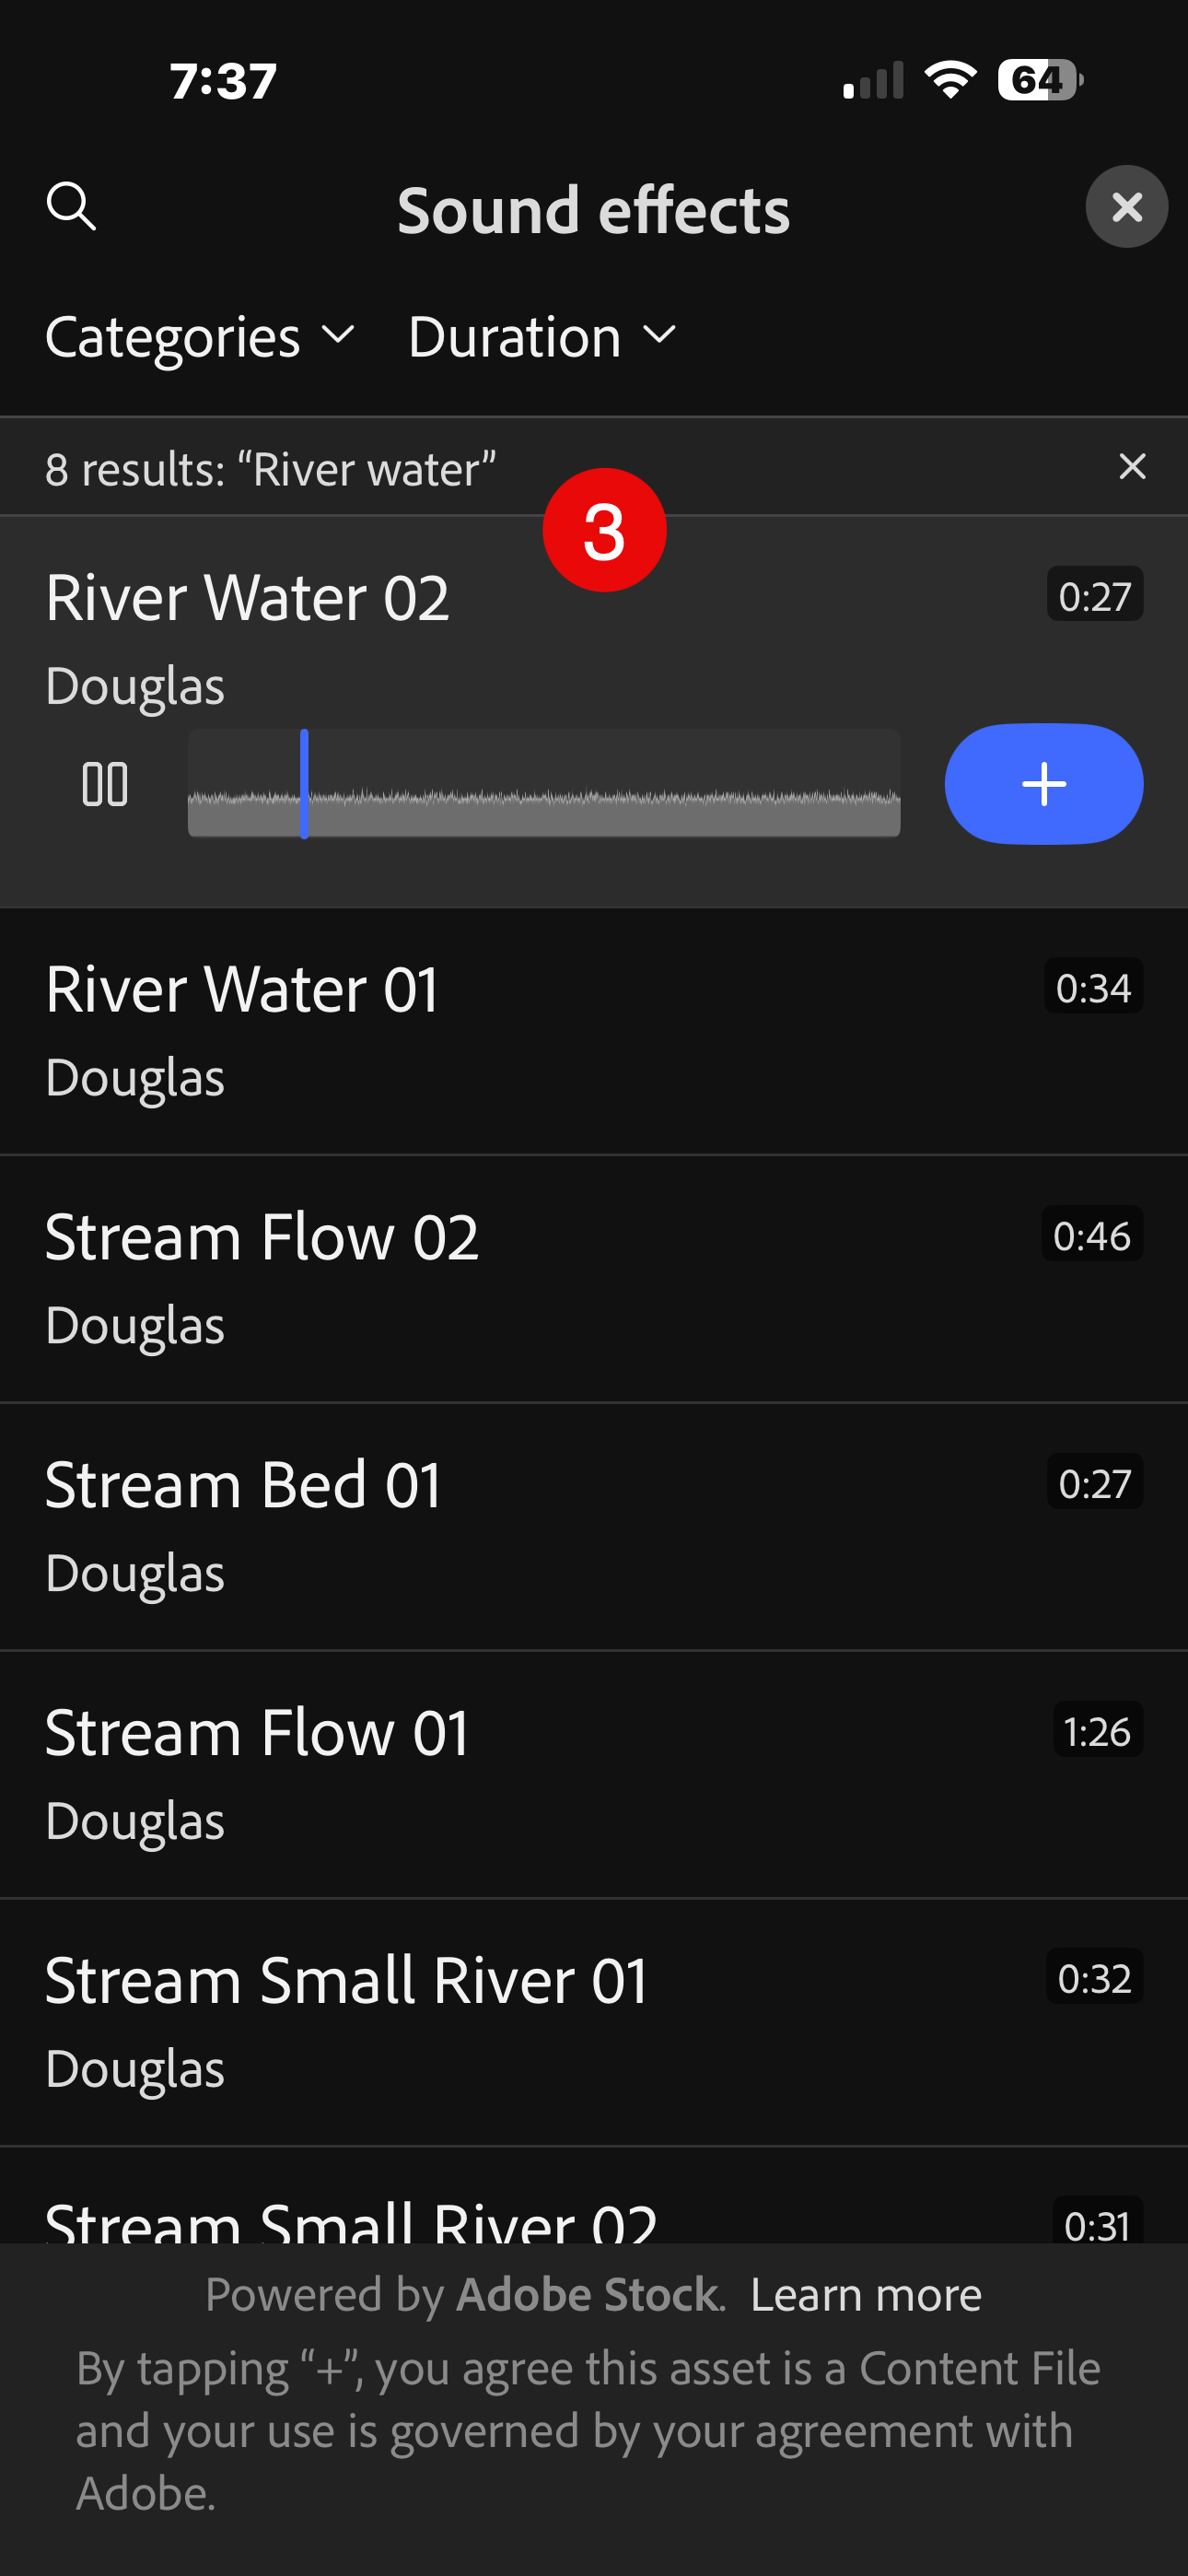
After generating the video, I also searched for the sound of running water right inside the app. Powered by the audio assets of Adobe Stock, a quick text search delivered exactly what I needed.
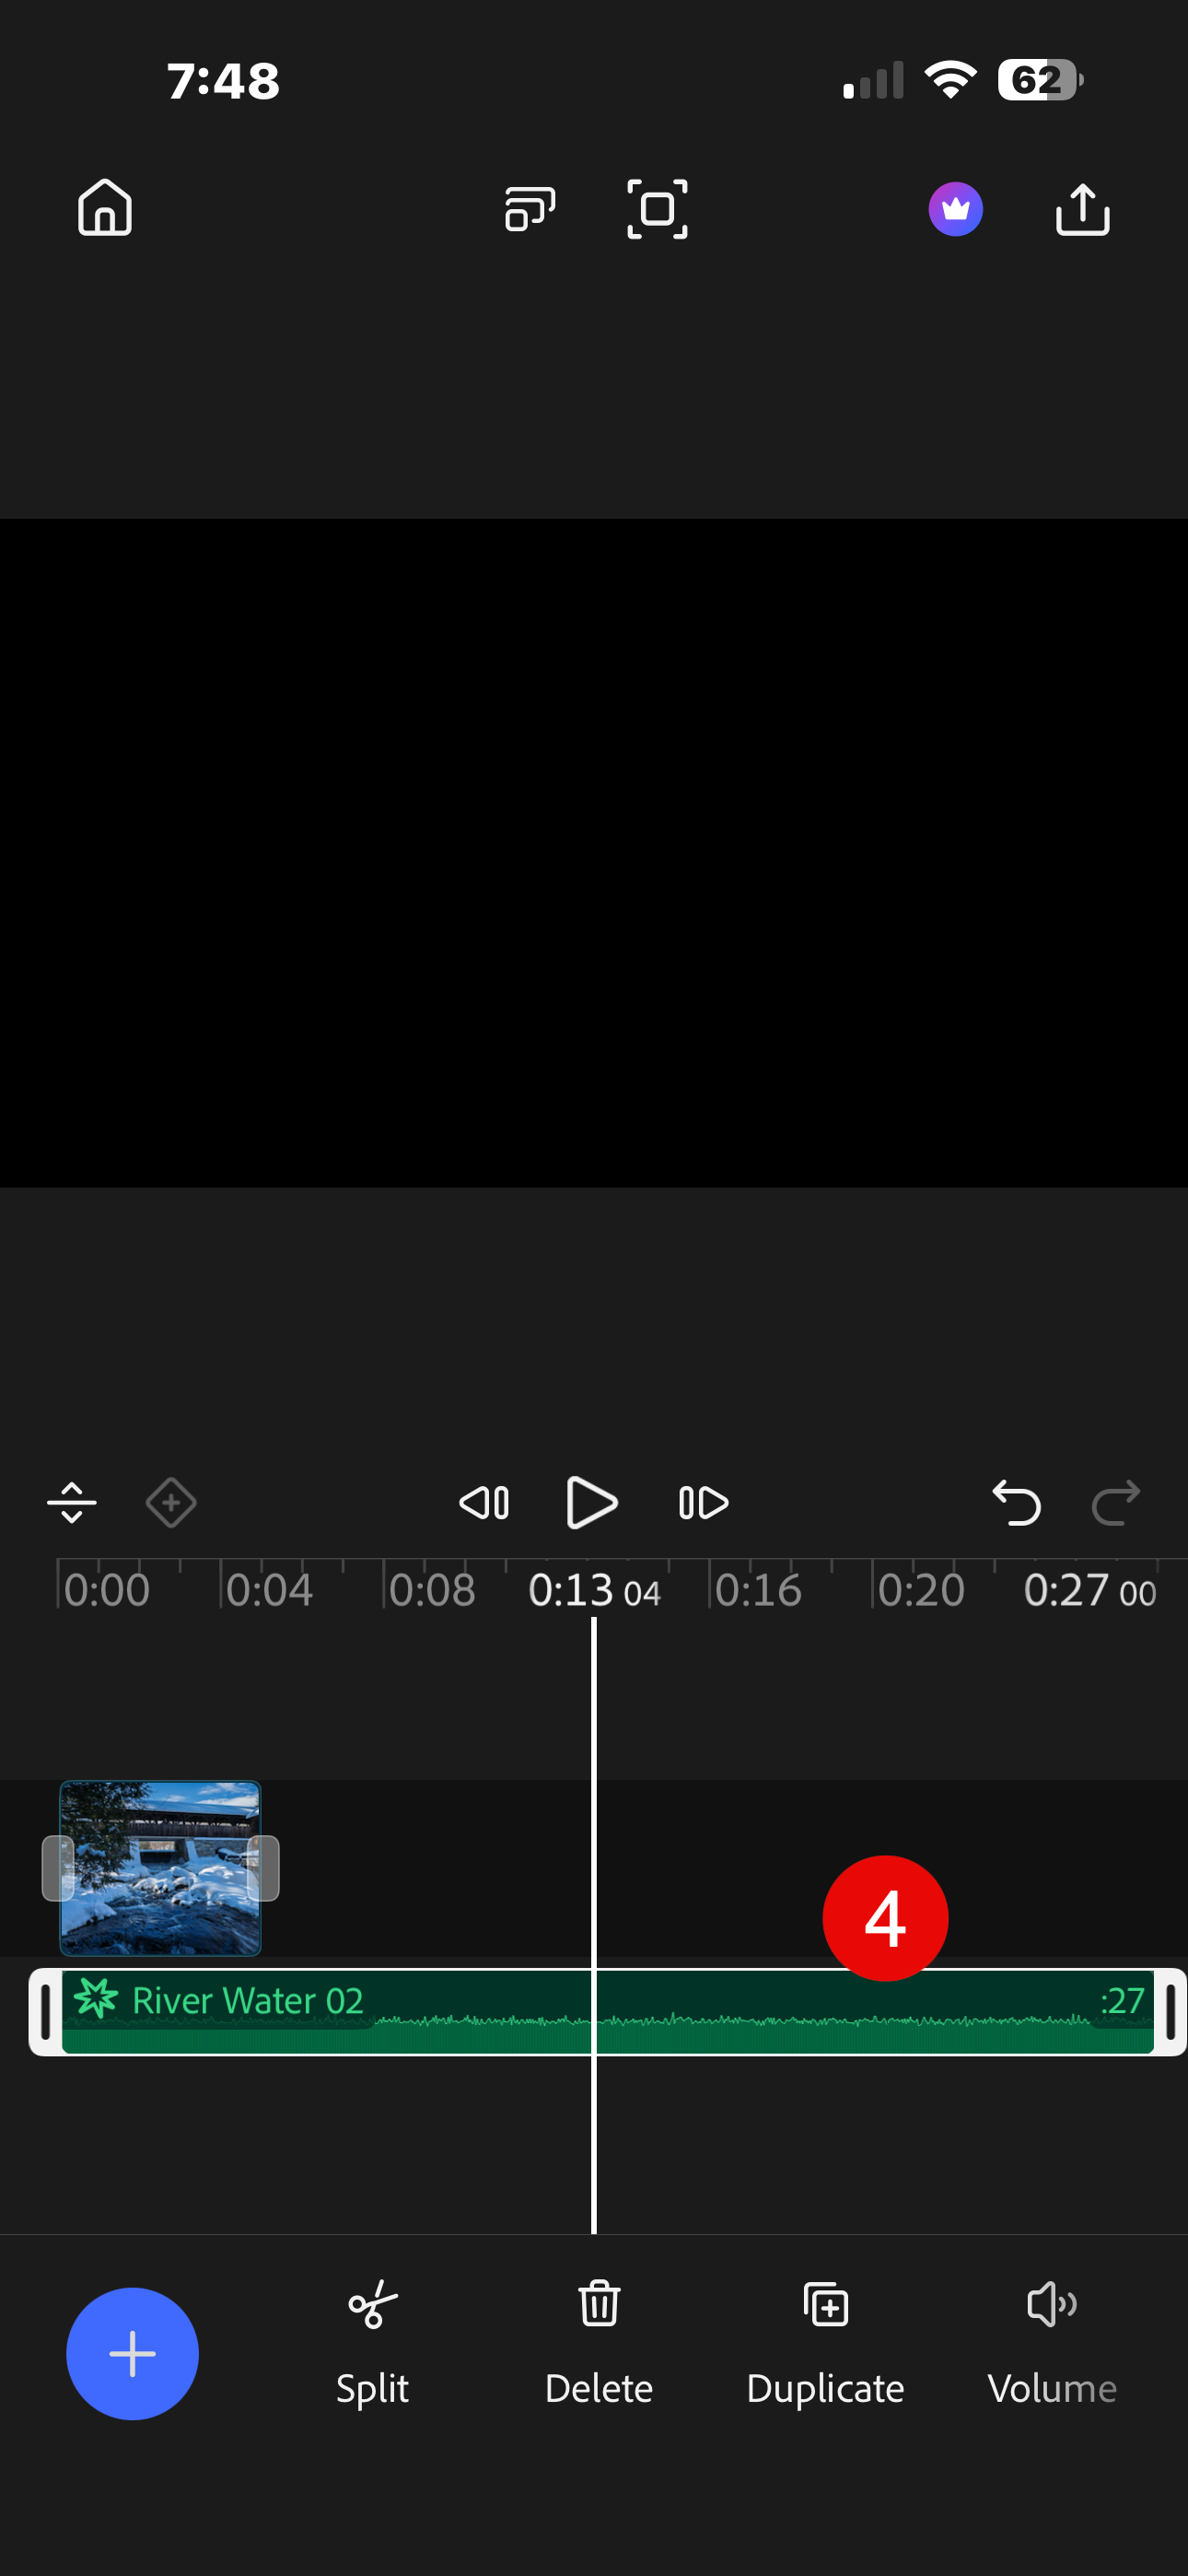
Once the audio clip was inserted, I selected the clip and dragged the handles to trim the longer audio to the right length.
The final video, complete with audio effects
Note: You can see more images from this location in my other recent project here on Behance, Welcome to the Deep Freeze.
A Drone Like No Other
I present what I think is another realistic scenario which doesn't involve forgetting to shoot footage: creating a drone shot where a drone would be illegal or unsafe to use.
Image to Video - Creating a Drone Shot
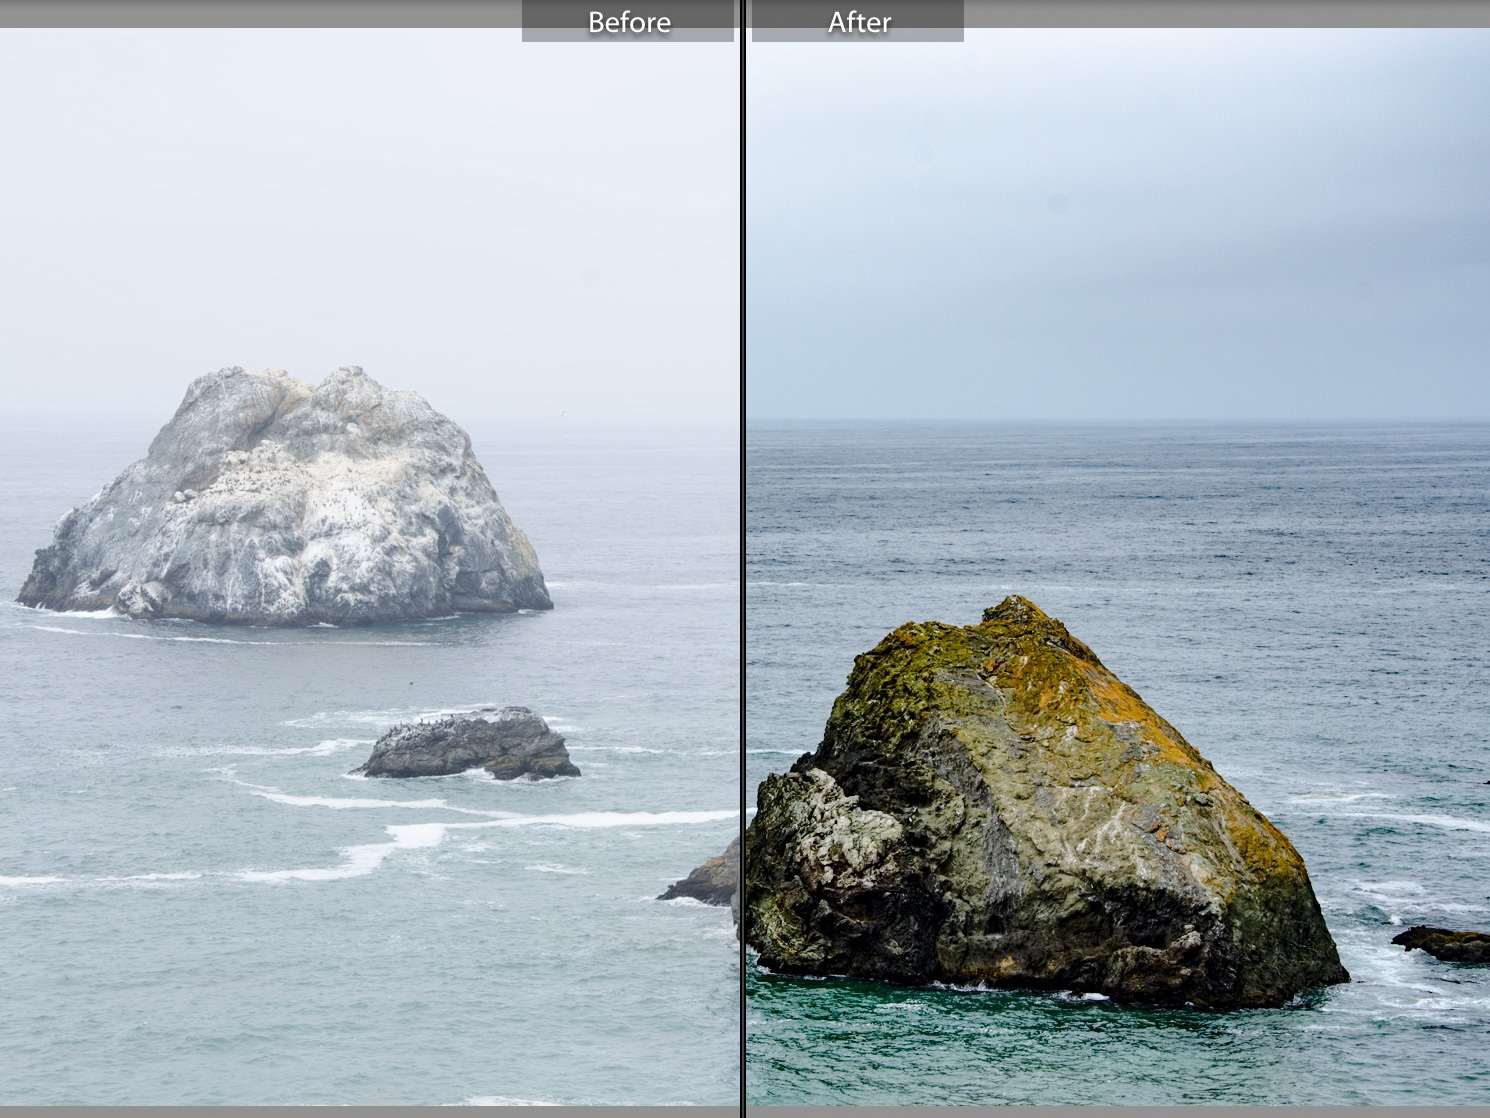
On a recent work trip to New York, a colleague and I took the Staten Island Ferry out to the island and back during some downtime. There were a great number of people filming the trip on their phones - yes, even ME! Unfortunately, I wasn't happy with the footage I captured. But I did have some great still images, including this one I processed for a gritty, retro look.
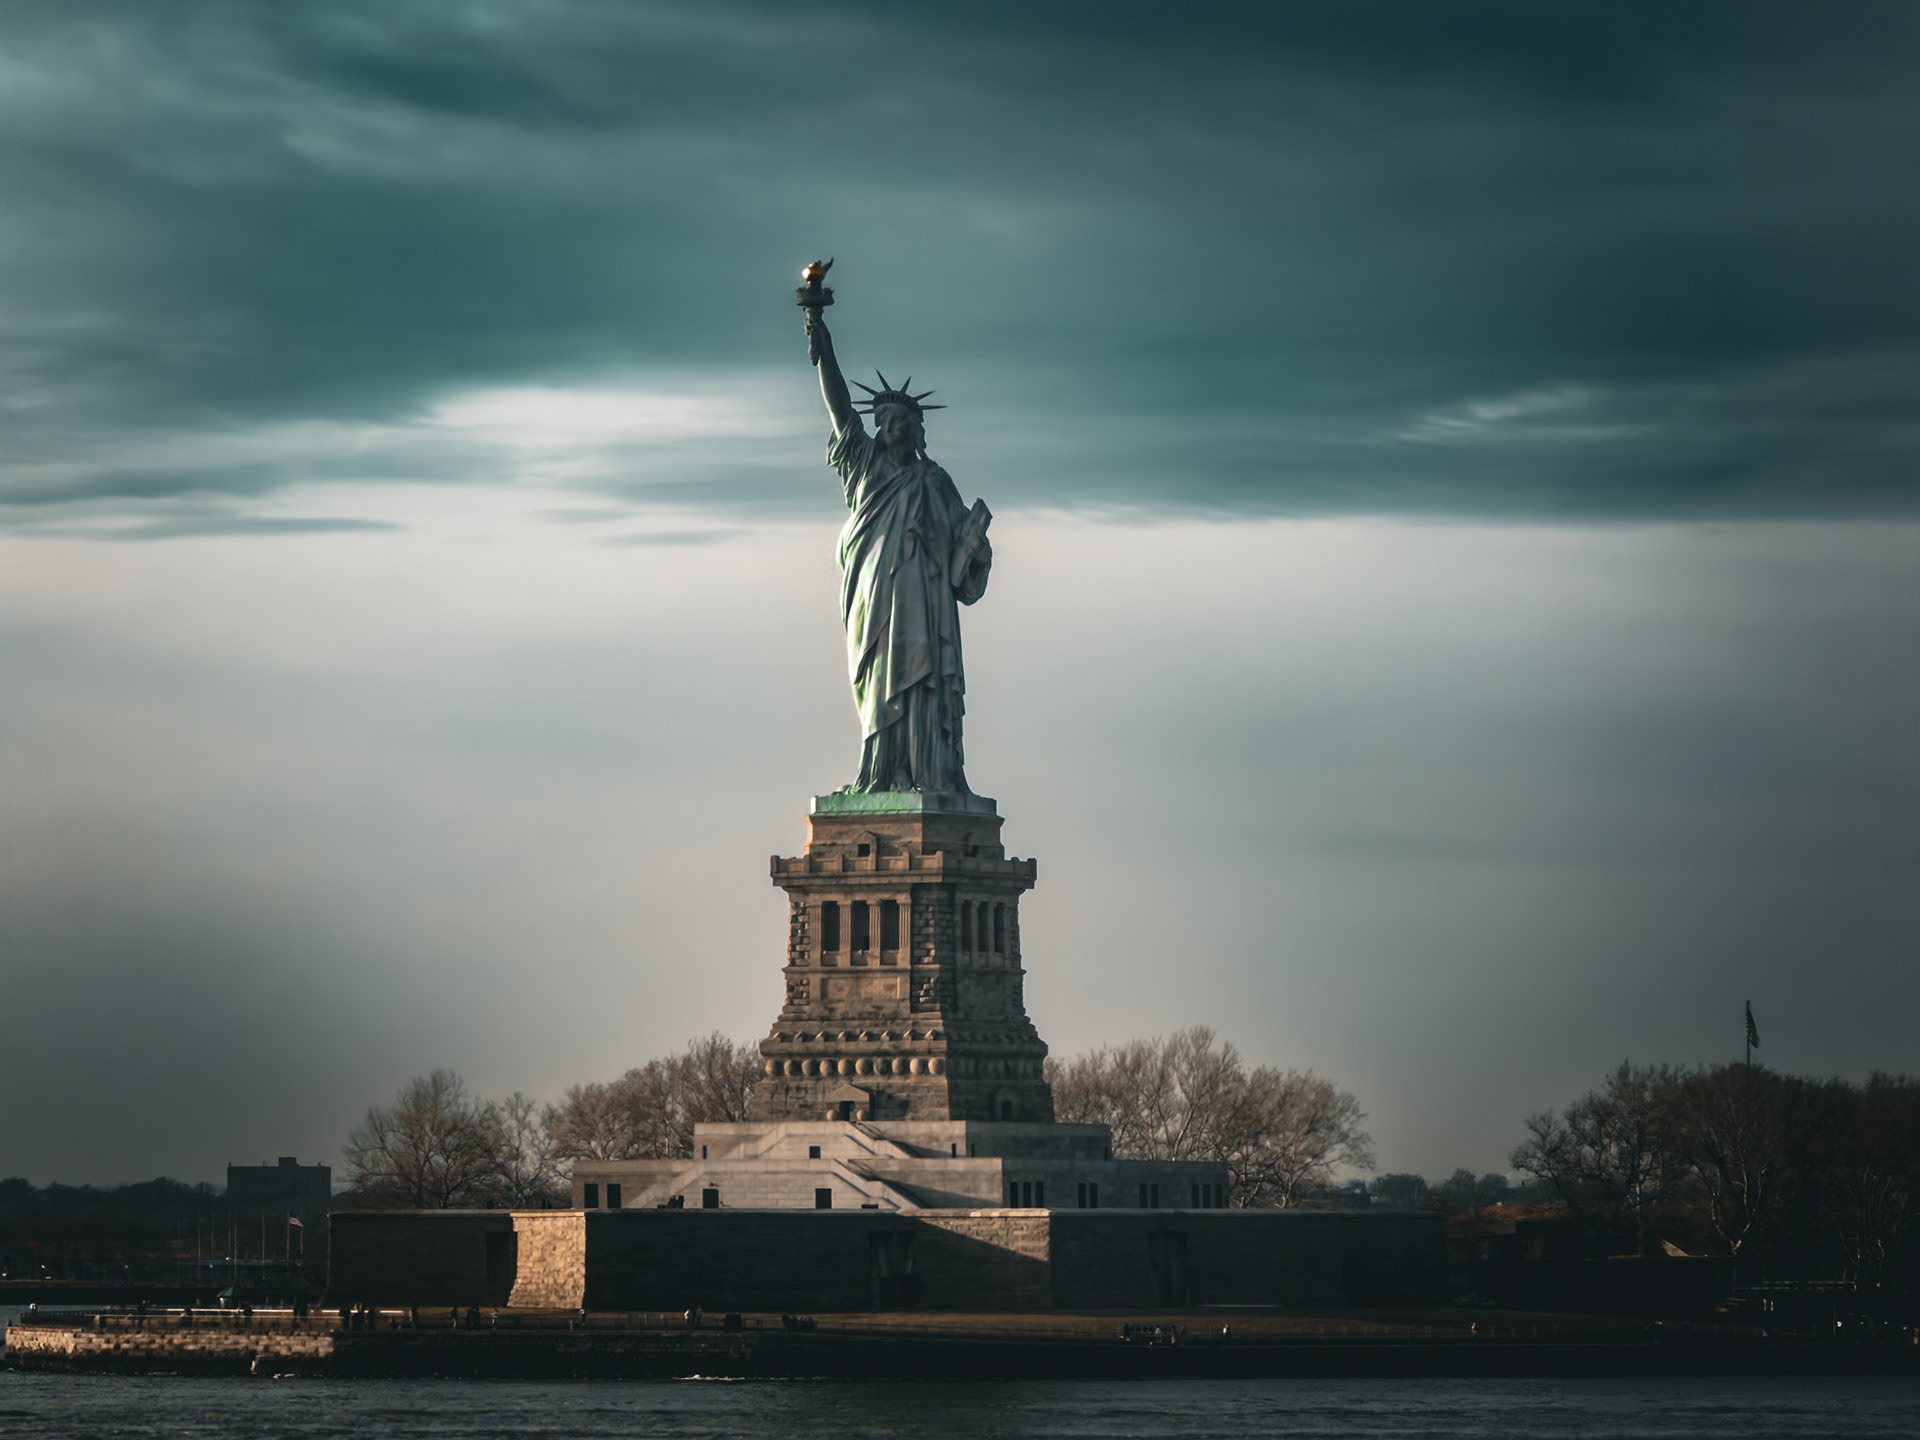
While I don't know the specific laws around it, I would think that flying a drone towards the Statue of Liberty without oodles of permits would be frowned upon, at the very least. But here's my "drone shot," no permits required.
A Drone, a Drone, My Kingdom for a Drone!
Said, like, no one.
Like, ever, dude.
However, there could be times - where you wished you had created a drone shot but either didn't own a drone or forgot to shoot the footage. In my case, it would be both.
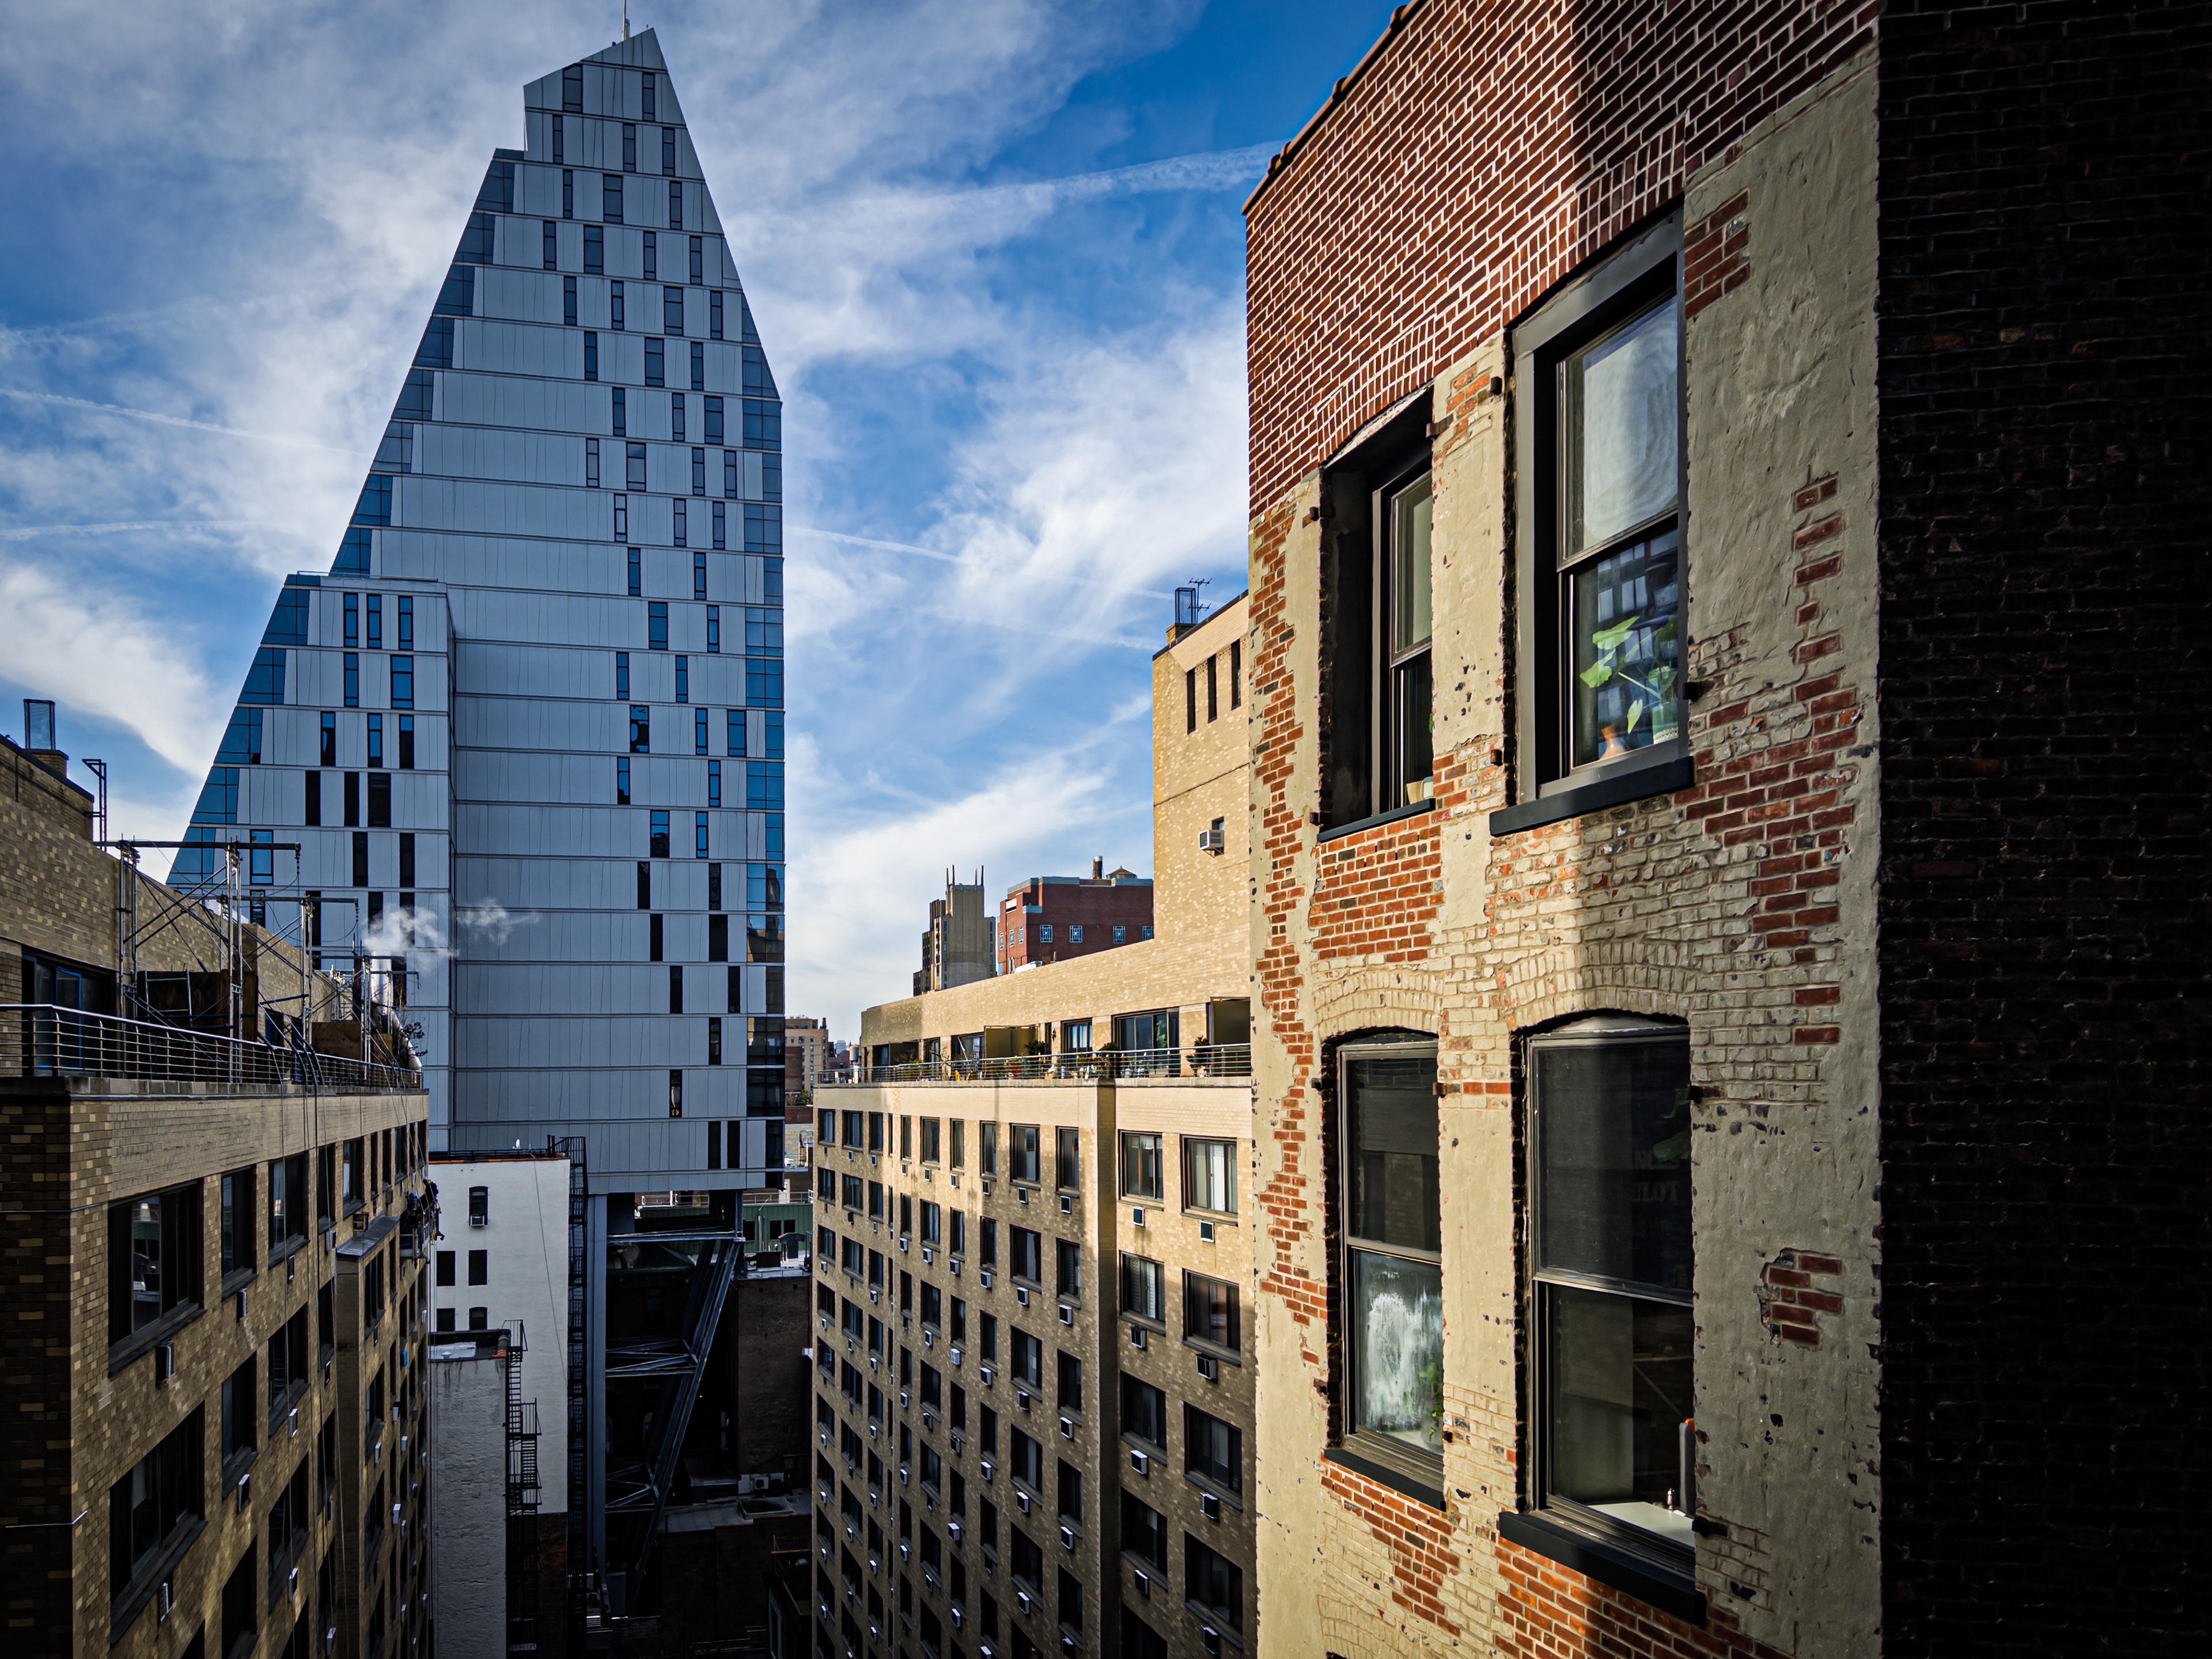
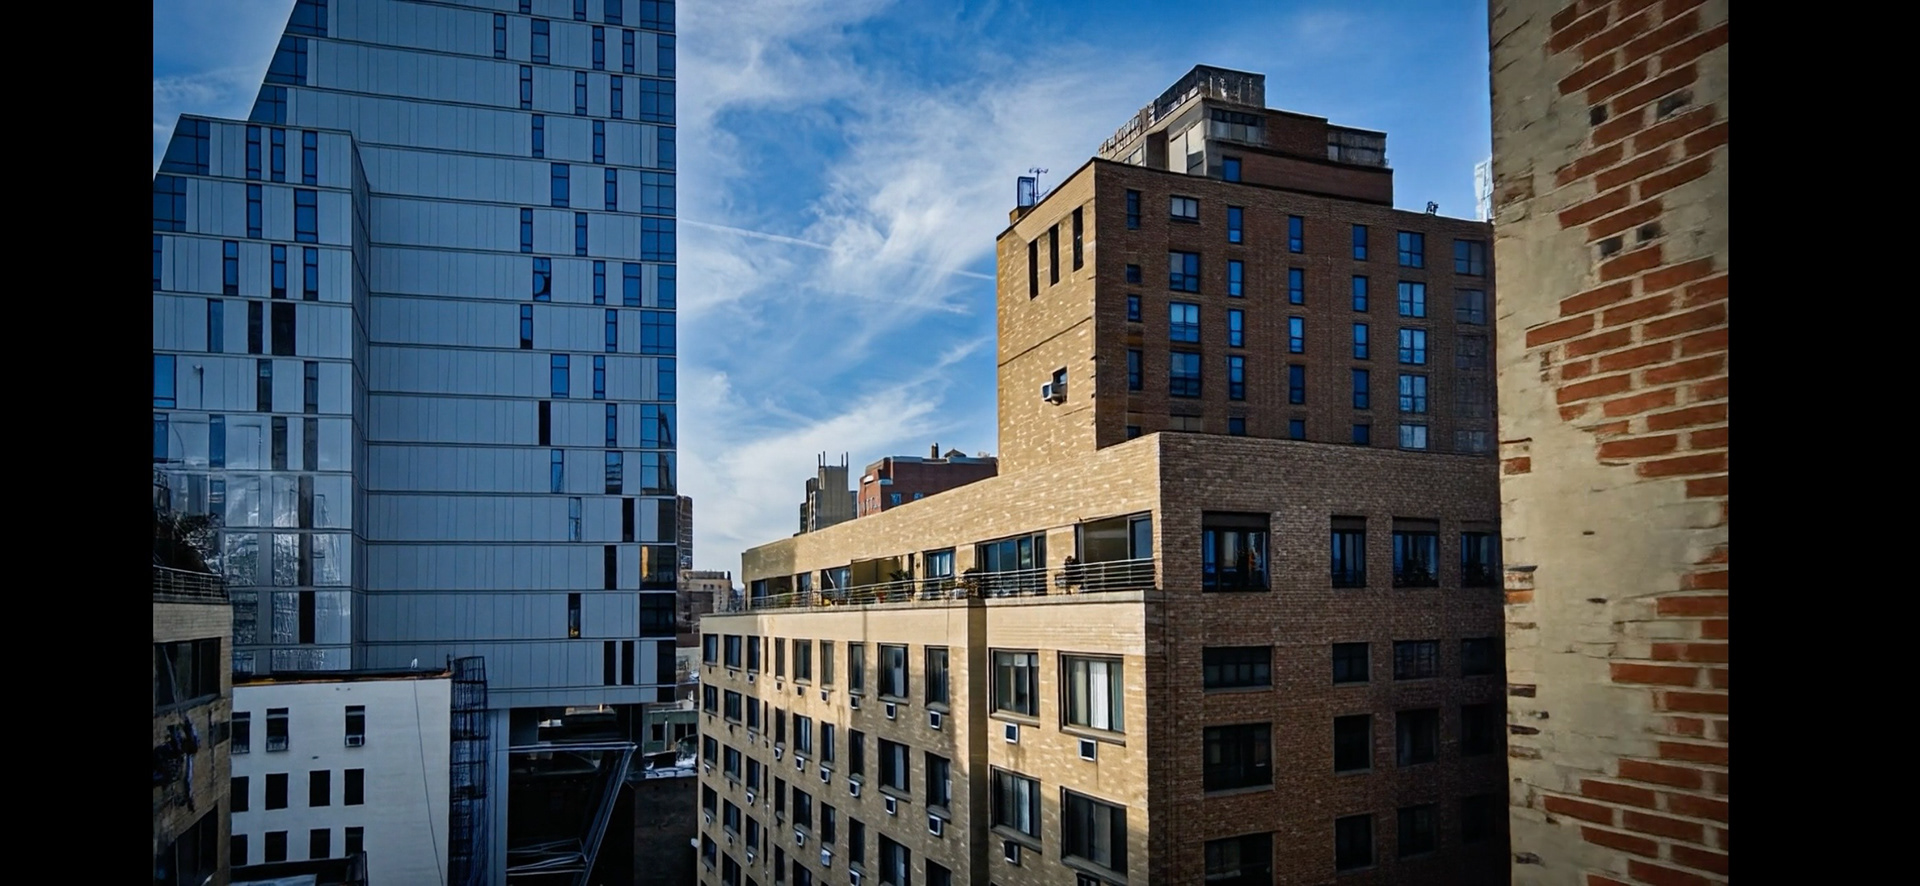
On that same work trip to New York, while standing on the patio at the Adobe office in Union Square, the light hitting the buildings and the contrast of brick and glass really caught my eye. I grabbed a couple captures with my phone before the light changed.
When I viewed this still image later, I immediately thought it would have made a great drone clip. And while this type of footage could likely have been captured with the correct permits (maybe?), there would no doubt be the element of time to consider and a delay in getting said permit could impact your ability to get the shot in the conditions you wanted.
And, seeing as I don't own a drone to begin with, the whole permit and flying a robot in city limits is moot. But that doesn't mean a video clip like this is impossible for someone like me.
Following the steps listed above, I created my first 5 second sequence.
However, I felt 5 seconds just wasn't long enough.
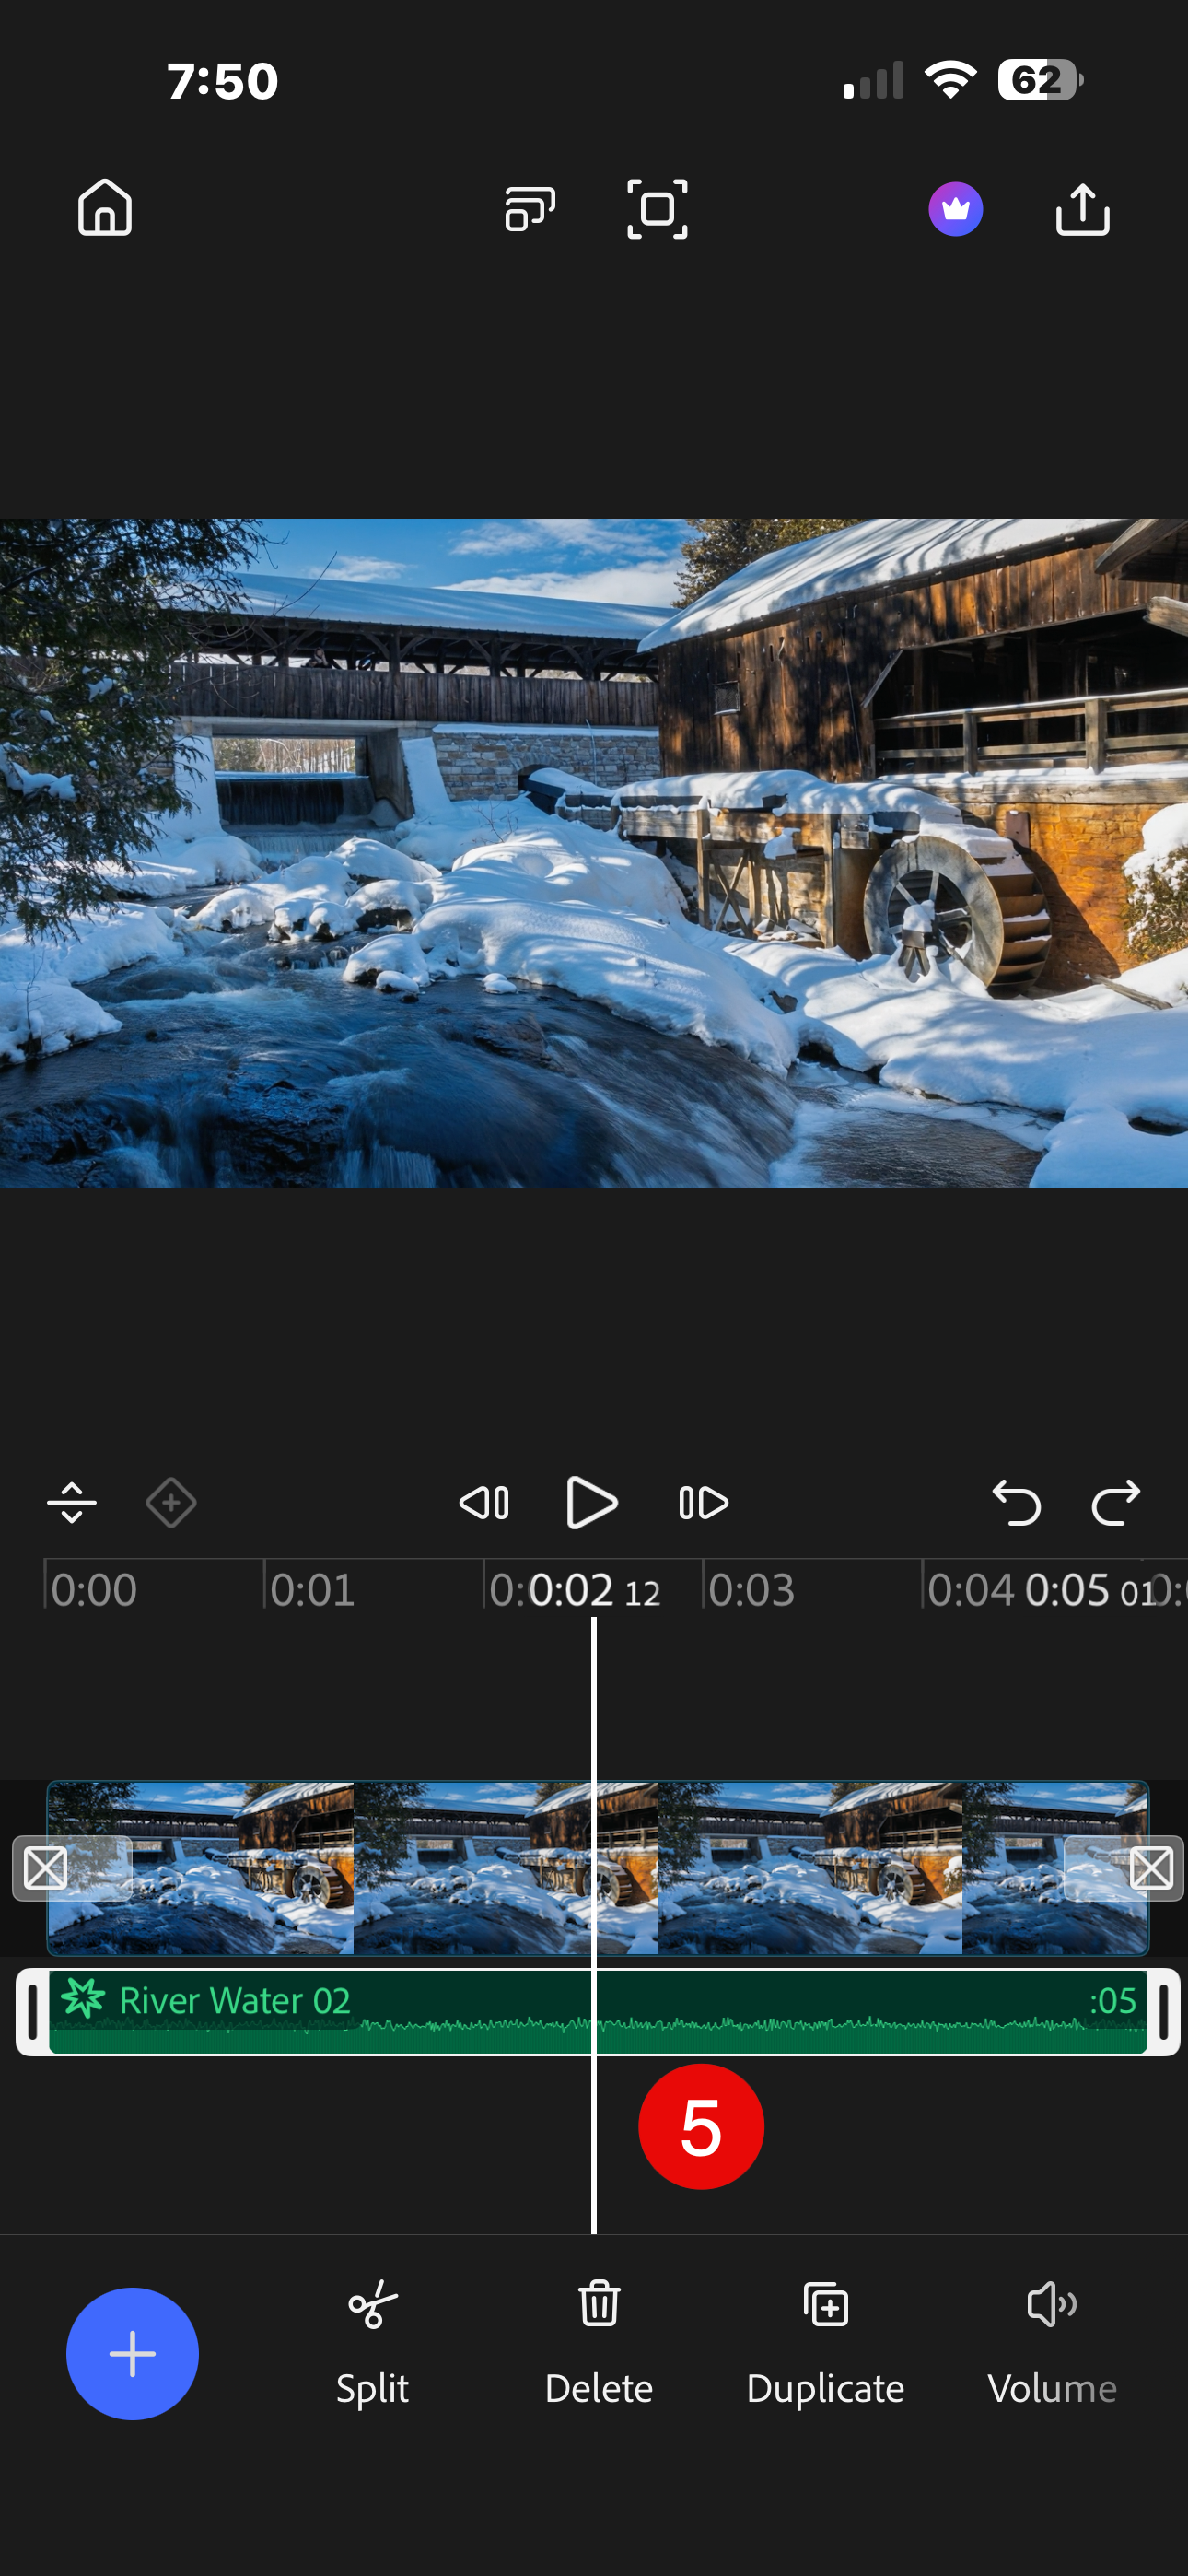
I scrubbed to the end of the clip and used the freeze action to create a copy of the last from of the clip. Then, with that still image selected, I once again chose Image to Video to generate another 5 second clip. Thanks to using that final frame as a starting frame for the next sequence, I was able to create a nearly seamless extension.
On the left was my inspiration image for the video. On the right is the last frame of the first video, created so I could extend the sequence by another 5 seconds.
Currently, Premiere Mobile doesn't accurately support generating a new clip from a freeze frame (at least, I couldn't get it to work), but there is a way to get around that challenge.
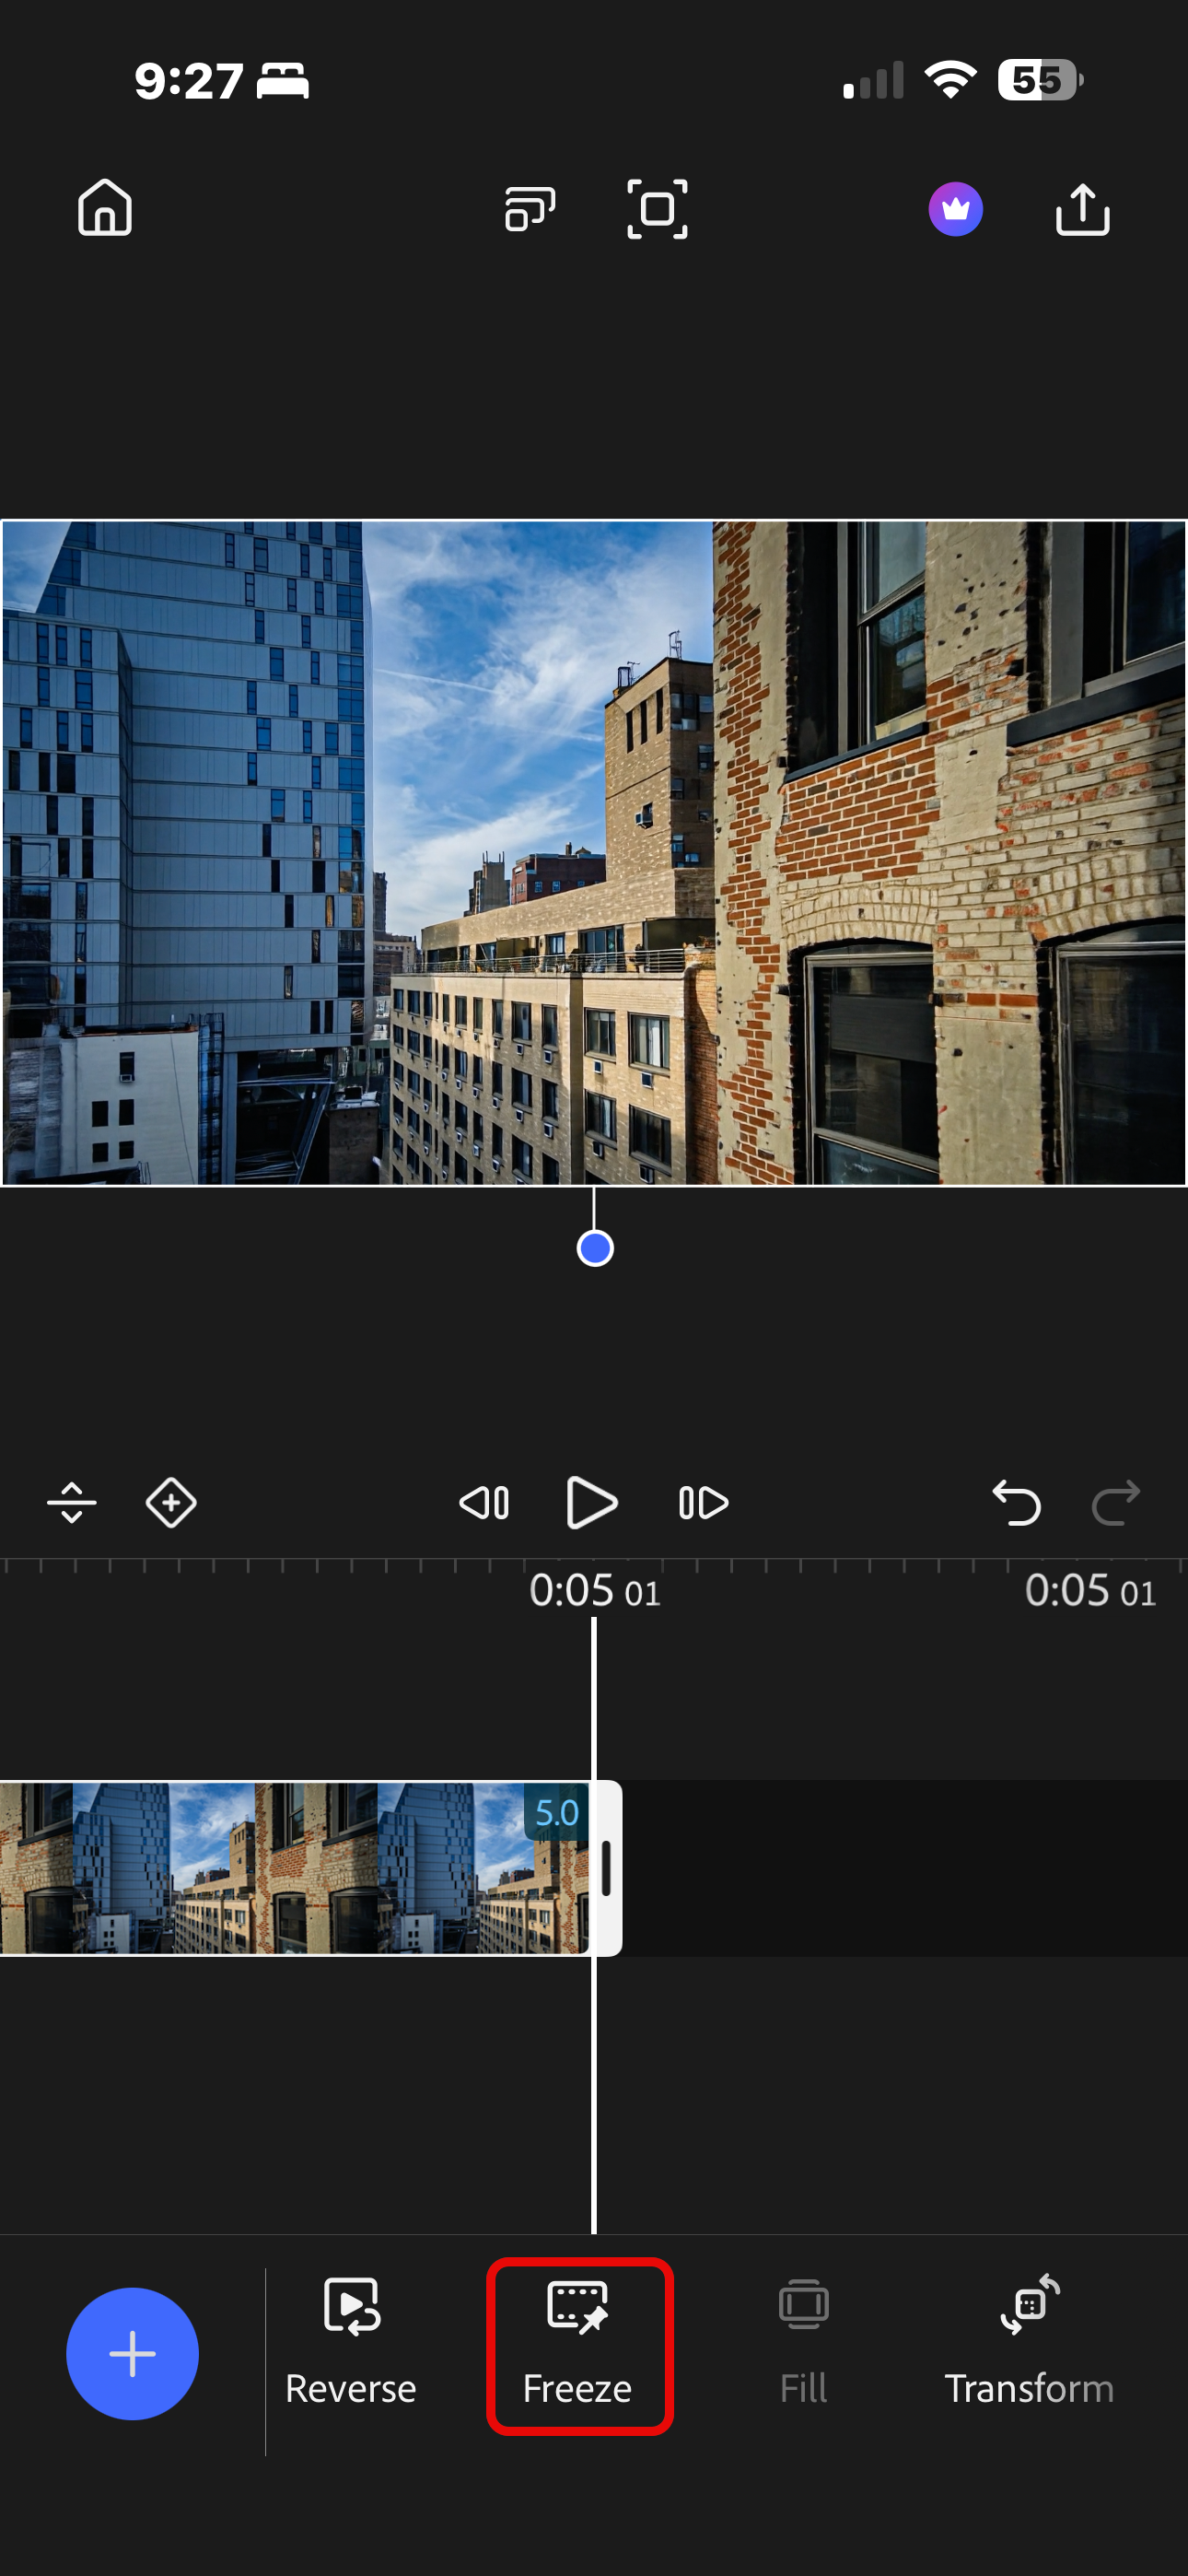
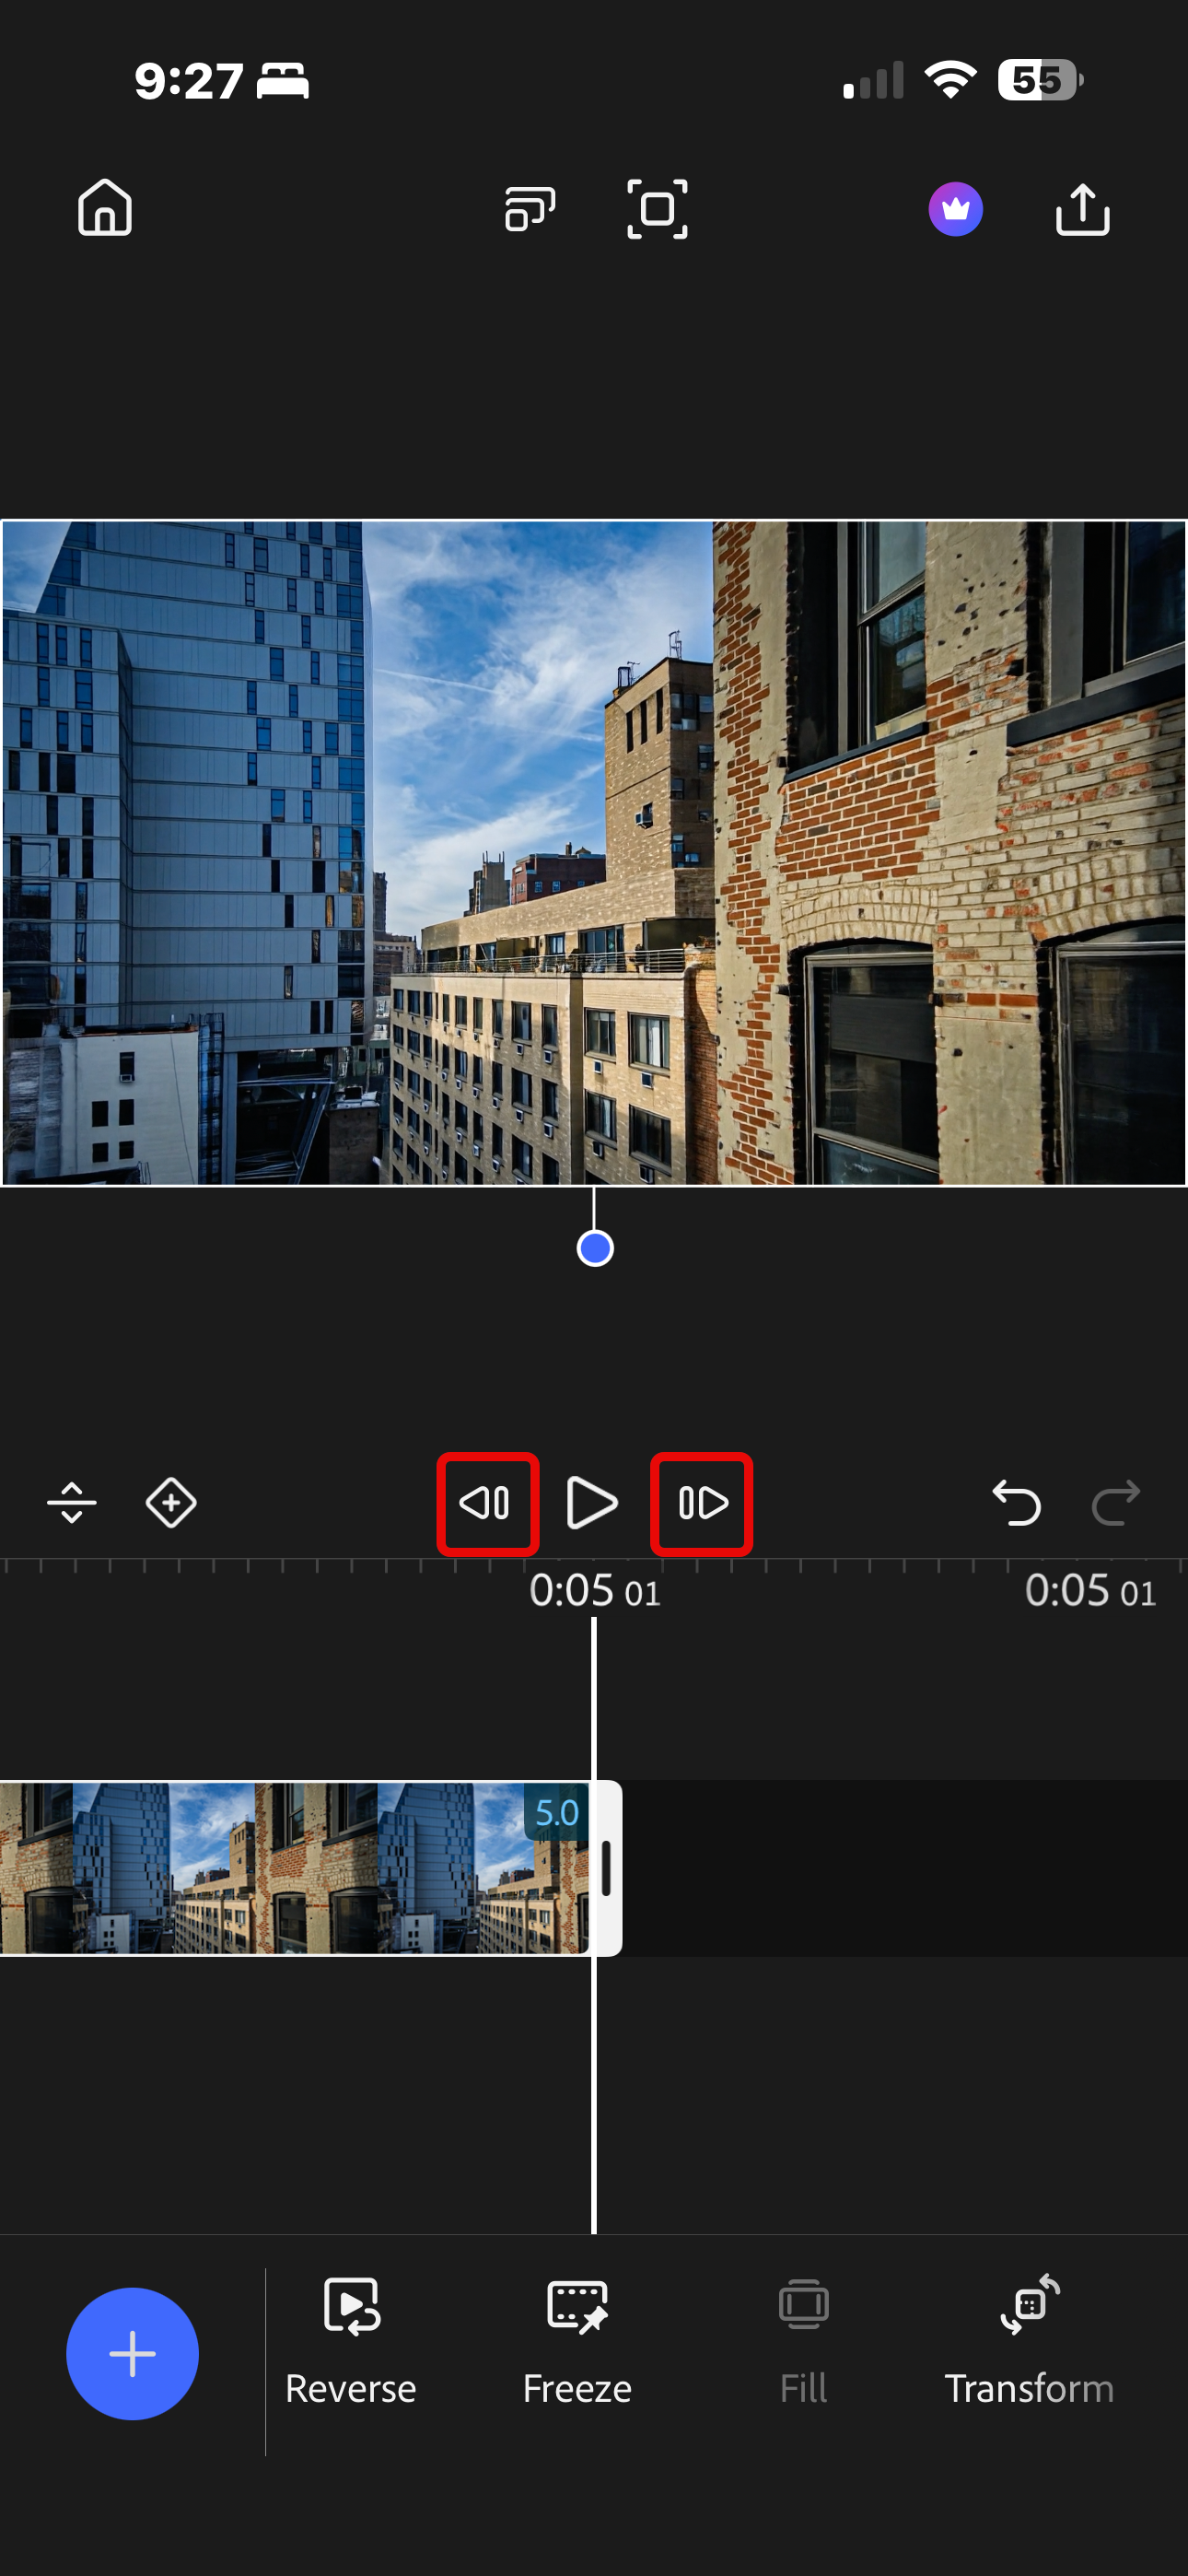
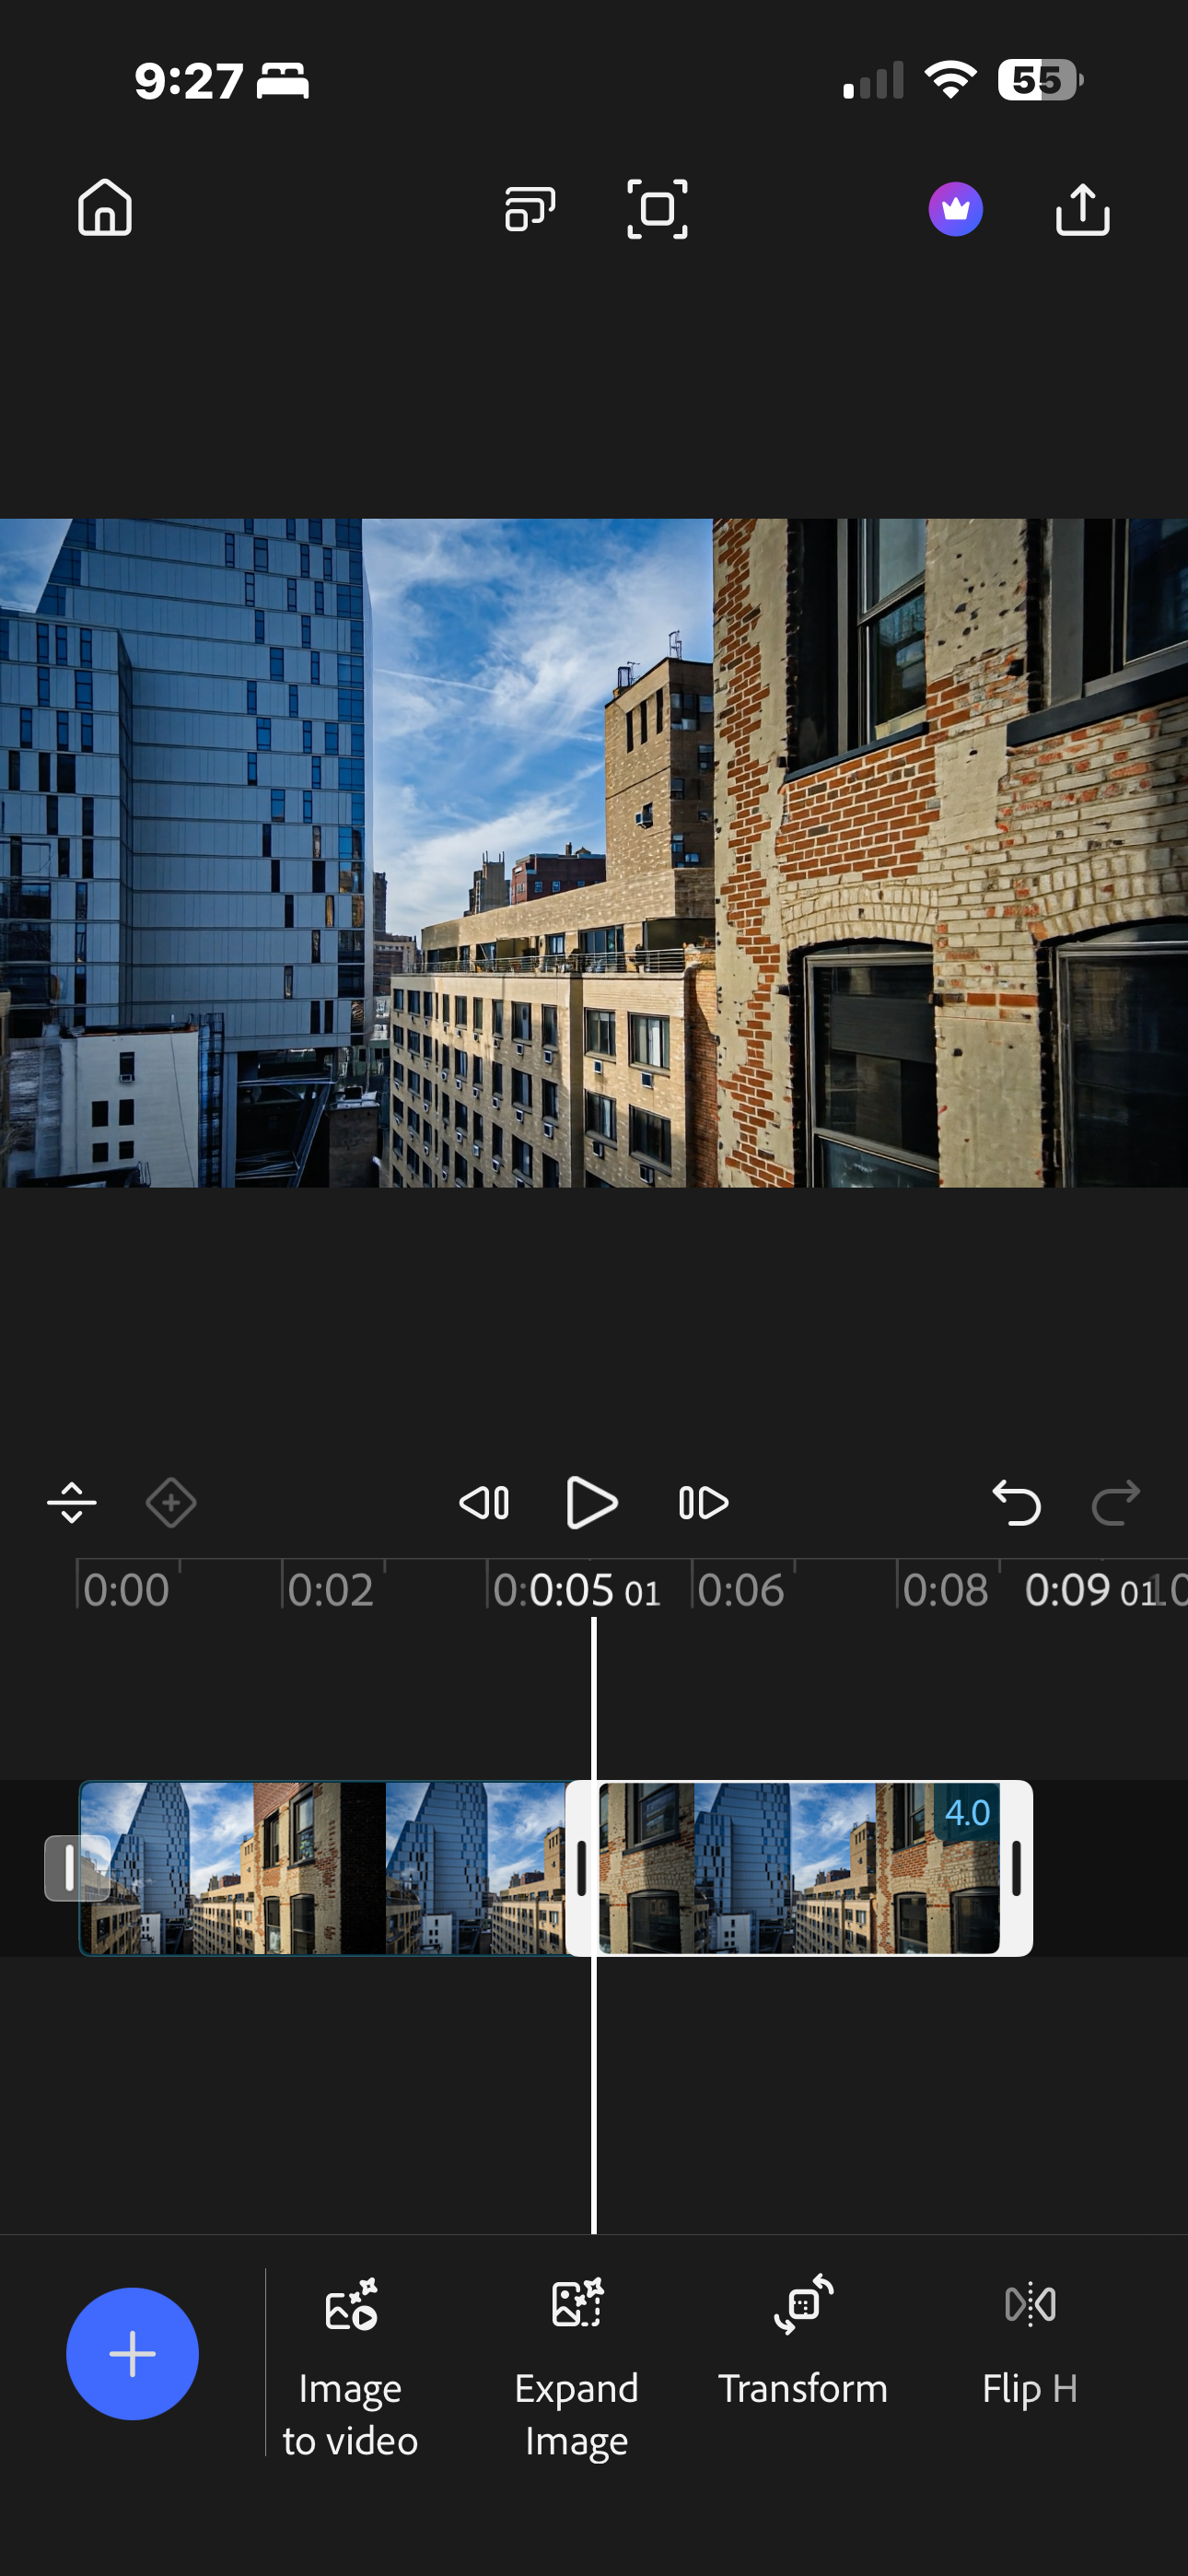
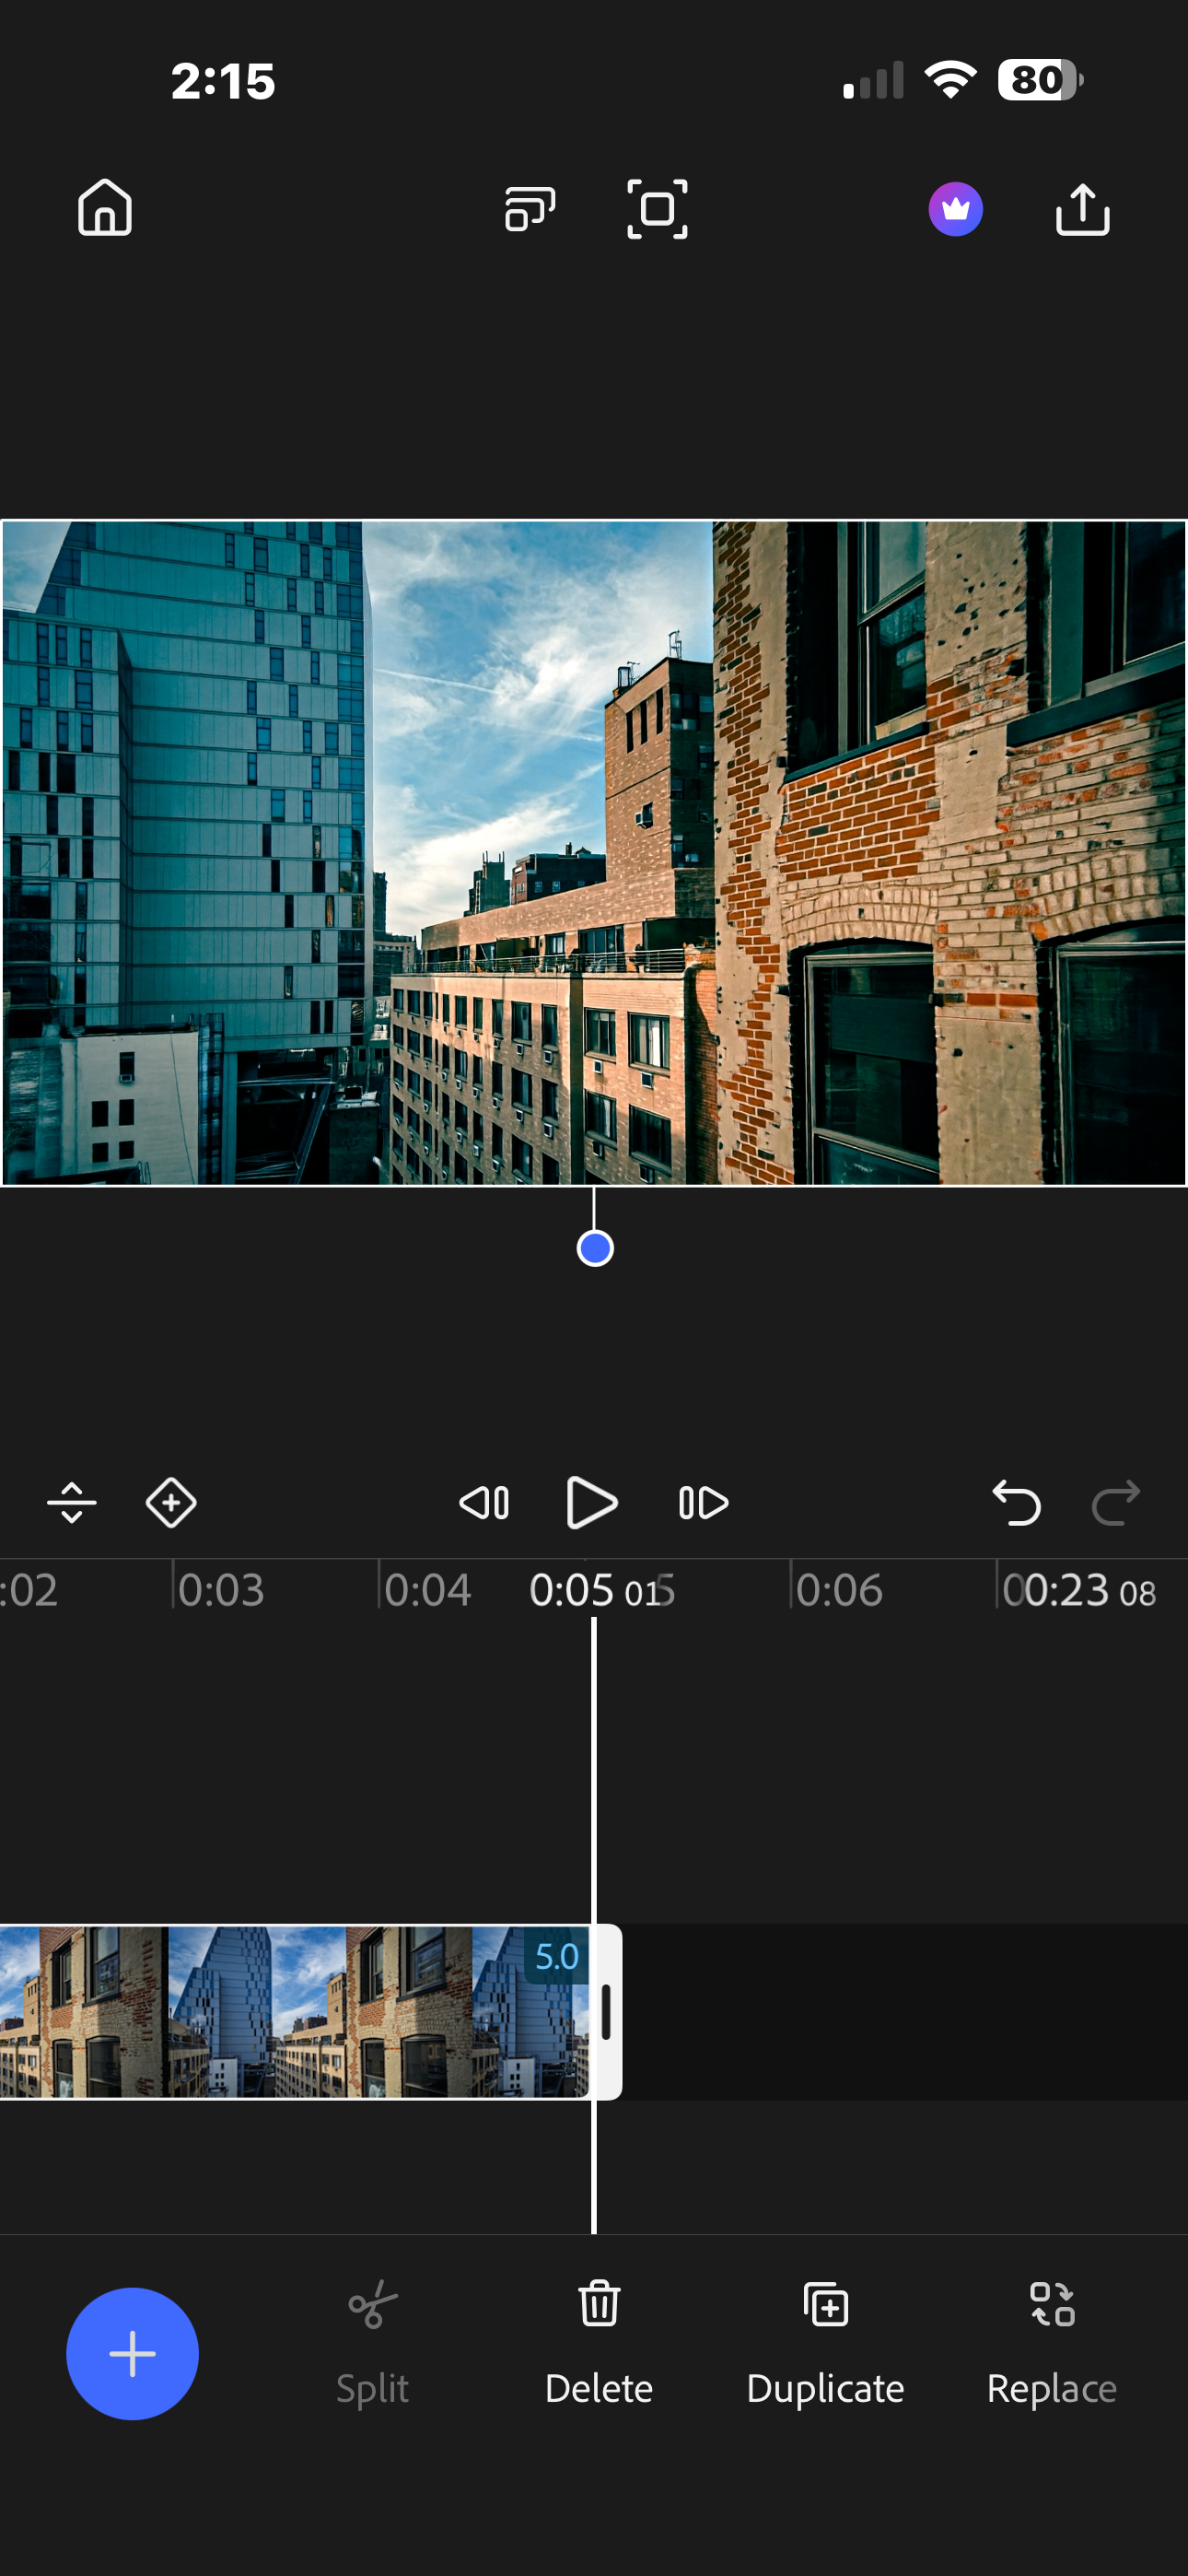
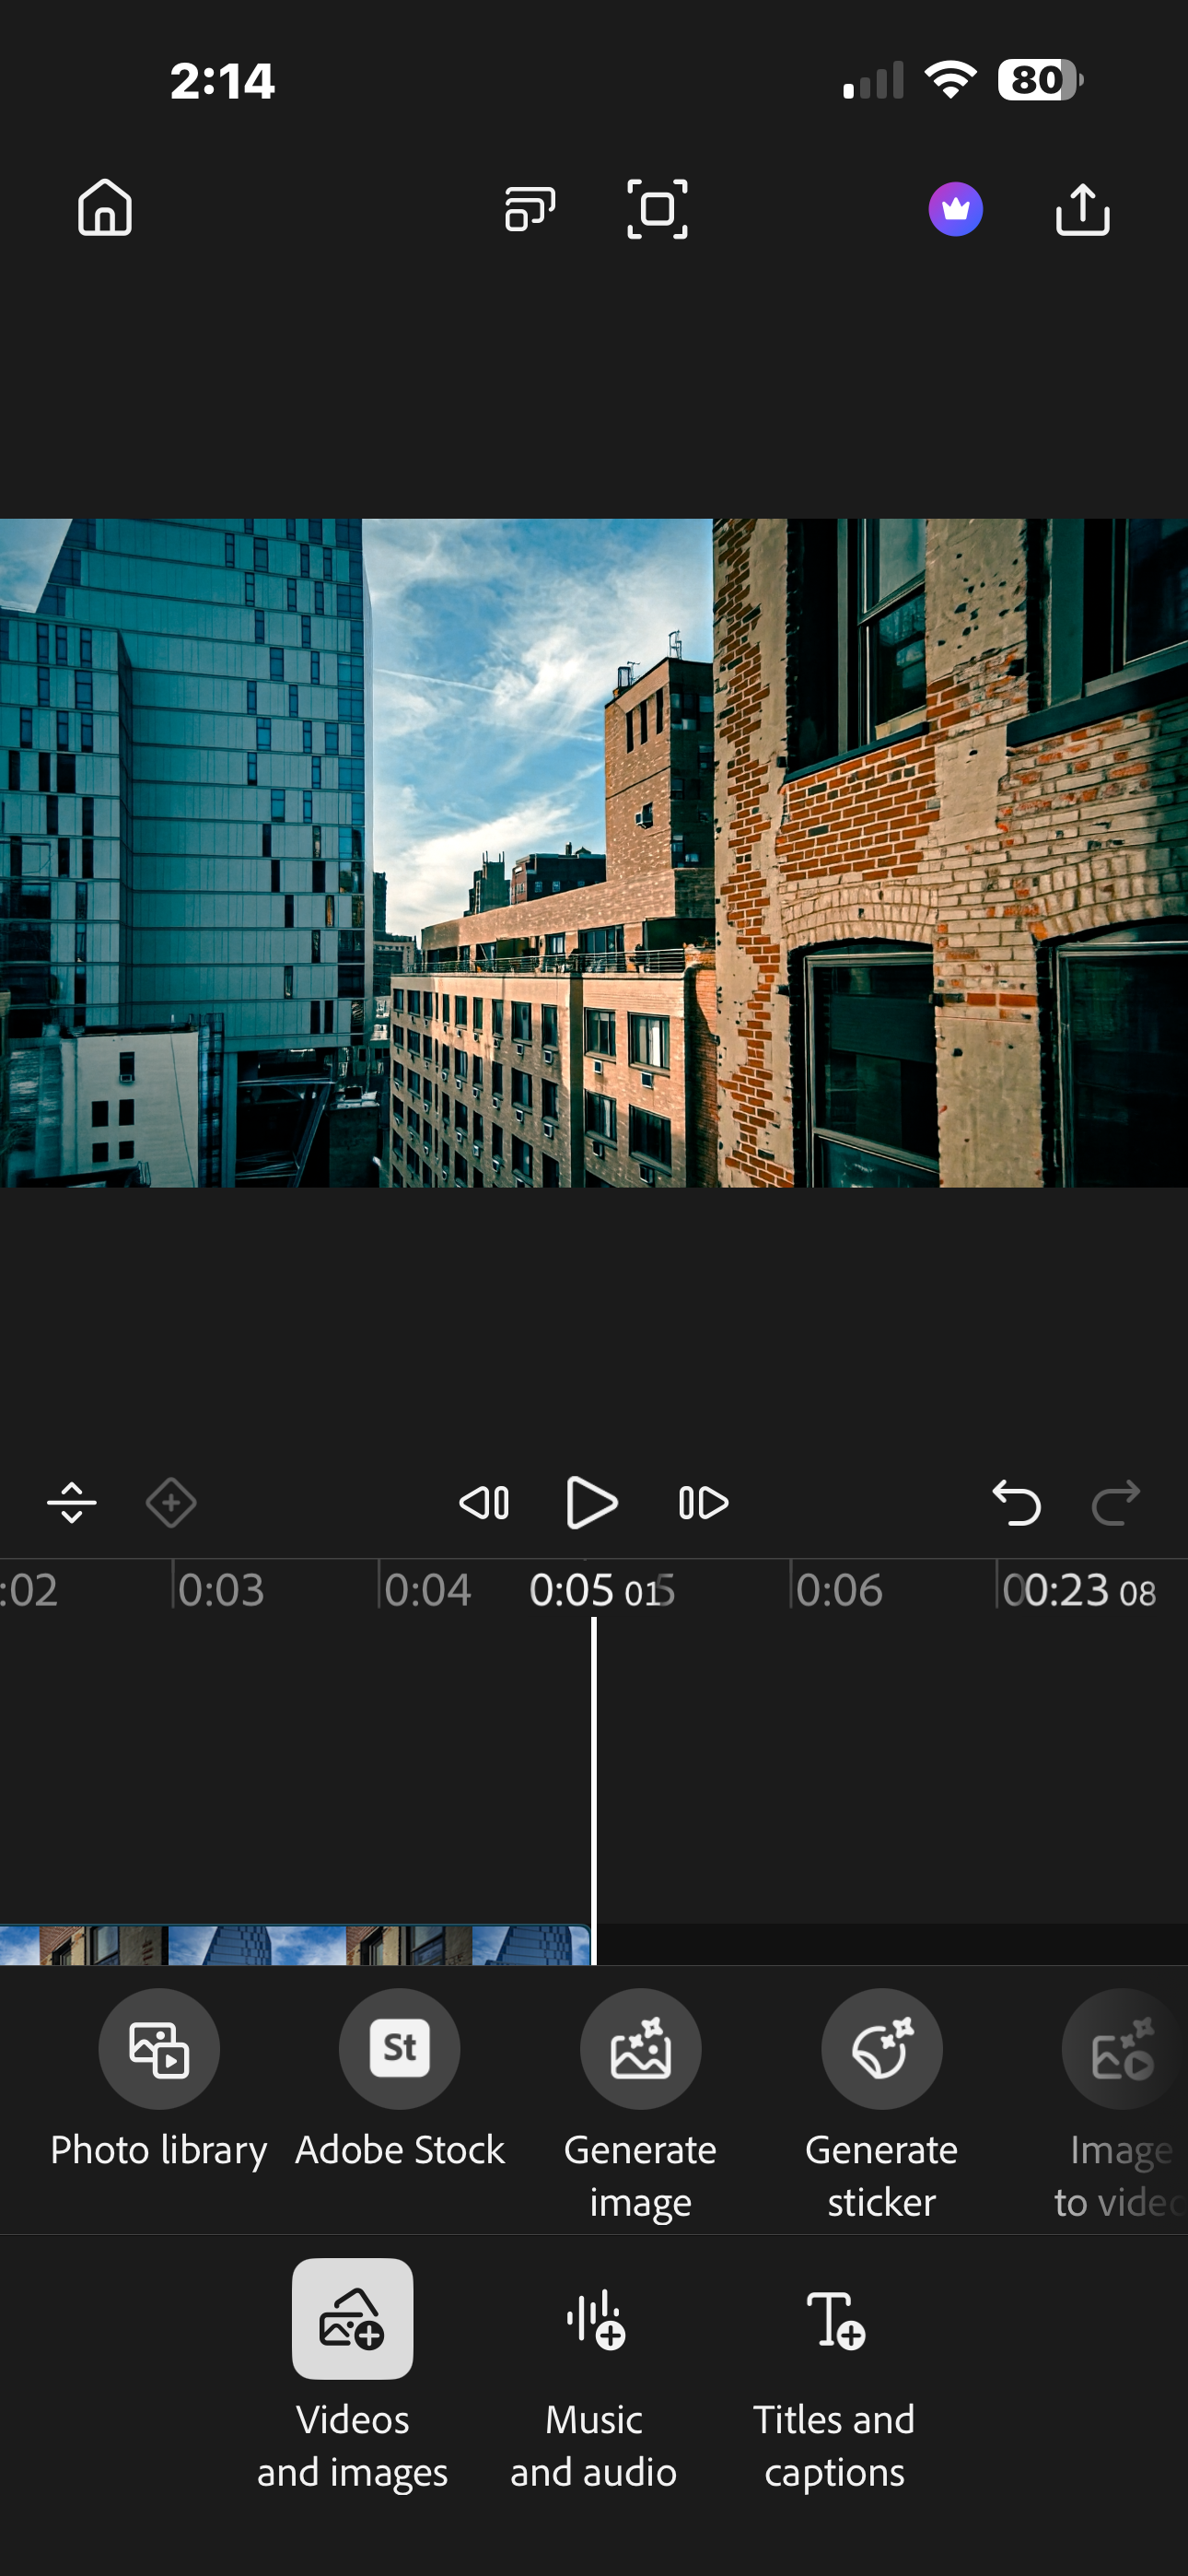
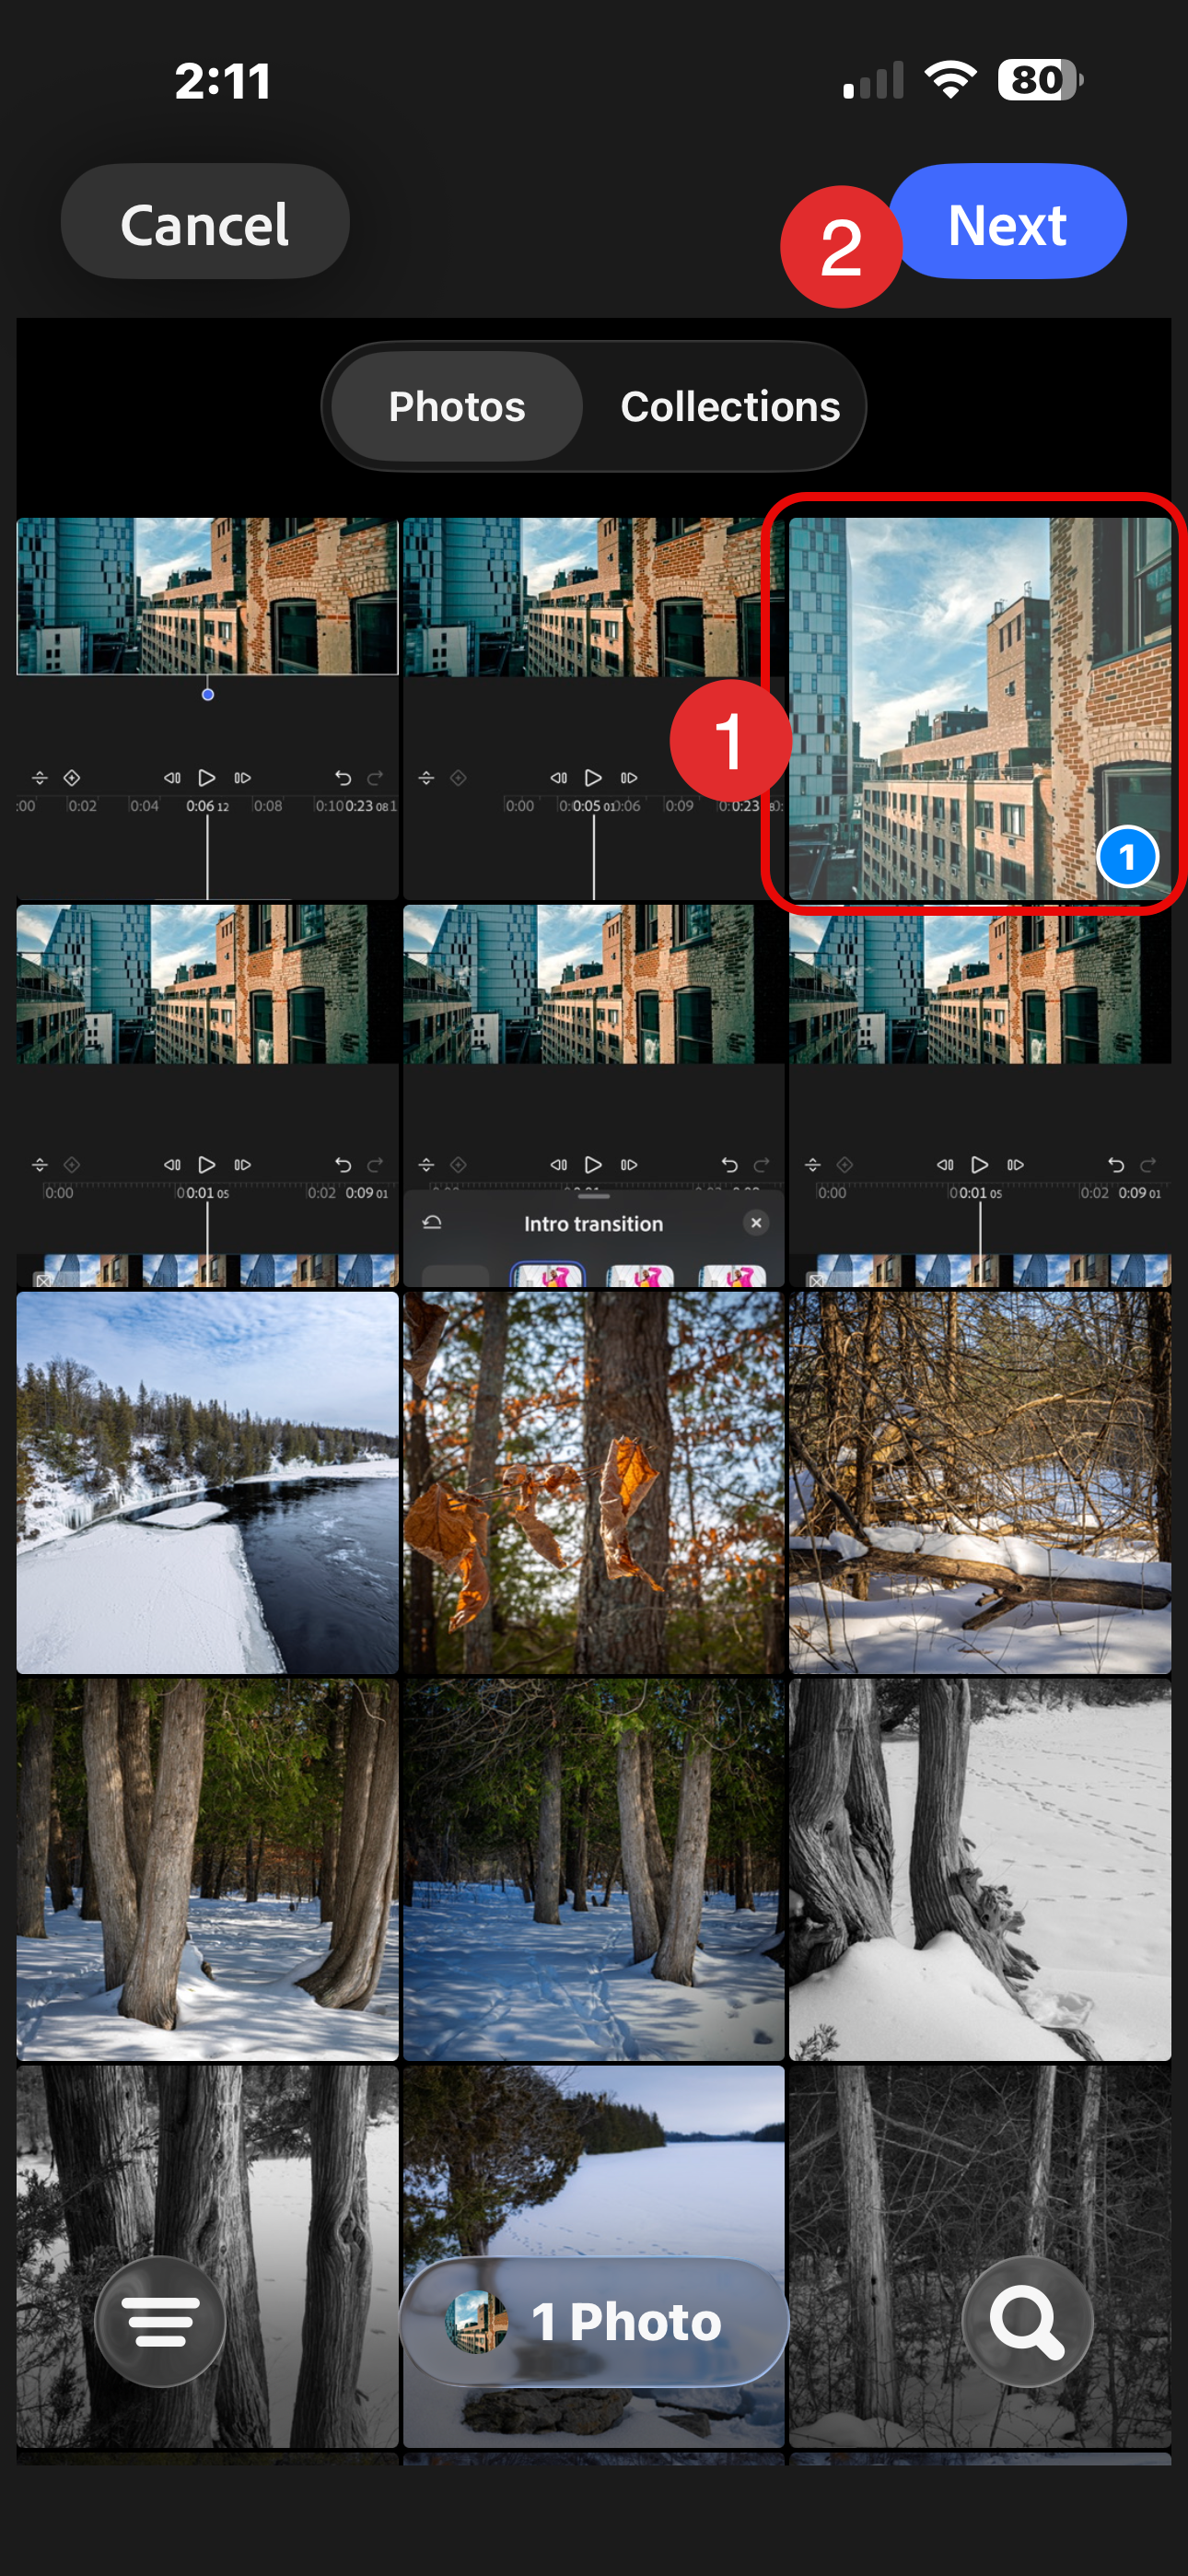
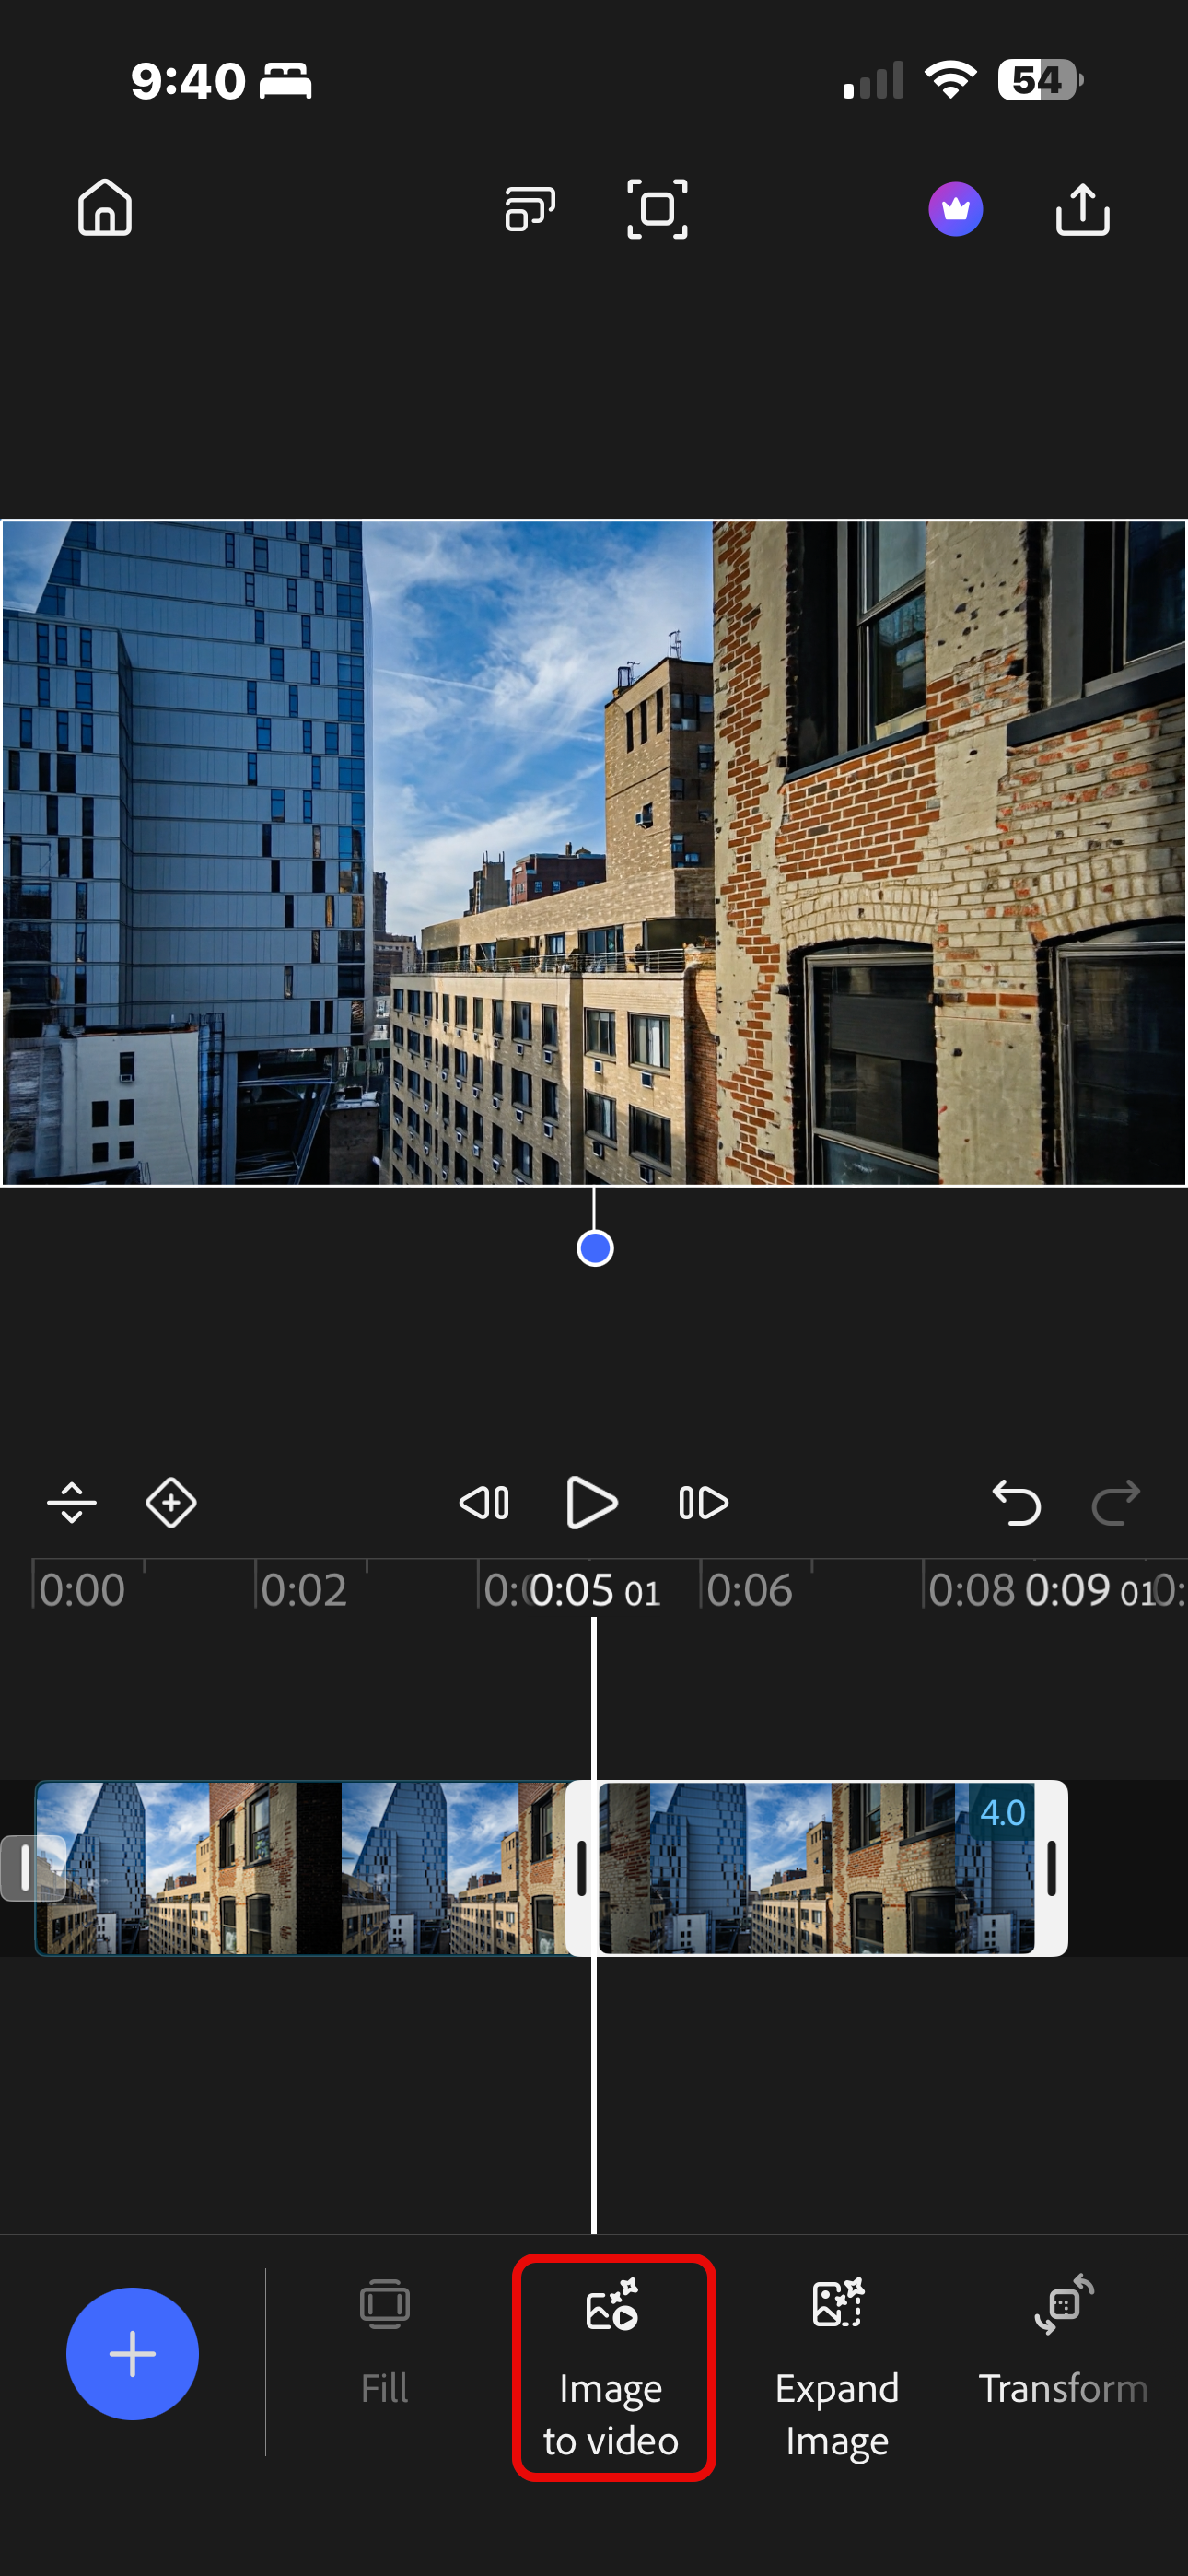
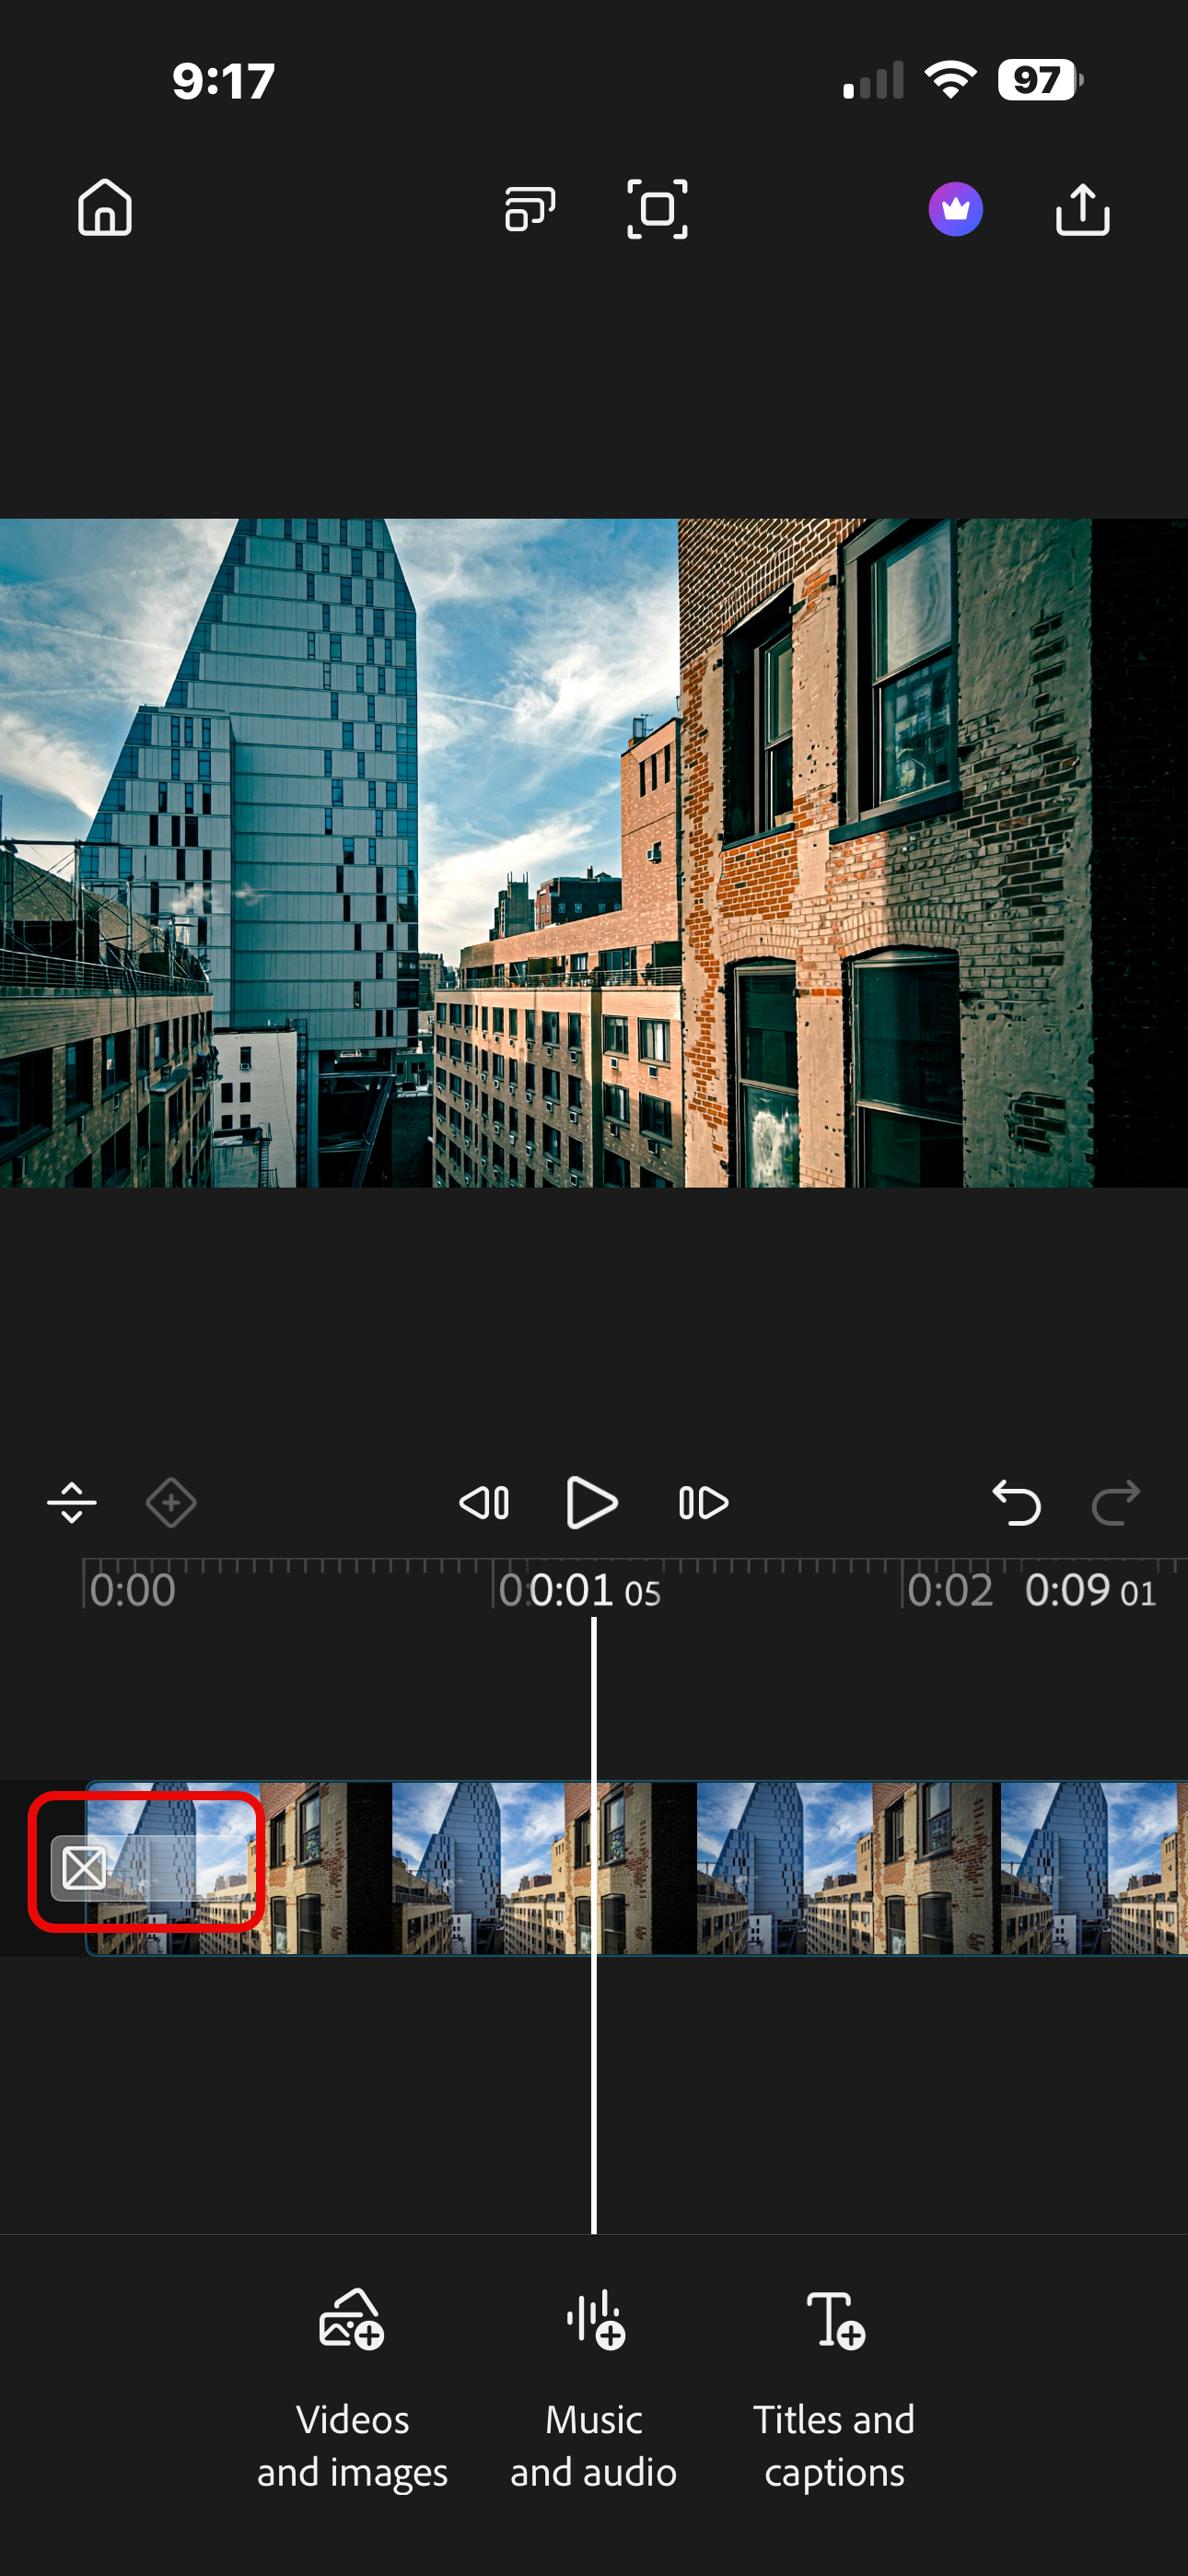
Image 1: making sure the final frame is selected in the sequence, scroll through the tools to locate the Freeze action.
Image 2: tap the frame-by-frame advance icons to make sure you are the very end of your sequence, to avoid or minimize an odd jump-cut effect.
Image 3: freeze frames are automatically added with a 4 second duration.
Images 4,5,6: With the freeze frame in playback window, create a screen shot and save it to your photo library. Using your preferred image editor, crop the screen shot to exclude everything except the freeze frame and save it.
In Premiere Mobile, Click the "+" sign to add that cropped screen shot into the timeline.
Image 7: with the new frame selected, choose Image to video to generate a new sequence. Use the same prompt as used for the first sequence.
Note: The Firefly Video Editor does a great job generating content based on the last frame of a clip without the uploading and downloading hack described here. I'm sure it's only a matter of time before this issue gets corected In Premiere Mobile.
Finishing Touches
With the two sequences on the same timeline, I selected each clip and applied the same Adobe Lightroom preset to them (Dramatic).
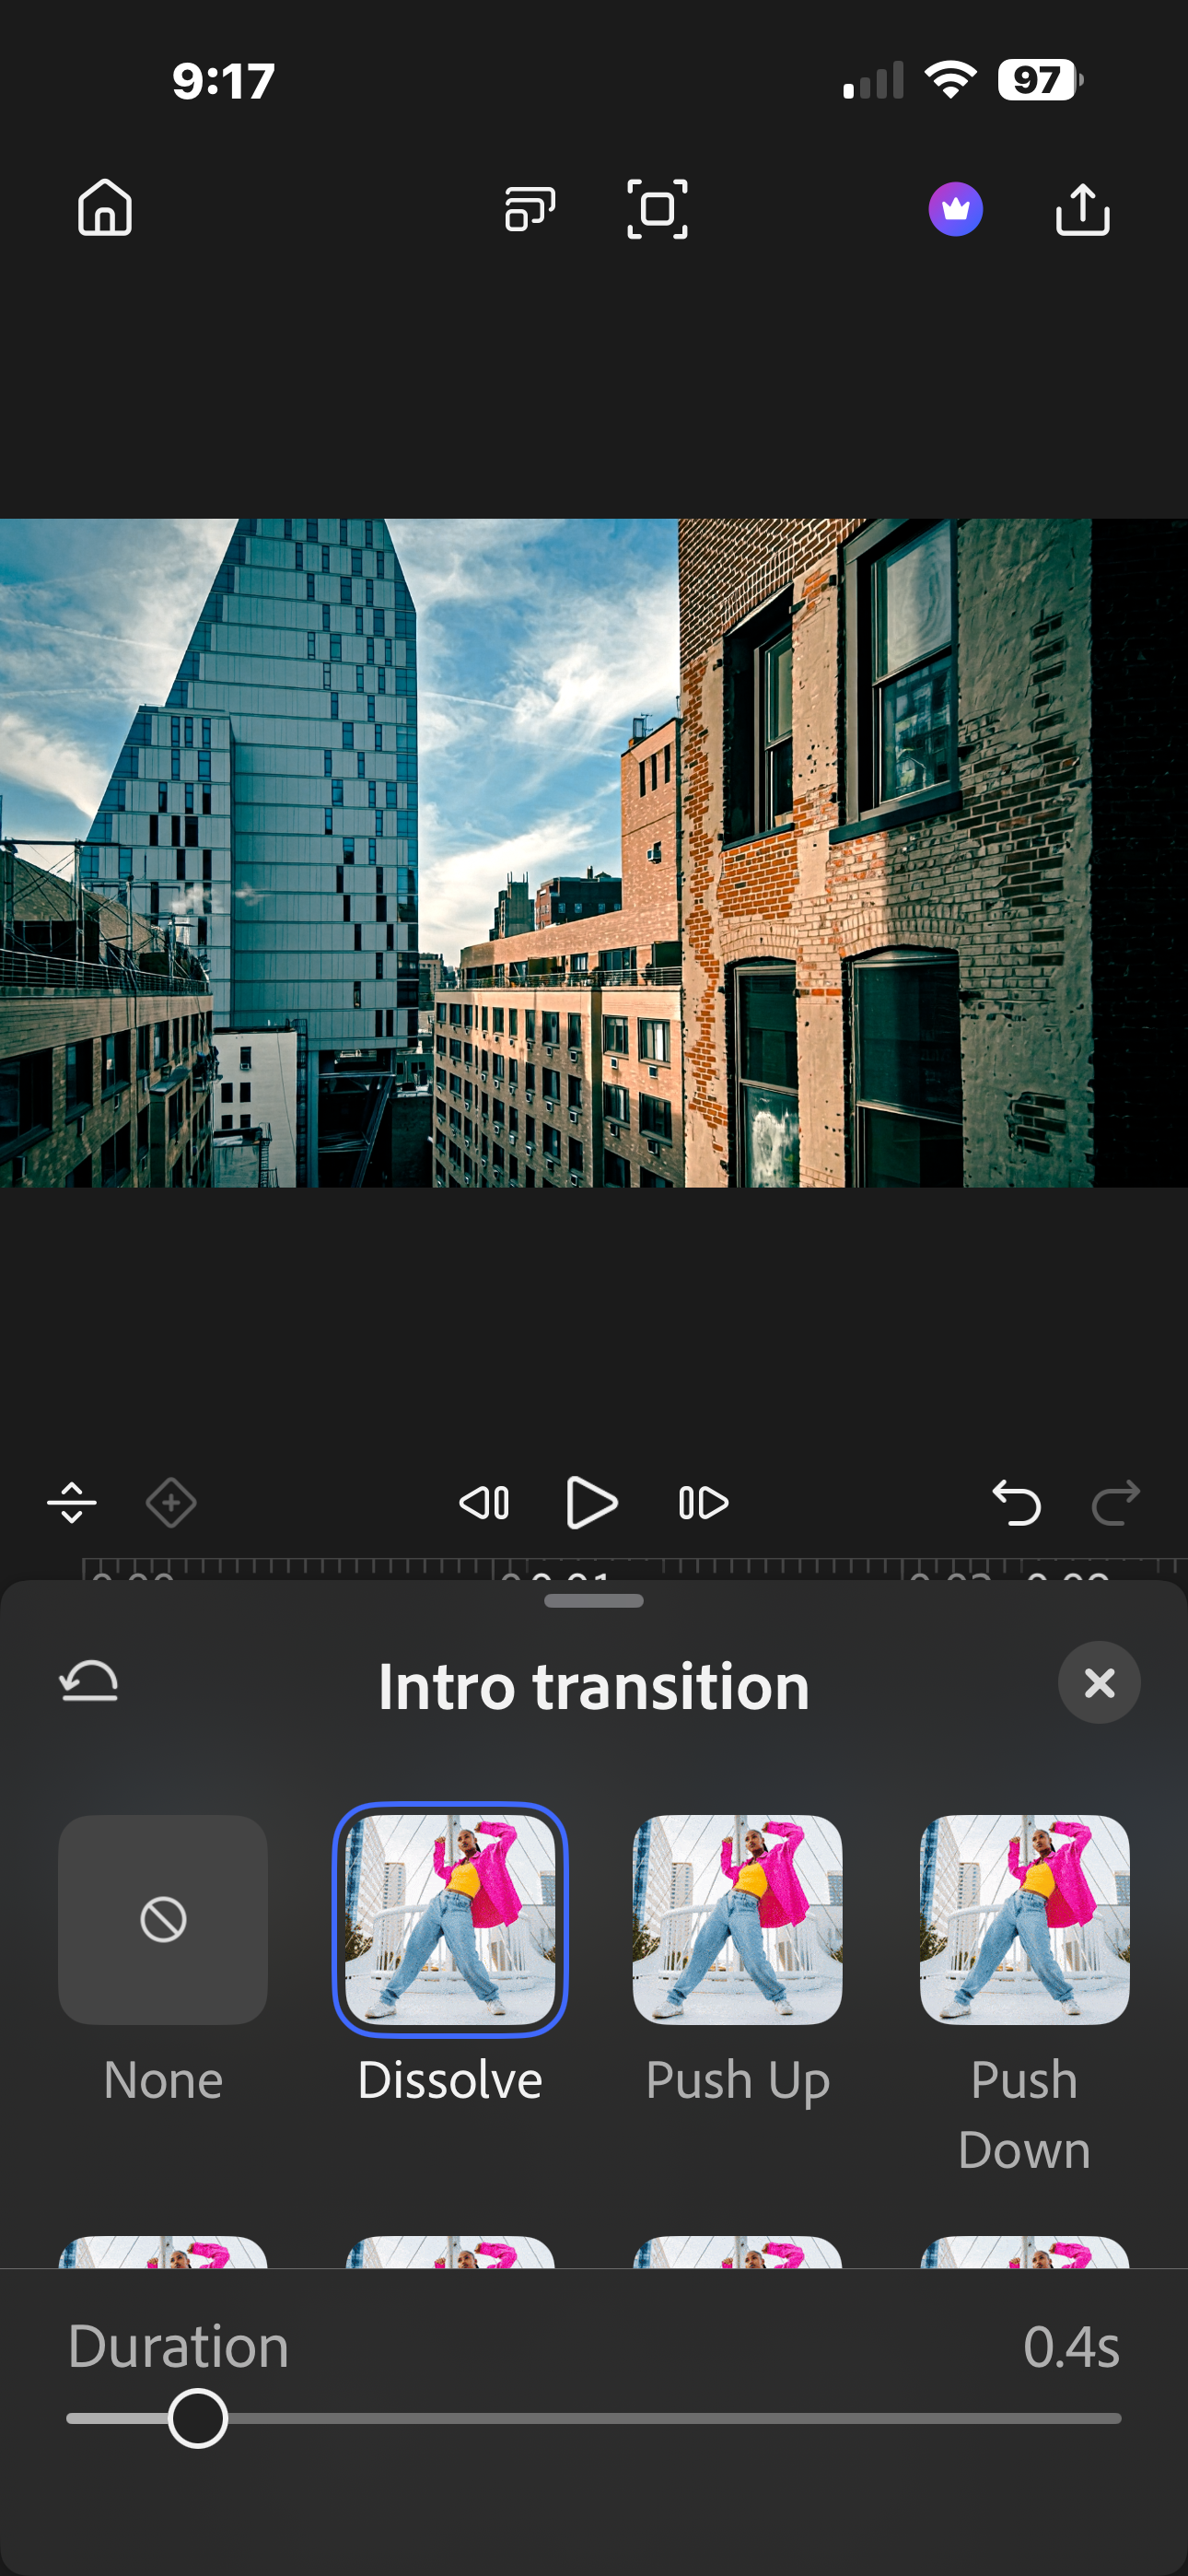
I set an intro and outro dissolve transition by selecting the transition handle for each clip and choosing the desired effect.
Note: If your clips are above the main timeline, just select the clip and scroll the tool bar to find Transitions.
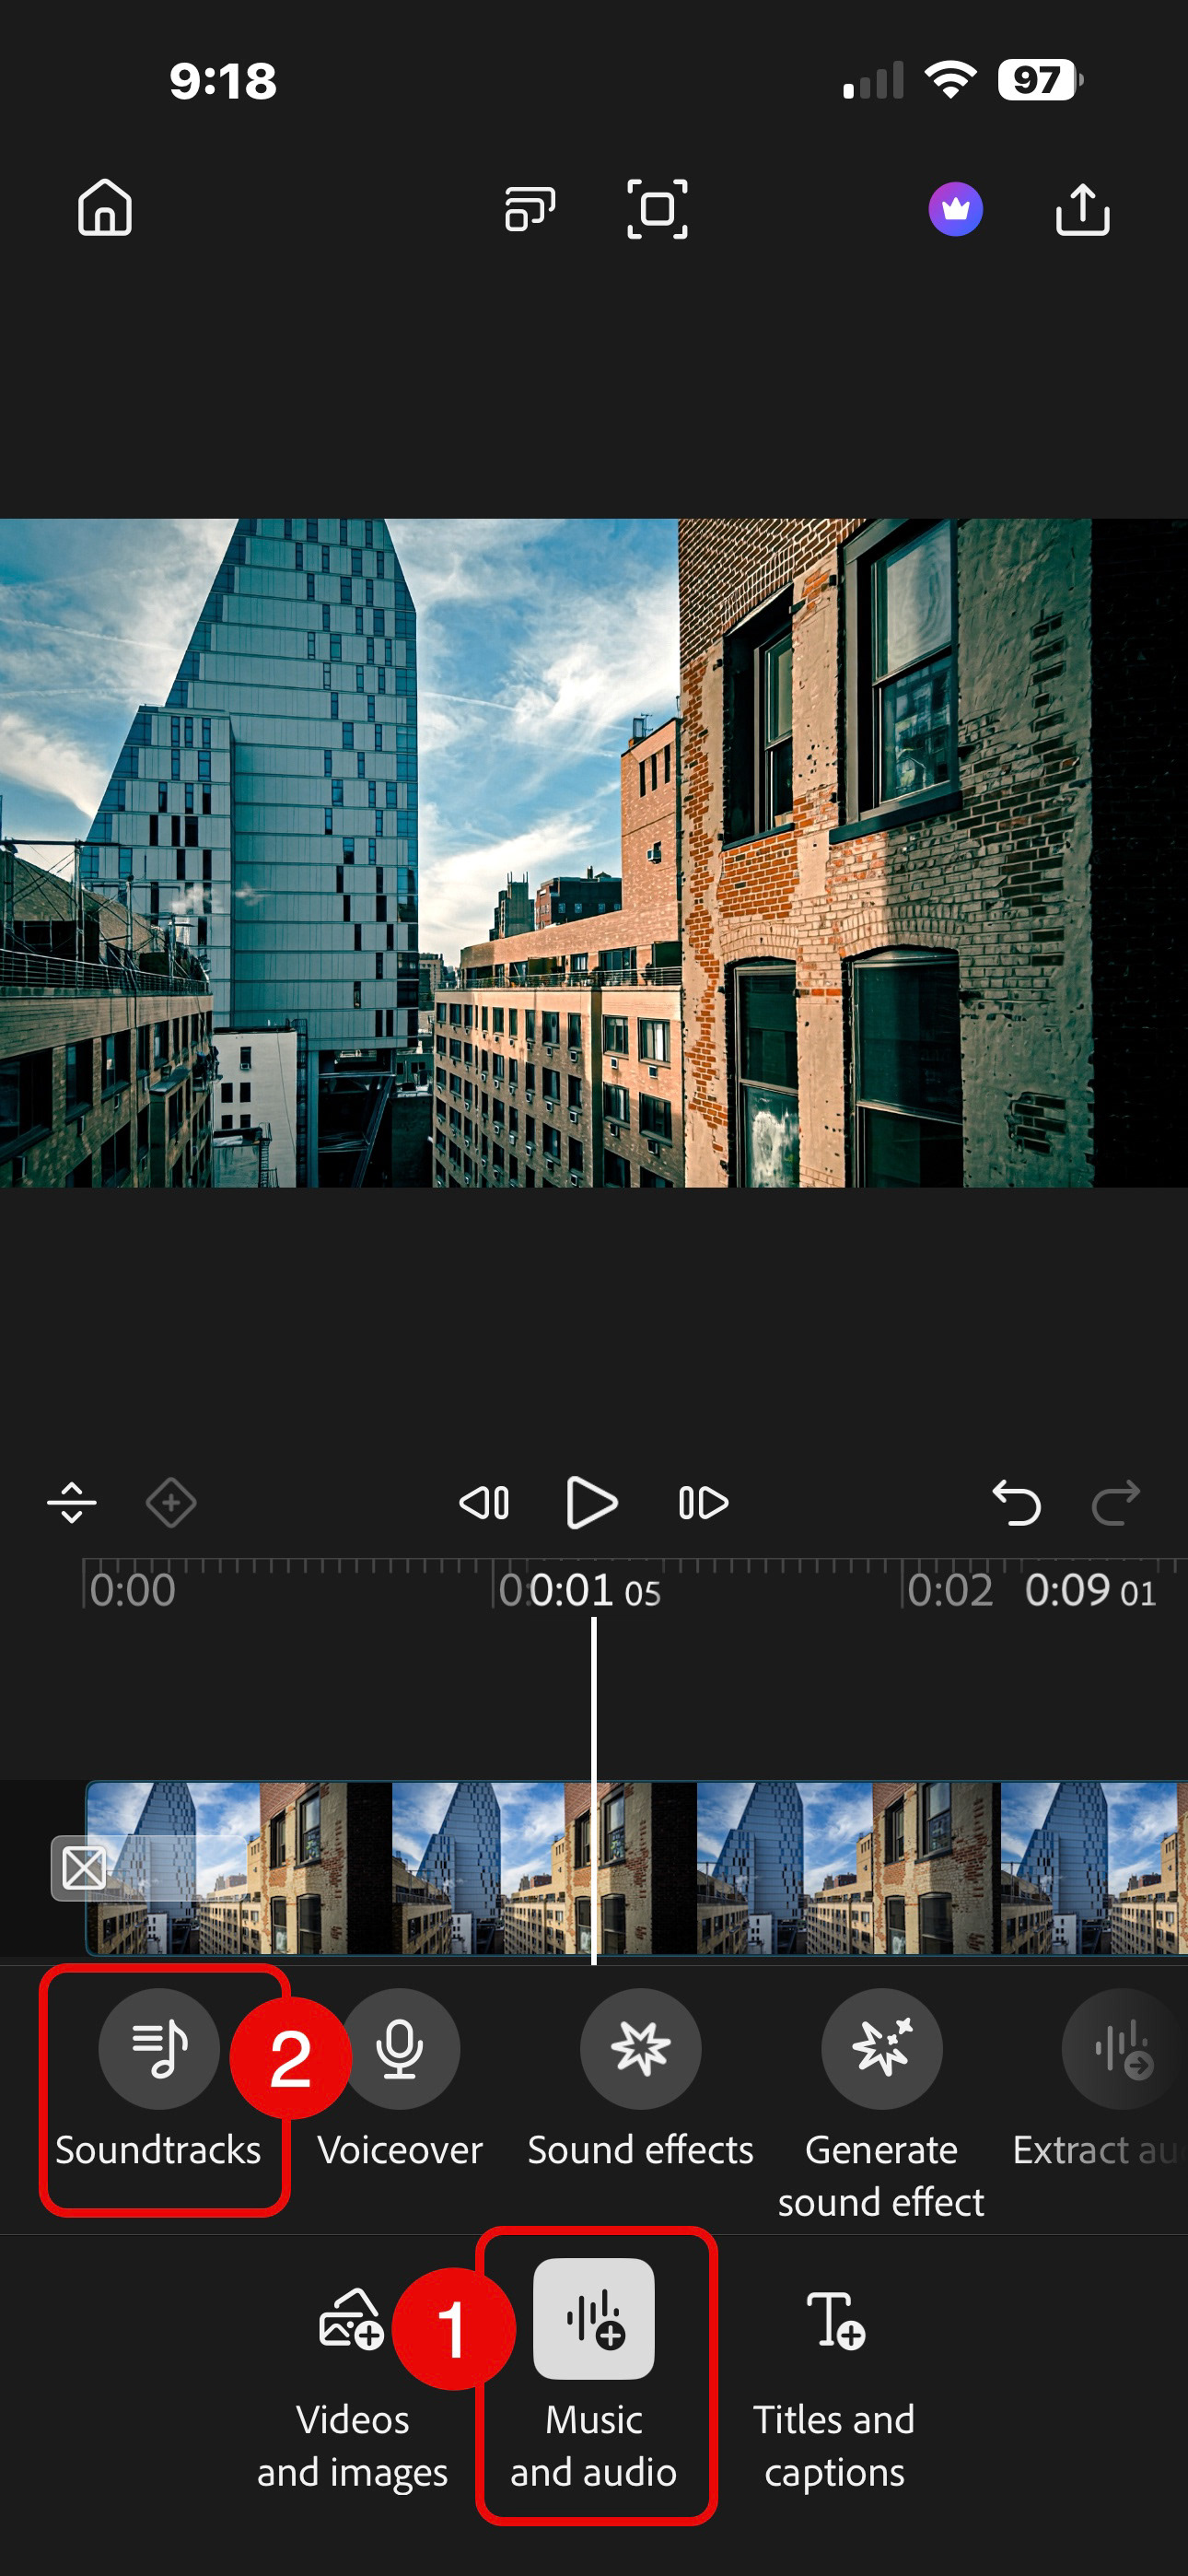
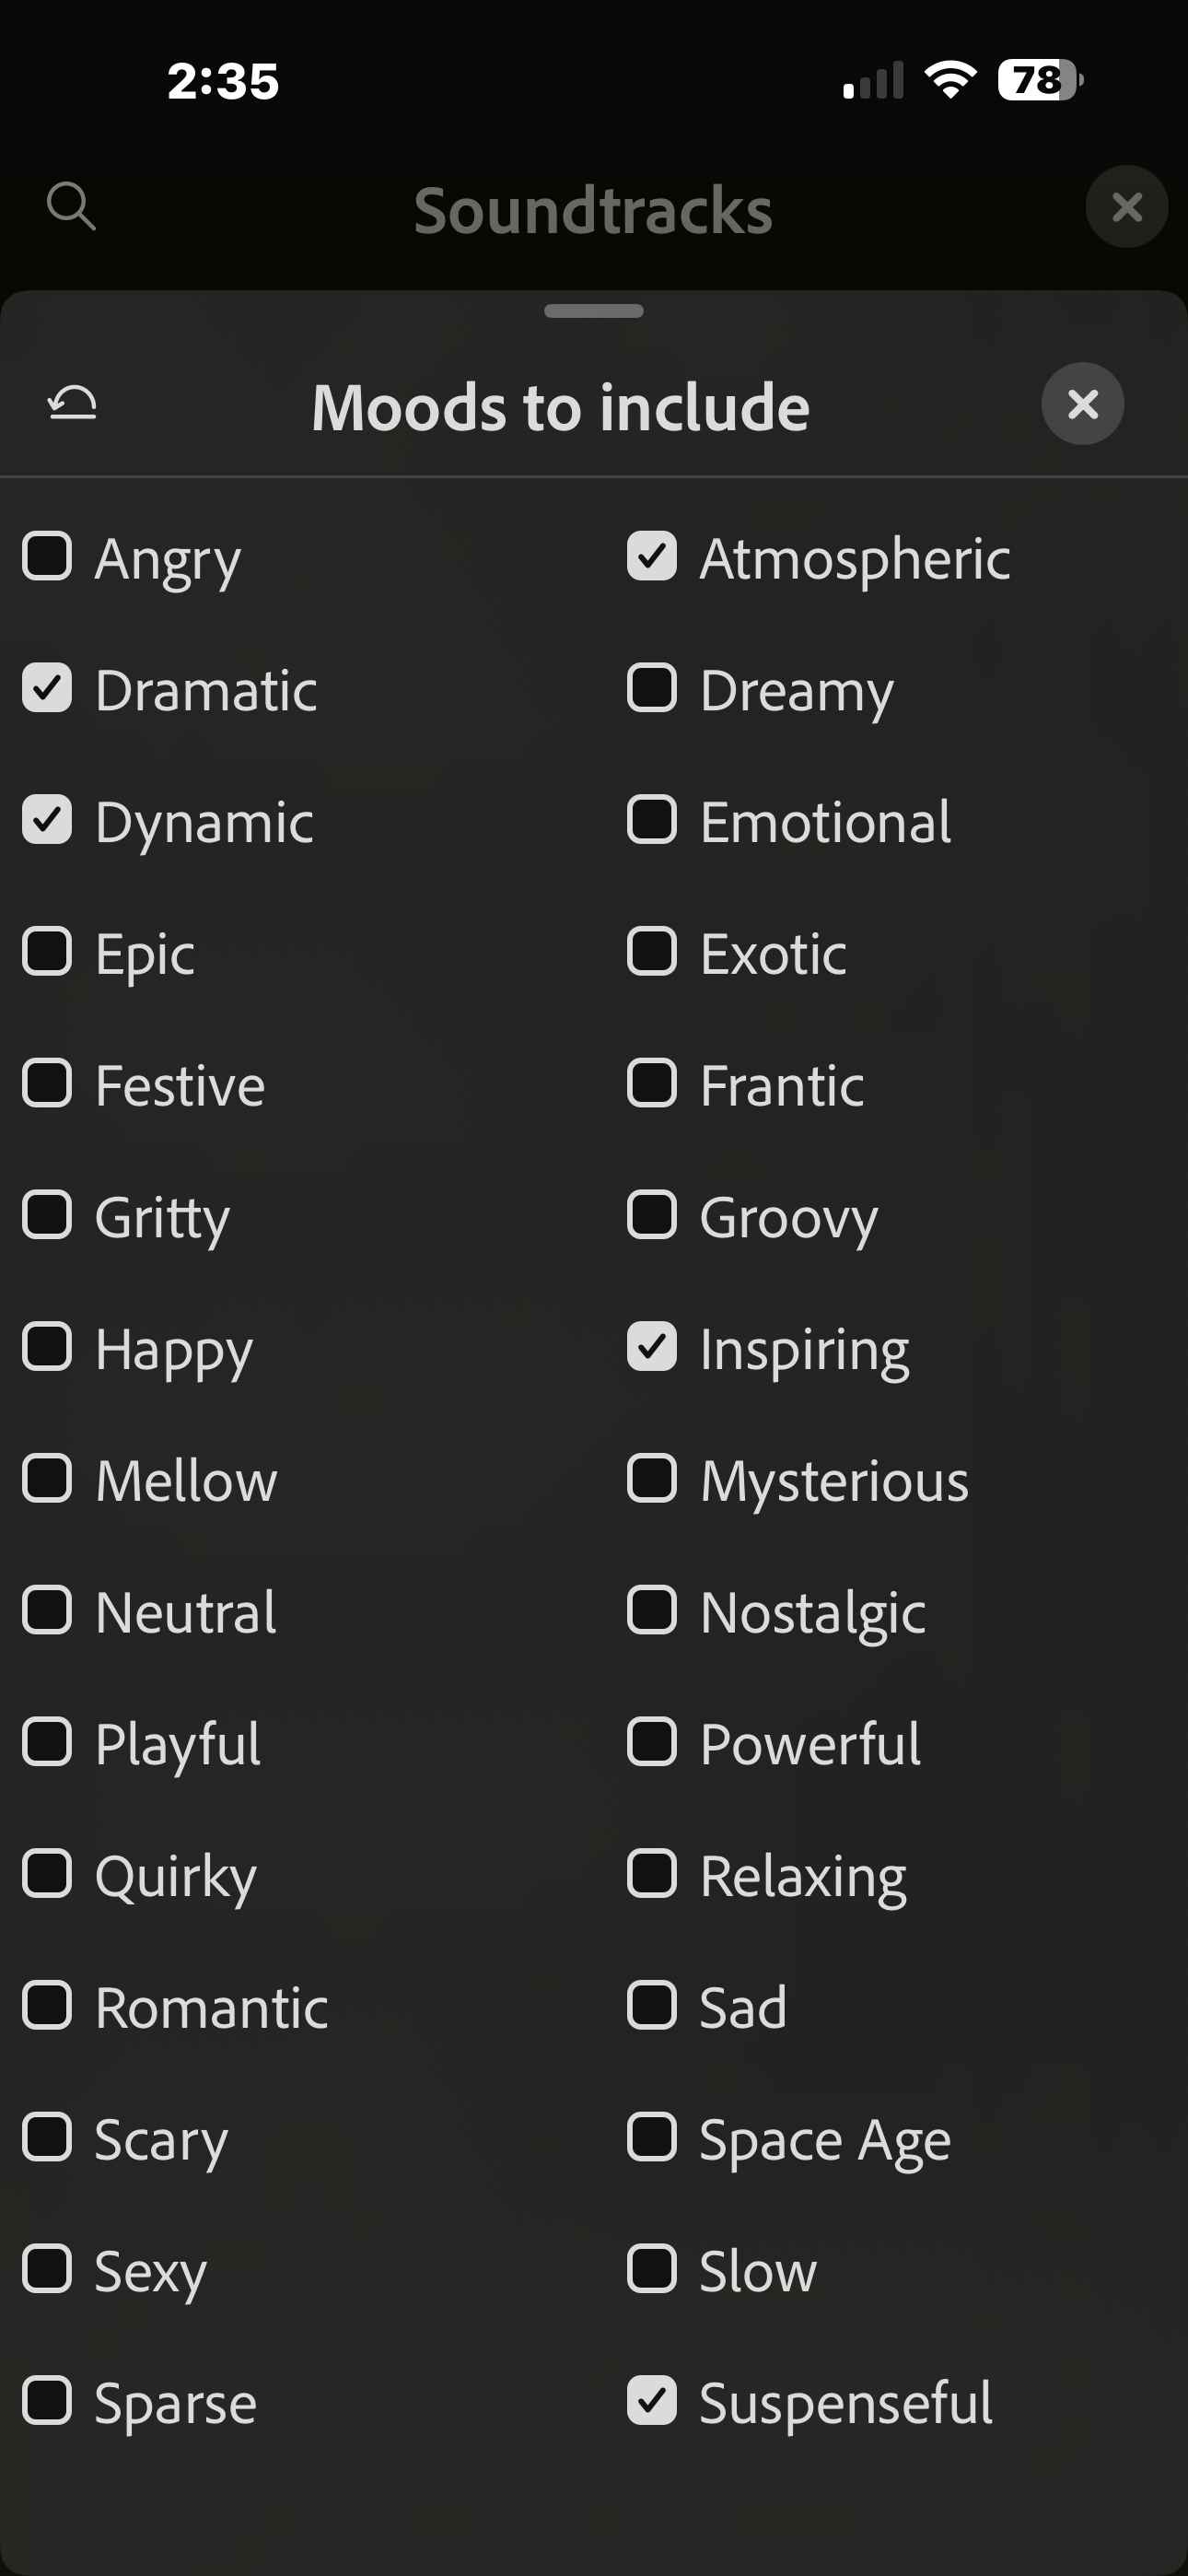
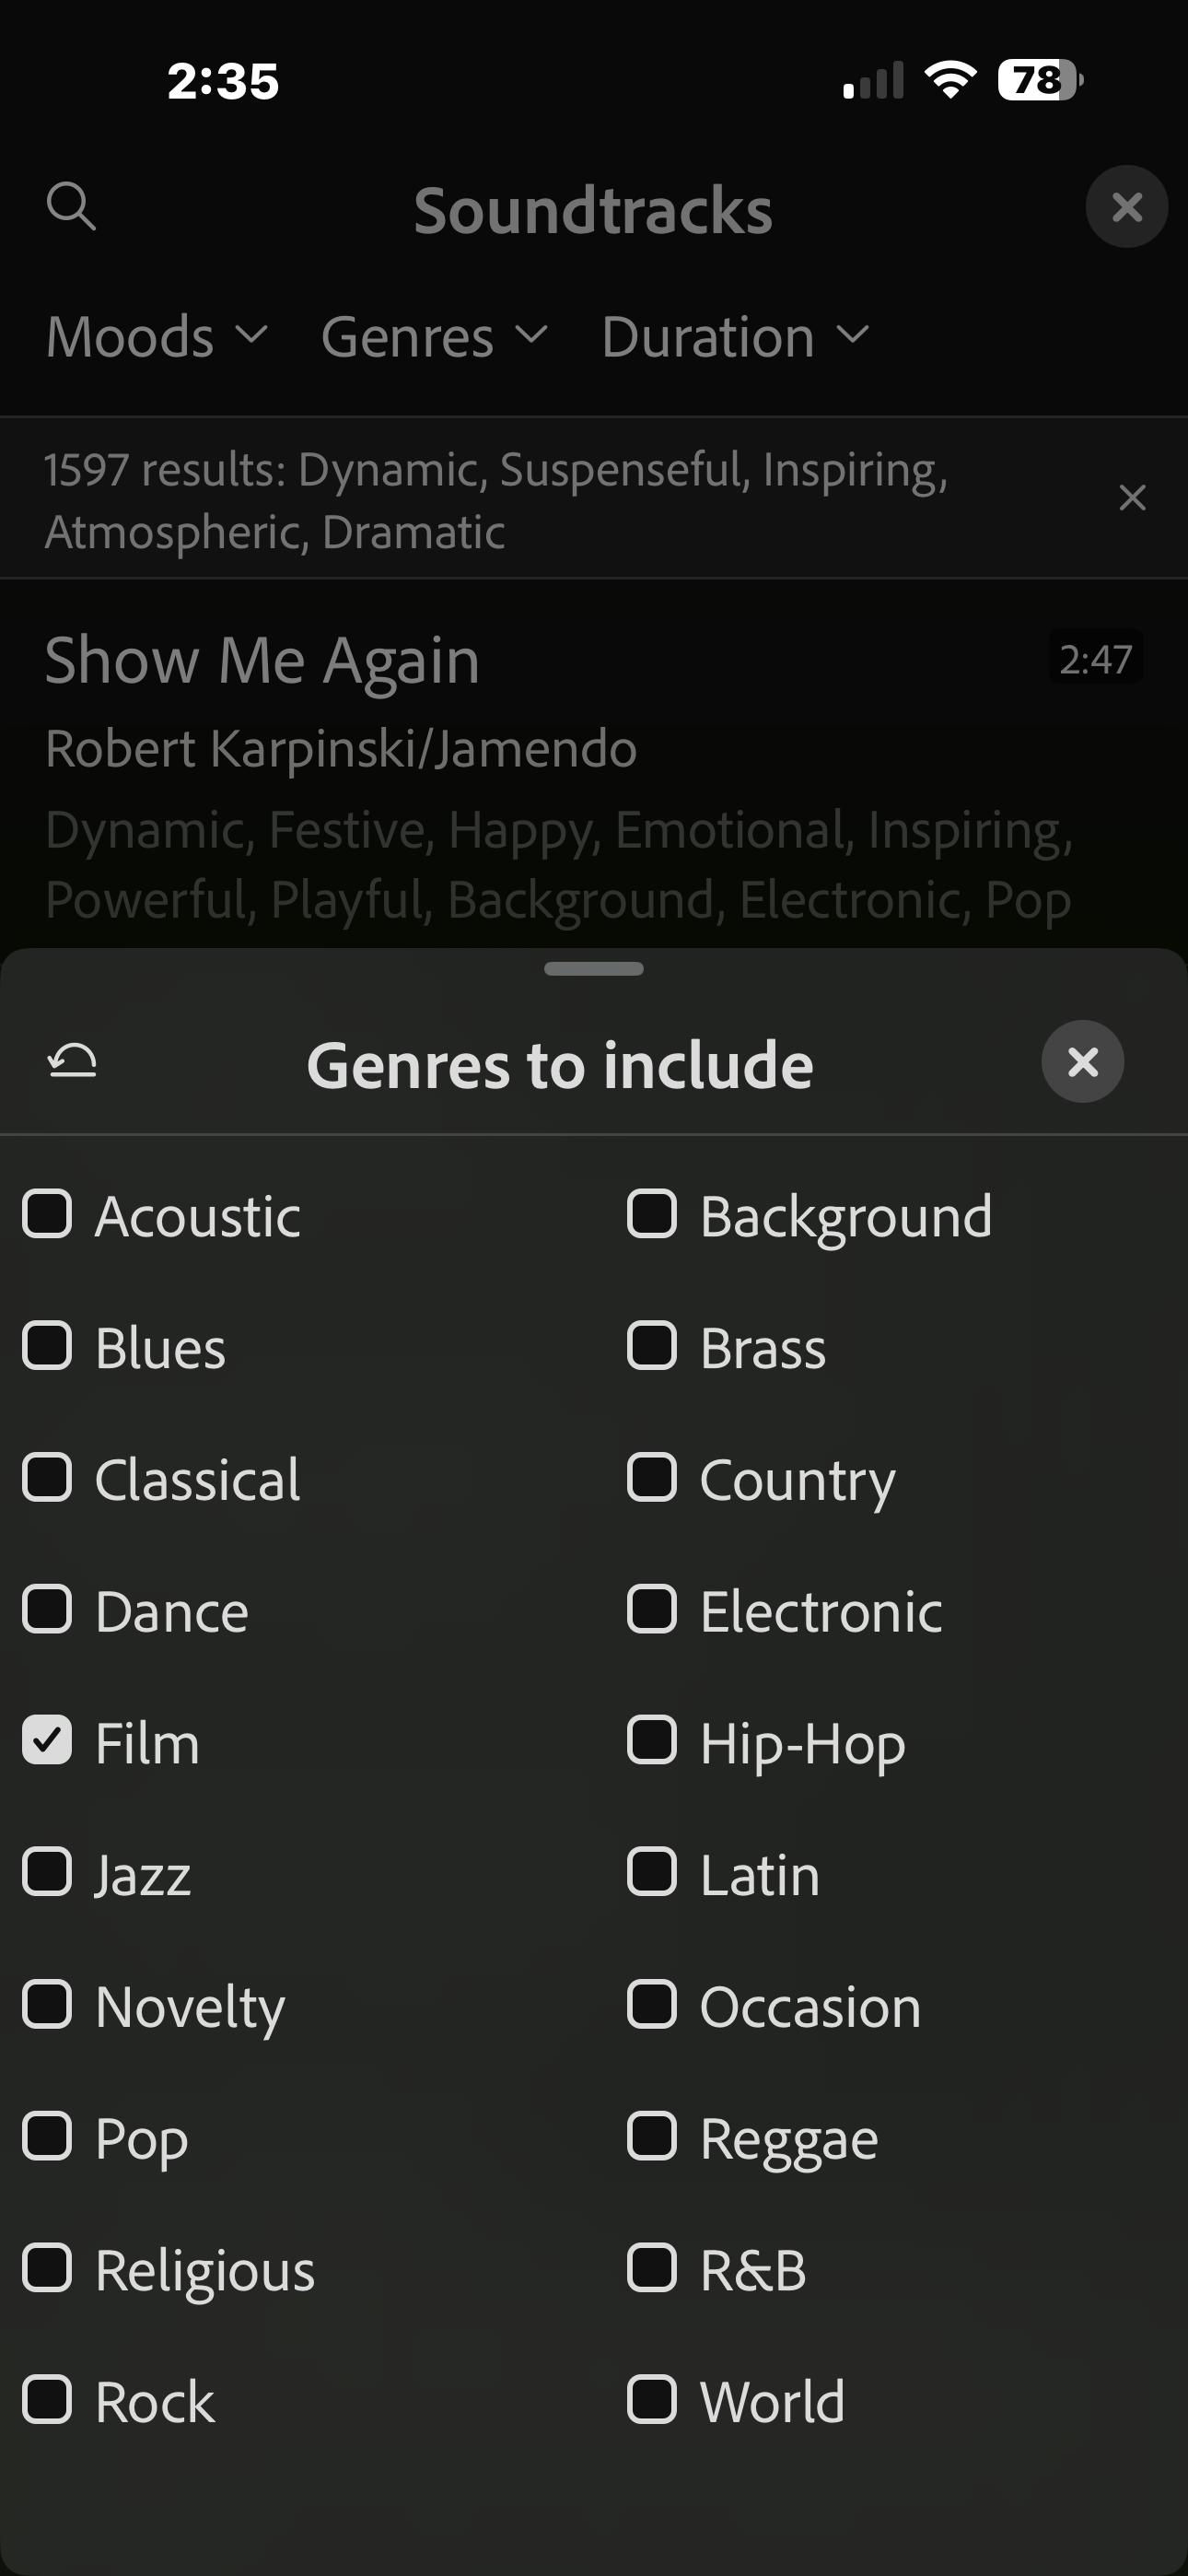
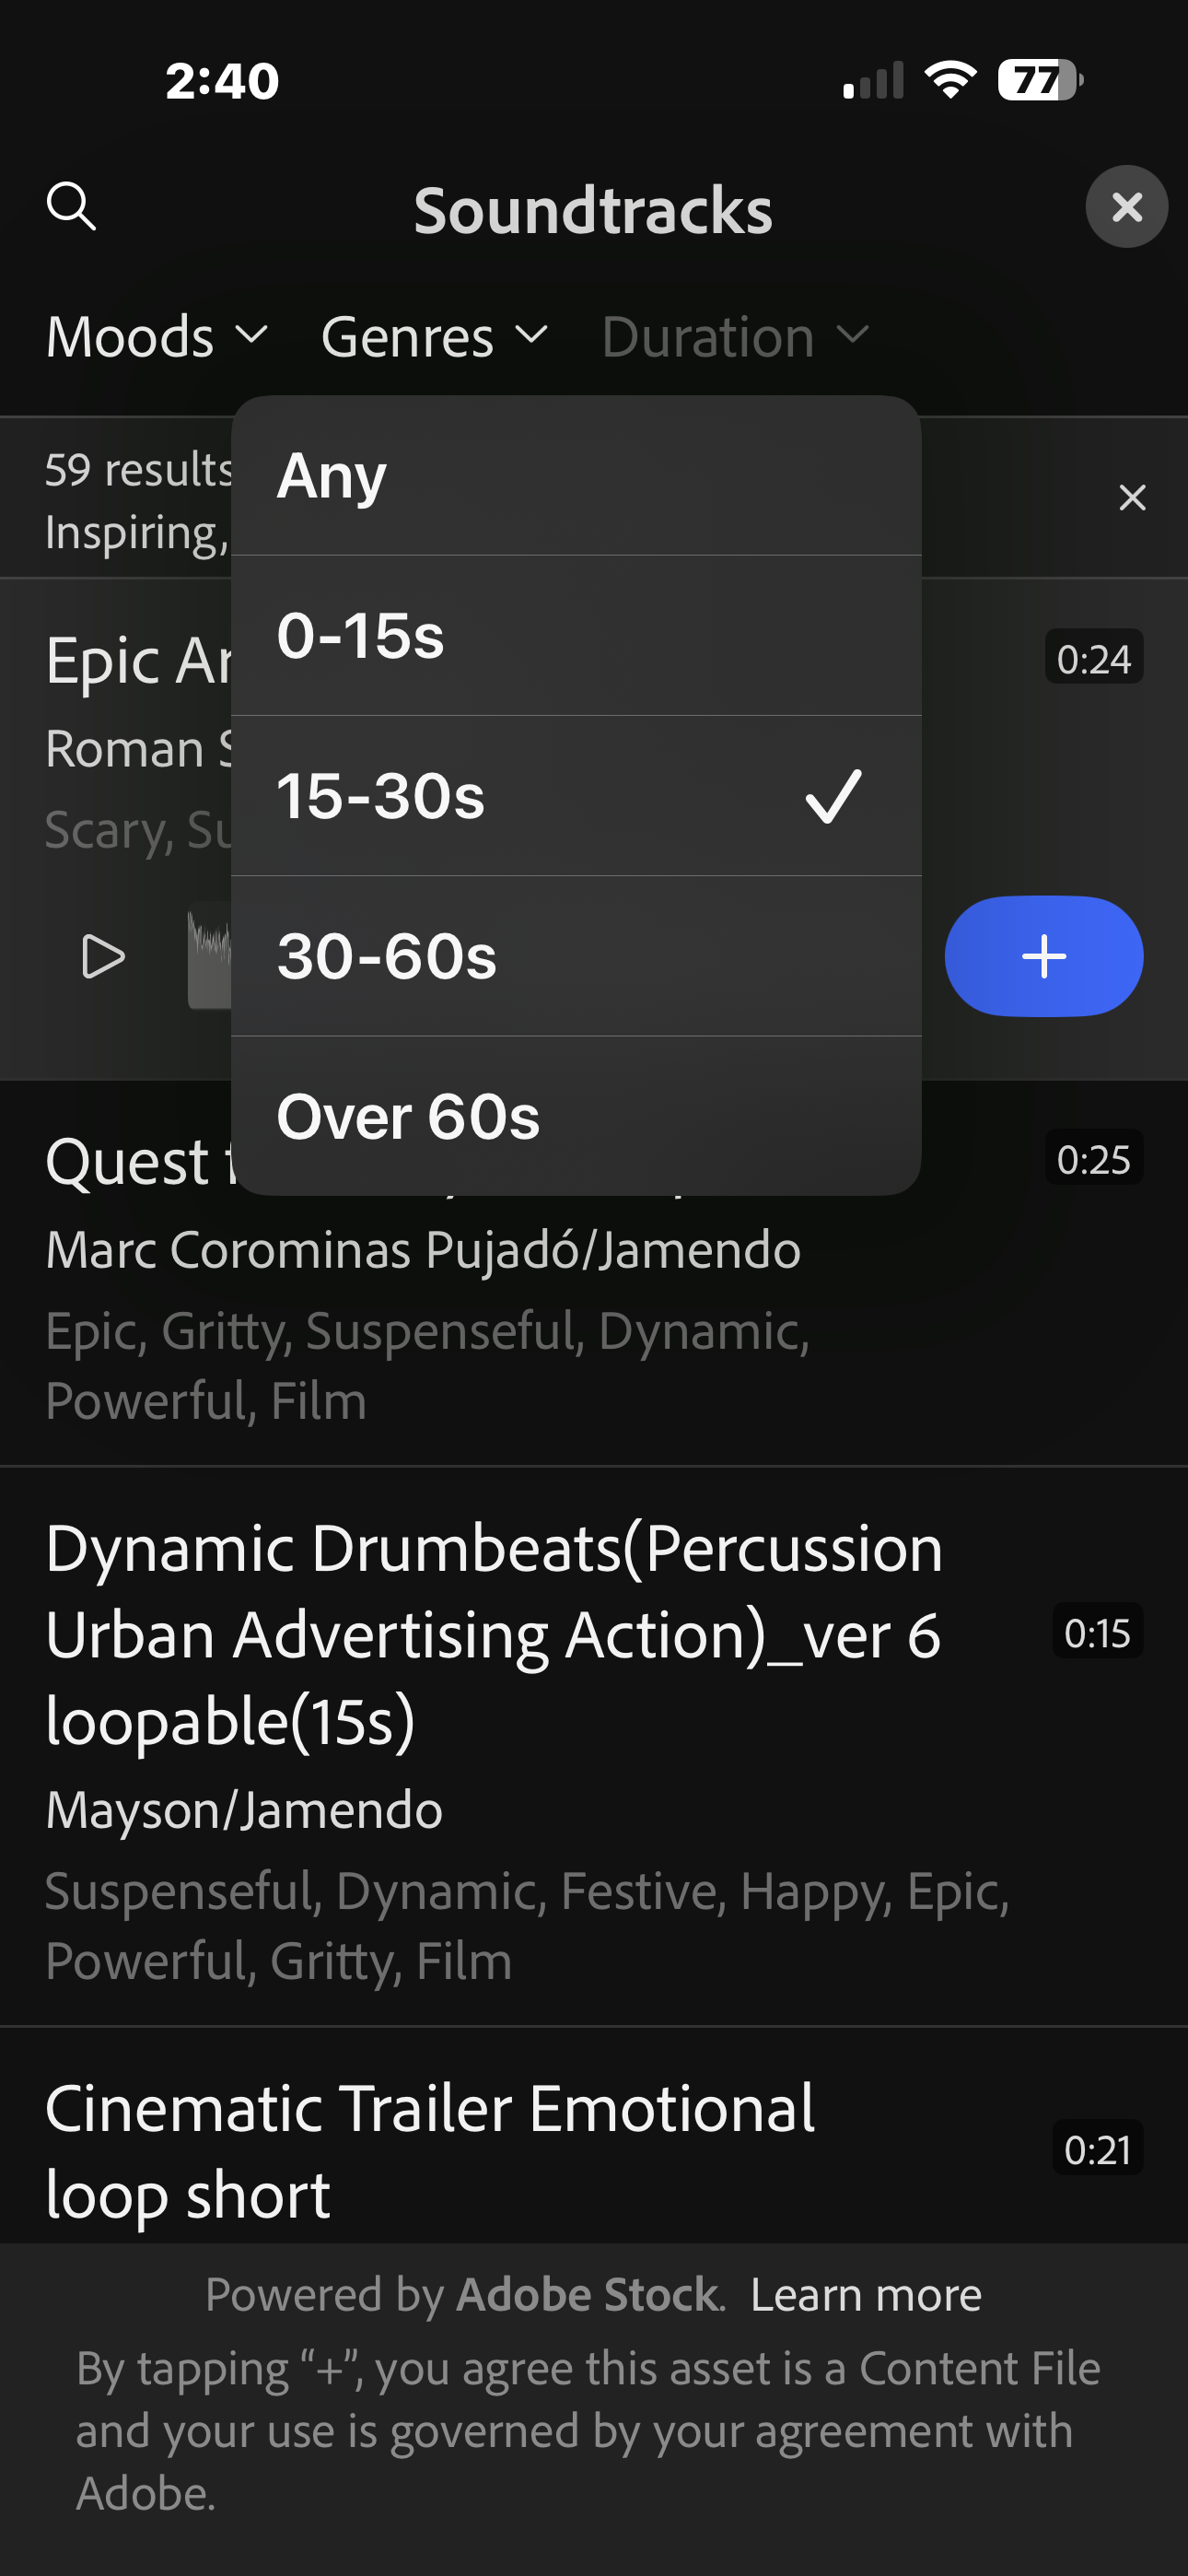
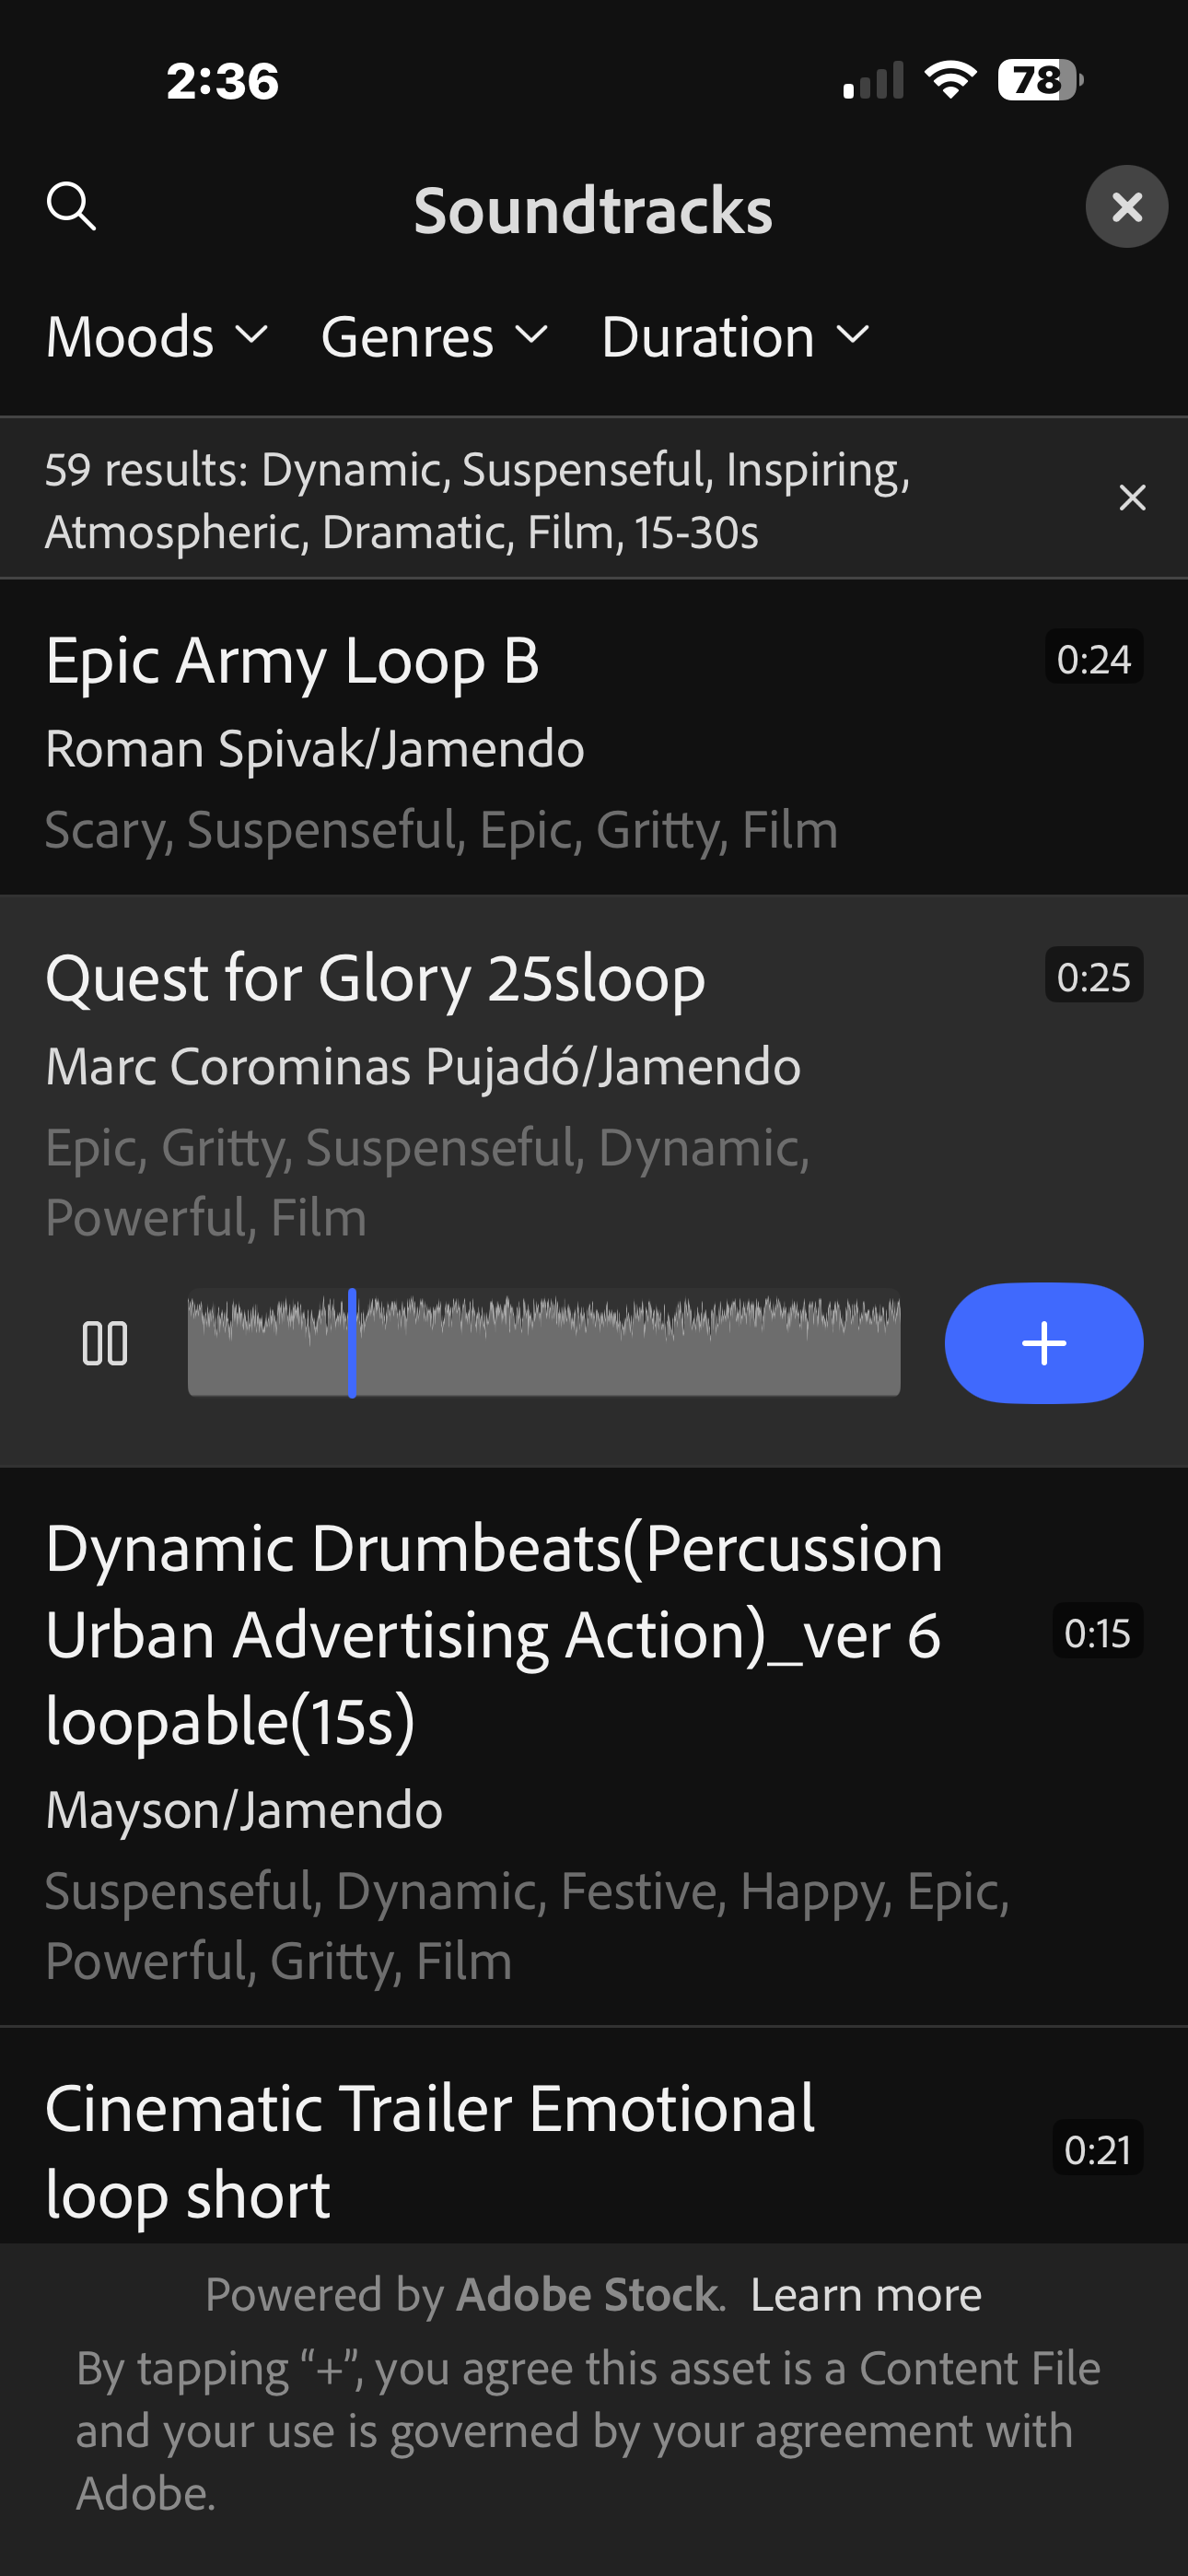
I also decided that an orchestral soundtrack would add impact, so I chose Music and Audio and selected Soundtracks. I searched through the extensive collection of Adobe Stock music clips that are included with Premiere Mobile by setting the mood (dramatic, dynamic, atmospheric, inspiring, suspenseful), the genre (film) and the duration (15-30 seconds). It was more duration than I needed, but combined with clip trimming and audio fading, gave me flexibility in choosing just the right part of the music to include.
The Final Result
Overall, I'm pretty pleased with this short cinematic sequence. It's a little astounding to realize that this video came from a single static image and a simple prompt, but that's the world we live in now. I hope this article encourages you to test things out and see where Generative AI can fit into your workflow, or at the very least, give you an understanding of what is possible.
Until next time!