Using Generative AI to Remove Visual Distractions
Practical Generative AI for Photographers
Welcome to another real-world photography/Gen AI project! If this is your first taste of these articles, my goal is share and show how Generative AI can be used as a tool in your photography without undermining your own creative efforts or skills; Generative AI in Photoshop is a great tool to assist in removing distractions, or enhancing the story of your photo, not a creative replacement for your original work. Links to the other articles in the series are at the end of this project.
This project covers three major topics; a basic outline of my post-processing protocol, my how-to for using Generative Fill in Photoshop and a deep-dive into Content Credentials and their importance in this age of Gen AI.
There continues to be a lot of talk and concern around AI being a bad thing for artists. If the AI is not trained responsibly and ethically, I would agree with that opinion. However, simply because there is so much talk about the issue, I think those "wild west" days of AI are likely numbered.
I want to stress that the things I do in this article - and others - are done using my critical creative input and decision-making; Firefly is not deciding what is best for the image; it's providing options, which I must choose from, or reject.
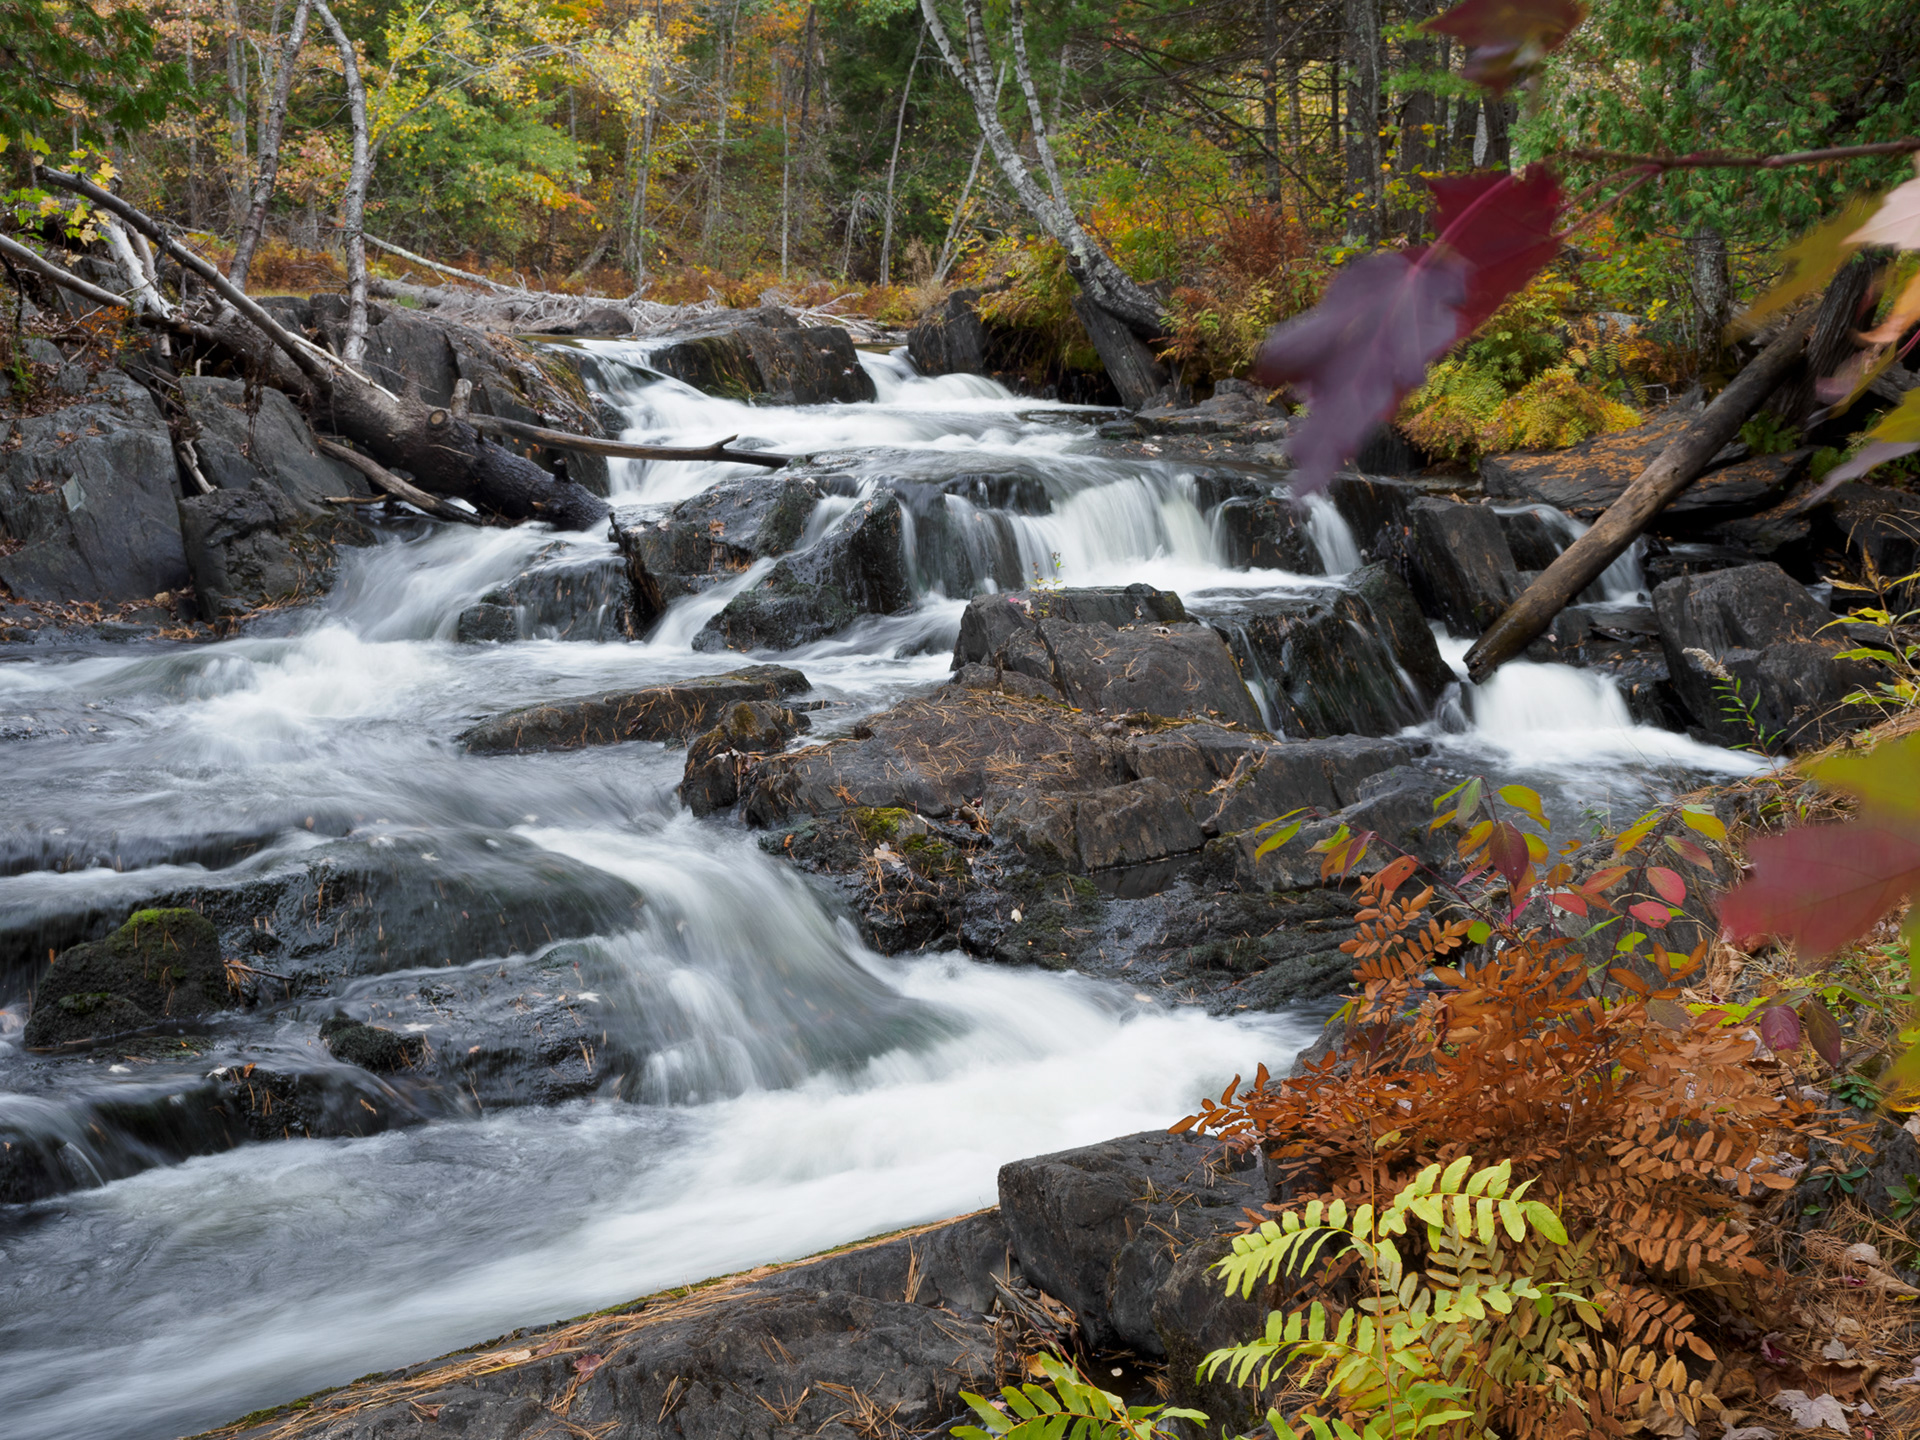
The project example is a waterfall scene from Cordova Falls in the Kawartha region of Ontario. I made many captures that day and this was one of many favorites. It exhibits a lot of movement and tension thanks to the oblique lines and silky water cascading over the rocks.
How Did I Get Here?
At the time, I thought I was being very clever - compositionally - by including some of the maple leaves in the foreground at the top right. After reviewing the image on a large screen, however, I realized that the red leaves were more distracting than they were helping generate additional depth in the scene. In hindsight, I should have framed the scene two ways at the time of capture. Another lesson in the ongoing series, "coulda, shoulda, woulda."


Before and after applying Generative Fill in Adobe Photoshop, to remove a couple distracting leaves.
Note: The blurred motion in this scene was created using another AI technology, this one built into my OM-5 camera; Live ND (Neutral Density). This feature uses computational photography to capture multiple frames and then blend the resulting images together into a single new RAW file. Traditionally, I would create this effect with external glass filters to reduce the light (ND filters) and extend my exposure time to achieve the blur. With Live ND - especially on an overcast day - I don't need to fumble with those filters!
Normal Post-Processing Regimen
On pretty much any image I edit, I go through a similar series of steps:
- Set the Color Profile (often for me, this is Landscape)
- Run Auto exposure balance
- Tweak the Basic exposure sliders based on Auto
- Apply edge Sharpening using the Sharpen mask
- Adjust Texture, Clarity, Vibrance and Dehaze to taste
- Apply masking for local adjustments. In this case, I only used a radial gradient (inverted) to tone down the texture and contrast around the waterfall, while beefing up the Vibrance a little more for the fall color, but in a waterfall shot I'll often use the Brush mask to let me further reduce highlights in bright water for more detail and texture.
- Apply manual or AI-powered Denoise. I'm so impressed with the AI-powered Denoise, that I don't bother with manual denoising unless I can't apply AI Denoise (AI Denoise doesn't work with all formats at this time)
- Crop the image if needed
Often, my initial edits are done in Lightroom Mobile on my iPad, as I often import directly from my media card into my iPad, using Lightroom Mobile.

Original capture vs final processing, and before Gen AI
"Why don't you make like a tree... and get out of here."
- Biff Tannen, speaking to Marty McFly
Back to the Future
Back to the Future
Apologies if my sense of humour is poorly communicated...
With the bulk of the processing dealt with, it was time to address the elephant - err, LEAF - in the waterfall.
I first tried the Remove tool in Lightroom Classic, but the results were not close to ideal. The Remove tool pulls data from other parts of the image and tries to realistically blend them into the are you want to fix. Those two red leaves took up a sizeable chunk of image area, behind which was a fairly detailed forest scene, so it's not really surprising that Lightroom alone was not up to the task. So, after applying Denoise AI to the file, it was off to Photoshop I went.
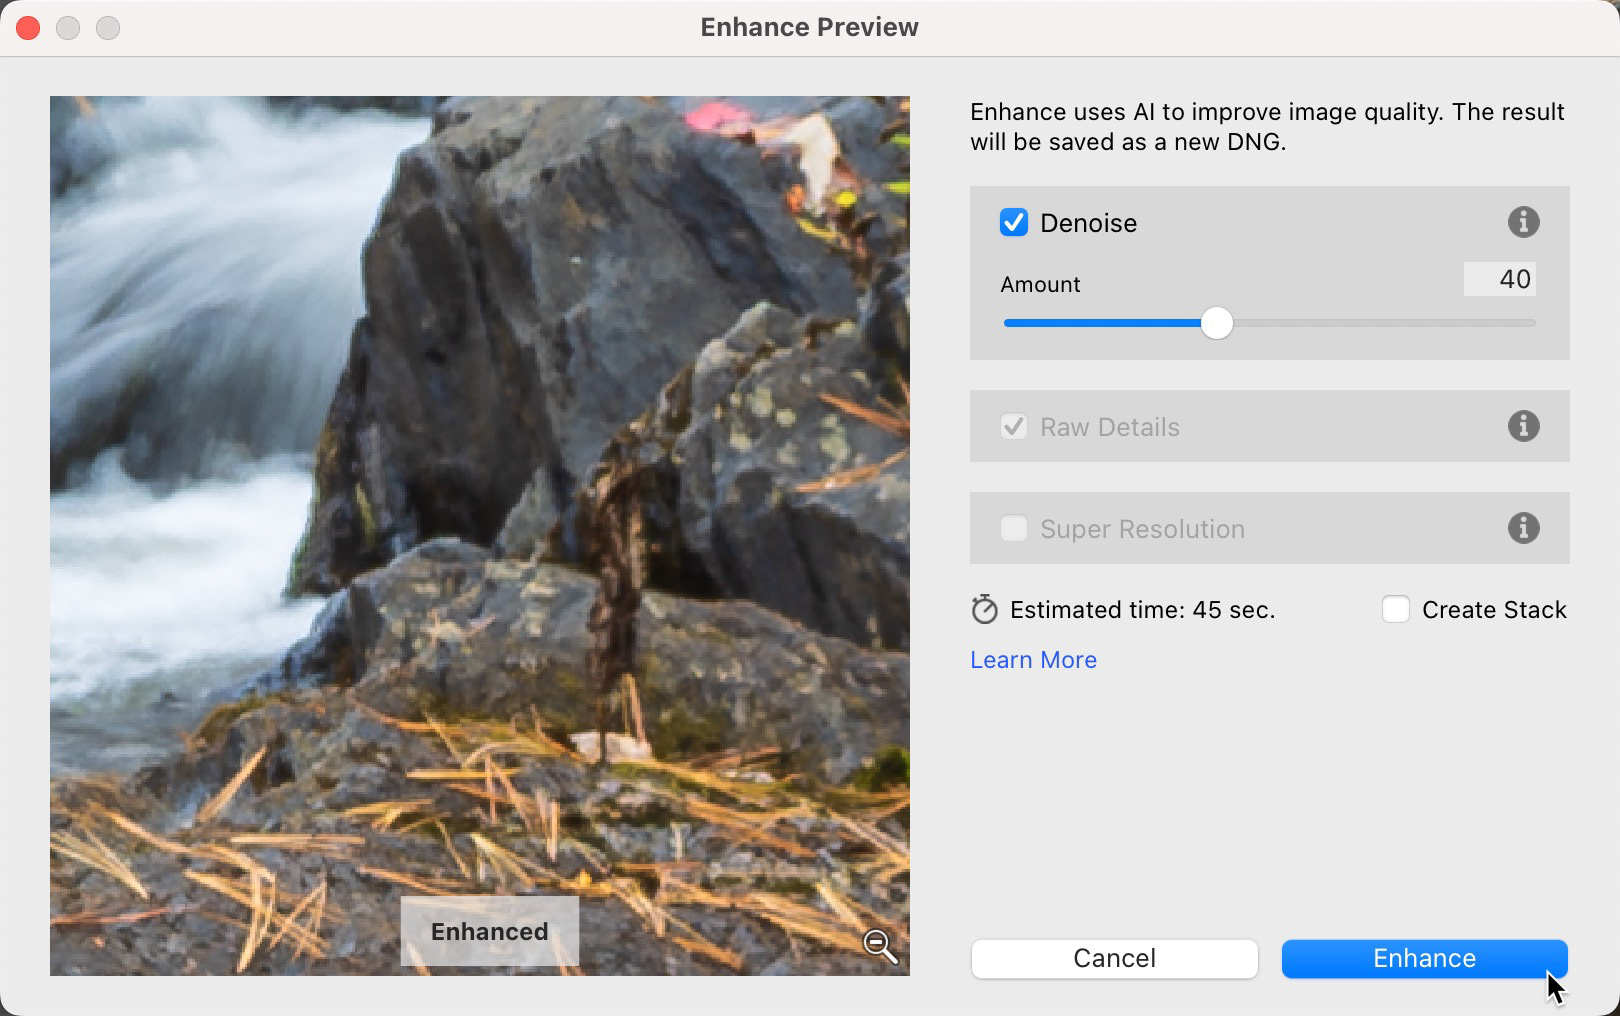
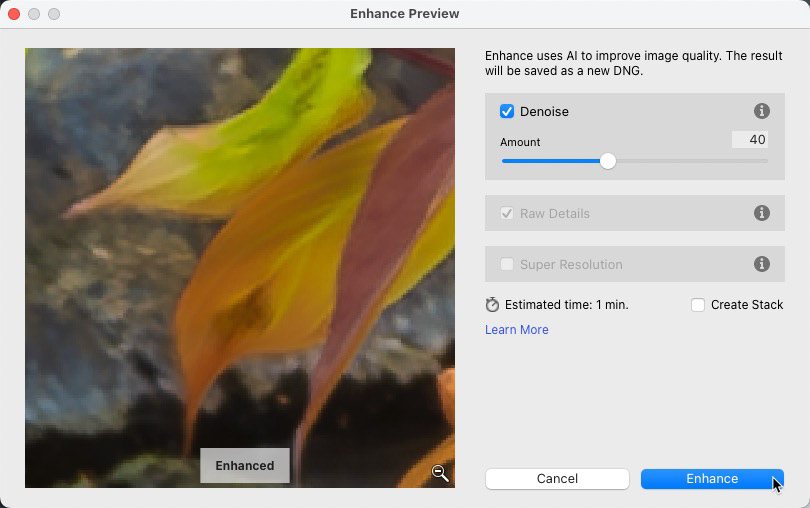
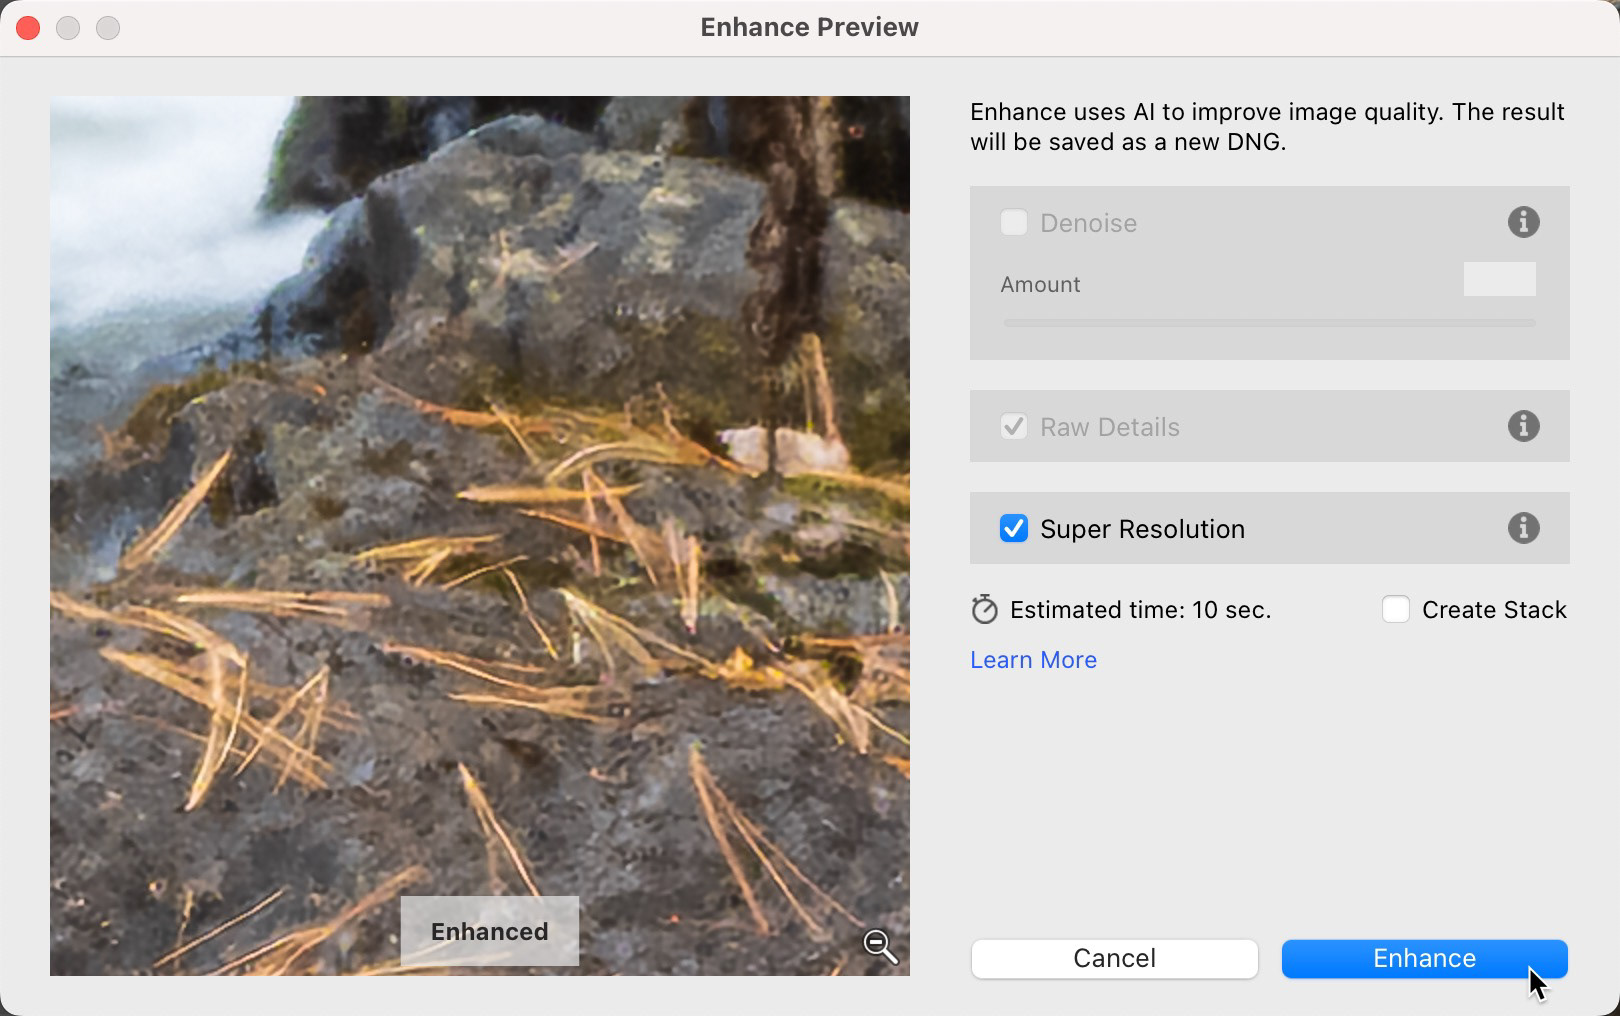
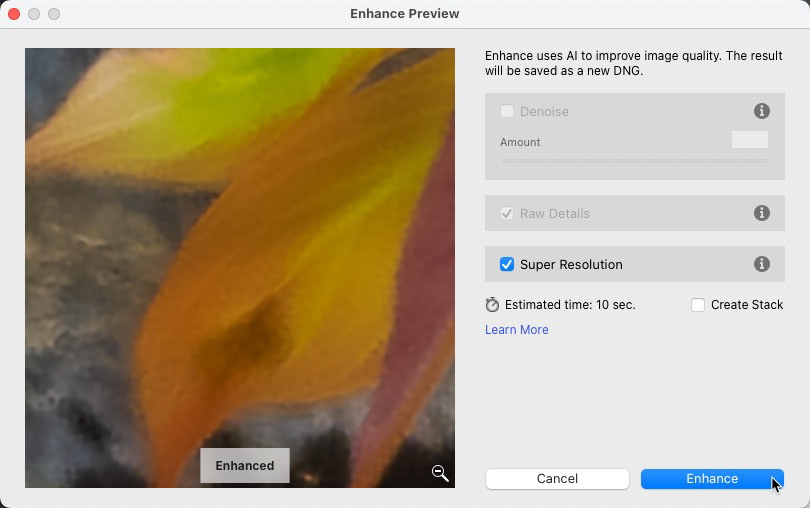
The Enhance option in Lightroom let's you either Denoise the RAW file, OR apply Super Resolution to scale the image to double its original size. You can't do both at the same time and because of the current workflow. I typically Denoise first, edit in Photoshop which allows me to save a new version of the file (not a bad thing) and then, if desired, I'll apply Super Resolution.
More info on Denoise AI
More info on Super Resolution
Object Removal in Photoshop
Right-clicking the image or thumbnail in Lightroom Classic gives you the option to Edit in Photoshop...
Once the image was open, I tried the Remove tool in Photoshop first. I often find it can do a better job on larger, more detailed areas, than the Remove tool in Lightroom. The Remove tool in Photoshop uses on-board AI to analyse the scene and generate new details. It did do a better job, but it still wasn't up to snuff for me. Likewise, Content-Aware Fill would not produce suitable resutls and the Clone Stamp tool... well, it would likely take me a long time just to find out I wasn't happy with the result, because it, too, relies on the pixel data in the image.
Adobe Firefly to the Rescue
This left Adobe Firefly and Generative Fill to solve my problem. Firefly is not limited to the pixels in the image; it can create new content based on the vast library of images it has been (ethically) trained with; Adobe Stock, public domain content and content that has fallen out of copyright.
I tried two different techniques for Generative Fill.
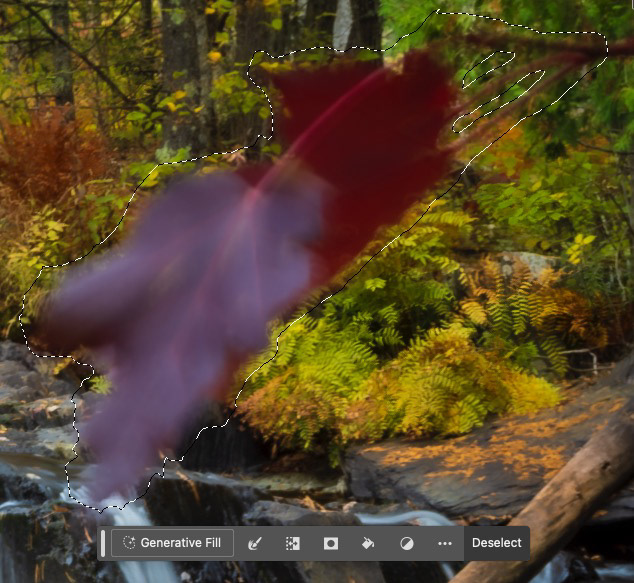
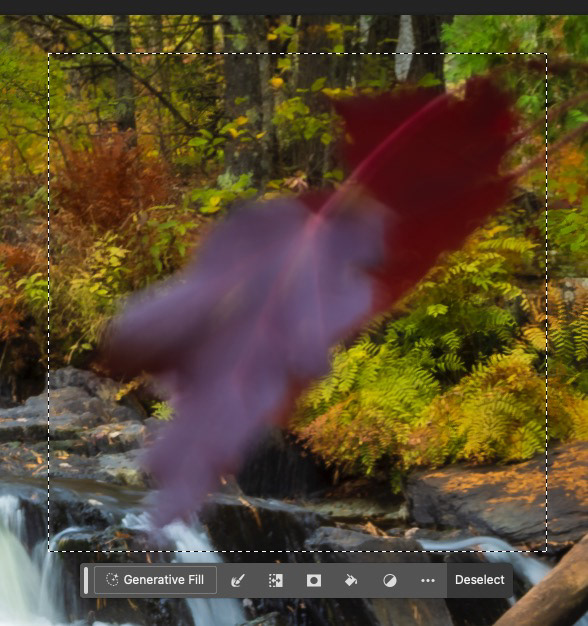
In one technique, I used the Lasso tool to roughly select around both leaves and generate the fill in a single step, by clicking on the Generate field in the new Contextual Taskbar and then tapping the Generate button.
Tip: Before generating, I made adjustments to the selection, including expanding the selection by 5 pixels and feathering it by pixels, just to help with blending.
The area I needed to fill was less that 1024x1024 pixels, so I was pretty confident Firefly and Photoshop would give me a decent result and, by the second set of variations, I had a couple choices I was pleased with.
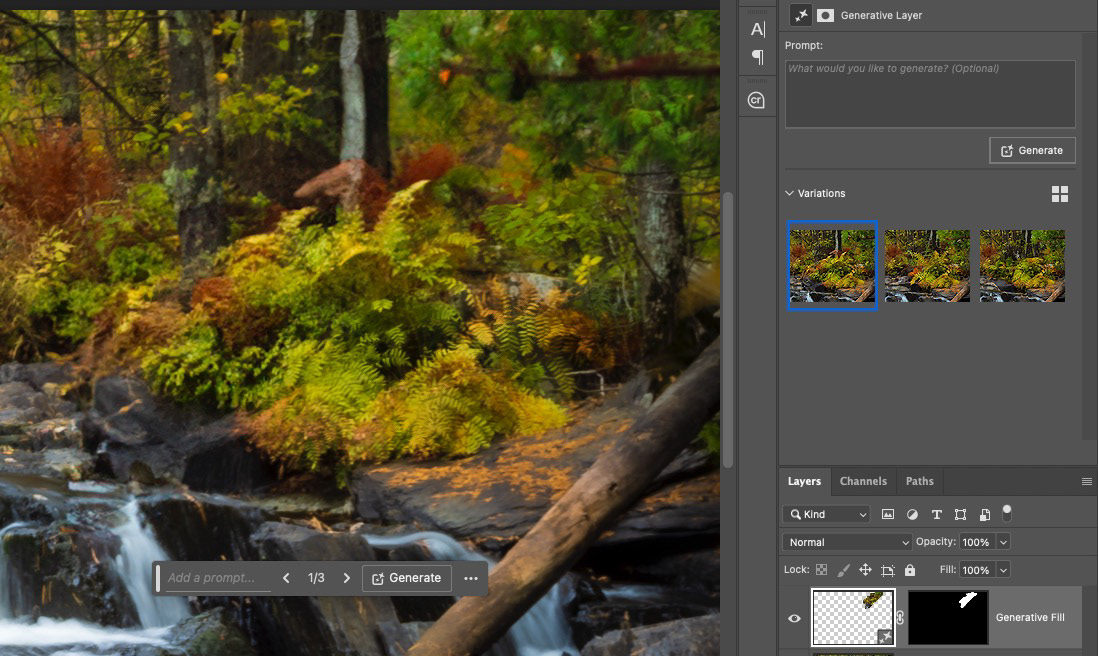
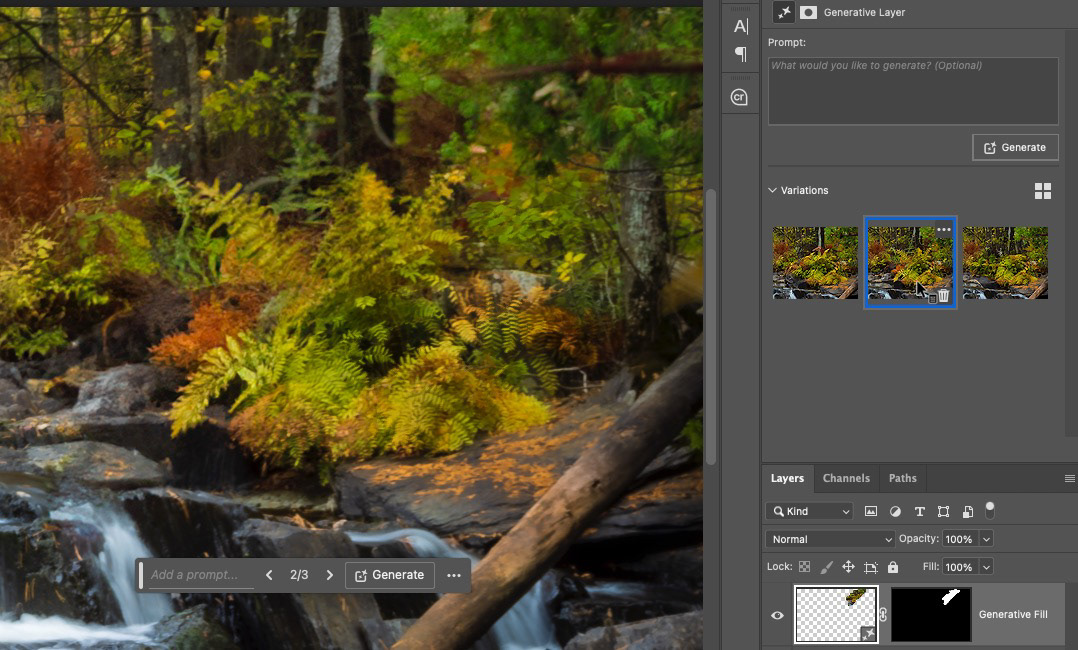
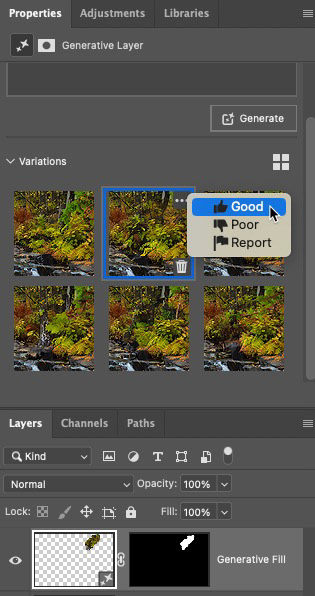
Of the first 3 variations, I liked the second one the best. It blows my mind that, without any prompting, Firefly can imagine a fern frond hanging over wet rocks. It looked so natural.
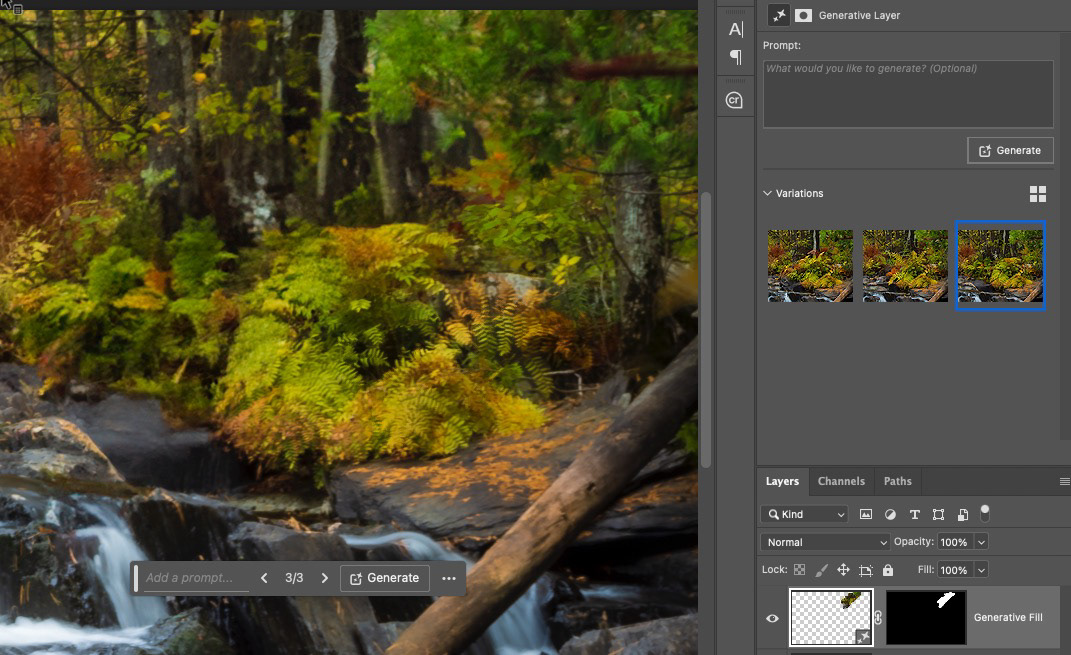
I also had some versions that just did not work (hence the second round of variations). In the end, I had a keeper from both the first and second set of variations. When you run into unacceptable (or acceptable, for that matter) variations, make sure to provide feedback through the 3-dot menu that is part of each variation. This just helps make Firefly better.
As I've shared in previous articles, Firefly Generative Fill and Expand are currently limited to generating a maximum resolution of 1024x1024 pixels. This can be problematic for large areas, as the image quality will not be the same as an original high-res photo, resulting in blurry, fuzzy pixels with little sharpness.
The leaves fit within a 1K pixel square selection.
A current workaround is to limit your selections to no more than 1024 pixels. While my area did not exceed this limit, I wanted to see if I would get a better result by reducing the selection area even further. So I drew a selection that was about half of the leaf, generated a fill for that selection, then selected the rest that needed to be replaced and ran Generate again.
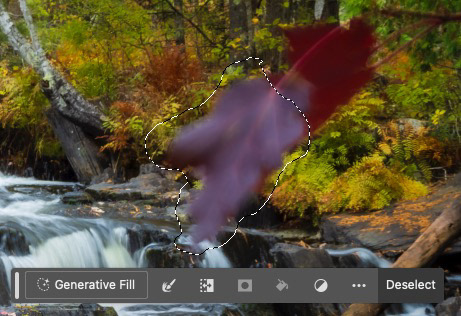
What I found was interesting; while the resolution wasn't significantly better than the single selection, giving Firefly less area to work on help create more detailed, realistic results.
Admittedly, this is a very unscientific test and your mileage may vary, but it's worth a try if you have the time.
Final Steps
The final steps included making a flattened layer copy that combined all the layers I need for the final image. To do this, Command+Click (Ctrl+Click on Windows) on each layer you wnat to include. Take care NOT to click on the thumbnail images.
Once all the layers are selected, use this key combination to created a new flattened layer copy based on the selected layers: Shift+Option+Command+E. This gives me a new flattened layer without discarding the original layers (in case I changed my mind on the Generative Fill choices, for example).
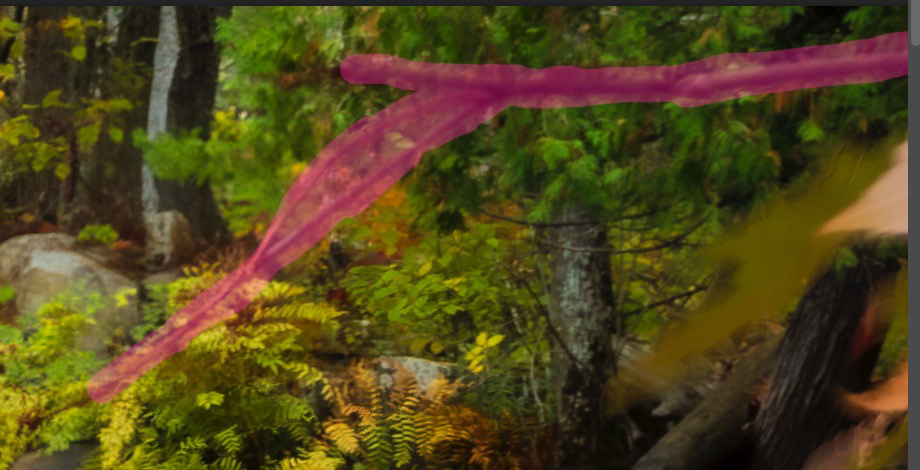
The last touch was to get rid of the rest of the blurry branch. The Remove tool did a great job of this. I've painted the whole branch for the screen grab below, but I got slightly better results by removing the lower branches first and then removing the horizontal branches in a second step.
With the branch completely removed, I chose File > Close and then saved the image when prompted. This set of steps puts the image right in my LIghtroom Classic catalog, alongside the original version of the image.


On the left, is the result with Technique 1; on the right, Technique 2. Hard to see any difference at this magnification, but I encourage you to view the images at 100% by clicking on them.
In the end, Generative Fill, Firefly and the Remove tool gave me a realistic result in a fraction of the time it might have taken me with more traditional image editing tools. Firefly continues to evolve and I expect we'll see better resolution and even more realistic results with Gen Fill over time. As I often tell my customers when talking about Generative AI, "This is the worst it will be," and "worst" is not too bad at all.
Content Credentials
As Generative AI and imaging software overall continues to evolve, I can't stress enough the importance of enabling Content Credentials, and doing so BEFORE you start to do any Generative AI work inside of Photoshop. Content Credentials are a voluntary way for a photographer or other artist to track the Gen AI changes they are making to an image. When you turn on this feature, Photoshop keeps track of changes being made to the image, including opening the file, composting, using Gen AI and making other edits to the file.
Turning on this feature at the time you open the file means a more accurate detailing of the steps or processes used will be recorded. If you forget (and I admit to forgetting) the information recorded is missing some steps. It's the digital equivalent of walking out of the room during your favorite show; you miss things while you're making that popcorn.
The Importance of Content Credentials
OK, so I said it's important, but WHY is it important?
"Content Credentials allow creators to attach extra information to their content when they export or download it. By including this information, creators can receive more recognition for their work, connect with others online, and enhance transparency for their audience."
- From the Adobe Web site
Ok...and...?
Content Credentials are important in the same way that the ingredient list on your favorite box of cereal is important; you want to know what's inside. What was used to make the tasty (visual) treat? Is it "real," or is it a creative combination of images, tools and techniques? Just as we want to trust what we eat is good for us (or at least know it's not, by reading the ingredients) and we also want to trust that what we see as a photograph is indeed an accurate representation of the original capture and scene.
While removing a distraction may not concern too many people, the addition of elements is a different story. Adding visual elements either through AI or compositing can drastically change the narrative of your image.
It's important that viewers can know that this shared image below was not the original capture, no matter how real it may appear. Honestly, if I was that close to a black bear, I'm sure one of us would be running in the opposite direction...
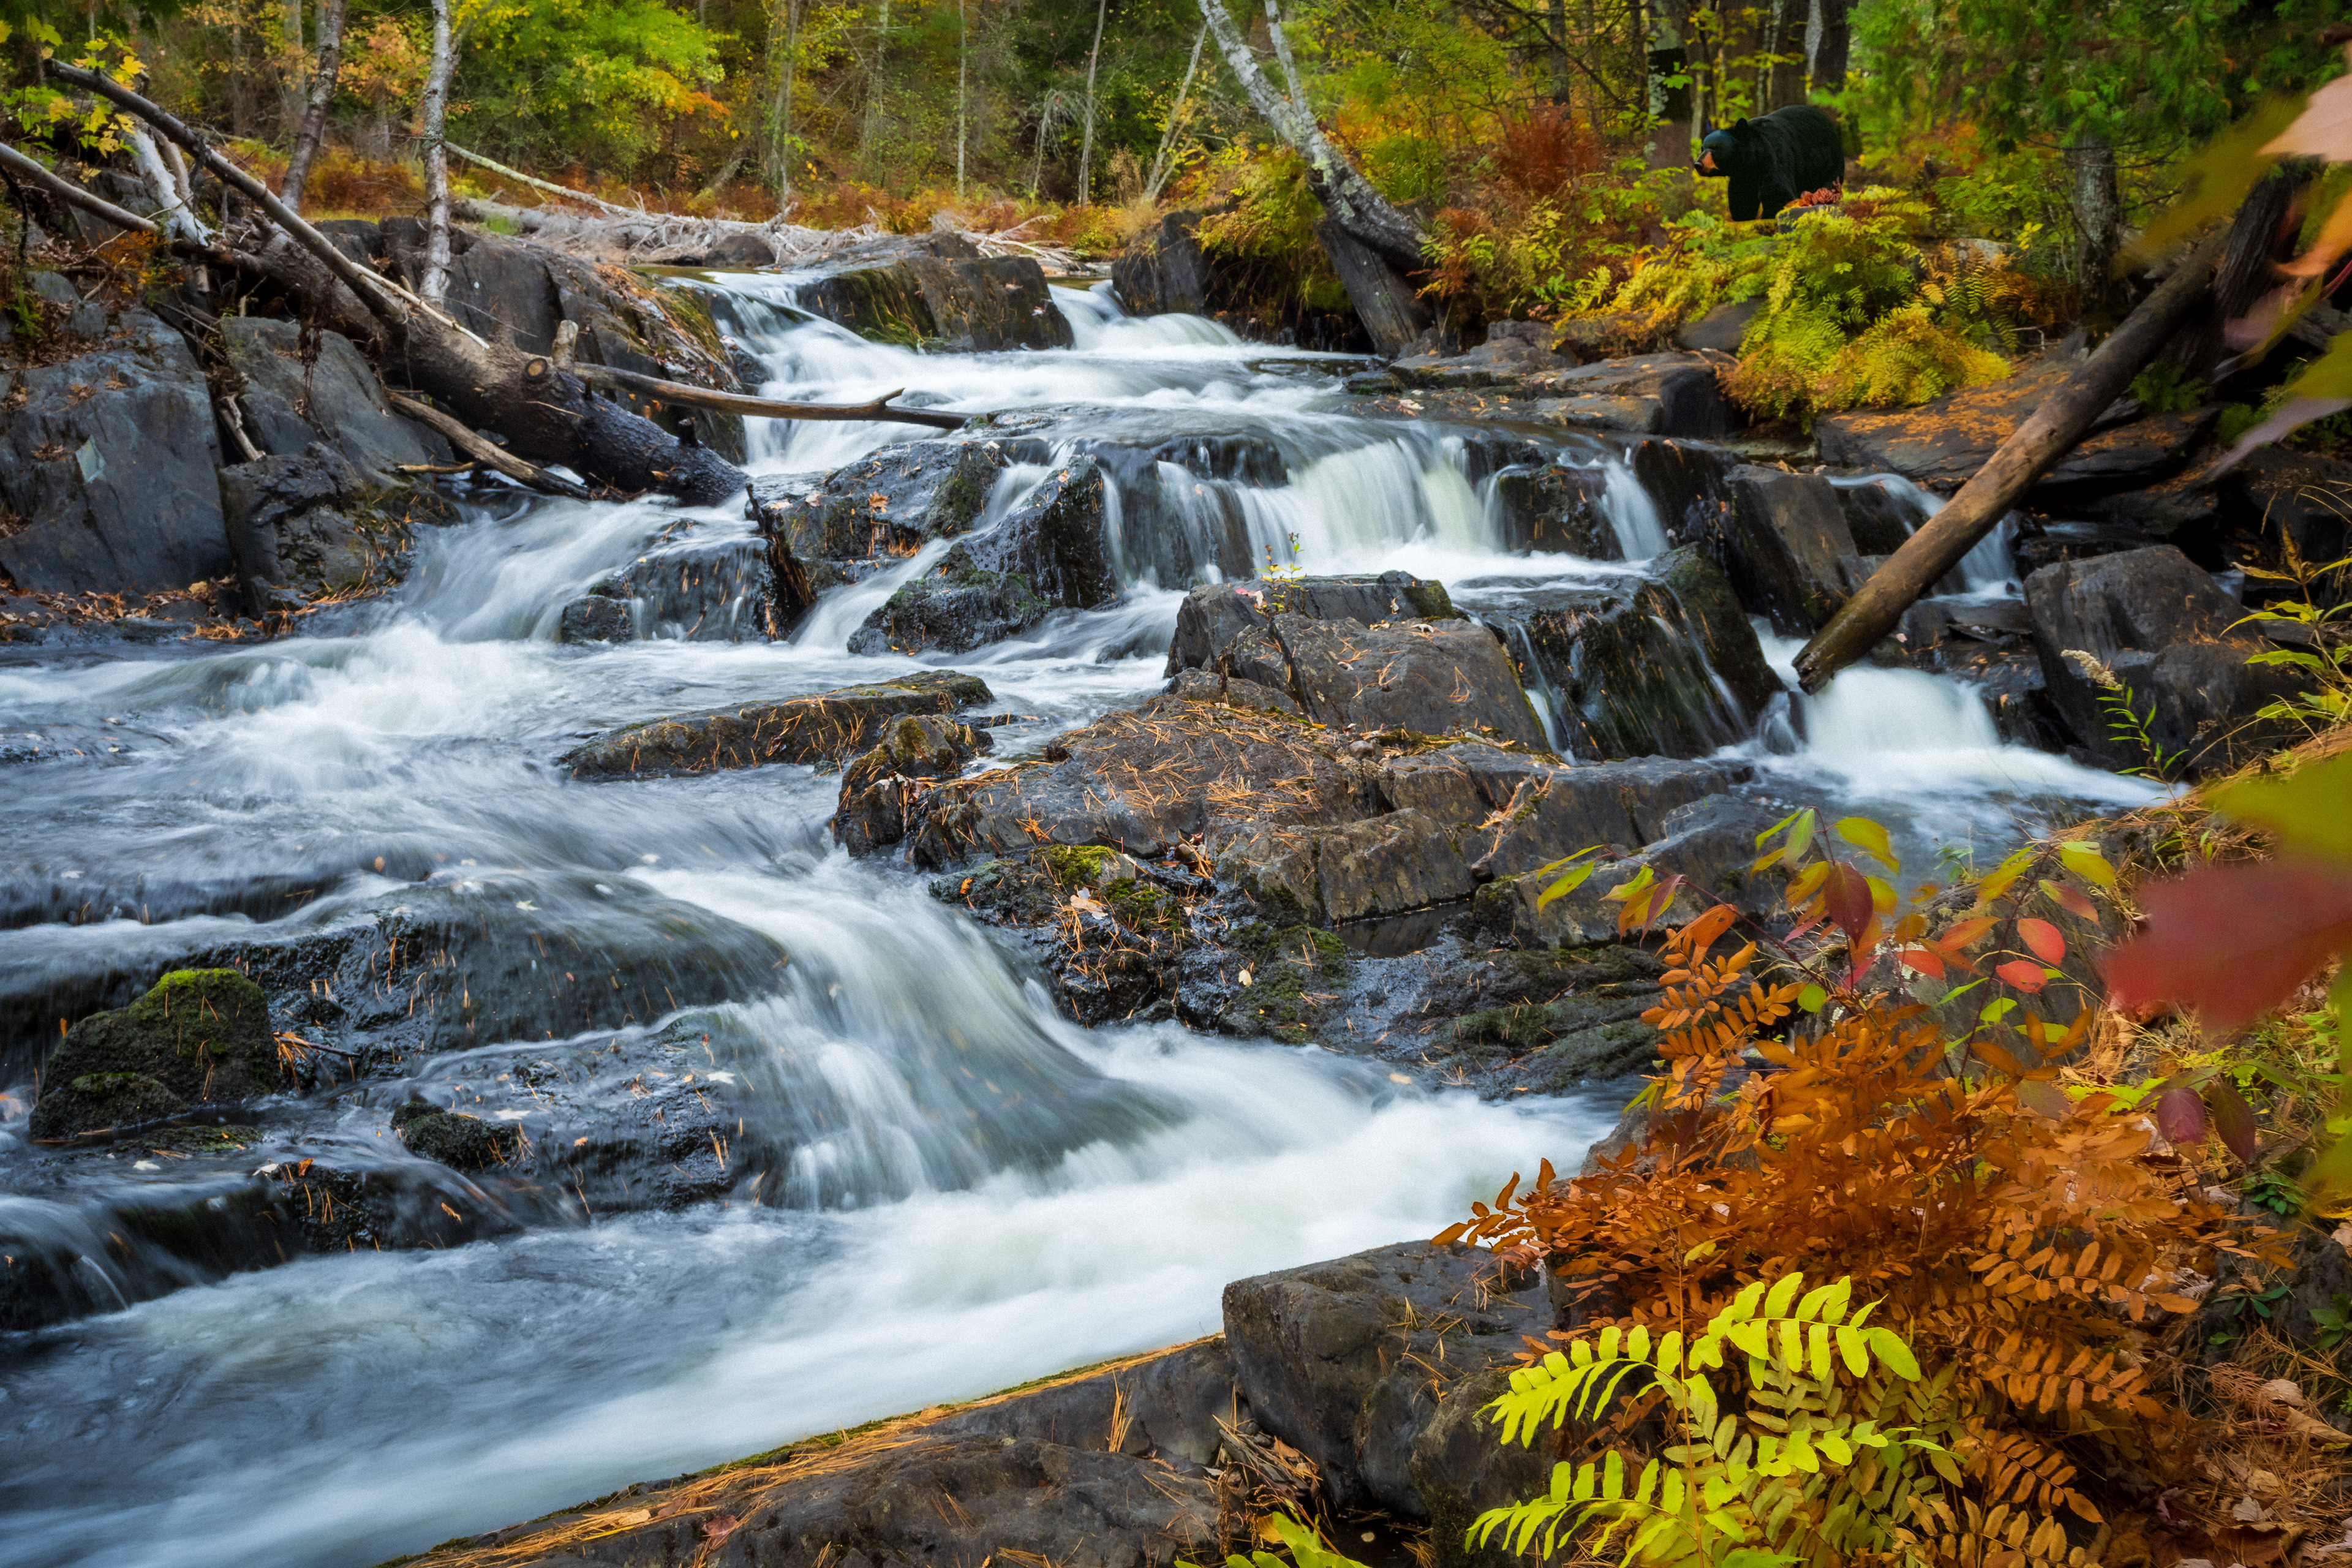
Altered image, with distracting leaves removed and black bear added to the scene using Generative Fill.
Note: AI is not just limited to desktop software and cute mobile apps. The list of companies who are part of the Content Authenticity Initiative (CAI) is currently in the hundreds and continues to grow, including media companies like the BBC and the Associated Press, software companies such as Adobe and camera manufacturers such as Nikon, Canon and Leica.
You can learn more about the CAI at this link.
Learn more about Content Credentials at this link.
Learn more about their application within Photoshop at this link.
Things to Remember
Enabling Content Credentials is NOT a global sticky setting. You must voluntarily enable it for any file you open for the first time. Once you enable the setting, it remains enabled for that particular file, even if you close and reopen the file.
Content Credentials can be embedded in the file or pushed to the web when you choose to Export the file as a JPG or PNG (NOT File > Quick Export; use File > Export As...)
While turning on Content Credentials is optional, don't think you can cheat when it comes to the use of Firefly or Generative Fill:
Adobe automatically applies non-personal Content Credentials to assets generated with Adobe Firefly features, such as Generative Fill in Photoshop. To learn more, check out Content Credentials for assets generated with Adobe Firefly.
Enabling Content Credentials
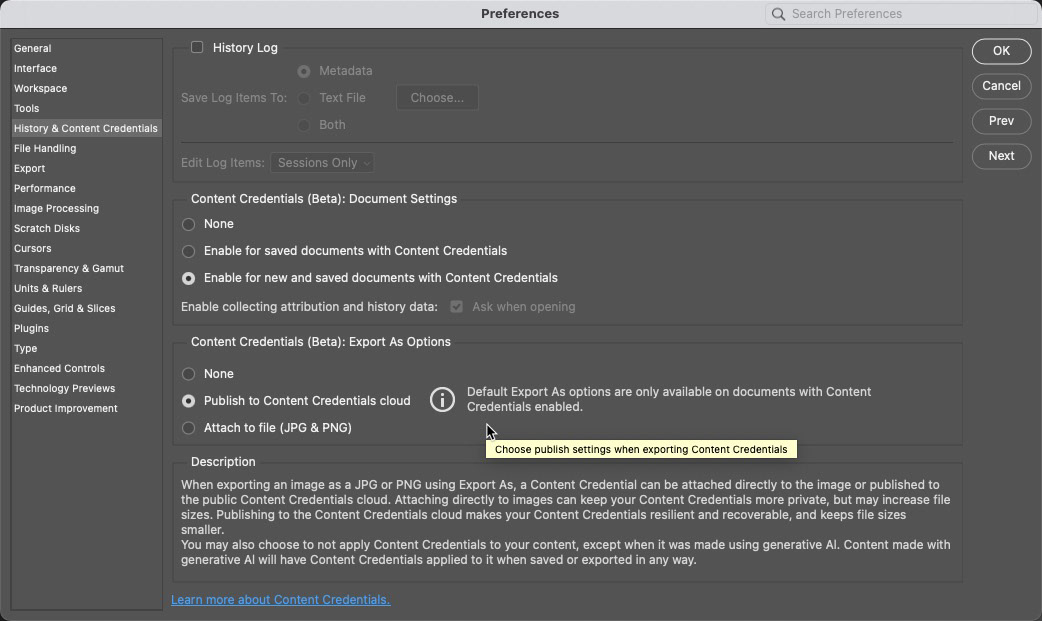
The first, and one-time step is to turn on the feature from the Photoshop Preferences or Settings. Here you can choose the document settings for Content Credentials and how they are associated with the file.
Note that Content Credentials are still in beta, so you might notice aspects of this feature change over time.
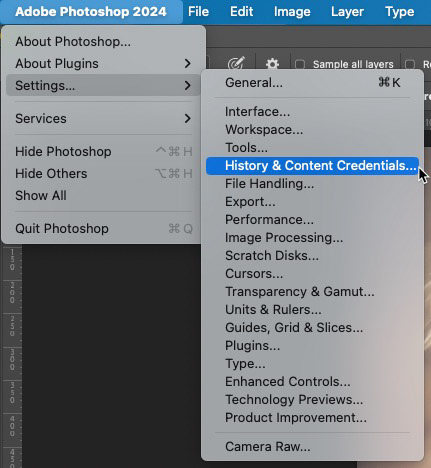
Turning on the global setting for Content Credentials is done one time only, from the Photoshop Preferences or Settings menu
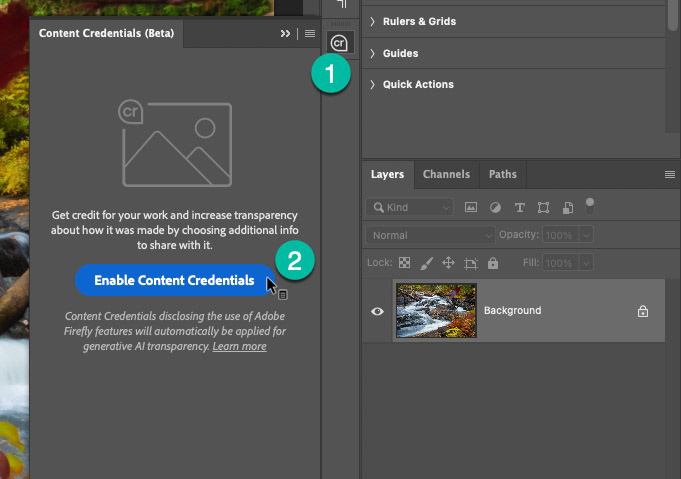
From this point on, each time you open an image where Content Credentials have NOT been enabled, you will have to enable them for that specific file, by clicking on the CR icon (Content Credentials settings panel)and tapping Enable. Photoshop will remember this setting for each file.
If you don't see the icon, go to Window > Content Credentials (beta) to activate the panel.
You have control over what personal data is included with these credentials on export, including your name, your connected social media accounts and Edits and Activity.
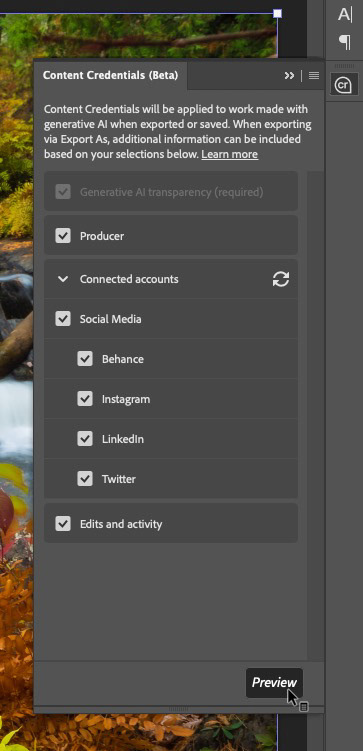
You can also preview at any time what will be shared by clicking on the Preview button. This is the information that will be viewable by you or someone else who checks the image on the Verify site.
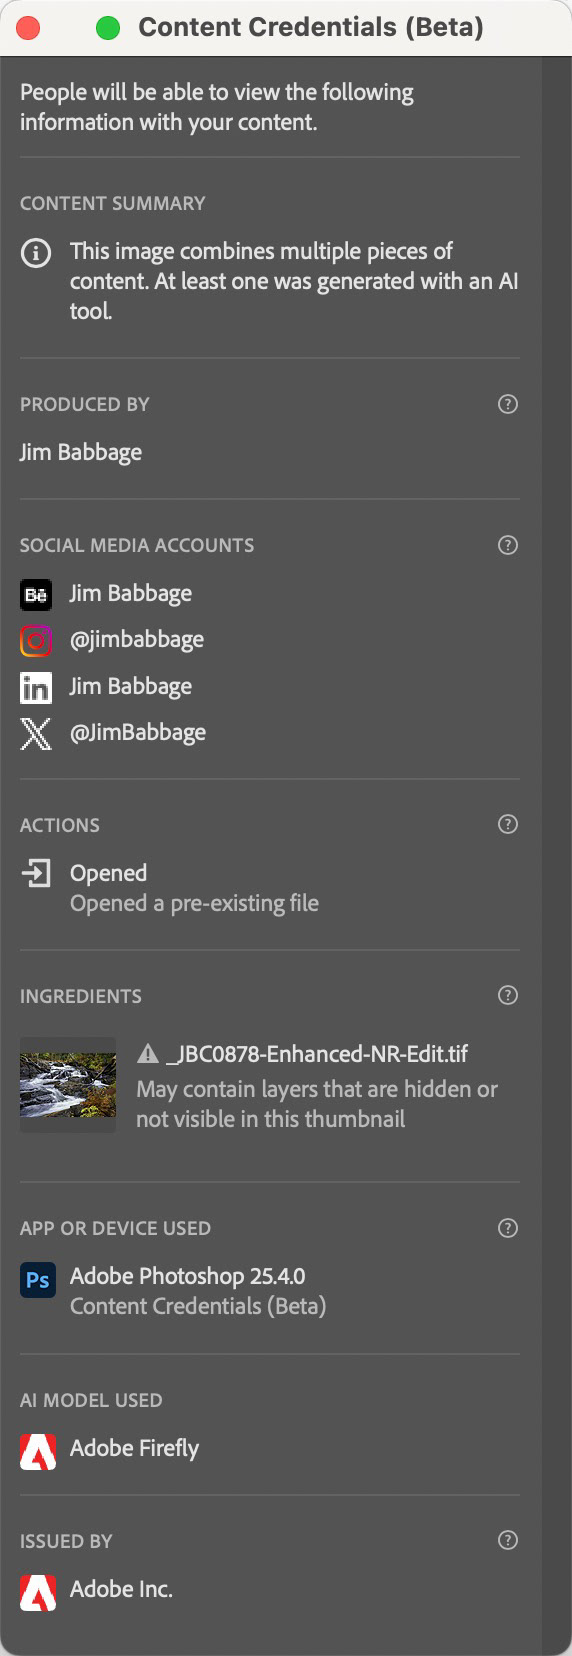
Once you've made all your edits and saved your PSD file, you'll probably want a jpeg of the final composite. It's important to follow certain steps if you want to control what is included in the Content Credentials and where that data will reside. I prefer to push this information to the cloud, rather than just embedding it in the file.
Once the image is out there on the web, or shared by email or social media, a viewer can upload it to the Verify tool on the Content Credentials web site and see the chain of activity that brought this image about, including references to the original asset.
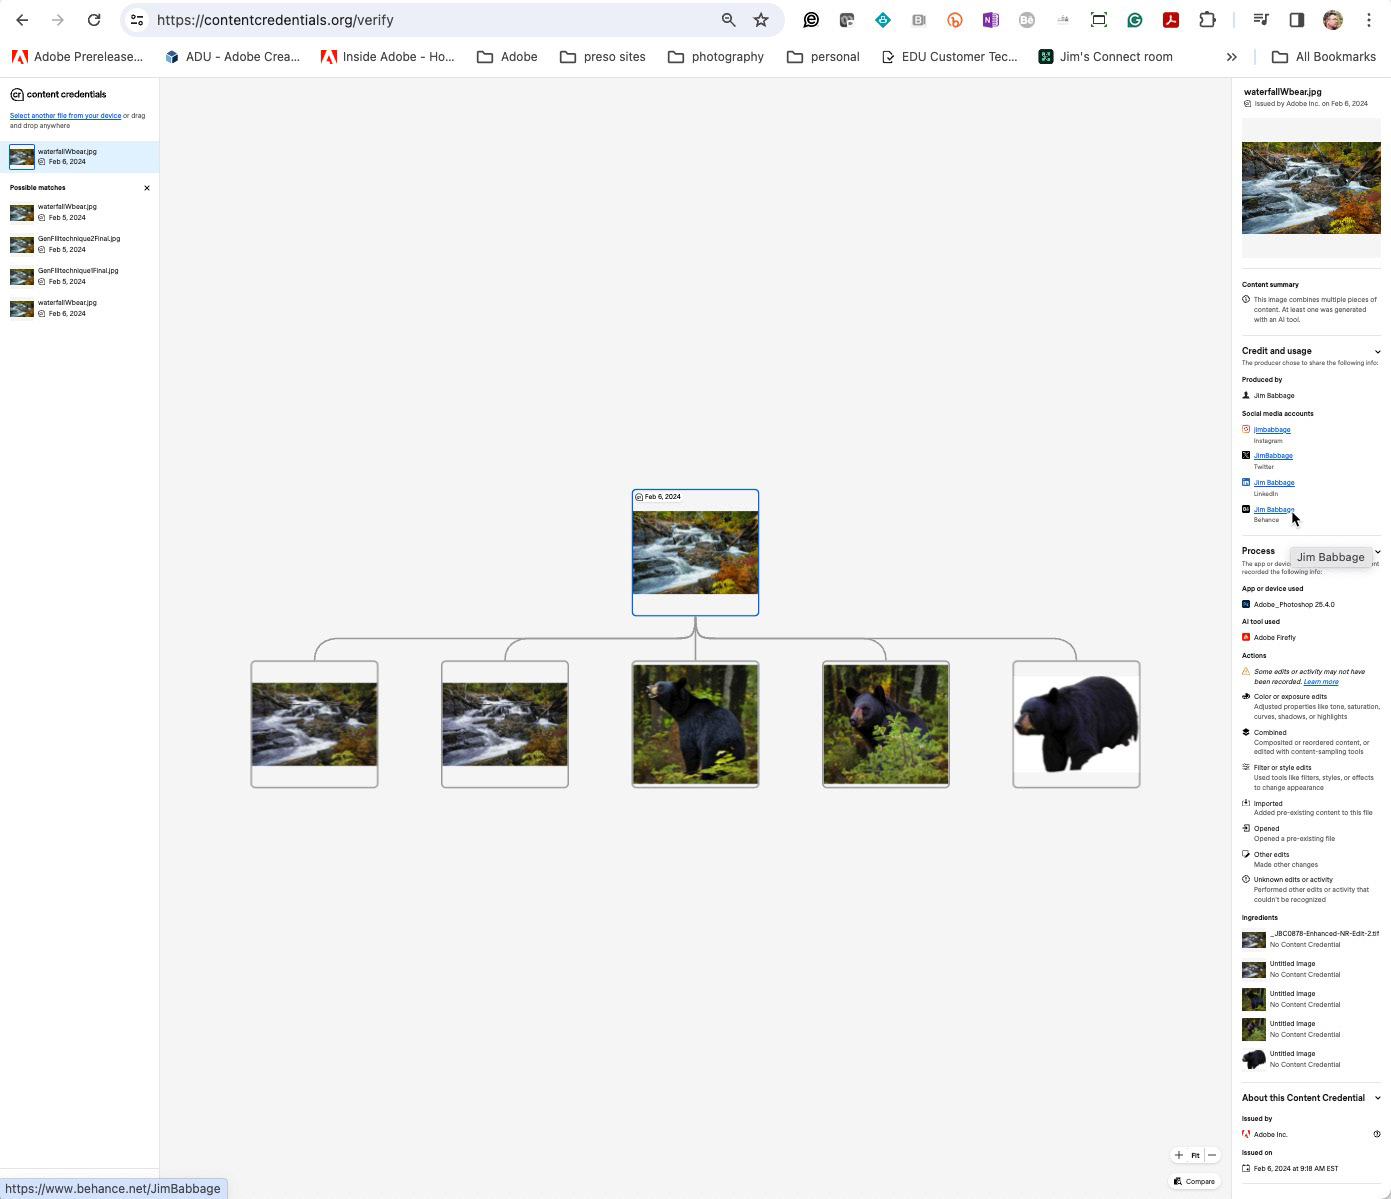
Provenance results from uploading my waterfall and bear image to the Verify tool on the CAI website.
Wrapping Up
I hope this article has been useful to you and you're walking away with a higher confidence that Generative AI can be helpful to you as a photographer, along with ways you might employ the technology in your own work. For other projects in this series, please see below or just check out my main Behance page.
Practical Generative AI for Photographers
Along with this article, below you will find likes to others in the series.